Table of Contents
Advertisement
Quick Links
Advertisement
Table of Contents

Related Manuals for Hand Held Products 3820


Summary of Contents for Hand Held Products 3820
- Page 1 2020/3820 Cordless System ™ User’s Guide...
- Page 2 Hand Held Products. Hand Held Products shall not be liable for technical or editorial errors or omissions contained herein; nor for incidental or consequential damages resulting from the furnishing, performance, or use of this material.
-
Page 3: Fcc Class B Compliance Statement
Statement of Agency Compliance The 2020-5B/3820 system meets or exceeds the requirements of all applicable standards organizations for safe operation. However, as with any electrical equipment, the best way to ensure safe operation is to operate them according to the agency guidelines that follow. Please read these guidelines carefully before using your 2020-5B/3820 system. -
Page 4: Canadian Compliance
The user may find the following booklet helpful: “Something About Interference.” This is available at FCC local regional offices. Hand Held Products, Inc. is not responsible for any radio or television interference caused by unauthorized modifications of this equipment or the substitution or attachment of connecting cables and equipment other than those specified by Hand Held Products, Inc. - Page 5 Hand Held Products shall not be liable for use of our product with equipment (i.e., power supplies, personal computers, etc.) that is not CE marked and does not comply with the Low Voltage Directive. Regulatory Approvals for Bluetooth Radio Devices...
-
Page 6: Ul And Cul Statement
TÜV or GS marked to EN60950 and EN60825-1. C-Tick Statement Conforms to AS/NZS 3548. C-Tick number: N10410. Mexico Certified Patents Please refer to the 3820 packaging for patent information. Solids and Water Protection The 3820 has a rating of IP41, immunity of foreign particles and dripping water. -
Page 7: Required Safety Labels
Required Safety Labels 3820 3820SR0C0BE... - Page 8 2020-5B...
-
Page 9: Table Of Contents
Changing Bluetooth PIN Code... 1-13 Out-of-Range Alarm... 1-13 Duration... 1-13 Alarm Sound Type ... 1-14 Data Accumulation Mode... 1-14 Beeper and LED Sequences and Their Meaning... 1-14 3820 LED Sequences and Their Meaning ... 1-15 2020-5B LED Sequences and Their Meaning ... 1-15... - Page 10 Basic Operation of the Cordless System ... 1-16 System Conditions ... 1-17 Communication Between the Cordless System and the Host 1-18 Connecting the Base When Powered by Host (Keyboard Wedge)... 1-18 Reading Techniques... 1-20 Resetting the Standard Product Defaults ... 1-20 Plug and Play ...
- Page 11 LED – Good Read ... 3-2 Number of Beeps – Good Read... 3-3 Good Read Delay... 3-3 User-Specified Good Read Delay ... 3-3 Scanner Trigger Modes... 3-4 Manual/Serial Trigger, Low Power... 3-4 Automatic Trigger ... 3-5 Presentation Mode... 3-5 Hands Free Time-Out ... 3-6 Reread Delay...
- Page 12 Chapter 4 - Data Editing Prefix/Suffix Overview... 4-1 To Add a Prefix or Suffix: ... 4-2 To Clear One or All Prefixes or Suffixes:... 4-3 To Add a Carriage Return Suffix to all Symbologies ... 4-3 Prefix Selections... 4-3 Suffix Selections ... 4-4 Function Code Transmit...
- Page 13 Code 39 ... 6-5 Code 39 Start/Stop Characters... 6-5 Code 39 Check Character... 6-6 Code 39 Message Length ... 6-6 Code 39 Append... 6-7 Code 32 Pharmaceutical (PARAF) ... 6-7 Full ASCII ... 6-8 Code 39 Code Page ... 6-9 Interleaved 2 of 5 ...
- Page 14 UPC E0 and UPC E1 ... 6-21 UPC E0 and UPC E1 Expand ... 6-21 UPC E0 and UPC E1 Addenda Required ... 6-21 UPC E0 and UPC E1 Addenda Separator... 6-22 UPC E0 Check Digit ... 6-22 UPC E0 Number System... 6-22 UPC E0 Addenda ...
- Page 15 Keyboard Function Relationships... 7-1 Supported Interface Keys... 7-3 Chapter 8 - Utilities To Add a Test Code I.D. Prefix to All Symbologies ... 8-1 Reset Scanner... 8-1 Show Software Revision... 8-1 Show Data Format ... 8-1 Scanner Report... 8-2 Scanner Address... 8-2 Base Address...
- Page 16 Symbologies ... 10-13 Chapter 11 - Product Specifications 3820 Product Specifications ... 11-1 2020-5B Product Specifications ... 11-2 3820 Depth of Field ... 11-3 Chapter 12 - Maintenance Maintenance... 12-1 Cleaning the Scanner’s Window... 12-1 Inspecting Cords and Connectors... 12-1 Replacing the 2020-5B Interface Cable: ...
-
Page 17: Getting Started
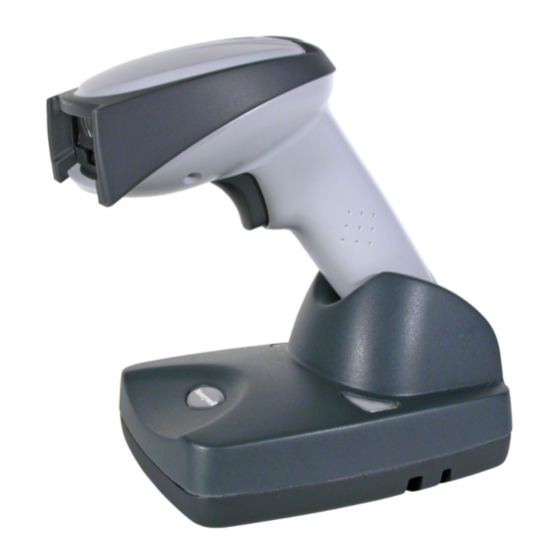
Getting Started The 3820 cordless scanning system consists of one 2020-5B base and one 3820 Cordless Linear Scanner. Up to seven scanners may be linked to one base. The 3820 marks a new performance level for hand held scanners. The 3820 is... -
Page 18: Unpacking The System
Models Models Description 2020-5BE Base: Keyboard wedge, TTL level 232, TTL level 232 serial wedge, IBM 4683, wand emulation, USB keyboard, USB HID, USB retail (IBM SurePOS) 3820SR0C0BE Cordless Linear Scanner 1 - 2 2020/3820 User’s Guide... -
Page 19: Cordless System: Main Components
About the Battery Use only the Li-ion battery packs provided by Hand Held Products. The use of any battery pack not sold by Hand Held Products will void your warranty and may result in damage to your unit. Power is supplied to the cordless scanner by a rechargeable battery that is integrated in the scanner handle. -
Page 20: Battery Recommendations
• Keep the base connected to power when the host is not in use. • Replace a defective battery immediately since it could damage the 3820. • Don’t short-circuit a battery or throw it into a fire. It can explode and cause severe personal injury. -
Page 21: Base Charge Mode
Using a slow charge rate draws less current (power) from the input power source when the battery is mostly discharged. Scan the appropriate bar code for your application. Default = Automatic . * Automatic Low Charge Rate 2020/3820 User’s Guide Condition 1 Condition 2 Fast Charge Slow Charge... -
Page 22: Linking Scanner To Base
If you receive a triple error beep and the red LED lights, the scanner has not linked to the base. Scanner Modes The 3820 is capable of working in single scanner mode, multiple scanner mode, or with Blutetooth devices, other than the 2020-5B base. Unlinking the Scanner If the base has a scanner linked to it, that scanner must be unlinked before a new scanner can be linked. -
Page 23: Single Scanner Operation
Override Locked Scanner If you need to replace a broken or lost scanner that is linked to a base, scan the Override Locked Scanner bar code below with a new scanner and place that scanner in the base. -
Page 24: Multiple Scanner Operation
The default name for an 3820 is “3820”. If you have more than one 3820 linked to a base, the first scanner that is linked to the base receives commands addressed using this name. -
Page 25: Changing Scanner Name - Via Bar Codes
If you wanted to set up your scanners with names 0001-0007, you may scan the bar codes below. Scan the Reset bar code after each name change and wait for the scanner to re-link to the base before scanning the next bar code to name the next scanner. -
Page 26: Scanner Report
For example, if the scanner was in work group 1 linked to the first base, it will be placed in work group 1 in the second base with the associated settings. -
Page 27: Application Work Group Selection
Application Work Group Selection This programming selection allows you to assign a scanner to a work group by scanning the bar code below. You may then program the settings (e.g., beeper volume, prefix/suffix, data formatter) that your application requires. * Group 0... -
Page 28: Resetting The Standard Product Default Settings: Current Application Work Group
Menu Commands each of the commands (indicated by an asterisk (*) on the programming pages). Note: Scanning this bar code also causes both the scanner and the base to perform a reset and become unlinked. Refer to Base"... -
Page 29: Using The Scanner With Bluetooth Devices
Using the Scanner with Bluetooth Devices The 3820 scanner may be used either with the 2020-5B base or with other Bluetooth devices. Scanning the Non-Base Bluetooth Connection bar code below allows the scanner to be used with other Bluetooth devices (e.g., PDA, PC - Bluetooth USB Adapter). -
Page 30: Alarm Sound Type
Data Accumulation Mode On Beeper and LED Sequences and Their Meaning The 3820 contains LEDs on the top of the unit to indicate its power up, communication, and battery status. Simply stated, red LED = error; green LED = success of any type. The unit’s audible indicators have meaning as well: 3 beeps = error;... -
Page 31: 3820 Led Sequences And Their Meaning
3820 LED Sequences and Their Meaning LED Indication Normal Operation Red Flash Green Flash Red, blinking Menu Operation Green Flash Red, blinking 2020-5B LED Sequences and Their Meaning The base contains a red LED that indicates the status of the unit and verifies its communication with the host system and a green LED that indicates scanner battery charge condition. -
Page 32: Basic Operation Of The Cordless System
Basic Operation of the Cordless System Cordless Base The cordless base provides the link between the cordless scanner and the host system. The base contains an interface assembly and an RF communication module. The RF communication module performs the data exchange between the cordless scanner and the interface assembly. -
Page 33: System Conditions
Whenever the scanner can’t communicate with the base for a few seconds, it is out of range. If the scanner is out of range and you scan a bar code, the scanner issues a triple beep indicating no communication with the base. -
Page 34: Communication Between The Cordless System And The Host
The cordless scanner provides immediate feedback in the form of a “good read” indication (a green LED on the scanner and an audible beep) after a bar code is scanned correctly and the base has acknowledged receiving the data. This is possible since the cordless system provides two-way communication between the scanner and the base. - Page 35 The scanner’s battery is not charged when in this mode. Using the 9-volt, external power supply allows the scanner’s battery to be charged, and no power is drawn from the host.
-
Page 36: Reading Techniques
Reading Techniques The scanner has a view finder that projects a bright red aiming beam that corresponds to its horizontal field of view. The aiming line should be centered horizontally over the bar code; it will not read if the aiming line is in any other direction. -
Page 37: Rs-232
Laptop Direct Connect For most laptops, scanning the Laptop Direct Connect bar code allows operation of the scanner in parallel with the integral keyboard. The following Laptop Direct Connect bar code selects terminal ID 03, programs a carriage return (CR) suffix and turns on Emulate External Keyboard... -
Page 38: Wand Emulation Plug & Play
Wand Emulation Plug & Play In Wand Emulation mode, the scanner decodes the bar code then sends data in the same format as a wand scanner. The Code 39 Format converts all symbologies to Code 39. The Same Code Format transmits UPC, EAN, Code 128 and Interleaved 2 of 5 without any changes, but converts all other symbologies to Code 39. -
Page 39: Ibm 4683 Ports 5B, 9B, And 17 Interface
IBM 4683 Ports 5B, 9B, and 17 Interface Scan one of the following “Plug and Play” codes to program the 3820 for IBM 4683 Port 5B, 9B, or 17. Note: After scanning one of these codes, you must power cycle the cash register. -
Page 40: Connecting The Base With Usb
The scanner’s battery is not charged when in this mode. Using the 9-volt, external power supply allows the scanner’s battery to be charged, and no power is drawn from the host. -
Page 41: Ibm Surepos
IBM SurePos Scan one of the following “Plug and Play” codes to program the 3820 for IBM SurePos (USB Hand Held scanner) or IBM SurePos (USB Tabletop scanner). Note: After scanning one of these codes, you must power cycle the cash register. -
Page 42: Usb Hid
USB HID Scan the following code to program the 3820 for USB HID bar code scanners. Scanning this code changes the terminal ID to 131. USB HID Bar Code Scanner USB Com Port Emulation Scan the following code to program the 3820 to emulate a regular RS-232-based Com Port. -
Page 43: Connecting The Base With Serial Wedge
6. Plug the power supply barrel connector to the base, and plug the power supply into the AC source. 7. Once the base has been fully connected, power up the computer. 2020/3820 User’s Guide on page 2-8 to set the baud rate 1 - 27... - Page 44 2-1. Make sure that all of the communication parameters match on all of the connected devices. Choosing Both sends scanned data to P1 and P2. Default = P1. * P1 Both P1 and P2 1 - 28 2020/3820 User’s Guide...
-
Page 45: Chapter 2 - Terminal Interfaces
Terminal ID bar code below, then scan the numeric bar code(s) from the Programming Chart inside the back cover of this manual to program the scanner for your terminal ID. Scan Save to save your selection. For example, an IBM AT terminal has a Terminal ID of 003. You would scan the... -
Page 46: Supported Terminals
Indy, Indigoll 078, 078A, 79, 80, 191, 196, 1191,1192, 1471, 1472, 1476, 1477, 1483 Data Entry Keyboard 078, 078A, 79, 80, 191, 196, 1191,1192, 1471, 1472, 1476, 1477, 1483 Terminal ID 003* 003* 003* 128** 129** 003* 003* 2020/3820 User’s Guide... - Page 47 * Default for 2020-5B. **It is best to use the Plug and Play bar codes, beginning on interfaces, rather than scanning the terminal ID listed in this table. 2020/3820 User’s Guide Model(s) 078, 078A, 79, 80, 191, 196, 1191,1192, 1471, 1472, 1476,...
-
Page 48: Keyboard Country
United States: @ | $ # { } [ ] = / ‘ \ < > ~ * United States Brazil Czech Republic Finland (Sweden) Germany/Austria Hungary 2 - 4 Belgium Canada (French) Denmark France Greece Israel (Hebrew) 2020/3820 User’s Guide... - Page 49 Keyboard Country (continued) Italy Latin America Netherlands (Dutch) Norway Poland Portugal Romania Russia Slovakia Spain Sweden Switzerland (German) Turkey F Turkey Q U.K. 2020/3820 User’s Guide 2 - 5...
-
Page 50: Keyboard Style
Please refer to the Hand Held Products website (www.handheld.com) for complete keyboard country support information and applicable interfaces. If you need to program a keyboard for a country other than one listed above, scan the Program Keyboard Country bar code below, then scan the numeric bar code(s) for the appropriate country from the inside back cover, then the Save bar code. -
Page 51: Keyboard Function Relationships
Relationships, page 7-1 for CTRL+ ASCII Values. Default = Off Control + ASCII Mode On * Control + ASCII Mode Off Turbo Mode: The scanner sends characters to a terminal faster. If the terminal drops characters, do not use Turbo Mode. Default = Off Turbo Mode On... -
Page 52: Connecting The Base With Rs-232 Serial Port
4. Plug the power supply barrel connector to the base, and plug the power supply into the AC source. 5. Once the base has been fully connected, power up the computer. 2 - 8 * Automatic Direct Connect Mode Off 2020/3820 User’s Guide... -
Page 53: Rs-232 Baud Rate
115,200 baud, parity–none, 8 data bits, 1 stop bit, and adds a suffix of a CR LF. RS-232 Baud Rate Baud Rate sends the data from the scanner to the terminal at the specified rate. The host terminal must be set for the same baud rate as the scanner. -
Page 54: Word Length: Data Bits, Stop Bits, And Parity2-10
8 Data, 1 Stop, Parity Even 8 Data, 1 Stop, Parity Odd 2 - 10 7 Data, 1 Stop, Parity None 7 Data, 2 Stop, Parity Even 7 Data, 2 Stop, Parity Odd * 8 Data, 1 Stop, Parity None 2020/3820 User’s Guide... -
Page 55: Rs-232 Handshaking
Off , no data flow control is used. When Data Flow Control is turned On , the host device suspends transmission by sending the XOFF character (DC3, hex 13) to the scanner. To resume transmission, the host sends the XON character (DC1, hex 11). Data transmission continues where it left off when XOFF was sent. -
Page 56: Host Ack Enable
• Scanner is suspended until 1) a valid escape string is received from the host system (via the base) or 2) the scanner “times out.” • Once condition 1 or 2 above has been met, the scanner is ready to scan again, and the process repeats. - Page 57 <ESC> 5 One beep at medium volume <ESC> 6 One beep at high volume <ESC> 7 Indicate as successful decode and communication to host. <ESC> 8 Indicate as unsuccessful decode and communication to host. 2020/3820 User’s Guide 2 - 13...
-
Page 58: Wand Emulation
ID only , without changing any other scanner settings. We recommend using Wand Emulation Plug & Play bar codes to program your scanner to emulate a wand reader. The Wand Emulation Plug & Play bar codes change other parameters, in addition to changing the terminal ID. Please refer Wand Emulation Plug &... -
Page 59: Wand Emulation Transmission Rate
Default = 25 inches/second. Wand Emulation Polarity The Polarity can be sent as standard with black bars high, or reversed with white bars high. Default = Black High. * Black High 2020/3820 User’s Guide * 25 White High 2 - 15... -
Page 60: Wand Emulation Idle
The idle describes the state of the scanner when no data is being transmitted. When in Wand Emulation mode, you must set the scanner’s idle state to match the idle state for the device to which the scanner is connected. Default = Idle High . -
Page 61: Wand Emulation Overall Checksum
The check character is the character which when Exclusive-OR’d with every preceding character of the message yields a result of 0x00 (00H). Default = Off. Wand Emulation Overall Checksum On * Wand Emulation Overall Checksum Off 2020/3820 User’s Guide 2 - 17... - Page 62 2 - 18 2020/3820 User’s Guide...
-
Page 63: Chapter 3 - Output
Default = On. * Beeper - Good Read On Beeper - Good Read Off Beeper Volume – Good Read The beeper volume codes modify the volume of the beep the scanner emits on a good read. Default = Medium. * Medium High 2020/3820 User’s Guide... -
Page 64: Beeper Pitch - Good Read
Low (1600 Hz) * Medium (3250 Hz) High (4200 Hz) Beeper Duration – Good Read The beeper duration codes modify the length of the beep the scanner emits on a good read. Default = Normal. * Normal Beep Short Beep LED –... -
Page 65: Number Of Beeps - Good Read
Default = One. Number of Beeps/LED Flashes Good Read Delay This sets the minimum amount of time before the scanner can read another bar code. Default = 0 ms (No Delay. ) * No Delay... -
Page 66: Scanner Trigger Modes
"Trigger Commands" on page 10-4). When in manual trigger mode, the scanner scans until a bar code is read, or until the trigger is released. When in serial mode, the scanner scans until a bar code has been read or until the deactivate command is sent. -
Page 67: Automatic Trigger
Whenever the trigger is enabled, the “scanner power time-out timer” is reset. If the scanner is placed in the 2020-5B cradle and the battery is in the process of being charged, the scanner will not go into power down mode. -
Page 68: Hands Free Time-Out
Hands Free Time-Out Reread Delay This sets the time period before the scanner can read the same bar code a second time. Setting a reread delay protects against accidental rereads of the same bar code. Longer delays are effective in minimizing accidental rereads at POS (point of sale). -
Page 69: Centering Window
Use the centering feature to narrow the scanner’s field of view so the scanner reads only the bar code you want. When centering is turned on, the scanner only reads codes that intersect or are contained within the centering window you set up. -
Page 70: Symbology Chart
Output Sequence Overview Require Output Sequence When turned off, the bar code data will be output to the host as the scanner decodes it. When turned on, all output data must conform to an edited sequence or the scanner will not transmit the output data to the host device. -
Page 71: Output Sequence Editor
When it’s On/Not Required , the scanner will attempt to get the output data to conform to an edited sequence, but if it cannot, the scanner transmits all output data to the host device as is. -
Page 72: Output Sequence Example
Output Sequence Example In this example, you are scanning Code 93, Code 128, and Code 39 bar codes, but you want the scanner to output Code 39 1st, Code 128 2nd, and Code 93 3rd, as shown below. Note: Code 93 must be enabled to use this example. - Page 73 Code 93 0012 C - Code 93 sample length (11) plus CR suffix (1) = 12 start character match for Code 93, 43h = “C” termination string for third code 2020/3820 User’s Guide 3 - 11...
-
Page 74: Multiple Symbols
* Multiple Symbols Off No Read With No Read turned On , the scanner sends an “NR” to the host if you pull and release the trigger without reading a code (e.g., bad bar code). If No Read is turned Off , the “NR” will not be sent to the host. -
Page 75: Chapter 4 - Data Editing
• Enter prefixes and suffixes in the order in which you want them to appear on the output. • When setting up for specific symbologies (as opposed to all symbologies), the specific symbology ID value counts as an added prefix or suffix character. 2020/3820 User’s Guide Scanned Data Suffix variable length 1-11 alpha numeric &... -
Page 76: To Add A Prefix Or Suffix
Programming Chart ASCII Conversion Chart (Code Page Programming Chart Programming Chart inside the back cover of this ASCII Conversion Chart (Code Page Programming Chart inside the back cover of this (page 4-3). inside the back inside the back 2020/3820 User’s Guide... -
Page 77: To Clear One Or All Prefixes Or Suffixes
This action first clears all current suffixes, then programs a carriage return suffix for all symbologies. Prefix Selections Add Prefix Clear All Prefixes 2020/3820 User’s Guide Programming Chart Add CR Suffix All Symbologies inside the back Clear One Prefix... -
Page 78: Suffix Selections
Clear All Suffixes Function Code Transmit When this selection is enabled and function codes are contained within the scanned data, the scanner transmits the function code to the terminal. Charts of these function codes are provided in Supported Interface Keys... -
Page 79: Intercharacter Delay
To remove this delay, scan the Delay Length bar code, and set the number of steps to 0. Scan the SAVE bar code using the back cover of this manual. 2020/3820 User’s Guide inside the back cover of this manual. Prefix... -
Page 80: Interfunction Delay
4 - 6 inside the back cover of this manual. Prefix Scanned Data 2 3 4 5 Interfunction Delays Interfunction Delay 2nd Scan Transmission Intermessage Delay Intermessage Delay Suffix Programming Chart Programming Programming Chart 2020/3820 User’s Guide... -
Page 81: Chapter 5 - Data Formatting
Data Formatting Data Format Editor Introduction You may use the Data Format Editor to change the scanner’s output. For example, you can use the Data Format Editor to insert characters at certain points in bar code data as it is scanned. The selections in the following pages are used only if you wish to alter the output. -
Page 82: Other Programming Selections
ASCII Conversion Chart (Code Page 1252) inside the back cover of Program- (page 5-2). Scan the sym- inside the back cover of this inside the back cover of Symbology on page A-2.) on page A-2.) 2020/3820 User’s Guide... -
Page 83: Move Commands
(xx stands for the hex value for an ASCII code, see FC Disables suppress filter and clear all suppressed characters. Syntax = FC. 2020/3820 User’s Guide ASCII Conversion Chart (Code Page ASCII Conversion Chart (Code Page 1252) ASCII Conversion Chart (Code Page 1252) on page A-2. -
Page 84: Data Format Editor
Enter Data Format Clear One Data Format Save 5 - 4 ...zz where nn is the total count of both defines replacement characters, continuing defines charac- on page A-2.) * Default Data Format Clear All Data Formats Discard 2020/3820 User’s Guide... -
Page 85: Data Formatter
1, 2, or 3. An alternate format is initiated by scanning one of the 3 alternate format bar codes below. The scanner will scan the next bar code, formatting the data with the selected alternate format, then revert immediately to the primary format. - Page 86 5 - 6 2020/3820 User’s Guide...
-
Page 87: Introduction
Interleaved 2 of 5 All Symbologies If you want to decode all the symbologies allowable for your scanner, scan the All Symbologies On code. If on the other hand, you want to decode only a particular symbology, scan All Symbologies Off followed by the On symbol for that particular symbology. -
Page 88: Message Length
If the data length of the scanned bar code doesn’t match the valid reading length, the scanner will issue an error beep. You may wish to set the same value for minimum and maximum length to force the scanner to read fixed length bar code data. -
Page 89: Codabar
No Check Character indicates that the scanner reads and transmits bar code data with or without a check character. When Check Character is set to Validate and Transmit , the scanner will only read Codabar bar codes printed with a check character, and will transmit this character at the end of the scanned data. -
Page 90: Codabar Concatenation
Codabar Concatenation Codabar supports symbol concatenation. When you enable concatenation, the scanner looks for a Codabar symbol having a “D” start character, adjacent to a symbol having a “D” stop character. In this case the two messages are concatenated into one with the “D” characters omitted. Default = On. -
Page 91: Codabar Message Length
* On Code 39 Start/Stop Characters Start/Stop characters identify the leading and trailing ends of the bar code. You may either transmit, or not transmit Start/Stop characters. Default = Don’t Transmit. Transmit * Don’t Transmit 2020/3820 User’s Guide 6 - 5... -
Page 92: Code 39 Check Character
Code 39 bar codes printed with a check character, but will not transmit the check character with the scanned data. When Check Character is set to Validate and Transmit, the scanner only reads Code 39 bar codes printed with a check character, and will transmit this character at the end of the scanned data. -
Page 93: Code 39 Append
(excluding the start and stop symbols), and does not immediately transmit the data. The scanner stores the data in the order in which the bar codes are read, deleting the first space from each. The scanner transmits the appended data when it reads a Code 39 bar code that starts with a character other than a space. -
Page 94: Full Ascii
Character pairs /P through /Y decode as 0 through 9. Full ASCII On 6 - 8 SPACE 0 < %G L %H M > * Off ‘ %W p %M m %N n %O o DEL %T * Full ASCII Off 2020/3820 User’s Guide... -
Page 95: Code Page Mapping Of Printed Bar Codes
< Default All Interleaved 2 of 5 Settings > Interleaved 2 of 5 * On Check Digit No Check Digit indicates that the scanner reads and transmits bar code data with or without a check digit. 2020/3820 User’s Guide 6 - 9... -
Page 96: Interleaved 2 Of 5 Message Length
Interleaved 2 of 5 bar codes printed with a check digit, but will not transmit the check digit with the scanned data. When Check Digit is set to Validate and Transmit, the scanner only reads Interleaved 2 of 5 bar codes printed with a check digit, and will transmit this digit at the end of the scanned data. -
Page 97: Code 93
A-4, and scan the value and the SAVE bar code from the Programming Chart inside the back cover of this manual. The data characters should then appear properly. Code 93 Code Page 2020/3820 User’s Guide 6 - 11... -
Page 98: Straight 2 Of 5 Industrial
6-2 for additional information. Minimum and Maximum lengths = 1-48. Minimum Default = 4, Maximum Default = 48. Minimum Message Length Maximum Message Length Straight 2 of 5 IATA (two-bar start/stop) <Default All Straight 2 of 5 IATA Settings> 6 - 12 2020/3820 User’s Guide... -
Page 99: Straight 2 Of 5 Iata Message Length
= 1-48. Minimum Default = 4, Maximum Default = 48. Minimum Message Length Maximum Message Length Matrix 2 of 5 <Default All Matrix 2 of 5 Settings> Matrix 2 of 5 * Off 2020/3820 User’s Guide 6 - 13... -
Page 100: Matrix 2 Of 5 Message Length
Code 11 * Off Check Digits Required This option sets whether 1 or 2 check digits are required with Code 11 bar codes. Default = Two Check Digits. One Check Digit * Two Check Digits 6 - 14 2020/3820 User’s Guide... -
Page 101: Code 11 Message Length
6-2 for additional information. Minimum and Maximum lengths = 1-80. Minimum Default = 4, Maximum Default = 80. Minimum Message Length Maximum Message Length Code 128 <Default All Code 128 Settings> Code 128 * On 2020/3820 User’s Guide 6 - 15... -
Page 102: Isbt 128 Concatenation
A-4, and scan the value and the SAVE bar code from the Programming Chart inside the back cover of this manual. The data characters should then appear properly. Code 128 Code Page 6 - 16 2020/3820 User’s Guide... -
Page 103: Code 128 Function Code Transmit
* Off Telepen Output Using AIM Telepen Output, the scanner reads symbols with start/stop pattern 1 and decodes them as standard full ASCII (start/stop pattern 1). When Original Telepen Output is selected, the scanner reads symbols with start/stop pattern 1 and decodes them as compressed numeric with optional full ASCII (start/stop pattern 2). -
Page 104: Telepen Message Length
UPC A * On UPC A Check Digit This selection allows you to specify whether the check digit should be transmitted at the end of the scanned data or not. Default = On. * On 6 - 18 2020/3820 User’s Guide... -
Page 105: Upc A Number System
Default = Off for both 2 Digit and 5 Digit Addenda. 2 Digit Addenda On 5 Digit Addenda On UPC A Addenda Required When Addenda Required is set to on, the scanner will only read UPC A bar codes that have addenda. Default = Not Required. Required 2020/3820 User’s Guide... -
Page 106: Upc A Addenda Separator
* On UPC-A/EAN-13 with Extended Coupon Code Use the following codes to enable or disable UPC-A and EAN-13 with Extended Coupon Code. Default = On. * On UPC E <Default All UPC E Settings> 6 - 20 2020/3820 User’s Guide... -
Page 107: Upc E0 And Upc E1
UPC E Expand expands the UPC E code to the 12 digit, UPC A format. Default = Off. * Off UPC E0 and UPC E1 Addenda Required When Addenda Required is set to on, the scanner will only read UPC E bar codes that have addenda. Default = Not Required. Required * Not Required 2020/3820 User’s Guide... -
Page 108: Upc E0 And Upc E1 Addenda Separator
The numeric system digit of a U.P.C. symbol is normally transmitted at the beginning of the scanned data, but the unit can be programmed so it will not transmit it. Default = On. * On 6 - 22 2020/3820 User’s Guide... -
Page 109: Upc E0 Addenda
This selection allows you to specify whether the check digit should be transmitted at the end of the scanned data or not. Default = On. * On 2020/3820 User’s Guide * 2 Digit Addenda Off * 5 Digit Addenda Off... -
Page 110: Ean/Jan 13 Addenda
2 Digit Addenda On 5 Digit Addenda On EAN/JAN 13 Addenda Required When Addenda Required is set to on, the scanner will only read EAN/JAN 13 bar codes that have addenda. Default = Not Required. Required EAN/JAN 13 Addenda Separator When this feature is on, there is a space between the data from the bar code and the data from the addenda. -
Page 111: Isbn Translate
EAN/JAN 8 * On EAN/JAN 8 Check Digit This selection allows you to specify whether the check digit should be transmitted at the end of the scanned data or not. Default = On. * On 2020/3820 User’s Guide 6 - 25... -
Page 112: Ean/Jan 8 Addenda
2 Digit Addenda On 5 Digit Addenda On EAN/JAN 8 Addenda Required When Addenda Required is set to on, the scanner will only read EAN/JAN 8 bar codes that have addenda. Default = Not Required. Required EAN/JAN 8 Addenda Separator When this feature is on, there is a space between the data from the bar code and the data from the addenda. -
Page 113: Msi
MSI bar codes with Type 10 check characters. Default = Validate Type 10, but Don’t Transmit. When Check Character is set to Validate and Transmit , the scanner will only read MSI bar codes printed with the specified type check character, and will transmit this character at the end of the scanned data. -
Page 114: Msi Message Length
Length on page 6-2 for additional information. Minimum and Maximum lengths = 4-48. Minimum Default = 4, Maximum Default = 48. Minimum Message Length 6 - 28 Message Maximum Message Length * Off Message Maximum Message Length 2020/3820 User’s Guide... -
Page 115: Rss Limited
RSS-14 < Default All RSS-14 Settings > RSS-14 * On RSS Limited < Default All RSS Limited Settings > RSS Limited * On 2020/3820 User’s Guide 6 - 29... -
Page 116: Rss Expanded
Maximum Message Length UCC Emulation • The scanner can automatically format the output from any EAN•UCC data carrier to emulate what would be encoded in an equivalent UCC/EAN-128 or RSS+Composite symbol. EAN•UCC data carriers include UPC-A and UPC-E, EAN-13 and EAN-8, ITF-14, UCC/EAN-128, and EAN•UCC RSS and Composites. -
Page 117: China Post Code
Scan the bar codes below to change the message length. Refer to Message Length on page 6-2 for additional information. Minimum and Maximum lengths = 2-80. Minimum Default = 4, Maximum Default = 80. Minimum Message Length Maximum Message Length 2020/3820 User’s Guide 6 - 31... -
Page 118: Korea Post Code
Scan the bar codes below to change the message length. Refer to Message Length on page 6-2 for additional information. Minimum and Maximum lengths = 2-80. Minimum Default = 4, Maximum Default = 48. Minimum Message Length Maximum Message Length PosiCode <Default All PosiCode Settings> 6 - 32 2020/3820 User’s Guide... -
Page 119: Posicode A And B
Scan the bar codes below to change the message length. Refer to Message Length on page 6-2 for additional information. Minimum and Maximum lengths = 2-80. Minimum Default = 4, Maximum Default = 48. Minimum Message Length Maximum Message Length 2020/3820 User’s Guide 6 - 33... -
Page 120: Trioptic Code
Scan the bar codes below to change the message length. Refer to Length on page 6-2 for additional information. Minimum and Maximum lengths = 1-2048. Minimum Default = 1, Maximum Default = 2048. Minimum Message Length 6 - 34 * Off * Off Message Maximum Message Length 2020/3820 User’s Guide... -
Page 121: Code 16K
Length on page 6-2 for additional information. Minimum and Maximum lengths = 0-160. Minimum Default = 1, Maximum Default = 160. Minimum Message Length Maximum Message Length Code 49 <Default All Code 49 Settings> 2020/3820 User’s Guide 6 - 35... -
Page 122: Code 49 Message Length
Scan the bar codes below to change the message length. Refer to Message Length on page 6-2 for additional information. Minimum and Maximum lengths = 1-81. Minimum Default = 1, Maximum Default = 81. Minimum Message Length Maximum Message Length 6 - 36 2020/3820 User’s Guide... -
Page 123: Chapter 7 - Interface Keys
Interface Keys Keyboard Function Relationships The following Keyboard Function Code, Hex/ASCII Value, and Full ASCII “CTRL”+ relationships apply to all terminals that can be used with the scanner. Refer to page 2-7 enable Control + ASCII mode. Function Code HEX/ASCII Value 2020/3820 User’s Guide... - Page 124 The following chart indicates the equivalents of these five characters for different countries. Country United States Belgium Scandinavia France Germany Italy Switzerland United Kingdom Denmark Norway Spain 7 - 2 Codes < < Ã < ¢ 2020/3820 User’s Guide...
-
Page 125: Supported Interface Keys
Reserved Delete CR/Enter Insert Escape Home Print Back Space Back Tab * IBM 3191/92, 3471/72, 3196/97, 3476/77, Telex (all models) 2020/3820 User’s Guide IBM XTs and IBM, DDC, Memorex Compatibles Telex, Harris* Supported Keys Supported Keys Reserved Reserved CR/Enter Enter... - Page 126 Back Tab Memorex Telex (88)** Supported Keys Reserved Enter PF10 PF11 PF12 Reserved Reserved New Line Field Forward Field Forward Reserved Field Forward Delete New Line Insert Erase Error Reset Reserved Print Back Space Back Field Reserved Home 2020/3820 User’s Guide...
- Page 127 Supported Interface Keys ASCII 2020/3820 User’s Guide Esprit 200, 400 Esprit 200, 400 ANSI ASCII Supported Keys Supported Keys Reserved Reserved New Line New Line New Line New Line New Line New Line Escape Escape Insert Insert Back Space Back Space...
- Page 128 Supported Interface Keys Apple Mac/iMac ASCII Supported Keys Reserved Enter/Numpad Enter CAPS ALT make ALT break CNTRL make CNTRL break RETURN APPLE make APPLE break RETURN Ins Help Home Prnt Scrn BACKSPACE LSHIFT TAB BACKSPACE 7 - 6 2020/3820 User’s Guide...
-
Page 129: Chapter 8 - Utilities
For instructions on how to reset your scanner, refer to (page 8-1). Reset Scanner Scanning this bar code causes the scanner to re-link with the base. Show Software Revision Scan the bar code below to output the current software revision, unit serial number, and other product information for both the scanner and base. -
Page 130: Scanner Report
10-1. Scanner Report Scanner Address Scan the bar code below to determine the address of the scanner you are using. Scanner Address Base Address Scan the bar code below to determine the address of the base you are using. -
Page 131: Resetting The Standard Product Default Settings: All Application Work Groups
Note: Scanning this bar code also causes both the scanner and the base to perform a reset and become unlinked. Refer to page 1-6 for additional information. Resetting the Standard Product Default Settings: All Application Work Groups The following bar code defaults all of the work groups to the factory settings. - Page 132 8 - 4 2020/3820 User’s Guide...
-
Page 133: Chapter 9 - Visual Xpress
You can modify the image settings and save the image settings to an INI file, which can be loaded later to capture new images. Imaging also lets you preview the images continuously captured by the imager. 2020/3820 User’s Guide 9 - 1... -
Page 134: Installing Visual Xpress From The Web
Installing Visual Xpress from the Web 1. Access the Hand Held Products web site at www.handheld.com. 2. Click in the Quick Search text box and enter Visual Xpress. 3. Click on Search Now. 4. Click on the entry for Visual Xpress. -
Page 135: Chapter 10 - Serial Programming Commands
:Name: To send information to the scanner (with the base connected to host): :3820: The default factory setting for an 3820 scanner is 3820. This setting is changed by using the BT_NAM command, which accepts alphanumeric values. If the name is not known, a wildcard (*) can be used :*:. -
Page 136: Query Commands
A pipe (|) separates items in a list of non-continuous val- ues.) :Name: Field Usage (Optional) This command returns the query information from the scanner. Tag Field Usage When a query is used in place of a Tag field, the query applies to the entire set of commands available for the particular storage table indicated by the Storage field of the command. -
Page 137: Concatenation Of Multiple Commands
(CBRENA) is 1, or on. Example #3: What is the device’s current setting for Codabar Coding Enable? Enter: cbrena?. Response: CBRENA1[ACK] This response indicates that the device’s Codabar Coding Enable (CBRENA) is set to 1, or on. 2020/3820 User’s Guide 10 - 3... -
Page 138: Trigger Commands
Activate:SYN T CR Deactivate:SYN U CR The scanner scans until a bar code has been read, until the deactivate com- mand is sent, or until the serial time-out has been reached (see (Serial Trigger Mode) on page 3-4 for a description, and the serial command on page 10-11). -
Page 139: Resetting The Standard Product Default Settings: Current Application Work Group
Menu Commands each of the commands (indicated by an asterisk (*) on the programming pages). Note: Scanning this bar code also causes both the scanner and the base to perform a reset and become unlinked. Refer to Base"... -
Page 140: Menu Commands
BASCHG2 BASCHG3 BASCHG4 BT_RMV BASCON0,DN BASCON1,DN BT_RPL1 BASCON2,DN BT_NAM RPTSCN 1-10 GRPSEL0 1-11 GRPSEL1 1-11 GRPSEL2 1-11 GRPSEL3 1-11 GRPSEL4 1-11 GRPSEL5 1-11 GRPSEL6 1-11 DEFALT 1-12 PAPDFT 1-12 BT_DNG5 1-13 BT_PIN 1-13 BASORD 1-13 BT_ORD 1-13 2020/3820 User’s Guide... -
Page 141: Terminal Interfaces
Selection Alarm Sound Type Data Accumulation Mode Factory Default Settings Terminal Interfaces Terminal ID 2020/3820 User’s Guide Setting * Indicates default Base Alarm Type Scanner Alarm Type *Off Default *003 Serial Command Page # Indicates a numeric entry BASORW 1-14... - Page 142 # Indicates a numeric entry KBDCTY0 KBDCTY1 KBDCTY16 KBDCTY18 KBDCTY15 KBDCTY8 KBDCTY2 KBDCTY3 KBDCTY4 KBDCTY17 KBDCTY19 KBDCTY12 KBDCTY5 KBDCTY14 KBDCTY11 KBDCTY9 KBDCTY20 KBDCTY13 KBDCTY25 KBDCTY26 KBDCTY21 KBDCTY22 KBDCTY10 KBDCTY23 KBDCTY6 KBDCTY27 KBDCTY24 KBDCTY7 KBDSTY0 KBDSTY1 KBDSTY2 KBDSTY6 KBDSTY5 2020/3820 User’s Guide...
- Page 143 Selection Keyboard Modifiers Serial Port Connection Baud Rate Word Length: Data Bits, Stop Bits, and Parity 2020/3820 User’s Guide Setting * Indicates default *Control + ASCII Off Control + ASCII On *Turbo Mode Off Turbo Mode On *Numeric Keypad Off Numeric Keypad On *Auto Direct Conn.
-
Page 144: Output Selections
2-15 WNDSPD4 2-15 WNDSPD5 2-15 WNDSPD6 2-15 WNDPOL0 2-15 WNDPOL1 2-15 WNDIDL0 2-16 WNDIDL1 2-16 WNDBLK0 2-16 WNDBLK1 2-16 WNDBLK2 2-16 WNDBLK3 2-16 WNDDLY0 2-16 WNDDLY1 2-16 WNDDLY2 2-16 WNDDLY3 2-16 WNDCHK0 2-17 WNDCHK1 2-17 BEPBEP0 BEPBEP1 2020/3820 User’s Guide... - Page 145 Read LED - Good Read Number of Beeps - Good Read Good Read Delay User-Specified Good Read Delay Trigger Mode 2020/3820 User’s Guide Setting * Indicates default *Medium High Low (1600) (min 400Hz) *Medium (3250) High (4200) (max 9000Hz) *Normal Beep...
-
Page 146: Prefix/Suffix Selections
DLYRRD1000 DLYRRD3000 DLYRRD#### DECWIN1 DECWIN0 DECLFT### DECRGT### SEQBLK SEQDFT SEQ_EN2 3-10 SEQ_EN1 3-10 SEQ_EN0 3-10 SHOTGN1 3-12 SHOTGN0 3-12 SHWNRD1 3-12 SHWNRD0 3-12 VIDREV1 3-12 VIDREV0 3-12 VSUFCR PREBK2## PRECL2 PRECA2 SUFBK2## SUFCL2 SUFCA2 RMVFNC0 RMVFNC1 DLYCHR## 2020/3820 User’s Guide... -
Page 147: Data Formatter Selections
Symbologies All Symbologies Codabar Codabar Codabar Start/Stop Char. Codabar Check Char. Codabar Concatenation Codabar Message Length 2020/3820 User’s Guide Setting * Indicates default Delay Length Character to Trigger Delay *Default Data Format (None) Enter Data Format Clear One Data Format... - Page 148 C39ENA1 C39SSX0 C39SSX1 C39CK20 C39CK21 C39CK22 C39MIN## C39MAX## C39APP0 C39APP1 C39B320 C39B321 C39ASC0 C39ASC1 I25DFT I25ENA0 I25ENA1 I25CK20 6-10 I25CK21 6-10 I25CK22 6-10 I25MIN## 6-10 I25MAX## 6-10 C93DFT 6-11 C93ENA0 6-11 C93ENA1 6-11 C93MIN## 6-11 C93MAX## 6-11 2020/3820 User’s Guide...
- Page 149 Required Code 11 Message Length Code 128 Code 128 ISBT Concatenation Code 128 Message Length Code 128 Code Page 2020/3820 User’s Guide Setting * Indicates default Default All Straight 2 of 5 Industrial Settings *Off Minimum (1 - 48) *4...
- Page 150 6-18 UPAENA1 6-18 UPACKX0 6-18 UPACKX1 6-18 UPANSX0 6-19 UPANSX1 6-19 UPAAD20 6-19 UPAAD21 6-19 UPAAD50 6-19 UPAAD51 6-19 UPAARQ0 6-19 UPAARQ1 6-19 UPAADS0 6-20 UPAADS1 6-20 UPEDFT 6-21 UPEEN00 6-21 UPEEN01 6-21 UPEEN10 6-21 UPEEN11 6-21 2020/3820 User’s Guide...
- Page 151 Addenda EAN/JAN 13 5 Digit Addenda EAN/JAN 13 Addenda Required EAN/JAN 13 Addenda Separator ISBN Translate EAN/JAN 8 EAN/JAN 8 2020/3820 User’s Guide Setting * Indicates default *Off *Off *Off *Not Required Required Default All EAN/ JAN 13 Settings *Off...
- Page 152 6-20 MSIDFT 6-27 MSIENA0 6-27 MSIENA1 6-27 MSICHK0 6-27 MSICHK1 6-27 MSIMIN## 6-28 MSIMAX## 6-28 PLSDFT 6-28 PLSENA0 6-28 PLSENA1 6-28 PLSMIN## 6-28 PLSMAX## 6-28 RSSDFT 6-29 RSSENA0 6-29 RSSENA1 6-29 RSLDFT 6-29 RSLENA0 6-29 RSLENA1 6-29 2020/3820 User’s Guide...
- Page 153 Korea Post Code Korea Post Code Msg. Length PosiCode PosiCode PosiCode Msg. Length Trioptic Code Codablock F 2020/3820 User’s Guide Setting * Indicates default Default All RSS-14 Expanded Settings Minimum (4 - 74) *4 Maximum (4 - 74) *74 RSS Emulation 128 Emulation *EAN•UCC Emulation Off...
- Page 154 Maximum (1 - 81) *81 Serial Command Page # Indicates a numeric entry CBFENA0 6-34 CBFENA1 6-34 CBFMIN#### 6-34 CBFMAX#### 6-34 16KDFT 6-35 16KENA0 6-35 16KENA1 6-35 16KMIN### 6-35 16KMAX### 6-35 C49DFT 6-35 C49ENA0 6-36 C49ENA1 6-36 C49MIN## 6-36 C49MAX## 6-36 2020/3820 User’s Guide...
-
Page 155: Chapter 11 - Product Specifications
Product Specifications 3820 Product Specifications Parameter Dimensions (Typical): Height Length Width Weight (with battery) Light Source Scan Rate Skew Angle Pitch Angle Horizontal Velocity Scan Contrast Battery: Lithium Ion Battery Capacity: Storage: Temperature Ranges: Operating Battery Charge Storage Humidity Mechanical Drop... -
Page 156: 2020-5B Product Specifications
-40° F to +140° F (-40° C to +60° C) Up to 95% non-condensing Operational after 50 drops from 3.3 feet (1 m) to concrete Withstands 5G peak from 22 to 300 Hz 15 kV to any external surface IP41 2020/3820 User’s Guide 125mA (will not charge) 850mA 825mA... -
Page 157: 3820 Depth Of Field
3820 Depth of Field Minimum Bar Width 13 mil 100% UPC 7.5 mil Code 39 10 mil Code 39 13 mil Code 39 15 mil Code 39 20 mil Code 39 55 mil Code 39 2020/3820 User’s Guide Maximum Near Field 1 in (2.5 cm) -
Page 158: Standard Cable Pinouts
Standard Cable Pinouts Keyboard Wedge 11 - 4 2020/3820 User’s Guide... - Page 159 Standard Cable Pinouts Wand Emulation 2020/3820 User’s Guide 11 - 5...
- Page 160 Standard Cable Pinouts Serial Output 11 - 6 2020/3820 User’s Guide...
- Page 161 Standard Cable Pinouts 2020/3820 User’s Guide 11 - 7...
- Page 162 11 - 8 2020/3820 User’s Guide...
-
Page 163: Chapter 12 - Maintenance
Reading performance may degrade if the scanner’s window is not clean. If the window is visibly dirty, or if the scanner isn’t operating well, clean the window with a soft cloth or lens tissue dampened with water (or a mild soapy water solution). -
Page 164: Replacing The 2020-5B Interface Cable
Insert the connector into the opening and press firmly. The connector is keyed to go in only one way, and will click into place. Changing the 3820 Battery: 1. Remove the screw on the end cap. 2. Remove the battery from the handle. - Page 165 Refer to information. Does the scanner read the bar code incorrectly? If the scanner reads a bar code, but the data is not displayed correctly on the host screen: • The base may not be programmed for the appropriate terminal interface.
- Page 166 1. Scan the sample bar codes in the back of this manual. If the scanner reads the sample bar codes, check that your bar code is readable. Verify that your bar code symbology is enabled (see 2. If the scanner still can’t read the sample bar codes, scan page 6-1.
-
Page 167: Chapter 13 - Customer Support
Hand Held Products provides service for all its products through service centers throughout the world. To obtain warranty or non-warranty service, return the unit to Hand Held Products (postage paid) with a copy of the dated purchase record attached. Contact the appropriate location below to obtain a Return Material Authorization number (RMA #) before returning the product. -
Page 168: Online Product Service And Repair Assistance
You can also access product service and repair assistance online at www.handheld.com. Technical Assistance If you need assistance installing or troubleshooting, please call your Distributor or the nearest Hand Held Products technical support office: North America/Canada: Telephone: (800) 782-4263, option 4 (8 a.m. to 6 p.m. EST) -
Page 169: Online Technical Assistance
(C) static electricity or electro-static discharge, (D) operation under conditions beyond the specified operating parameters, or (E) repair or service of the product by anyone other than Hand Held Products or its authorized representatives. This warranty shall extend from the time of shipment for the duration published by Hand Held Products for the product at the time of purchase ("Warranty... - Page 170 Hand Held Products, Inc. extends these warranties only to the first end- users of the products. These warranties are nontransferable. The limited duration of the warranty for the 2020-5B and 3820 is for three (3) years. The limited duration of the warranty for the scanner battery is for one (1) year.
-
Page 171: Symbology Chart
Note: Prefix/Suffix entries for specific symbologies override the universal (All Symbologies, 99) entry. Refer to Data Editing beginning on page 4-1 and page 5-1 for information about using Code ID and AIM ID. 2020/3820 User’s Guide Symbology Korea Post Matrix 2 of 5 No Read ]K m... -
Page 172: Ascii Conversion Chart (Code Page 1252
ASCII Conversion Chart (Code Page 1252 Note: This table applies to U.S. style keyboards. Certain characters may differ depending on your Country Code/PC regional settings. Char A - 2 Char “ & ‘ < > Char 2020/3820 User’s Guide Char ‘... - Page 173 ‰ Š ‹ Œ Ž ‘ ’ “ ” • – — ˜ ™ š › œ ž Ÿ 2020/3820 User’s Guide Dec. Char Dec. ¡ ¢ £ ¤ ¥ ¦ § ¨ © ª « ¬ ® ¯ °...
-
Page 174: Code Page Mapping Of Printed Bar Codes
Description Automatic National Replacement Characters Swedish Replacement Characters French/Belgium Replacement Charac- ters French/Belgium Replacement Charac- ters German Replacement Characters Italian Replacement Characters Swiss Replacement Characters British Replacement Characters Danish Replacement Characters Norwegian Replacement Characters Spanish Replacement Characters 2020/3820 User’s Guide... -
Page 177: Sample Symbols
Sample Symbols UPC A 0 123456 7890 Interleaved 2 of 5 1234567890 Code 128 Code 128 EAN 13 9 780330 290951 EAN 8 3210 5 UPC-E 456123... - Page 178 Sample Symbols Code 39 Codabar BC321 Code 93 A13579B Straight 2 of 5 Industrial 123456-9$ Matrix 2 of 5 123456 6543210 RSS-14 (01)00123456789012...
-
Page 179: Programming Chart
Programming Chart Note: If you make an error while scanning the letters or digits (before scanning Save), scan Discard, scan the correct letters or digits, and Save. Discard Save... - Page 180 Hand Held Products, Inc. 700 Visions Drive P.O. Box 208 Skaneateles Falls, NY 13153-0208 3820-UG Rev A 5/06...
Need help?
Do you have a question about the 3820 and is the answer not in the manual?
Questions and answers
the scanner will not scan any barcode even the one in the manual
The Hand Held Products 3820 scanner may not be scanning any barcodes due to several possible reasons:
1. Poor Barcode Quality – If the barcode is damaged, poorly printed, or has low contrast, the scanner may not be able to read it.
2. Incorrect Interface Configuration – The scanner supports multiple interfaces (keyboard wedge, wand emulation, RS-232, USB, etc.), and an incorrect configuration may prevent scanning.
3. Improper Aiming or Distance – The scanner relies on linear imaging technology with a bright aiming line. If the barcode is too close or too far, it may not be readable.
4. Battery or Power Issues – If the scanner is cordless, ensure it has enough battery charge to function correctly.
5. Programming Settings – If the scanner has been reprogrammed or is in an incorrect mode, it may not be scanning properly. Resetting to factory settings or reprogramming may resolve the issue.
6. Hardware Malfunction – If none of the above resolve the issue, the scanner hardware may be faulty.
Checking these factors can help identify and resolve the scanning problem.
This answer is automatically generated