Hand Held Products QUICK CHECK 890 User Manual
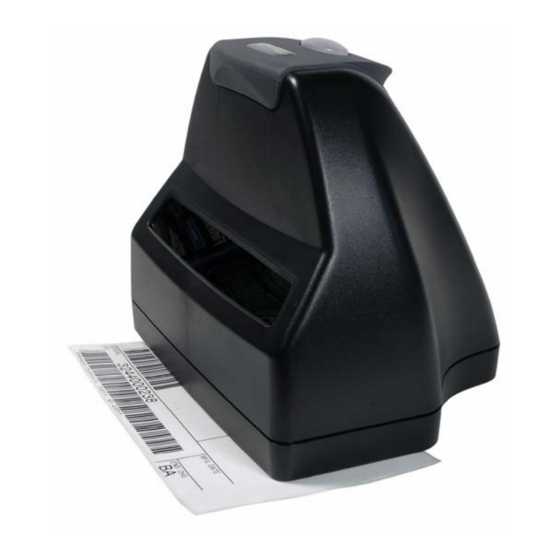
Bar code verifier
Hide thumbs
Also See for QUICK CHECK 890:
- Quick start manual (104 pages) ,
- User manual (40 pages) ,
- User manual (40 pages)
Table of Contents
Advertisement
Quick Links
Advertisement
Table of Contents

Related Manuals for Hand Held Products QUICK CHECK 890


Summary of Contents for Hand Held Products QUICK CHECK 890
- Page 1 Quick Check® 890 Bar Code Verifier Quick Check® ImageData ™ User’s Guide...
- Page 2 Hand Held Products. Hand Held Products shall not be liable for technical or editorial errors or omissions contained herein; nor for incidental or consequential damages resulting from the furnishing, performance, or use of this material.
-
Page 3: Table Of Contents
Enabling QCID for Bluetooth... 2-7 Using Quick Check ImageData ... 2-8 Help System... 2-9 Chapter 3 - Using the Quick Check 890 Verifier System Scanning a Bar Code Symbol Using the QC890 Verifier ... 3-1 Scanning a Bar Code Symbol Using... - Page 4 Calibrating the QC890 Verifier ... 3-2 Scanning Properly Using a Pen/Mouse Wand... 3-3 Calibrating an External Pen/Mouse Wand ... 3-4 Scanning Properly Using the QC3800V Linear Imager:... 3-5 Calibration Log... 3-6 Reflectometer Mode ... 3-7 Chapter 4 - Maintenance Cleaning the External Devices... 4-1 QC890 Verifier ...
-
Page 5: Chapter 1 - Getting Started
Getting Started Introduction The Quick Check® 890 Verifier System (QC890) is a professional quality control system for verifying the readability and standards compliance of printed linear bar code symbols. This verification system implements an integrated approach that consists of the QC890 Verifier unit and the Quick Check® ImageData (QCID) software. -
Page 6: Using The Qc890 Verifier
The verifier tests the following symbologies: Codabar Code 11 Code 16K Code 39 Code 49 Code 93 Code 128 IATA 2 of 5 Using the QC890 Verifier The QC890 Verifier offers a choice of Automatic, 5, 6, and 10 mil aperture settings. -
Page 7: User Led Indications
User LED Indications LED Indication Green Solid Green Flash Red Solid Red Flashing Audio Sound An audio signal (default ON) provides a quick indication if a scan passes or fails the current test. You can change the pitch/volume of these beeps (see Illumination Timer on page B-1). -
Page 8: Specifications
Specifications Item Dimensions Weight Temperature Humidity Battery Internal Battery Note: Batteries are factory replaceable only. You must return your unit to Hand Held Products for replacement (see 5-1). Charging the Battery Note: The battery may be in an unknown charge state at delivery. We recommend that you charge the battery for at least 6 hours prior to use. -
Page 9: Chapter 2 - Quick Check Imagedata
Installation of the QCID software for your appropriate operating system is included on the CD-ROM that accompanied your verifier. The QCID is the graphical interface to the Quick Check 890 Verifier. The verification results can be saved for later reference. -
Page 10: Usb Com Port Emulation
Note: Please review the file, readme.htm, in the install location prior to running the QCID. Connect the QC890 Verifier to the host as shown in the illustration below. USB COM Port Emulation Scan the following bar code to program the QC890 Verifier to emulate an RS- 232-based COM Port. -
Page 11: Rs-232 Serial Communication Interface
RS-232 Serial Communication Interface An RS-232 interface requires no additional drivers. Connect the QC890 Verifier to the host as shown in the illustration below. RS-232 Selections Scan the following bar code to select RS-232 communications. The RS-232 settings supported are: Baud Rate: 115,200 Parity:... -
Page 12: Using The Qc890 Verifier With Bluetooth Devices
Laptop. * Bluetooth Connection - PC/Laptop To establish a Bluetooth connection to a PDA or Hand Held Products Mobility Systems device, scan the bar code below, follow the instructions supplied with your Bluetooth device to locate the QC890 Verifier, and connect to it. If you go out of range with your QC890 Verifier, the QC890 Verifier will not re-connect. -
Page 13: Enabling Your Device For Bluetooth
Enabling Your Device for Bluetooth After scanning the appropriate Bluetooth connection bar code, you need to run the Quick Check ImageData application to enable the Bluetooth radio in your device (PC, PDA, or Mobility Systems device) in order to look for the QC890 Verifier. - Page 14 Select the QC890 Verifier to which you want to bond and select Next. You will be asked if you need a passkey to add your device. The default passkey for all Hand Held Products QC890 verifiers is “1234.” The Wizard loads the QC890 Verifier information into your device. You may be given a choice of selecting a check box if you want your QC890 Verifier to be set as the default device to which Quick Check ImageData connects.
-
Page 15: Enabling Qcid For Bluetooth
Once you select Finish, your device is ready to communicate with the QC890 Verifier via the assigned ports. Make a note of the assigned port number. You will need to know this port number in the following installation steps. Enabling QCID for Bluetooth 1. -
Page 16: Using Quick Check Imagedata
Using Quick Check ImageData For the PC version of Quick Check ImageData, start Quick Check ImageData by clicking on Start->Programs->Hand Held Products->Quick Check ImageData or double click the Quick Check ImageData icon on your desktop (set up during installation). For the Windows Mobile for Pocket PC version, start Quick Check ImageData by clicking on Start ->Programs. -
Page 17: Help System
Windows Mobile for Pocket PC Main Screen Help System The Quick Check ImageData program has an extensive help system to aid in the verification of your bar codes. Please refer to the help files for questions regarding the verification process and for specific questions regarding the QCID program. - Page 18 2 - 10 Quick Check® 890 User’s Guide...
-
Page 19: Chapter 3 - Using The Quick Check 890 Verifier System
Using the Quick Check 890 Verifier System Scanning a Bar Code Symbol Using the QC890 Verifier Note: Calibration is a requirement of the ISO/IEC standards. Without proper initial calibration, the values displayed may not be accurate. Please be sure to calibrate the QC890 Verifier prior to scanning bar codes and when you change apertures and/or external scanning devices . -
Page 20: Calibrating The Qc890 Verifier
Make sure to use only the original calibration tools that were supplied with your QC890 Verifier kit or certified replacements obtained from Hand Held Products. 1. Place the verifier on top of the symbol. -
Page 21: Scanning Properly Using A Pen/Mouse Wand
5. Enter the prompted data (Name and Location) and press OK. The following screen displays. 6. If the unit does not calibrate, contact Hand Held Products Technical Support (see Technical Assistance Scanning Properly Using a Pen/Mouse Wand 1. -
Page 22: Calibrating An External Pen/Mouse Wand
• If you hear a single beep tone followed by another single beep of the same tone, it signifies a good read. • If you hear a single beep and then a beep of a different tone, the unit detected an error in the scanned symbol. -
Page 23: Scanning Properly Using The Qc3800V Linear Imager
3. After you type in your name and location, click OK. The following message appears: Note: When using the external QC3800V linear imager, it does not report ISO/ IEC reflectance parameters; therefore no calibration is necessary or possible. Scanning Properly Using the QC3800V Linear Imager: 1. -
Page 24: Calibration Log
Note: The QC3800V reading width (includes quiet zones) is 6 inches. Note: The QC3800V is the only device that can be used as a non-contact input device with a QC890 Verifier unit. The QC3800V should not be used with any decoders, terminals, or other brand of verifiers. Calibration Log The Calibration Log records the instances when calibration was performed. -
Page 25: Reflectometer Mode
The Calibration Log looks like this: Reflectometer Mode Note: The Reflectometer Mode is only available for use with the mouse/pen wands. Reflectometer Mode measures the spot reflectance of the area at which the imager is “looking.” 1. To activate the Reflectometer, click on the Reflectometer icon ( tool bar below the menu options. - Page 26 3 - 8 Quick Check® 890 User’s Guide...
-
Page 27: Chapter 4 - Maintenance
QC890 Verifier. Recertification Sending the QC890 Verifier back to Hand Held Products periodically for a factory calibration and re-certification is recommended; however the frequency is based on your company’s ISO procedures regarding test and measurement equipment. - Page 28 4 - 2 Quick Check® 890 User’s Guide...
-
Page 29: Chapter 5 - Customer Support
Hand Held Products provides service for all its products through service centers throughout the world. To obtain warranty or non-warranty service, return the unit to Hand Held Products (postage paid) with a copy of the dated purchase record attached. Contact the appropriate location below to obtain a Return Material Authorization number (RMA #) before returning the product. -
Page 30: Online Product Service And Repair Assistance
You can also access product service and repair assistance online at www.handheld.com. Technical Assistance If you need assistance installing or troubleshooting, please call your Distributor or the nearest Hand Held Products technical support office: North America/Canada: Telephone: (800) 782-4263, option 4 (8 a.m. to 6 p.m. EST) -
Page 31: Online Technical Assistance
(C) static electricity or electro-static discharge, (D) operation under conditions beyond the specified operating parameters, or (E) repair or service of the product by anyone other than Hand Held Products or its authorized representatives. This warranty shall extend from the time of shipment for the duration published by Hand Held Products for the product at the time of purchase ("Warranty... - Page 32 Hand Held Products, Inc. extends these warranties only to the first end- users of the products. These warranties are nontransferable. The limited duration of the warranty for the Quick Check 890 Verifier is for two (2) years. 5 - 4...
-
Page 33: Chapter A - Apertures
Apertures Pen/Mouse Wand Aperture Selection The table below is a handy reference to help you choose the proper aperture size required for the size/type bar code you wish to verify. This data is based on the standard ISO/IEC 15416 Bar code Print Quality Test Specification - Linear Symbols. - Page 34 A - 2 Quick Check® 890 User’s Guide...
-
Page 35: Chapter B - Menu Setting Bar Codes
Menu Setting Bar Codes The QC890 bar code verifiers are programmed in the factory for the most common settings. If you need to change these settings, programming is accomplished by scanning the bar codes included in this chapter. An asterisk (*) next to an option indicates the default setting. Resetting the Standard Product Defaults If you aren’t sure what programming options are in your device, or you’ve changed some options and want the factory settings restored, scan the... - Page 36 If there are no scans during the “scanner power time-out timer” interval, the QC890 Verifier goes into power down mode. Whenever a scan occurs, the “scanner power time-out timer” is reset. Default = 15 minutes No Power Down Timeout 5 minutes *15 minutes 60 minutes 120 minutes...
- Page 37 Symbology Defaults - Operation The default QC890 symbologies and operation are listed below: • Codabar* • Code 11** • Code 16K*** • Code • Code 49*** • Code • Code 128* • IATA 2 of 5 Enabled by default. Can be scanned when disabled. Disabled by default.
- Page 38 C - 2 Quick Check® 890 User’s Guide...
- Page 40 Hand Held Products, Inc. 700 Visions Drive P.O. Box 208 Skaneateles Falls, NY 13153-0208 QC890-UG Rev A 6-06...
Need help?
Do you have a question about the QUICK CHECK 890 and is the answer not in the manual?
Questions and answers