
Related Manuals for Thermo Scientific 8000DH Series


Summary of Contents for Thermo Scientific 8000DH Series
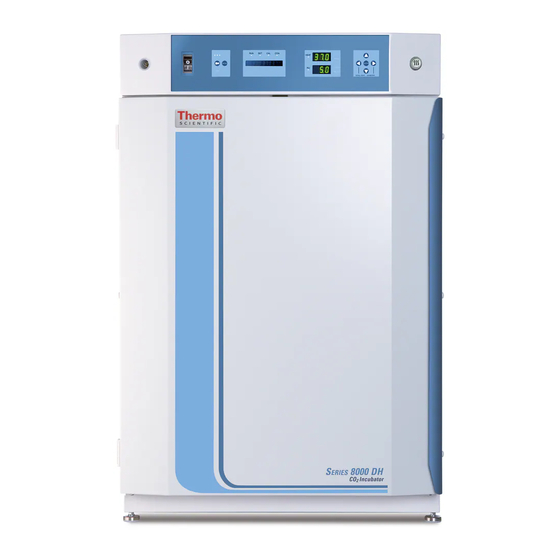
- Page 1 Series 8000DH Incubator Direct Heat with Sterilization Cycle Operating and Maintenance Manuals 7013540 Rev. 4...
- Page 2 24851, 24849/IN-3971 1/7/10 CO2 valve connection inlet & inner door switch kits-parts list & drawing 370-200-5 ccs 25694/IN-3954 10/26/09 Release level 2 - added spring rod kit (pg. 1-7) ECR/ECN DATE DESCRIPTION Thermo Scientific Thermo Scientific Direct Heat CO2 Incubator...
- Page 3 Warning If the incubator is not used in the manner specified in this operating manual, the protection provided by the equipment design may be impaired. ©2007 Thermo Scientific. All rights reserved. Direct Heat CO2 Incubator Thermo Scientific...
- Page 4 European Country, and this product should be disposed of or recycled through them. Further information on Thermo’s compliance with this directive, the recyclers in your country and information on Thermo Scientific products will be available at www.thermofisher.com. Always use the proper protective equipment (clothing, gloves, goggles, etc.) 4 Always dissipate extreme cold or heat and wear protective clothing.
- Page 5 We can also provide you with a quotation on our Extended Warranty for your Thermo Scientific products. Whatever Thermo Scientific products you need or use, we will be happy to discuss your applications. If you are experiencing technical problems, working together, we will help you locate the problem and, chances are, correct it yourself...over the telephone without a service...
- Page 6 • Repairs to parts or systems resulting from unauthorized unit modifications. • Any labor costs other than that specified during the parts and labor warranty period, which may include additional warranty on CO sensors, blower motors, water jackets, etc. Thermo Scientific Thermo Scientific Direct Heat CO2 Incubator...
-
Page 8: Table Of Contents
Relative Humidity ........2-4 Thermo Scientific... - Page 9 Sterilization Cycle ........5-8 Direct Heat CO2 Incubator Thermo Scientific...
- Page 10 Warranty Information ........10-1 Thermo Scientific...
-
Page 12: Installation And Start-Up
Control Panel - Keypad, displays & indicators (Figure 1-2) • Leveling Legs - Used to level the unit • Sterilization Cycle Button - Switch to initiate sterilization cycle Note The incubators are stackable. Information follows. Thermo Scientific Direct Heat CO2 Incubator... - Page 13 ENTER Silence Active Heat Indicator Mode Select Indicators Indicator Switch in °C button Switch Message Display Scroll Arrow Keys Power Switch Active Injection Indicator Humidity in % level in % Figure 1-2. Control Panel Direct Heat CO2 Incubator Thermo Scientific...
-
Page 14: Keypad Operation
Temp Relay Lo Alarm Hi Alarm Relay Z & S #'s * RH Lo Alarm RH Relay Display Temp Display RH T/C units Base Unit Displays Option Unit Displays IR units *T/C units only Thermo Scientific Direct Heat CO2 Incubator... -
Page 15: Displays
3. Locate the unit away from doors and windows and heating and air conditioning ducts. 4. Lift the unit by the sides of the cabinet base. Do not attempt to lift it by the front and back. This places stress on the outer door hinges. Direct Heat CO2 Incubator Thermo Scientific... -
Page 16: Stacking The Incubators
Warning This incubator weighs 260 lbs (118kg). Have sufficient personnel available when lifting. Lift the unit by the sides of the cabinet base to avoid placing stress on the outer door hinge. Figure 1-6. Stacked Thermo Scientific Direct Heat CO2 Incubator... -
Page 17: Preliminary Cleaning
Accidental spills of hazardous materials on or inside this unit are the responsibility of the user. Direct Heat CO2 Incubator Thermo Scientific... -
Page 18: Duct Sheets And Shelf Installation
Pull the shelf channel forward and engage the channel’s front slot into the side duct’s appropriate forward tab. Refer to Figure 1-12. 5. Figure 1-11 shows one of the channels installed on the right side duct. Thermo Scientific Direct Heat CO2 Incubator... - Page 19 Shelves (cont.) Ridge Spring Figure 1-13. Spring End Figure 1-14. Spring Assemble to Rod Figure 1-15. Spring End Front opening of chamber Back wall of chamber Figure 1-16. Four Rods Installed in Chamber Direct Heat CO2 Incubator Thermo Scientific...
-
Page 20: Access Port Filter & Co2 Sensor Cover Plate
2. Install the air sample filter assembly to the black hose barb behind the top duct. 3. Insert the other end of the filter assembly onto the metal tubing on the top duct. Refer to the Figure 1-18. Figure 1-18. Air Sample Filter Installation Thermo Scientific Direct Heat CO2 Incubator... -
Page 21: Hepa Filter Installation
Connect the incubator to a grounded, dedicated circuit. The power cord connector is the mains disconnect device for the incubator. Position the unit so that it can be easily disconnected. 1-10 Direct Heat CO2 Incubator Thermo Scientific... - Page 22 Tap water may also have a high mineral content, which would produce a build-up of scale in the pan. High purity or ultra pure water is not recommended as it is an extremely aggressive solvent and will deteriorate the stainless steel. Thermo Scientific Direct Heat CO2 Incubator 1-11...
-
Page 23: Filling The Humidity Pan
A single stage CO pressure regulator will not maintain 15 psig (103.4 kPa) to the incubator as the pressure in the CO cylinder decreases; therefore, a two stage regulator is recommended. 1-12 Direct Heat CO2 Incubator Thermo Scientific... -
Page 24: Incubator Start-Up
All Series 8000DH incubators have an operating temperature range of 10°C to 50°C, depending on ambient temperature. The incubator is Temperature shipped from the factory with a temperature setpoint of 10°C. At this setting, all heaters are turned off. Thermo Scientific Direct Heat CO2 Incubator 1-13... - Page 25 If the incubator’s operating temperature setpoint is set above the overtemp setpoint, the overtemp setpoint will automatically update to 1°C above the temperature setpoint. It is recommended that the overtemp setpoint be maintained at 1°C over the operating temperature setpoint. 1-14 Direct Heat CO2 Incubator Thermo Scientific...
- Page 26 4. Press ENTER to save the setpoint. 5. Press the MODE key until the RUN indicator lights to go to RUN mode or press the right/left arrow keys to go to next/previous parameter. Thermo Scientific Direct Heat CO2 Incubator 1-15...
- Page 27 Section 1 Installation and Start-Up 1-16 Direct Heat CO2 Incubator Thermo Scientific...
-
Page 28: Calibration
Startup - Allow 12 hours for the temperature in the cabinet to stabilize before proceeding. Already Operating - Allow at least 2 hours after the display reaches setpoint for temperature to stabilize before proceeding. Thermo Scientific Direct Heat CO2 Incubator... -
Page 29: Thermal Conductivity Co2 System
12 hours before checking the CO concentration with an independent instrument. Presently Operating - Make sure the chamber doors are closed. Allow at least 2 hours after the temperature and CO displays reach their setpoints for chamber atmosphere stabilization. Direct Heat CO2 Incubator Thermo Scientific... - Page 30 Sensor Stabilization Times Start-Up- Allow the temperature and the CO of the cabinet to stabilize at least 12 hours before proceeding. Presently Operating - Allow CO to stabilize at least 2 hours at setpoint before proceeding. Thermo Scientific Direct Heat CO2 Incubator...
-
Page 31: Infrared Co2 System
3. Press the right arrow key until “RH CAL XX” appears in the message display. 4. Press the up/down arrow to match the display to the independent instrument. 5. Press ENTER to store the calibration. 6. Press the MODE key to return to RUN mode. Direct Heat CO2 Incubator Thermo Scientific... - Page 32 2. With a full humidity pan and stable temperature, the relative humidity in the chamber will be 95%. 3. Using Step 3-5 of the relative humidity sensor adjustment, adjust the display to 95%. This calibration method should be accurate to within 5%. Thermo Scientific Direct Heat CO2 Incubator...
- Page 33 Section 2 Calibration Direct Heat CO2 Incubator Thermo Scientific...
-
Page 34: Configuration
2. Press the right arrow until NEW HEPA shows in the message display. 3. Press ENTER to restart the timer and clear the REPLACE HEPA alarm. 4. Press the MODE key to return to RUN mode. Thermo Scientific Direct Heat CO2 Incubator... -
Page 35: Set Replace Hepa Filter Reminder
3. Press up/down arrow to change the access code. 4. Press ENTER to save the access code. 5. Press the MODE key to return to the RUN mode or right/left arrow to go to next/previous parameter. Direct Heat CO2 Incubator Thermo Scientific... -
Page 36: Enable Low Temp Alarm To Trip Contacts
3. Press the up/down key to toggle the setting ON/OFF. 4. Press ENTER to save the setting 5. Press the MODE key to return to RUN mode, or the right/left arrow to go to next/previous parameter. Thermo Scientific Direct Heat CO2 Incubator... - Page 37 3. Press up/down arrow to change the high CO alarm limit. 4. Press ENTER to save the high CO alarm limit. 5. Press the MODE key to return to RUN mode, or right/left arrow to go to next/previous parameter. Direct Heat CO2 Incubator Thermo Scientific...
-
Page 38: Set New Zero Number For T/C Co2 Sensors
3. Press up/down arrow to change the zero number to match the sticker. 4. Press ENTER to save the setting. 5. Press the MODE key to return to RUN mode or right/left arrow to go to next/previous parameter. Thermo Scientific Direct Heat CO2 Incubator... -
Page 39: Setting A Low Rh Alarm Limit
3. Press up/down arrow to change the RH low alarm limit. 4. Press ENTER to save the RH low alarm limit. 5. Press the MODE key to return to RUN mode or right/left arrow to go to next/previous parameter. Direct Heat CO2 Incubator Thermo Scientific... -
Page 40: Enabling Temp/Rh To Be Displayed
3. Press up/down arrow to toggle the setting ON/OFF. 4. Press ENTER to save the setting. 5. Press the MODE key to return to RUN mode or right/left arrow to go to next/previous parameter. Thermo Scientific Direct Heat CO2 Incubator... - Page 41 Section 3 Configuration Direct Heat CO2 Incubator Thermo Scientific...
- Page 42 Section 3 Configuration Thermo Scientific Direct Heat CO2 Incubator...
- Page 43 Section 3 Configuration 3-10 Direct Heat CO2 Incubator Thermo Scientific...
-
Page 44: Alarms
15 minutes. The TEMP IS LOW alarm is disabled when the Temp set point is 10°C. The CO alarms are disabled when the CO set point is 0.0%. Thermo Scientific Direct Heat CO2 Incubator... -
Page 45: Sensor Fault Alarms
The microprocessor in Series 8000DH incubators continually scans all available sensors to ensure that they are operating properly. Should an error be detected, the incubator sounds an alarm and shows the appropriate message. Contact your local distributor. Direct Heat CO2 Incubator Thermo Scientific... -
Page 48: Routine Maintenance
Do not use solutions of sodium hypochlorite (bleach) as they may also cause pitting and rusting. A HEPA filter replacement kit (see Parts List) should be on-hand prior to cleaning the incubator interior. Thermo Scientific Direct Heat CO2 Incubator... -
Page 49: Clean Cabinet Exterior
7. Install the shelves and spray with 70% alcohol. Clean Cabinet Clean the incubator exterior with a damp sponge or soft, well-wrung cloth and mild detergent dissolved in water. Dry with a soft cloth. Exterior Direct Heat CO2 Incubator Thermo Scientific... -
Page 50: Replace Power Fuses
Table 5-1. Fuse Replacement Chart Fuse Voltage Manufacturer’s P/N Amperage Rating Rupture Speed IEC Letter Code 230VAC BUSS GMC-0.5A 500mA Time-Lag 115VAC BUSS GMC-1.0A 1.0 Amp Time-Lag Thermo Scientific Direct Heat CO2 Incubator... -
Page 51: Replace Air Sample Filter
1. Turn off the incubator’s power switch and unplug the power cord. 2. Remove the three screws from the back of the cabinet top. 3. Slide the top backward about an inch and lift it off. Direct Heat CO2 Incubator Thermo Scientific... - Page 52 Section 5 Routine Maintenance Major Components Refer to Figure 5-3. Some components shown are factory installed options. Figure 5-3. Electronics Drawer Thermo Scientific Direct Heat CO2 Incubator...
-
Page 53: Sterilization Cycle
6) IR sensor, if applicable • During the Sterilization Cycle, discoloration of some materials may occur. For example, stainless steel turns a straw color after a period of exposure to high temperatures. This is normal. Direct Heat CO2 Incubator Thermo Scientific... - Page 54 HEAT PHASE begins if the chamber temperature has not dropped below 139°C STERILIZATION PHASE starts again when the chamber temperature reaches 140°C CANCELED COOL PHASE* starts if the chamber temp dropped below 139°C * For further information on CANCELED COOL PHASE, see page 5-12. Thermo Scientific Direct Heat CO2 Incubator...
- Page 55 Pre Sterilization with IR CO sensor - If an IR sensor is connected, the display toggles between “POWER OFF” and “REMOVE IR”. If power is not turned off within 1 minute, the display returns to “SYSTEM OK”. Direct Heat CO2 Incubator Thermo Scientific...
- Page 56 ENTER”. If “ENTER” is not pressed within 1 minute, the display toggles between “POWER OFF” and “REPLACE IR”. When the unit is powered back on with the IR sensor reinstalled, the display returns to “SYSTEM OK”. Figure 5-14. Displays with IR Sensor Removed Thermo Scientific Direct Heat CO2 Incubator...
- Page 57 Phase begins and the display changes to “STERILIZING”. Figure 5-16. Sterilization Phase 8. After approximately 2 hours, a 5-second audible tone sounds, signaling that sterilization is complete. The Cool Phase begins. The display toggles between “STERILIZING” and “COOL PHASE”. 5-10 Direct Heat CO2 Incubator Thermo Scientific...
- Page 58 Reinstall the sensor by pushing it as far as it will go into the hole. After the unit is powered back on with the IR sensor reinstalled, the display toggles between “CYC COMPLETE”, “REPL HEPAs”, and “PRESS ENTER”. Figure 5-18. IR Sensor Reinstalled Thermo Scientific Direct Heat CO2 Incubator 5-11...
- Page 59 “REPLACE IR”. The white LED is lighted but no longer flashes. After the unit is powered back on with the IR sensor reinstalled, the display toggles between “CYC CANCELED”, “REPL HEPAs” and “PRESS ENTER”. 5-12 Direct Heat CO2 Incubator Thermo Scientific...
-
Page 60: Factory Options
The contacts may also be programmed to trip or not trip on temperature alarms, CO alarms, and RH alarms. See Section 3, Configuration mode. Figure 6-1. Remote Alarm Contacts CAUTION Contains Parts and Assemblies Susceptible to Damage by Electrostatic Discharge (ESD) Thermo Scientific Direct Heat CO2 Incubator... -
Page 61: Humidity Readout
Caution Incubators equipped with a T/C (thermal conductivity) CO sensor rely on a constant level of relative humidity to accurately measure and control the CO concentration in the incubator. Direct Heat CO2 Incubator Thermo Scientific... -
Page 62: Specifications
Inlet pressure ....15 psig (1 bar) Display ..Digital LED, 0.1% increments Thermo Scientific Direct Heat CO2 Incubator... - Page 63 Power switch/circuit breaker . . . 2 Pole, 12.0 Amp Accessory outlet . . .Voltage equal to the cabinet input. 75 Watts maximum, 0.5ma leakage current Alarm contacts . . Deviation of temperature, CO , power, NO and NC Direct Heat CO2 Incubator Thermo Scientific...
- Page 64 2 Pollution Degree describes the amount of conductive pollution present in the operating environment. Pollution degree 2 assumes that normally only non-conductive pollution such as dust occurs with the exception of occasional conductivity caused by condensation. Thermo Scientific Direct Heat CO2 Incubator...
-
Page 66: Spare Parts
114021 ..Grommet (1) for updated duct sheets 1900567 ....Exterior door assembly SRO Thermo Scientific Direct Heat CO2 Incubator... - Page 67 Section 8 Spare Parts Direct Heat CO2 Incubator Thermo Scientific...
- Page 68 Section 8 Spare Parts Thermo Scientific Direct Heat CO2 Incubator...
- Page 69 Section 8 Spare Parts Direct Heat CO2 Incubator Thermo Scientific...
- Page 70 Section 8 Spare Parts 370-200-5 Rev 8 370 BACK PANEL ASSEMBLY Page 1 of 2 Thermo Scientific Direct Heat CO2 Incubator...
- Page 71 Section 8 Section title 370-200-5 Rev 8 370 BACK PANEL ASSEMBLY Page 2 of 2 Direct Heat CO2 Incubator Thermo Scientific...
- Page 72 Section 8 Section title Thermo Scientific Direct Heat CO2 Incubator...
- Page 73 Section 8 Spare Parts Direct Heat CO2 Incubator Thermo Scientific...
- Page 74 Section 8 Spare Parts Thermo Scientific Direct Heat CO2 Incubator...
- Page 75 Section 8 Spare Parts 8-10 Direct Heat CO2 Incubator Thermo Scientific...
- Page 76 Section 8 Spare Parts Thermo Scientific Direct Heat CO2 Incubator 8-11...
-
Page 78: Electrical Schematics
Section 9 Electrical Schematics Thermo Scientific Direct Heat CO2 Incubator... - Page 79 Section 9 Electrical Schematics Thermo Scientific Direct Heat CO2 Incubator...
- Page 80 Section 9 Electrical Schematics Thermo Scientific Direct Heat CO2 Incubator...
- Page 81 Section 9 Electrical Schematics Direct Heat CO2 Incubator Thermo Scientific...
- Page 82 Section 9 Electrical Schematics Thermo Scientific Direct Heat CO2 Incubator...
- Page 83 Section 9 Electrical Schematics Direct Heat CO2 Incubator Thermo Scientific...
Need help?
Do you have a question about the 8000DH Series and is the answer not in the manual?
Questions and answers