Table of Contents
Advertisement
Available languages
Available languages
Quick Links
Advertisement
Table of Contents

Subscribe to Our Youtube Channel
Related Manuals for Create WINDLIGHT MINIMAL DC


Summary of Contents for Create WINDLIGHT MINIMAL DC
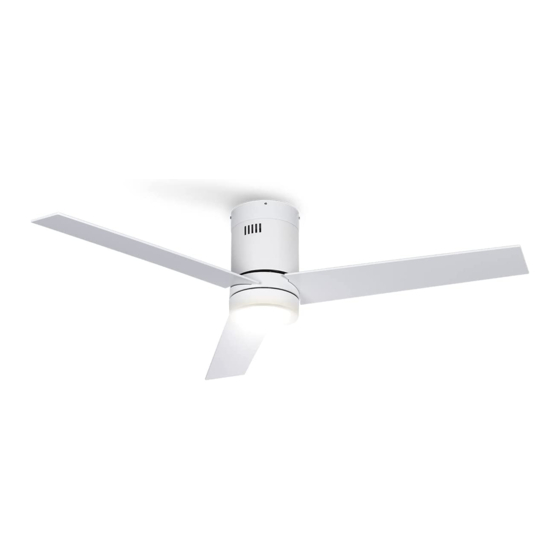
- Page 1 CEILING FAN VENTILADOR DE TECHO USER MANUAL...
-
Page 4: Table Of Contents
IND E X ENGLISH ESPAÑOL LIST OF PARTS LISTA DE PARTES INSTALLATION PREPARATION PREPARACIÓN DE LA INSTALACIÓN INSTALLATION INSTRUCTIONS INSTRUCCIONES DE SEGURIDAD Security instructions INSTRUCCIONES DE INSTALACIÓN MOUNTING BRACKET ATTACHMENT FIJACIÓN DEL SOPORTE DE MONTAJE REMOTE CONTROL MANDO A DISTANCIA REMOTE CONTROL CONNECTION CONEXIÓN DEL MANDA A DISTANCIA RECEIVER PLACEMENT... - Page 5 I NDE X ITALIANO DEUTSCH ELENCO DELLE PARTI TEILELISTE PREPARAZIONE ALL'INSTALLAZIONE INSTALLATIONSVORBEREITUNG ISTRUZIONI PER L'INSTALLAZIONE SICHERHEITSHINWEISE ISTRUZIONI DI SICUREZZA INSTALLATIONSANLEITUNG ATTACCO STAFFA DI MONTAGGIO MONTAGEHALTERUNG BEFESTIGUNG TELECOMANDO FERNBEDIENUNG CONNESSIONE TELECOMANDO ANSCHLUSS DER FERNBEDIENUNG POSIZIONAMENTO DEL RICEVITORE EMPFÄNGERPLATZIERUNG MONTAGGIO LAME MONTAGE DER KLINGEN MONTAGGIO DEL PANNELLO DI CONNESSIONE MONTAGE DES ANSCHLUSSPANELS PANNELLO LED E SCHERMO DECORATIVO...
-
Page 6: English
ENGL ISH Thank you for choosing our ceiling fan. Before using the appliance, and to ensure the best use, please read these instructions carefully. The safety precautions included in this document reduce the risk of death, injury, and electric shock when properly followed. Keep the manual in a safe place for future reference, along with the complete warranty card, sales receipt, and package. -
Page 7: Installation Preparation
SECURITY INSTRUCTIONS When using any electrical appliance, basic safety precautions should always be observed. • Read this entire manual carefully before beginning installation. Save these instructions. • Use only original spare parts. • To reduce the risk of personal injury, connect the fan directly to the building support structure in accordance with these instructions and use only the supplied hardware. -
Page 8: Mounting Bracket Attachment
M OU NT I NG B R ACKE T AT TACH ME NT • The outlet box and beam must be securely mounted and capable of reliably supporting at least the weight of the fan. Wood roof Concrete ceiling Securely attach the mounting bracket with Drill holes with an 8mm drill, depending on wood screws and washers to the ceiling joints. -
Page 9: Remote Control Connection
RE MO TE CON TROL CO NNECT I O N • Make the connection between the receiver wires and the fan motor wires following the color indications. Make sure the connection is firm. Ground (green / yellow) Take Neutral N (white) ground L input (black) -
Page 10: Mounting The Blades
M OU NT I NG TH E B L AD E S Blade arm screw • TIP: Blade bolt washers can be attached to each bolt prior to installing blades. Align the juicers on the blades with the screw holes on the motor. Tighten all the screws once you have hooked the blades. - Page 11 Connect the single-pin plugs on the backplane with those on the LED panel. The LED panel is magnetized so it will be attached to the patch panel simply by snapping them together. TIP: While installing or removing the LED board, keep the insulation pads intact carefully. Turning the setscrews too hard or too quickly will damage the insulation pads.
-
Page 12: Lista De Partes
ESP AÑOL Gracias por elegir nuestro ventilador de techo. Antes de utilizar el aparato, y para garantizar el mejor uso, lea atentamente estas instrucciones. Las precauciones de seguridad incluidas en este documento reducen el riesgo de muerte, lesiones y descargas eléctricas cuando se cumplen correctamente. Guarde el manual en un lugar seguro para futuras consultas, junto con la tarjeta de garantía completa, el recibo de compra y el paquete. -
Page 13: Preparación De La Instalación
INSTRUCCIONES DE SEGURIDAD Al utilizar cualquier aparato eléctrico, siempre se deben observar las precauciones básicas de seguridad. • Lea todo este manual detenidamente antes de comenzar la instalación. Guarde estas instrucciones. • Utilice únicamente repuestos originales. • Para reducir el riesgo de lesiones personales, conecte el ventilador directamente a la estructura de soporte del edificio de acuerdo con estas instrucciones y use solo el hardware suministrado. -
Page 14: Fijación Del Soporte De Montaje
FIJACIÓN D E L SOP ORT E D E MO NTA JE • La caja de salida y la viga deben estar montadas de forma segura y ser capaces de soportar de manera confiable al menos el peso del ventilador. Techo de madera Techo de hormigón Fije firmemente el soporte de montaje con... -
Page 15: Conexión Del Manda A Distancia
C O NE XI ÓN D E L MANDA A DI STANCI A • Realice la conexión entre los cables del receptor y los cables del motor del ventilador siguiendo las indicaciones de color. Asegúrese de que la conexión esté firme. Toma tierra (verde / amarilla) Toma tierra Neutro N (blanco) -
Page 16: Montaje De Las Aspas
M O NTA J E DE L AS ASPAS Tornillo del brazo de la aspa • CONSEJO: Las arandelas para los tornillos de las aspas pueden colocarse en cada tor- nillo antes de instalar las aspas. Alinee los jugueros de las aspas con los agujeros de los tornillos del motor. - Page 17 Conecte los enchufes de un solo pin de la placa de conexiones con los del panel LED. El panel LED está magnetizado, por lo que se adjuntará al panel de conexiones simplemente colocándolos juntos. CONSEJO: Mientras instala o retira la placa de LED, mantenga las almohadillas de aislamiento intactas con cuidado.
-
Page 18: Português
PORTU GU ÊS Obrigado por escolher nosso ventilador de teto. Antes de usar o aparelho, e para garantir o melhor uso, leia atentamente estas instruções. As precauções de segurança incluídas neste documento reduzem o risco de morte, ferimentos e choque elétrico quando devidamente seguidas. Guarde o manual em local seguro para referência futura, junto com o cartão de garantia completo, recibo de venda e embalagem. -
Page 19: Preparação De Instalação
INSTRUÇÕES DE SEGURANÇA Ao usar qualquer aparelho elétrico, as precauções básicas de segurança devem sempre ser observadas. • Leia todo o manual cuidadosamente antes de iniciar a instalação. Guarde essas instruções. • Use apenas peças sobressalentes originais. • Para reduzir o risco de acidentes pessoais, conecte o ventilador diretamente à estrutura de suporte do prédio de acordo com estas instruções e use apenas o hardware fornecido. -
Page 20: Anexo Do Suporte De Montagem
A NE XO D O SU P ORT E D E MO NTAGE M • A caixa de saída e a viga devem ser montadas com segurança e capazes de suportar de forma confiável pelo menos o peso do ventilador. Telhado de madeira Teto de concreto Prenda firmemente o suporte de montagem... -
Page 21: Conexão De Controle Remoto
C O NE X ÃO D E CONT RO LE RE MO TO • Faça a conexão entre os fios do receptor e os fios do motor do ventilador seguindo as indicações coloridas. Certifique-se de que a conexão esteja firme. Solo (verde / amarelo) Tomar Neutro N (branco) -
Page 22: Montagem Das Lâminas
M O NTAG E M DAS L ÂMI NAS Parafuso do braço da lâmina • GORJETA: As arruelas dos parafusos das lâminas podem ser fixadas em cada parafuso an- tes de instalar as lâminas. Alinhe os espremedores nas lâminas com os orifícios dos para- fusos no motor. - Page 23 Conecte os plugues de pino único no painel traseiro com os do painel de LED. O painel de LED é magnetizado para que seja conectado ao painel de conexão simplesmente encaixando-os. GORJETA: Ao instalar ou remover a placa de LED, mantenha as almofadas de isolamento intactas com cuidado.
-
Page 24: Français
F RA NÇA IS Merci d'avoir choisi notre ventilateur de plafond. Avant d'utiliser l'appareil, et pour garantir une utilisation optimale, veuillez lire attentivement ces instructions. Les précautions de sécurité incluses dans ce document réduisent le risque de mort, de blessure et de choc électrique lorsqu'elles sont correctement suivies. Conservez le manuel dans un endroit sûr pour référence future, ainsi que la carte de garantie complète, le reçu de vente et l'emballage. -
Page 25: Préparation À L'installation
CONSIGNES DE SÉCURITÉ Lors de l'utilisation de tout appareil électrique, des précautions de sécurité de base doivent toujours être observées. • Lisez attentivement l'intégralité de ce manuel avant de commencer l'installation. Enregistrez ces instructions. • N'utilisez que des pièces de rechange d'origine. •... -
Page 26: Fixation Du Support De Montage
FIX ATION DU SU PP ORT D E MONTAGE • La boîte de sortie et la poutre doivent être solidement fixées et capables de supporter de manière fiable au moins le poids du ventilateur. Toit en bois Plafond en béton Fixez solidement le support de montage Percez des trous avec un foret de 8 mm, en avec des vis à... -
Page 27: Connexion De La Télécommande
C O NNE XION DE L A T É LÉCO MMAND E • Faire la connexion entre les fils du récepteur et les fils du moteur du ventilateur en suivant les indications de couleur. Assurez-vous que la connexion est ferme. Terre (vert / jaune) Prendre du Neutre N (blanc) -
Page 28: Montage Des Lames
M O NTAG E D E S L AME S Vis de bras de lame • CONSEIL: Des rondelles de boulon de lame peuvent être fixées à chaque boulon avant d'installer les lames. Alignez les extracteurs de jus sur les lames avec les trous de vis sur le moteur. - Page 29 Connectez les fiches à broche unique du fond de panier à celles du panneau LED. Le panneau LED est magnétisé de sorte qu'il sera fixé au panneau de brassage simplement en les enclenchant ensemble. CONSEIL: Lors de l'installation ou du retrait de la carte LED, gardez soigneusement les coussinets isolants intacts.
-
Page 30: Italiano
I TAL IA NO Grazie per aver scelto il nostro ventilatore da soffitto. Prima di utilizzare l'apparecchio, e per garantire il miglior utilizzo, leggere attentamente queste istruzioni. Le precauzioni di sicurezza incluse in questo documento riducono il rischio di morte, lesioni e scosse elettriche se seguite correttamente. -
Page 31: Preparazione All'installazione
ISTRUZIONI DI SICUREZZA Quando si utilizza qualsiasi apparecchio elettrico, è necessario osservare sempre le precauzioni di sicurezza di base. • Leggere attentamente l'intero manuale prima di iniziare l'installazione. Salva queste istruzioni. • Utilizzare solo ricambi originali. • Per ridurre il rischio di lesioni personali, collegare il ventilatore direttamente alla struttura di supporto dell'edificio secondo queste istruzioni e utilizzare solo l'hardware in dotazione. -
Page 32: Attacco Staffa Di Montaggio
AT TACCO STAFFA DI MO NTAGGI O • La scatola di derivazione e la trave devono essere montate in modo sicuro e in grado di sostenere in modo affidabile almeno il peso del ventilatore. Tetto in legno Soffitto in cemento Fissare saldamente la staffa di montaggio Praticare dei fori con una punta da 8 mm, con viti per legno e rondelle ai giunti del... -
Page 33: Connessione Telecomando
C O NNE S SI ON E T E LEC OMAND O • Effettuare il collegamento tra i fili del ricevitore ei fili del motore del ventilatore seguendo le indicazioni del colore. Assicurati che la connessione sia stabile. Terra (verde/giallo) Prendere Neutro N (bianco) terra... -
Page 34: Montaggio Lame
M O NTAG G IO L AME Vite braccio lama • CONSIGLIO: Le rondelle dei bulloni della lama possono essere fissate a ciascun bullone prima di installare le lame. Allineare gli spremiagrumi sulle lame con i fori delle viti sul mo- tore. - Page 35 Collegare le spine unipolari sul backplane con quelle sul pannello LED. Il pannello LED è magnetizzato, quindi sarà attaccato al pannello patch semplicemente facendoli scattare insieme. CONSIGLIO: Durante l'installazione o la rimozione della scheda LED, mantenere intatti i cuscinetti isolanti con cura. Girare le viti di fissaggio troppo forte o troppo velocemente danneggerà...
- Page 36 D E U T SC H Vielen Dank, dass Sie sich für unseren Deckenventilator entschieden haben. Bevor Sie das Gerät verwenden und um eine optimale Nutzung zu gewährleisten, lesen Sie bitte diese Anleitung sorgfältig durch. Die in diesem Dokument enthaltenen Sicherheitsvorkehrungen verringern das Risiko von Tod, Verletzung und Stromschlag, wenn sie richtig befolgt werden.
-
Page 37: Installationsvorbereitung
SICHERHEITSHINWEISE Bei der Verwendung von Elektrogeräten sollten immer grundlegende Sicherheitsvorkehrungen beachtet werden. • Lesen Sie dieses Handbuch sorgfältig durch, bevor Sie mit der Installation beginnen. Anleitung aufbewahren. • Verwenden Sie nur Original-Ersatzteile. • Um die Verletzungsgefahr zu reduzieren, verbinden Sie den Ventilator gemäß dieser Anleitung direkt mit der Gebäudeunterkonstruktion und verwenden Sie nur die mitgelieferte Hardware. -
Page 38: Montagehalterung Befestigung
M O NTAG E H ALTE RU NG B E F E ST IGUNG • Der Auslasskasten und der Balken müssen sicher montiert sein und mindestens das Gewicht des Ventilators zuverlässig tragen können. Holzdach Betondecke Befestigen Sie die Montagehalterung mit Bohren Sie Löcher mit einem 8mm Bohrer, je Holzschrauben und Unterlegscheiben sicher nach Länge der Dehnschrauben. -
Page 39: Anschluss Der Fernbedienung
A NSCHLU S S D E R F E RNB E DI E NU NG • Stellen Sie die Verbindung zwischen den Empfängerkabeln und den Lüftermotorkabeln gemäß den Farbangaben her. Stellen Sie sicher, dass die Verbindung fest ist. Masse (grün / gelb) Boden Neutral N (weiß) nehmen... -
Page 40: Montage Der Klingen
M O NTAG E DE R KLI NGE N Messerarmschraube • SPITZE: Messerschraubenunterlegscheiben können an jeder Schraube angebracht wer- den, bevor die Messer installiert werden. Richten Sie die Entsafter an den Klingen mit den Schraubenlöchern am Motor aus. Ziehen Sie alle Schrauben fest, nachdem Sie die Klingen eingehakt haben. - Page 41 Verbinden Sie die einpoligen Stecker der Backplane mit denen des LED-Panels. Das LED- Panel ist magnetisiert, so dass es einfach durch Zusammenschnappen am Patchpanel befestigt wird. SPITZE: Achten Sie beim Installieren oder Entfernen der LED-Platine darauf, dass die Isolationspads sorgfältig intakt sind. Durch zu starkes oder zu schnelles Drehen der Stellschrauben werden die Isolierpads beschädigt.
-
Page 42: Nederlands
N E DE R LA ND S Bedankt voor het kiezen van onze plafondventilator. Lees deze instructies aandachtig door voordat u het apparaat in gebruik neemt en voor een optimaal gebruik. De veiligheidsmaatregelen in dit document verminderen het risico op overlijden, letsel en elektrische schokken als ze correct worden opgevolgd. -
Page 43: Installatie Voorbereiding
BEVEILIGINGSINSTRUCTIES Bij het gebruik van een elektrisch apparaat moeten altijd elementaire veiligheidsmaatregelen in acht worden genomen. • Lees deze hele handleiding aandachtig door voordat u met de installatie begint. Bewaar deze instructies. • Gebruik alleen originele reserveonderdelen. • Om het risico op persoonlijk letsel te verminderen, sluit u de ventilator rechtstreeks aan op de draagconstructie van het gebouw in overeenstemming met deze instructies en gebruikt u alleen de meegeleverde hardware. -
Page 44: Montagebeugel Bevestiging
M O NTAG E B E UGE L B E VE ST I GI NG • De uitlaatdoos en balk moeten stevig worden gemonteerd en in staat zijn om ten minste het gewicht van de ventilator betrouwbaar te dragen. Houten dak Betonnen plafond Bevestig montagebeugel... -
Page 45: Aansluiting Afstandsbediening
A A NSLUI TI N G AFSTANDSB E D IE NI NG • Maak de verbinding tussen de ontvangerdraden en de ventilatormotordraden volgens de kleuraanduidingen. Zorg ervoor dat de verbinding stevig is. Grond (groen / geel) Grond Neutraal N (wit) nemen L-ingang (zwart) -
Page 46: De Me S Se N Monte Re N
DE ME S SE N MONTE RE N Mesarmschroef • TIP: Mesboutringen kunnen aan elke bout worden bevestigd voordat de messen worden geïnstalleerd. Lijn de sapcentrifuges op de messen uit met de schroefgaten op de motor. Draai alle schroeven vast zodra u de messen hebt vastgehaakt. Herhaal dit proces met de overige schroeven voordat u de schroeven definitief bevestigt. - Page 47 Verbind de enkelpolige stekkers op de backplane met die op het LED-paneel. Het LED- paneel is gemagnetiseerd, zodat het eenvoudig aan het patchpaneel kan worden bevestigd door ze in elkaar te klikken. TIP: Houd bij het installeren of verwijderen van de LED-kaart de isolatiekussentjes zorgvuldig intact.
-
Page 48: Polski
P OL SKI Dziękujemy za wybranie naszego wentylatora sufitowego. Przed użyciem urządzenia i aby zapewnić jak najlepsze użytkowanie, prosimy o dokładne zapoznanie się z niniejszą instrukcją. Środki ostrożności zawarte w tym dokumencie zmniejszają ryzyko śmierci, obrażeń i porażenia prądem, jeśli są właściwie przestrzegane. Instrukcję należy przechowywać w bezpiecznym miejscu do wykorzystania w przyszłości, wraz z pełną... -
Page 49: Przygotowanie Do Instalacji
INSTRUKCJE BEZPIECZEŃSTWA Podczas korzystania z jakiegokolwiek urządzenia elektrycznego należy zawsze przestrzegać podstawowych zasad bezpieczeństwa. • Przeczytaj uważnie całą instrukcję przed rozpoczęciem instalacji. Zapisz te instrukcje. • Używaj tylko oryginalnych części zamiennych. • Aby zmniejszyć ryzyko obrażeń ciała, należy podłączyć wentylator bezpośrednio do konstrukcji wsporczej budynku zgodnie z niniejszą... -
Page 50: Mocowanie Wspornika Montażowego
M OCOWAN IE WSP ORNI K A MO NTA ŻOWEG O • Skrzynka wylotowa i belka muszą być solidnie zamontowane i zdolne do niezawodnego utrzymania co najmniej ciężaru wentylatora. Dach drewniany Sufit betonowy Bezpiecznie przymocuj wspornik montażowy Wywierć otwory wiertłem 8mm w zależności za pomocą... -
Page 51: Połączenie Zdalnego Sterowania
P O Ł ĄCZ E NI E Z DALNEGO ST E ROWANI A • Wykonać połączenie między przewodami odbiornika i przewodami silnika wentylatora zgodnie z kolorami wskazań. Upewnij się, że połączenie jest stabilne. Ziemia (zielony/żółty) Zajmij Neutralny N (biały) ziemię Wejście L (czarne) L przezroczysty (niebieski) -
Page 52: Montaż Noży
M O NTA Ż N OŻ Y Śruba ramienia ostrza • WSKAZÓWKA: Podkładki do śrub ostrzy można przymocować do każdej śruby przed za- instalowaniem ostrzy. Wyrównaj sokowirówki na ostrzach z otworami na śruby w silniku. Po zaczepieniu ostrzy dokręć wszystkie śruby. Przed trwałym przykręceniem wkrętów, po- wtórz ten proces z pozostałymi. - Page 53 Połącz wtyczki jednopinowe na płycie montażowej z wtyczkami na panelu LED. Panel LED jest namagnesowany, dzięki czemu można go przymocować do panelu krosowego, po prostu łącząc je ze sobą. WSKAZÓWKA: Podczas montażu lub demontażu tablicy LED należy uważać na nienaruszone podkładki izolacyjne.
- Page 56 Made in P.R.C.
Need help?
Do you have a question about the WINDLIGHT MINIMAL DC and is the answer not in the manual?
Questions and answers