
Related Manuals for Atlas Copco FlexiROC T30 R


Summary of Contents for Atlas Copco FlexiROC T30 R
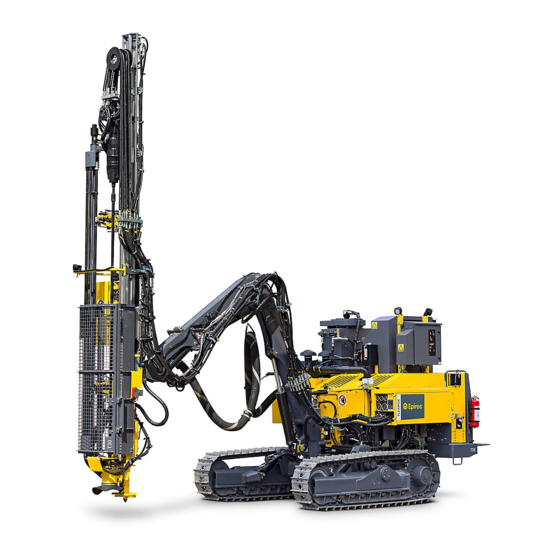
- Page 1 FlexiROC T30 R Maintenance Original Instructions 2017-04-11 | No: 3629357835.1.3629419915 en-US...
-
Page 3: Table Of Contents
FlexiROC T30 R Table of Contents Table of Contents 1 Introduction ...................... 9 Safety First.......................... 9 The Purpose of This Publication .................... 9 Target Group .......................... 9 Product Warranty ........................ 9 2 About Maintenance Management .............. 11 Maintenance Planning and Counters .................. 11 Maintenance Records ...................... 11 3 Specifications...................... - Page 4 FlexiROC T30 R Table of Contents 7.15 Tighten Bolted Joints ...................... 38 7.16 Check Condition of Feed...................... 39 7.17 Check Condition of Feed...................... 40 7.18 Check Drill Rod Support ...................... 41 7.19 Check Rod Handling ........................ 42 7.20 Check Rod Handling System .................... 42 7.21 Check Drill Rod Support...................... 43 7.22 BSH-XS............................ 44...
- Page 5 FlexiROC T30 R Table of Contents 11 Diesel Engine....................... 73 11.1 Check Engine Oil Level ...................... 73 11.2 Drain Water Condensation from Preliminary Fuel Filter ............ 74 11.3 Replace Preliminary Fuel Filter.................... 75 11.4 Replace Secondary Fuel Filter.................... 75 11.5 Replace Engine Oil Filter...................... 76 11.6 Replacing Compressor Oil Filter .................... 77...
- Page 6 FlexiROC T30 R Table of Contents 15.1 Check Compressor Oil Level .................... 99 15.2 Oil Change and Oil Filter Replacement.................. 99 15.3 Replace Air Compressor Oil and Oil Filter ................ 100 15.4 Check Safety Valve on Compressor System............... 101 15.5 Replace Separator Filter...................... 102 15.6 Changing to New Type of Compressor Oil ................ 102 15.7 Flushing Air Compressor ...................... 103...
- Page 7 FlexiROC T30 R Table of Contents 18.4 Starting Up Water Mist System from Dry................ 128 18.5 Clean Filter in Water Mist Tank..................... 129 19 Automatic Central Lubrication System CLS........... 131 19.1 Automatic Central Lubrication System CLS ............... 131 19.2 Pause Time and Running Time Settings................ 131 19.3 Lubrication Pump Safety Valve .................... 132...
- Page 8 FlexiROC T30 R Table of Contents viii No: 3629357835.1.3629419915 en-US...
-
Page 9: Introduction
Use only Atlas Copco original parts. Any damage or operational interruptions caused by using spare parts of other manufactures than Atlas Copco will not be covered by warranty. Atlas Copco is not liable for any damage caused by unauthorized modification to the machine and its equipment. - Page 10 FlexiROC T30 R 1 Introduction No: 3629357835.1.3629419915 en-US...
-
Page 11: About Maintenance Management
FlexiROC T30 R 2 About Maintenance Management 2 About Maintenance Management 2.1 Maintenance Planning and Counters Maintenance is organized at scheduled intervals. Scheduled intervals supplement each other. A longer interval comprises maintenance tasks supplementary to tasks from a shorter interval. Maintenance scheduling should be applied periodically at the shortest interval of the unit/ function (whichever comes first dur- ing operation). - Page 12 FlexiROC T30 R 2 About Maintenance Management No: 3629357835.1.3629419915 en-US...
-
Page 13: Specifications
3 Specifications 3.1 Standard Tightening Torques Bolted Joints All bolted joints are tightened to the torque required by Atlas Copco Standard K 4369:01 K (metric) and 4368K/-01K (imperial) unless otherwise stated. In such cases, this torque is specified in the maintenance instructions of the module in question. - Page 14 FlexiROC T30 R 3 Specifications No: 3629357835.1.3629419915 en-US...
-
Page 15: General Machine Condition
FlexiROC T30 R 4 General Machine Condition 4 General Machine Condition 4.1 Wash Machine Externally Disconnect fire-fighting equipment if steam washing or high-pressure washing. Rinse the machine with water at least once a day to remove drill cuttings, mud, and dirt. - Page 16 FlexiROC T30 R 4 General Machine Condition No: 3629357835.1.3629419915 en-US...
-
Page 17: Fire Fighting Equipment
FlexiROC T30 R 5 Fire Fighting Equipment 5 Fire Fighting Equipment 5.1 Check Fire Extinguishers Check that the indicator is in the green zone. Replace the fire extinguisher if the indicator is in the red zone. Check the seals for damage. - Page 18 FlexiROC T30 R 5 Fire Fighting Equipment No: 3629357835.1.3629419915 en-US...
-
Page 19: Boom Unit
FlexiROC T30 R 6 Boom Unit 6 Boom Unit 6.1 Lubricate Boom and Feed Pump lubricating grease into the 21 grease nipples (A). No: 3629357835.1.3629419915 en-US... -
Page 20: Check Boom Condition
FlexiROC T30 R 6 Boom Unit 6.2 Check Boom Condition Check the mounting on the boom head (A). Tightening torque 73 Nm (54 lbf.ft). Check the clearance between the feed and feed bracket (B). Clearance 2-4 mm. Check the mounting on the feed bracket (C). Tightening torque 185 Nm (136 Ibf.ft). -
Page 21: Check Silence Kit
FlexiROC T30 R 6 Boom Unit 6.3 Check Silence Kit Check mountings and tightening torque. No: 3629357835.1.3629419915 en-US... - Page 22 FlexiROC T30 R 6 Boom Unit No: 3629357835.1.3629419915 en-US...
-
Page 23: Feed Unit
FlexiROC T30 R 7 Feed Unit 7 Feed Unit 7.1 Safety Precautions Before Working on Feed Unit WARNING Dismantling and Assembling Components Can cause personal injury. Components that could move or fall down must be securely supported or strapped in place during service and maintenance work. -
Page 24: 2000 And 6000 Series
FlexiROC T30 R 7 Feed Unit 7.2 2000 and 6000 Series 7.3 Assembling Rock Drill Precondition p The feeder must be clean from corrosion inhibitor. Remove burrs, paint, or other coatings from the cradle and the contact surfaces on the rock drill. -
Page 25: Haul And Return Ropes
FlexiROC T30 R 7 Feed Unit 7.4 Haul and Return Ropes Adjustment for haul rope Adjustment for return rope Scraper plate Haul rope tensioner Holder for intermediate drill rod support No: 3629357835.1.3629419915 en-US... -
Page 26: Replacing Haul Rope
FlexiROC T30 R 7 Feed Unit 7.5 Replacing Haul Rope Operate the drill to about half its length of travel. Slacken the tension on the ropes, bolt (A) and nut (B). Remove the haul rope from its front attachment on the rock drill cradle. -
Page 27: Tension Of Return Rope
FlexiROC T30 R 7 Feed Unit Fit the new rope and refit the scraper plate. Adjust the ropes. 7.5.1 Tension of Return Rope Place a plank between the rock drill cradle and the intermediate drill rod support. Run the cradle forward until it stops against the plank. Keep the feed force applied. -
Page 28: Replacing Slide Pieces In Holder
FlexiROC T30 R 7 Feed Unit Adjustment measurement Then shift the lower holders lengthways until a clearance of 1 mm has been attained between the lower holder and feed beam. Tighten the bolts (B). Check by running the cradle along the entire beam. The pressure to run the cradle forwards must be maximum 30 bar with the hydraulic oil at operating temperature. -
Page 29: Replacing Slide Rails
FlexiROC T30 R 7 Feed Unit Prise off the slide pieces (C) from the holder using a screwdriver and remove the keys (D). Slide a new slide piece into the holder track and install the new keys. Make sure that the holders are installed in the cradle correctly. The holders must be adjusted so that the total lateral play is 23 mm. -
Page 30: Disassembling Feed Cylinder
FlexiROC T30 R 7 Feed Unit Remove the cradle for the drill, the intermediate drill steel support, and the hose drum from the beam. Remove the old slide rails (A). Press the lower edges of the bar outwards. Clean the beam surfaces thoroughly. -
Page 31: Tension Bushings For Spacers
FlexiROC T30 R 7 Feed Unit Remove bolt A completely. Remove also end piece G and the end plate H. The cylinder and fork can now be pulled backwards out of the beam. 8. If necessary, remove the fork I by knocking away the pin K. -
Page 32: Disassembling Tension Bushing For Spacer
FlexiROC T30 R 7 Feed Unit 7.10.1 Disassembling Tension Bushing for Spacer WARNING Dismantling and Assembling Components Can cause personal injury. Components that could move or fall down must be securely supported or strapped in place during service and maintenance work. -
Page 33: Assembling Tension Bushing For Spacer
FlexiROC T30 R 7 Feed Unit Remove the plastic plugs (A). Remove the bolts (B) from the bushing. Place the bolts (B) into the threaded holes and pull them alternately until the bushing are separated. 7.10.2 Assembling Tension Bushing for Spacer... -
Page 34: Storing Feed For Longer Period Of Down-Time
FlexiROC T30 R 7 Feed Unit NOTE: The (SP) measurement is noted before disassembling and is also specified in the Spare Parts Catalog. Assemble the bushing and the bolts (B). Do not tighten the bolts (B). Install the spacer and bushing into the sleeve and make sure spacer measurement (SP) is as noted before disassembling. -
Page 35: Lubricate Drill Rod Support
FlexiROC T30 R 7 Feed Unit 7.11 Lubricate Drill Rod Support Fill grease into the 6 grease nipples (A) on the drill rod support. No: 3629357835.1.3629419915 en-US... -
Page 36: Check Condition Of Feed
FlexiROC T30 R 7 Feed Unit 7.12 Check Condition of Feed Check attachment and function on the limit switches (A). Adjust rope tension on the pull and return rope (B). Lubricate the intermediate drill rod support (C). Check for wear on the drill rod support bearing (C). Replace if necessary. -
Page 37: Lubricate Rod Handling
FlexiROC T30 R 7 Feed Unit 7.13 Check Condition of Feed Check for leaks on the feed cylinder (A). Adjust tension, check lubrication, and leakage on the pull and return rope (B). Check attachment and function on the limit switches (C). -
Page 38: Tighten Bolted Joints
FlexiROC T30 R 7 Feed Unit Pump lubricant into the grease nipples (A). 7.15 Tighten Bolted Joints Tighten the bolted joints on the drill rod support. No: 3629357835.1.3629419915 en-US... -
Page 39: Check Condition Of Feed
FlexiROC T30 R 7 Feed Unit 7.16 Check Condition of Feed Check clearance, attachment, and tightening torque 185 Nm (136 lbf ft) on the slide rails (A). Maximum clearance 2–4 mm (0.08-0.16 inches). Check attachment and damage on the feed cylinder (B). - Page 40 FlexiROC T30 R 7 Feed Unit 7.17 Check Condition of Feed Check clearance, attachment, and tightening torque 185 Nm (136 lbf ft) on the slide rails (A). Maximum clearance 2–4 mm (0.08-0.16 inches). Check wear on the slide pieces (B). Minimum thickness 4 mm.
-
Page 41: Check Drill Rod Support
FlexiROC T30 R 7 Feed Unit 7.18 Check Drill Rod Support Check adjustment and check for any cracks or wear on the drill rod support halves (A). Check clearance on the ball bearings in cylinder lugs (B). Maximum 0.5 mm. -
Page 42: Check Rod Handling
FlexiROC T30 R 7 Feed Unit 7.19 Check Rod Handling Check the mounting of the hydraulic motor (A). Applies only to machines equipped with RHS. Check for wear and cracks on the bushing halves (B). Check the mounting of the hydraulic cylinders (C). -
Page 43: Check Drill Rod Support
FlexiROC T30 R 7 Feed Unit Check attachment on the hydraulic cylinders (A). Check for wear and cracks on bushing halves (B). 7.21 Check Drill Rod Support Check installation of the attachment. Tightening torque 80 Nm, 15 bolts. Tighten the bolted joints. -
Page 44: Bsh-Xs
FlexiROC T30 R 7 Feed Unit 7.22 BSH-XS Drill Rod Support BSH-XS 7.23 Check Jaw Function BSH-XS For safety reasons, the jaws are always equipped with a lug to support the drill string. Check that the jaws of this type are fitted correctly for example, for drilling upwards or downwards respectively. -
Page 45: Adjusting The Drill Rod Support
FlexiROC T30 R 7 Feed Unit Extract the loose jaw (C). Install the new jaw in place. Repeat steps 3–5 for the second jaw. Return the control plate to the center to lock both jaws. Install the bolts (A). 7.25 Adjusting the Drill Rod Support... -
Page 46: Pressure Setting
FlexiROC T30 R 7 Feed Unit Check the play between the jaws and the drill rods. Loosen the bolts holding the drill rod support. Adapt the drill rod support position until the play is around 1 mm. Fasten the bolts. -
Page 47: Drilling System
FlexiROC T30 R 8 Drilling System 8 Drilling System 8.1 Adjusting Damper Pressure WARNING Incorrect Adjusted Damper Pressure Incorrect adjusted damper pressure can cause serious damage to the equipment. Damper pressure adjustments must only be carried out by trained staff. - Page 48 FlexiROC T30 R 8 Drilling System Push the button for damper flow pressure on the operator panel. Adjust the damper pressure on the constant flow valve. Undo the locking screw (B) on the constant flow valve. Adjust the damper pressure with knob (A), clockwise to re- duce pressure and counterclockwise to increase pressure.
- Page 49 FlexiROC T30 R 8 Drilling System Tighten the locking screw (B) when the correct pressure has been reached. NOTE: The impact stops automatically if damper pressure rises above 120 bar or drops below 35 bar while drilling is in progress.
-
Page 50: Adjusting High Percussion Pressure
FlexiROC T30 R 8 Drilling System 8.2 Adjusting High Percussion Pressure NOTE: The operator cannot adjust low percussion. NOTE: Percussion pressure can be checked on the pressure gauge Percussion pres- sure (E). NOTE: Pressure ex works is 200 bar (factory setting). -
Page 51: Adjusting Drill Feed Pressure
FlexiROC T30 R 8 Drilling System Raise and lower the pressure using button respectively. Read the percussion pressure on pressure gauge (E). 8.3 Adjusting Drill Feed Pressure Activate drill feed pressure by pressing button on the operator panel. Raise and lower the pressure using button respectively. -
Page 52: Adjusting Rotation Speed
FlexiROC T30 R 8 Drilling System Read the feed pressure on pressure gauge (D). 8.4 Adjusting Rotation Speed NOTE: Rotation speed can be set without drilling taking place. Precondition p The hydraulic oil must be at operating temperature, normally 40 °C (104 °C). - Page 53 FlexiROC T30 R 8 Drilling System Raise and lower the rotation speed using button respectively. Count the number of revolutions the drill string completes per minute (make a mark on the drill rod) to measure rotation speed. Alternatively, use an electronic instrument.
-
Page 54: Adjusting Threading Speed
FlexiROC T30 R 8 Drilling System X drill bits give a lower penetration rate. 8.5 Adjusting Threading Speed Activate the threading speed by pressing button on the operator panel. Raise and lower the threading speed using button respectively. 8.6 RPCF System RPCF (Rotation Pressure Controlled Feed) is used to regulate the drill feed pressure. - Page 55 FlexiROC T30 R 8 Drilling System Select RPC-F using the arrow , confirm with Enter Start drilling and set the appropriate feed pressure, percussion pressure, and rotation speed in accordance with the rock drill settings instructions. Wait until a smooth and stable rotation pressure (pressure gauge J) is obtained.
-
Page 56: Setting Lubricant Oil Dosage
FlexiROC T30 R 8 Drilling System 8.6.2 Setting Lubricant Oil Dosage The setting for the dosage of lubricant oil for the rock drill (ECL) and the screw cutting oil (ECG) is made in the operator panel. Precondition p Dust Collector and Flushing Air switch in On position. -
Page 57: Dust Collector
FlexiROC T30 R 9 Dust Collector 9 Dust Collector 9.1 Check Dust Collector Check attachment 12 bolts (24 Nm) on the engine plate (A). Check attachment 4 nuts (24 Nm) on the engine (B). Check attachment 8 bolts (47 Nm) on the inlet (C). - Page 58 FlexiROC T30 R 9 Dust Collector Loosen the four bolts to each filter lid. Lift the whole unit with both filter lids. Grab the strip and lift out the old filters. Replace with new filters. NOTE: The filters are fastened by the filter lids that pushes down the filters against a rubber sealing.
-
Page 59: Replacing Cassettes On Bag-Handling System
FlexiROC T30 R 9 Dust Collector 9.3 Replacing Cassettes on Bag-Handling System Precondition p The old bag cassette is all used. Remove the old bag cassette (A) and replace it with a new one. No: 3629357835.1.3629419915 en-US... - Page 60 FlexiROC T30 R 9 Dust Collector No: 3629357835.1.3629419915 en-US...
-
Page 61: Hydraulic System
FlexiROC T30 R 10 Hydraulic System 10 Hydraulic System 10.1 Safety Precautions Before Working on Hydraulic System WARNING High Hydraulic Oil Pressure Working on the hydraulic system involves a high risk of personal injury. Make sure that the system is de-pressurized before starting any work. -
Page 62: Replacing Hydraulic Hoses
The correct quality class The correct dimensions All pressurized components must be purchased from Atlas Copco. The grades and dimen- sions of hoses are specified in the spare parts catalog. Make sure that hose couplings are clean, undamaged, and properly tightened. -
Page 63: Check Hydraulic Jacks
FlexiROC T30 R 10 Hydraulic System 10.6 Check Hydraulic Jacks Check bolted joints on the hydraulic jack (A). Tightening torque 73 Nm. Check bolted joints on the hydraulic jack (B). Tightening torque 185 Nm. Check hydraulic jack (C). Tightening torque 120 Nm. -
Page 64: Hydraulic Tank
FlexiROC T30 R 10 Hydraulic System 10.7 Hydraulic Tank 10.7.1 Check Hydraulic Tank Precondition p The machine is parked on a flat and leveled surface. p The oil temperature is 40°C / 104°F. Replace the return oil filter (A) if the warning sign is displayed. -
Page 65: Replace Hydraulic Oil
FlexiROC T30 R 10 Hydraulic System The ball valve (A) is used to drain water that can seriously damage components in the hy- draulic system and cause corrosion. It is also used for emptying all hydraulic oil from the tank. -
Page 66: Emptying Hydraulic Oil Tank
FlexiROC T30 R 10 Hydraulic System NOTE: The electric filler pump stops automatically when the hy- draulic tank is full. It also stops if the source of oil runs out. 10.7.4 Emptying Hydraulic Oil Tank Open the breather filter in the top of the hydraulic oil tank. -
Page 67: Check Hydraulic Tank Cover Plate
FlexiROC T30 R 10 Hydraulic System Check the hydraulic oil level (1 and 2). The hydraulic oil level can be read in the sight glass on the front of the hydraulic oil tank. The lower sight glass (2) must be full and the upper sight glass (1) must be half full. -
Page 68: Check Lubricant Tank Level
FlexiROC T30 R 10 Hydraulic System 10.7.7 Check Lubricant Tank Level NOTE: Bleeding of the lubrication system is necessary if all the oil is drained out of it. Precondition p The level must not be below 40 mm (1.6"). Check the tank and connections for signs of leakage. -
Page 69: Check Hydraulic Oil Filter
Check to see if the needle on the pressure gauge Pressure in the return oil filter (B) is in the red zone. If so, the filter must be changed. Contact Atlas Copco. NOTE: The pressure gauge (B) Pressure in the return oil filter is only reliable when the oil has reached a temperature of at least 40 °C (104 °F) -
Page 70: Replace Breather Filter
FlexiROC T30 R 10 Hydraulic System Clean on and around the filter cap. Loosen and remove the nuts (A). Lift off the cap (B) and replace the O-ring (C) if damaged. Lift out the filter cannister (D). Remove the nut (E). Lift out and clean the magnetic rod (F). - Page 71 FlexiROC T30 R 10 Hydraulic System Clean thoroughly on and around the filter housing (A). Remove the cover plate by turning it counterclockwise. Replace with a new filter. Apply a little hydraulic oil to the sealing surface and threads. Reinstall the cover.
- Page 72 FlexiROC T30 R 10 Hydraulic System No: 3629357835.1.3629419915 en-US...
-
Page 73: Diesel Engine
FlexiROC T30 R 11 Diesel Engine 11 Diesel Engine 11.1 Check Engine Oil Level WARNING Burning Hazard Hot engine and components can cause serious personal injury. Shut off the engine during all maintenance work. Be careful when draining hot oil and fluids. -
Page 74: Drain Water Condensation From Preliminary Fuel Filter
FlexiROC T30 R 11 Diesel Engine Fill oil through the filler cap (B) if necessary. NOTE: Only use engine oil that the engine manufacturer approves for engine and type of operation. See Reference Documentation Diesel engine instruction manual 11.2 Drain Water Condensation from Preliminary Fuel Filter... -
Page 75: Replace Preliminary Fuel Filter
FlexiROC T30 R 11 Diesel Engine 11.3 Replace Preliminary Fuel Filter Unscrew the preliminary fuel filter (B) using a suitable tool. Collect any residual fuel. Clean the surface of the filter holder. Oil the rubber seal of the new fuel filter sparingly. -
Page 76: Replace Engine Oil Filter
FlexiROC T30 R 11 Diesel Engine Clean the surface of the filter holder. Lubricate the rubber seal of the new fuel filter sparingly with a little oil. Install the new filter and hand tighten it until the gasket makes contact with the sur- face of the filter holder. -
Page 77: Replacing Compressor Oil Filter
FlexiROC T30 R 11 Diesel Engine 11.6 Replacing Compressor Oil Filter Replace the compressor oil filter (A). See Reference Documentation Diesel engine instruction manual 11.7 Draining Condensate from Fuel Tank Remove the front protective plate from the underside of the machine. -
Page 78: Filling Fuel Manually
FlexiROC T30 R 11 Diesel Engine 11.8 Filling Fuel Manually WARNING Flammable and Toxic Liquid Fuel is toxic and can cause injury. Fuel is flammable and causes burns, serious per- sonal injury, or death. Shut off the engine. Use personal protective gear. -
Page 79: Location Of Def Tank
FlexiROC T30 R 11 Diesel Engine Fuel Quality Sulphur Grade Ultra Low Sulfur Diesel (ULSD) Maximum 15 PPM 11.9 Location of DEF Tank DEF tank 11.10 Draining DEF Tank Drain the DEF tank by loosening the plug (A). No: 3629357835.1.3629419915 en-US... -
Page 80: Filling Def Tank
FlexiROC T30 R 11 Diesel Engine 11.11 Filling DEF Tank WARNING Empty DEF Tank There is a risk of damage to the equipment if the engine is operated with empty DEF tank. The machine can be switched off and only personnel from Cummins staff can clear the fault code generated. -
Page 81: Check Diesel Engine Components
FlexiROC T30 R 11 Diesel Engine 11.12 Check Diesel Engine Components Check attachment on the power frame (A). M16: Tightening torque 185 Nm. Check attachment on engine (B). M10: Tightening torque 41 Nm, M12: Tightening torque 73 Nm, M16: Tightening torque 185 Nm. -
Page 82: Lubricate V-Belt Pulley Pto
Lubricate 1/4 to 1/3 gram or 1/4 to 1/3 pump stroke per lubrication. NOTE: Special tools must be used when replacing bearings. Con- tact Atlas Copco for information about how to proceed. See Reference Documentation Diesel engine instruction manual... -
Page 83: Air System
FlexiROC T30 R 11 Diesel Engine 11.15 Air System NOTE: Location and shape of air filter differs depending on brand and model. The air filters consist of a filter housing (F) with cover (A), clamps (B), main cartridge (D), safety cartridge (E), and evacuation valve (C). Air filtration is performed in two stages. The first stage comprises a cyclone and the second stage a normal filter. -
Page 84: Check Air Filter Indicator Function
FlexiROC T30 R 11 Diesel Engine 11.15.2 Check Air Filter Indicator Function NOTE: Check that no dirt or other particles enter the filter housing. Remove the air intake's cover on the filter housing. Let the engine idle. Gradually cover part of the air intake. Use a piece of board or similar. -
Page 85: Replace Air Filter Cartridge
FlexiROC T30 R 11 Diesel Engine 11.15.3 Replace Air Filter Cartridge NOTE: Do not clean the filter cartridge. Remove the clamps (A). Remove the cover (B). Remove the filter cartridge (C). Clean inside the filter housing and lid. Check the evacuation valve (D). -
Page 86: Replace Air Filter Safety Cartridge
FlexiROC T30 R 11 Diesel Engine 11.15.4 Replace Air Filter Safety Cartridge Undo the clamps (A). Remove the cover (B). Pull out the safety cartridge (C). Cover the air outlet with adhesive tape. Clean inside the filter housing and lid. -
Page 87: Cooling System
FlexiROC T30 R 12 Cooling System 12 Cooling System 12.1 Safety Precautions Before Working on Cooling System DANGER Scalding and Pressure High pressure in the radiator can cause serious personal injury. Undo the radiator cap slowly to gradually release the pressure. -
Page 88: Adding Coolant
FlexiROC T30 R 12 Cooling System 12.3 Adding Coolant WARNING Danger of Scalding and Pressure Can cause serious personal injury. Release the pressure in the radiator before removing the radiator cap. Loosen the radiator cap (A) to the stop position, release the pressure in the cooling system and only then remove the cap. -
Page 89: Replace Long-Term Effective Coolant
FlexiROC T30 R 12 Cooling System Check that the radiators (A) are not clogged. Use compressed air to clean the radia- tors. 12.5 Replace Long-term Effective Coolant Replace the long-term effective coolant (ECL). See Reference Documentation Diesel engine instruction manual... - Page 90 FlexiROC T30 R 12 Cooling System No: 3629357835.1.3629419915 en-US...
-
Page 91: Electrical System
FlexiROC T30 R 13 Electrical System 13 Electrical System 13.1 Check Emergency Stops and Work Lights Check that each emergency stop (A) stops the engine when activated. Before check- ing the next emergency stop, the previous emergency stop must be reset. -
Page 92: Check Condition Of Electrical System
FlexiROC T30 R 13 Electrical System 13.2 Check Condition of Electrical System Check sealing strip damages on the electric cabinet. Check corrosion and tightening on the connection blocks. 13.3 Check the Battery Check electrolyte level in batteries (A). 13.4 Battery Charging The battery is normally charged by the alternator and as well when the main power supply of the machine is on. -
Page 93: Charging Battery Using External 24V Charger
FlexiROC T30 R 13 Electrical System the battery is probably expended. Rapid charging, when carried out correctly, does not damage the battery. Rapid charging must rarely be undertaken and is not recommended for old batteries. Repeated dischargings for long periods impair the service life of the bat- tery. -
Page 94: Charging Battery Using External 12V Charger
FlexiROC T30 R 13 Electrical System Connect the battery charger's positive cable to the battery's positive terminal (B). Connect the battery charger's negative cable to the battery's negative terminal (A). Start the battery charger. Turn off the battery charger when batteries are fully charged. -
Page 95: Starting With Auxiliary Battery
FlexiROC T30 R 13 Electrical System Connect the battery charger's positive cable to the positive terminal on battery (A). Connect the battery charger's negative cable to the negative terminal on battery (A). Start the battery charger. Turn off the battery charger when battery (A) is fully charged. - Page 96 FlexiROC T30 R 13 Electrical System Precondition p Switch off the RCS system on the control system panel. p Disconnect fire-fighting system. Check that the auxiliary batteries (A) have the same voltage as the chassis batteries (B). Connect the positive terminal of the auxiliary batteries (A) to the positive terminal of the chassis batteries (B).
-
Page 97: Control System And Sensors
FlexiROC T30 R 14 Control System and Sensors 14 Control System and Sensors 14.1 Remote Control Batteries The remote control batteries should be fully discharged and then fully recharged regu- larly. Charging can only take place in the temperature range +10°C and +40°C. -
Page 98: Clean Remote Control
FlexiROC T30 R 14 Control System and Sensors 14.4 Clean Remote Control Clean and lubricate the battery contacts on the remote control. 14.5 Remote Control Storage There is a storage space where the remote control can be hung on the rear of the rig when the remote control is not in use. -
Page 99: Compressed Air System
FlexiROC T30 R 15 Compressed Air System 15 Compressed Air System 15.1 Check Compressor Oil Level Precondition p The machine is parked on a flat and leveled surface. Switch off the machine and allow the oil level to settle for at least five minutes. -
Page 100: Replace Air Compressor Oil And Oil Filter
FlexiROC T30 R 15 Compressed Air System 15.3 Replace Air Compressor Oil and Oil Filter WARNING Risk of Fire and Explosion Using incorrect or old oil may lead to a risk of fire or explosion in the compressor sys- Use correct, new oil according to the Fluids and Lubricating Greases manual. -
Page 101: Check Safety Valve On Compressor System
FlexiROC T30 R 15 Compressed Air System NOTE: If the oil has been contaminated, the system must be flushed clean before new oil is filled. 15.4 Check Safety Valve on Compressor System Perform a 15 bar pressure test on the safety valve (A). -
Page 102: Replace Separator Filter
FlexiROC T30 R 15 Compressed Air System 15.5 Replace Separator Filter Replace the separator filter (A) in the pressure tank. NOTE: Check that the washer (B) under the filter remains in place. Do not throw it away with the old filter during replacement. -
Page 103: Flushing Air Compressor
FlexiROC T30 R 15 Compressed Air System Paroil Sxtreme Drainage ** Drainage Drainage * * When changing to the same oil within the interval between changes, drainage is sufficient ** Changing not recommended 15.7 Flushing Air Compressor WARNING Risk of Fire and Explosion Using incorrect or old oil may lead to a risk of fire or explosion in the compressor sys- Use correct, new oil according to the Fluids and Lubricating Greases manual. - Page 104 FlexiROC T30 R 15 Compressed Air System Precondition p Run the compressor to operating temperature and confirm that the pressure is zero. Place vessels under the drain plugs. Remove drain plugs for compressor tank, compressor cooler, and compressor ele- ment and drain the oil.
-
Page 105: Check Compressor Components
FlexiROC T30 R 15 Compressed Air System 15.8 Check Compressor Components Check for signs of oil or water or air leakage on the compressor (A). Check connections and couplings on intake manifolds (B) on the air filters for com- pressor and diesel engine. -
Page 106: Check Compressor And Air Filters
FlexiROC T30 R 15 Compressed Air System Open the drain plug under the machine and drain off the water. 15.10 Check Compressor and Air Filters Check for signs of air or oil leakage on the compressor (A). Check connections and couplings on the intake manifold on the air filters (B). -
Page 107: Track Frames
FlexiROC T30 R 16 Track Frames 16 Track Frames 16.1 Check Tension of Crawler Tracks Track tension is checked between the front wheel (C) and carrier roller (A). Precondition p The machine is parked on a flat and leveled surface. -
Page 108: Checking Tightening Torques On Track Frames
FlexiROC T30 R 16 Track Frames 16.2 Checking Tightening Torques on Track Frames Check tightening torques on track frames. Size Torque in Nm Quantity/Track Comments (lb-ft) Frames 347 (256) 289 (213) 187 (138) 188 (139) 347 (256) 260 ± 10 (192 ± 7) -
Page 109: Procedures For Checking Wear
FlexiROC T30 R 16 Track Frames 16.3 Procedures for Checking Wear When components on the track frames are worn down to the minimum recommended levels, they must be replaced with new components. Regular and accurate measuring is required in order to establish the extent of the wear and when replacement is necessary. -
Page 110: Check Track Roller For Wear
FlexiROC T30 R 16 Track Frames Specification Metric Data Imperial U.S Data New Drive Wheel 26 mm 1.02 in Wear 25% 26.2 mm 1.03 in Wear 50% 26.4 mm 1.04 in Wear 75% 26.6 mm 1.05 in Wear 100% 26.8 mm 1.06 in... -
Page 111: Check Carrier Roller For Wear
FlexiROC T30 R 16 Track Frames 16.3.4 Check Carrier Roller for Wear Check the wear by measuring the diameter (A) of the carrier roller. Specification Metric Data Imperial U.S Data New Limberoller 110 mm 4.33 in Wear 25% 109.5 mm 4.31 in... -
Page 112: Check Track Link Depth For Wear
FlexiROC T30 R 16 Track Frames Specification Metric Data Imperial U.S Data Wear 25% 17.4 mm 0.69 in Wear 50% 16.8 mm 0.66 in Wear 75% 16.2 mm 0.64 in Wear 100% 15.6 mm 0.61 in Also see about this 2 Procedures for Checking Wear [} 109]... -
Page 113: Check Bushing For Wear
FlexiROC T30 R 16 Track Frames Specification Metric Data Imperial U.S Data New Chain 70 mm 2.76 in Wear 25% 69.8 mm 2.75 in Wear 50% 69.5 mm 2.74 in Wear 75% 69.3 mm 2.73 in Wear 100% 69 mm 2.72 in... -
Page 114: Check Track Chain Elongation For Wear
FlexiROC T30 R 16 Track Frames 16.3.9 Check Track Chain Elongation for Wear Check chain wear by measuring the distance (A) between the center point in the first pin to the center point of the fifth pin. Specification Metric Data Imperial U.S Data... - Page 115 FlexiROC T30 R 16 Track Frames Visually inspect the tension on the crawler tracks (E). Check that the springs and dampeners move freely on the front wheel (F). Clean, if necessary. Check for loose screws and nuts. 16.5 Check Track Frames NOTE: First oil change after 150 engine hours, then every 1500 engine hours.
-
Page 116: Check Track Frames
FlexiROC T30 R 16 Track Frames 16.6 Check Track Frames Check oil level on the traction gear (A). Position the level plug on the traction gear at 9 o'clock to check the level of the oil. Check for signs of leakage on the track rollers (B). - Page 117 FlexiROC T30 R 16 Track Frames Fill the traction gear (A) with new oil (approximately 2 liters) until some oil drains from the oil level bore. No: 3629357835.1.3629419915 en-US...
- Page 118 FlexiROC T30 R 16 Track Frames No: 3629357835.1.3629419915 en-US...
-
Page 119: Winch
FlexiROC T30 R 17 Winch 17 Winch 17.1 Check Attachment of Winch Cable WARNING Risk of Tipping and Cable Failure Can cause serious personal injury and damage to property. The anchorage point must be firm and secure. The safety hook must not slide or detach from the attachment point. -
Page 120: Checking Oil Level On Winch
FlexiROC T30 R 17 Winch when replacing the cable. when attaching the cable after shortening. Check that the winch locking mechanism is fully engaged in the drum before use, following the attachment of the cable eye on the anchorage point. -
Page 121: Check Winch Unit Attachment
FlexiROC T30 R 17 Winch Set the drum so that the filler plug (A) is aligned downwards. Undo the plug to drain out the old oil. Turn the drum so that the filler plug (A) aligns in the top position and the level plug (B) aligns in horizontal position. -
Page 122: Replace Winch Transmission Oil
FlexiROC T30 R 17 Winch 17.6 Replace Winch Transmission Oil Change the oil on the winch gear (A) for the first time after 500 engine hours. There- after once per year. Lubricate the drum brake disengager with oil if it does not rotate freely. -
Page 123: Checking Cable For Wire Breaks
FlexiROC T30 R 17 Winch Deformation of the cable 17.8.1 Checking Cable for Wire Breaks Wire breaks occur after a certain operating time depending on operating conditions and subsequently occur more frequently. The number of wire breaks in relation to the operating time should be determined and documented. -
Page 124: Checking Cable For Corrosion
FlexiROC T30 R 17 Winch 17.8.4 Checking Cable for Corrosion Corrosion is especially problematic in marine environments and in areas where the air is polluted by industrial emissions. Corrosion can reduce operational strength through rust spots and static tensile strength through a reduction in the cross section of the metallic ca- ble. -
Page 125: Water Mist System
FlexiROC T30 R 18 Water Mist System 18 Water Mist System NOTICE Damage to Water Mist Pump Risk of damage to water mist pump if it is run without water in the system. Do not run the pump without water in the system. -
Page 126: Check Seals On Water Mist Pump
FlexiROC T30 R 18 Water Mist System 18.1 Check Seals on Water Mist Pump Run the water mist pump (A) for 1 minute. Count the number of water drops that run out from the drain holes (B). è Replace the all old seals with new ones if more than 10 drops leak out of the drain holes during one minute. -
Page 127: Filling Water Mist Tank
FlexiROC T30 R 18 Water Mist System 18.2 Filling Water Mist Tank WARNING Explosion Risk Adding wrong type of fluid to the water tank could result in injury and damage to ma- chine. Always fill the water mist tank with clean water. -
Page 128: Draining Water Mist System
FlexiROC T30 R 18 Water Mist System 18.3 Draining Water Mist System Unscrew bolt from the drain hole (B). Drain water from water mist tank. Screw the bolt back into the drain hole (B). Put the machine in drilling mode. -
Page 129: Clean Filter In Water Mist Tank
FlexiROC T30 R 18 Water Mist System Fill up the water mist tank. Turn off flushing air. Run the water mist pump at full speed for a few seconds so that the system fills up with water. 18.5 Clean Filter in Water Mist Tank Precondition p The water mist tank must be empty. - Page 130 FlexiROC T30 R 18 Water Mist System No: 3629357835.1.3629419915 en-US...
-
Page 131: Automatic Central Lubrication System Cls
FlexiROC T30 R 19 Automatic Central Lubrication System CLS 19 Automatic Central Lubrication System CLS 19.1 Automatic Central Lubrication System CLS Pump element Safety valve Plug (timer for pause and running time) Filler nipple Reservoir 19.2 Pause Time and Running Time Settings Integrated in the lubrication pump is a timer which controls pause and running times. -
Page 132: Lubrication Pump Safety Valve
FlexiROC T30 R 19 Automatic Central Lubrication System CLS Pause time can be adjusted to increments of 15 with the blue rotary switch (A). Pause time is preset from factory. Running time can be adjusted to increments of 15 with the red rotary switch (B). Run- ning time is preset from factory. -
Page 133: Filling Lubricant
FlexiROC T30 R 19 Automatic Central Lubrication System CLS 19.4 Filling Lubricant The container is transparent for visual inspection of the level. The filler nipple (A) is located directly on the pump. NOTE: Use a filler pump to fill the lubricant. - Page 134 FlexiROC T30 R 19 Automatic Central Lubrication System CLS Lubrication System Timer Turn on the ignition key. è The diode (C) for ignition current comes on. Press the push button (A) for two seconds. è The pump starts to run the preset running time and the diode (B) for the electric motor comes on.
-
Page 135: Welding
NOTE: Always keep a fire extinguisher for oil fires near during all types of welding, cut- ting, and grinding. Screen off the work area from flammable materials. Contact Atlas Copco before repair welding on components or frames, approval of welding method and choice of electrodes. -
Page 136: Can Bus System Disconnection Before Welding
20.2 CAN Bus System Disconnection Before Welding NOTE: The CAN bus and RCS can be severely damaged when welding. NOTE: Consult Atlas Copco for approval of welding and choice of electrodes. Locate all modules present on the machine. Disconnect supply voltage to all modules, both + (positive) and - (ground). -
Page 137: Downtime
FlexiROC T30 R 21 Downtime 21 Downtime 21.1 Preparations Before Long Period of Downtime Protect the equipment from corrosion and storage damage if downtime is expected to last three months or longer. If environment is, for example, corrosive or dusty, extra protection is necessary. -
Page 138: Preparing Water Mist System For Long Time Storage
FlexiROC T30 R 21 Downtime Apply corrosion inhibitor (For example, Tectyl 506) to the machined surfaces. Apply touch-up paint to any scratches and damage on painted areas. 21.1.4 Preparing Water Mist System for Long Time Storage Drain the water mist system. -
Page 139: Maintenance Table
FlexiROC T30 R Maintenance table Maintenance table Interval Type Interval Maintenance Task Calendar Time Daily Wash Machine Externally Check Condition of Signs Check Fire Extinguishers 10.5 Check Hoses and Couplings 10.7.1 Check Hydraulic Tank 10.7.7 Check Lubricant Tank Level 10.8.2 Check Hydraulic Oil Filter 11.1... - Page 140 FlexiROC T30 R Maintenance table Interval Type Interval Maintenance Task Check Dust Collector 10.8.4 Replace Breather Filter 11.3 Replace Preliminary Fuel Filter 11.4 Replace Secondary Fuel Filter 11.5 Replace Engine Oil Filter 13.2 Check Condition of Electrical System 13.3 Check the Battery 14.4...
- Page 141 FlexiROC T30 R Maintenance table Interval Type Interval Maintenance Task 1500 10.7.3 Replace Hydraulic Oil 10.8.3 Replace Return Oil Filter 11.15.4 Replace Air Filter Safety Cartridge 16.7 Replace Oil on Traction Gears for Track Frames 2000 Replace Dust Collector Filters 15.5...
- Page 142 FlexiROC T30 R Maintenance table No: 3629357835.1.3629419915 en-US...
- Page 143 Maintenance table No: 3629357835.1.3629419915 en-US...
- Page 144 www.atlascopco.com...
Need help?
Do you have a question about the FlexiROC T30 R and is the answer not in the manual?
Questions and answers