
Related Manuals for Storage Canopy FB408021DP


Summary of Contents for Storage Canopy FB408021DP
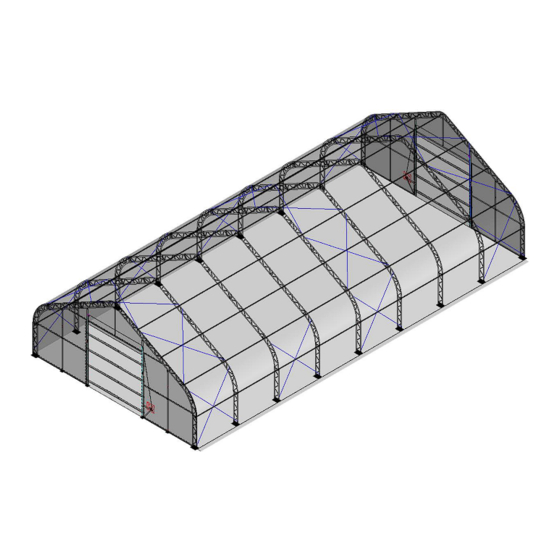
- Page 1 Fabric Building Double Truss Peak Style Model# FB408021DP 40’x80’x21’ (10’ arch space) Assembly Instructions...
-
Page 2: Equipment List
Equipment List Speed Wrench 22#.23#.24# Hammer (30lb) Rope (12#) Long Tape (50m) Hammer Drill*1 Lifter*2 Crane*1 Forklift*1 Protective equipment... - Page 3 YOU MUST READ THIS DOCUMENT BEFORE YOU BEGIN TO ASSEMBLE THE SHELTER. Thank you for purchasing our shelter. When properly assembled and maintained, this product will provide years of reliable service. These instructions include helpful hints and important information needed to safely assemble and properly maintain the shelter.
- Page 4 Fabric Building 40’x80’x21’ Parts List Part Qty/ Description Code Roof top truss for 2nd to 8th arch top truss for 1st and 9th arch roof truss for 2nd to 8th arch roof truss for 1st and 9th arch lower roof truss for 2nd to 8th arch lower roof truss for 1st and 9th arch...
- Page 5 corner base plate (left & right) for 1st and 7th arch, installed with ratchet interior base plate for 2nd to 8th arch, installed with ratchet tube clip for steel wire No.22 bolt M8x70 for truss swaged end connection bolt M10x70 for purlin connection end plug (Φ40) for tensioning tube No.8...
- Page 6 Front & Back Wall with Winch Door W13'xH13' square tube post on the lower left side of the front and back door square tube post on the lower right side of the front and back door square tube post on the upper left side of the front and back door square tube post on the upper...
- Page 7 pole for door opening door bracing tube 2pcs/set 6 sets bottom bracing tube with hole 2 sets 2pcs/set bolt M10x30 for rail and connection plate bolt M10x50 for post and truss bolt M6x40 for door bracing tube No.40, No.41 bolt M12x130 for square tube post No.23, 24, 25, 26 bolt M10x70 for square tube post No.23, 24, 25, 26...
-
Page 8: Installation Process
INSTALLATION PROCESS A—BASE PLATES INSTALLATION Please refer to the below diagram to mark the position of base plate. The measurement is from center to center of base plates. Referring to the diagram and confirm the place of base plates. ENSURE THAT THE FOUNDATION IS SQUARE. Note: The expansion bolt (No.19, No.49) applies for fixing base plate on concrete ground. - Page 9 B—FRAME INSTALLATION First & Ninth Arch and Front & Back Wall 1. Find Trusses (No.1A, 2A, 3A, 4A, 5) for first and ninth arch and connect them by bolt M8x70 (No.12). 2. Find relative parts of posts and rails for front and back wall and assemble them according to the below diagram.
- Page 10 Second Arch to Eighth Arch Installation 3. Find Trusses (No.1, 2, 3, 4, 5) for second to eighth arch and connect them by bolt M8x70 (No.12).
- Page 11 Purlin and Steel Wire Installation 4. Lift the assembled arches onto base plates (No.9 and No.10) and connect them by bolt M8x70 (No.12). 5. When finish installing the first and second arches, install purlin (No.6) and connect them by bolt M10x70 (No.13).
- Page 12 C-INSTALLING COVER Front & Back Cover and Winch Door Installation Install the winch door refer to the diagram bellow. Winch Door Installation...
- Page 13 1. Install the front door frame and door winch bracket 2. Fix the winch to the bracket. Make sure the winch handle faces the outside. Refer to Figure 1.
- Page 14 3. Take out the door curtain cloth and lay it on the ground. Pay attention to the direction. The side with pipe pockets faces inward. 4. Connect the door bracing tube (2pcs/set) with M6x40 bolt. 5. Thread the door bracing tube into the pocket from top to bottom. Pay attention to the bottom bracing tube.
- Page 15 6. Put the steel wire rope through the pulley on the door frame as shown in Figure 3, so that the steel wire rope is located on the inner side of the door frame and on the same plane as the pulley, and then the steel wire rope sags naturally.
- Page 16 9. Adjust the length of the steel wire rope to be equal on both sides.Fix the wire rope fold to the hole in the winch. Refer to Figure 4.
- Page 17 10. Turn the winch clockwise to lift the door curtain cloth and bracing tubes to a position about 40-50cm away from the cross beam. Lace the eyelets on the cloth to cross beam with a rope. Refer to Figure 5.
- Page 18 11. Now the winch door installation is completed.Turn the winch clockwise to raise and counterclockwise to lower the door. The steel wire rope shall be evenly wound on the winch so that the door can rise and fall smoothly.
- Page 19 Front & back Cover Installation Install front & back cover (No.53) to the first and ninth arch and posts and rails on front and back wall with rope (No.47) and cable tie (No.48). Roof Cover Installation NOTE: DO NOT install the cover onto the frame of your building in high wind conditions. A slight breeze is the most advantageous for cover installation.
- Page 20 Now your assembly is completed.
Need help?
Do you have a question about the FB408021DP and is the answer not in the manual?
Questions and answers