Advertisement
Quick Links
Advertisement

Subscribe to Our Youtube Channel
Related Manuals for Premier Mounts AM100


Summary of Contents for Premier Mounts AM100
- Page 1 AM100 Maximum Flat Panel Weight: 100 lb. / 45.5 kg. INSTALLATION GUIDE Low-Profile Ultra-Slim Swingout Mount for Flat-Panels www.premiermounts.com | North America 800.368.9700 | International +1-714-632-7100 9531-100-001-0X v4.0 2620 Palisades Drive, Corona, CA 92882 USA publ. 03/25/19...
-
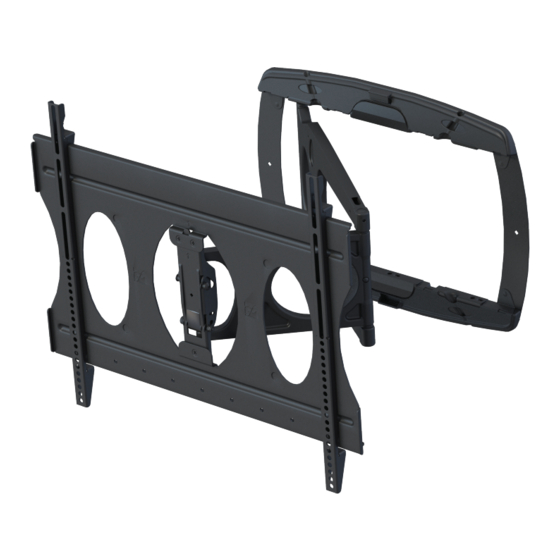
Page 2: Included Components
AM100 Installation Guide INCLUDED COMPONENTS Universal Washers Finned Anchor 5/16” x 3” Lag Bolts Wall Mount (Qty 4) (Qty 4) (Qty 4) (Qty 1) 5/16” Flat Washers Universal Spacers 10mm Socket (Qty 4) (Qty 8) (Qty 1) Template (Qty 1) - Page 3 AM100 Installation Guide OPTIONAL: CHANGING THE DEFAULT SWINGOUT PIVOT POSITION Loosen the eight flat screws to disengage the upper and lower chassis. Loosen the set screw (top and bottom) M2.5 Allen Key Put together the mount after adjusting the swing pivot position and recap the plastic plugs.
- Page 4 AM100 Installation Guide Find the center of the wood studs and mark the wall with a pencil Stud Finder FOR CONCRETE APPLICATIONS SEE PAGE 6 LEVEL Position the template to the desired location. Drill into 4 marked mounting points on the wall surface.
- Page 5 AM100 Installation Guide LOOSEN THE (2) M5 FLAT SCREWS TO REMOVE THE BRACKET MOUNT PLATE DETACH THE CABLE ACESS COVERS TO EXPOSE THE MOUNTING LOCATIONS www.premiermounts.com | North America 800.368.9700 | International +1-714-632-7100 Page 5...
- Page 6 AM100 Installation Guide Confirm the placement of the mounting screws before bolting into place. LEVEL (4) 5/16” x 3” Hex Lag and (4) 5/16” Washers LEVEL Use 13mm or 1/2” Socket Wood Application Concrete Application Wood Studs Use 3/8” Concrete...
- Page 7 AM100 Installation Guide FASTEN USING (2) M5 FLAT SCREWS TO SECURE THE BRACKET MOUNT PLATE Selecting the Mounting Hardware Insert a small straw or toothpick into the threaded inserts found on the back of the flat-panel. Use a pencil to mark the depth of the threaded insert on the small straw or toothpick.
-
Page 8: Install The Mounting Brackets
AM100 Installation Guide INSTALL THE MOUNTING BRACKETS TOP OF FLAT PANEL Selected the mounting Directional arrows on the brackets pointing up screws (from previous step) M5, M6 Universal Washers USE ADDITIONAL UNIVERSAL SPACERS TO FILL UNEVEN GAPS Longer screws length (commercially available) might be needed if using spacers. - Page 9 AM100 Installation Guide Center the display to the mount HOOK THE DISPLAY BRACKETS TO THE MOUNT Post leveling control adjustment screws. POST-LEVELING (RETRACTED POSITION) Tighten these screws to lock the brackets in place. www.premiermounts.com | North America 800.368.9700 | International +1-714-632-7100...
-
Page 10: Tilt Adjustment
AM100 Installation Guide Use 2.5mm hex key to adjust the tension TILT near the pivot. ADJUSTMENT Do not over tighten. Use 10mm deep socket to adjust the tension ROUTE POWER AND SIGNAL ALONG THE MOUNT Page 10 www.premiermounts.com | North America 800.368.9700 | International +1-714-632-7100... - Page 11 AM100 Installation Guide INSTALL THE CABLE COVERS AND MOUNTING COVERS SECONDARY POST LEVELING ADJUSTMENT ±3° Adjust. RETRACTED OR EXTENDED POSITION Pivot www.premiermounts.com | North America 800.368.9700 | International +1-714-632-7100 Page 11...
- Page 12 This warranty gives you specific legal rights, and you may also have other rights which vary from state to state. Premier Mounts intends to make this manual accurate and complete. However, Premier Mounts makes no claim that the information contained herein covers all details, conditions or variations, nor does it provide for every possible contingency in connection with the installation or use of this product.
Need help?
Do you have a question about the AM100 and is the answer not in the manual?
Questions and answers