Table of Contents
Advertisement
Quick Links
INSTALLATION INSTRUCTIONS
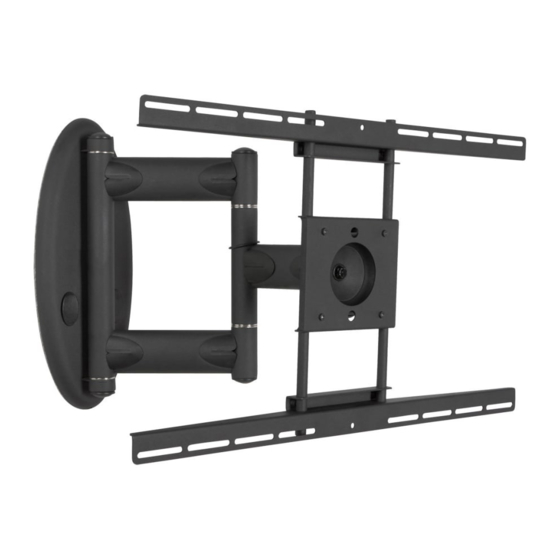
Universal Swingout Arm for 37˝ to 47˝ Flat Panels
Model: AM80
NORTH AMERICA
EUROPE
AUSTRALIA AND OCEANIA
3130 East Miraloma Avenue
Swallow House,
Distributed by Amber Technology Limited
Anaheim, CA 92806 USA
Shilton Industrial Estate,
Unit B, 5 Skyline Place
USA and Canada
Shilton, Coventry, England CV79JY
Frenchs Forest NSW 2086
Phone: 1-800-368-9700
Phone: +44 (0) 2476 614700
Australia
Fax: 1-800-832-4888
Fax: +44 (0) 2476 614710
Phone: +61 2 9452 8600 Sydney Office
Other Locations
Toll Free: 1-800-368-9700
Phone: (001) 714-632-7100
Email: mounts@ambertech.com.au
Fax: (001) 714-632-1044
9531-039-001-00
Advertisement
Table of Contents

Related Manuals for Premier Mounts AM80


Summary of Contents for Premier Mounts AM80
- Page 1 INSTALLATION INSTRUCTIONS Universal Swingout Arm for 37˝ to 47˝ Flat Panels Model: AM80 NORTH AMERICA EUROPE AUSTRALIA AND OCEANIA 3130 East Miraloma Avenue Swallow House, Distributed by Amber Technology Limited Anaheim, CA 92806 USA Shilton Industrial Estate, Unit B, 5 Skyline Place...
-
Page 2: Table Of Contents
PROPER SAFETY EQUIPMENT AND TOOLS FOR THE ASSEMBLY PROCEDURE TO PREVENT PERSONAL INJURY. PREMIER MOUNTS DOES NOT WARRANT AGAINST DAMAGE CAUSED BY THE USE OF ANY PREMIER MOUNTS PRODUCT FOR PURPOSES OTHER THAN THOSE FOR WHICH IT WAS DESIGNED OR DAMAGE CAUSED BY... -
Page 3: Installation Tools
Socket Wrench Parts List Your Premier Mounts product is shipped with all proper installation hardware and components. Make sure that none of these parts are missing and/or damaged before beginning the installation. If there are parts missing and/or damaged, please stop the installation and contact Premier Mounts at 1-800-368-9700. - Page 4 (Qty 6) M8 x 16mm Combo Screw M8 x 30mm Combo Screw (Qty 6) (Qty 6) M8 x 25mm Combo Screw M8 x 45mm Combo Screw (Qty 6) (Qty 6) Page 4 Installation Instructions Visit the Premier Mounts website at http://www.premiermounts.com...
-
Page 5: Features
Set screw secures flat panel to wall plate. Cable Routing Built-in cable management Universal organizes cables and prevents Adapter accommodates cable pinching. mounting patterns up to 600mm x 400mm. Installation Instructions Page 5 Visit the Premier Mounts website at http://www.premiermounts.com... -
Page 6: Installing The Wall Plate
Use a level to level the wall plate along the center of the wood stud. ¯ Use a pencil to mark the four (4) mounting locations along the center of the wood stud. Page 6 Installation Instructions Visit the Premier Mounts website at http://www.premiermounts.com... - Page 7 ® Use a Phillips head screwdriver to tighten the screw. ¯ Repeat for the remaining two (2) screws. ® Proceed to “Selecting the Mounting Hardware” on page 9. Installation Instructions Page 7 Visit the Premier Mounts website at http://www.premiermounts.com...
-
Page 8: Concrete Installation
° Repeat for the other three (3) screws. ® ¯ Do not overtighten the screws in the plastic wall anchors. Proceed to “Selecting the Mounting Hardware” on page 9. Page 8 Installation Instructions Visit the Premier Mounts website at http://www.premiermounts.com... -
Page 9: Selecting The Mounting Hardware
If yes, you do not need the universal adapter. 75/100mm Proceed to “Attaching The Flat Panel” on page 14. Mounting Points If no, you do need the universal adapter. Proceed to “The Universal Adapter” on page 10. Installation Instructions Page 9 Visit the Premier Mounts website at http://www.premiermounts.com... -
Page 10: The Universal Adapter
® Use the supplied M3 Allen wrench to tighten both set screws on each adapter arm. Do not completely tighten these screws at this time. M3 Allen Wrench Page 10 Installation Instructions Visit the Premier Mounts website at http://www.premiermounts.com... -
Page 11: Universal Washer Installation
AM80 The Universal Adapter (cont’d) Universal Washer Installation Universal Washer Premier Mounts’ universal washers fit M4, M5, M6, and M8 hole sizes used by flat panels. M5, M6 Do not place excessive pressure on the back of the flat panel, as this may damage it. -
Page 12: Attaching The Universal Adapter To The Flat Panel
● Any obstruction near the mounting point? If yes, then you must install universal spacers. Premier Mounts’ universal spacers allow you to attach Universal Spacer the universal adapter to flat panels that have recessed or uneven mount points. Each universal spacer adds ¼˝ to the distance between the universal adapter and the flat panel. -
Page 13: Attaching The Universal Adapter To The Cover Plate
Insert and tighten the bottom two (2) M4x10mm screws to secure the universal adapter to the cover plate. Do not overtighten the screws. Proceed to “Finish the Installation” on page 16. M4x10mm Screw (2) Installation Instructions Page 13 Visit the Premier Mounts website at http://www.premiermounts.com... -
Page 14: Attaching The Flat Panel
Any obstruction near the mounting point? If yes, then you must install universal spacers. Premier Mounts’ universal spacers allow you to attach the cover plate to flat panels that have recessed or uneven mount points. Each universal spacer adds ¼˝ to the distance between the cover plate and the flat panel. - Page 15 Insert and tighten the bottom two (2) M4x10mm screws to secure the flat panel to the cover plate. Do not overtighten the screws. Proceed to “Finish the Installation” on page 16. M4x10mm Screw (2) Installation Instructions Page 15 Visit the Premier Mounts website at http://www.premiermounts.com...
-
Page 16: Finish The Installation
Make any tilt/pivot adjustments to the flat panel to determine the final viewing angle. ® Use the ˝ Allen wrench to tighten the tilt/pivot locking screw. ˝ Allen Wrench Page 16 Installation Instructions Visit the Premier Mounts website at http://www.premiermounts.com... -
Page 17: Tension Adjustment
Route all cables along the mount. ° Use the two (2) supplied cable ties to attach the cables to the mount as shown. ± Cut off any excess cable tie. Cable Cable Tie (2) Installation Instructions Page 17 Visit the Premier Mounts website at http://www.premiermounts.com... -
Page 18: Technical Specifications
AM80 Technical Specifications All measurements are in inches [millimeters]. Without Universal Adapter With Universal Adapter Page 18 Installation Instructions Visit the Premier Mounts website at http://www.premiermounts.com... -
Page 19: Warranty
What Premier Mounts Will Do At the sole option of Premier Mounts, Premier Mounts will repair or replace any product or product part that is defective. If Premier Mounts chooses to replace a defective product or part, a replacement product or part will be shipped to you at no charge, but you must pay any labor costs.
Need help?
Do you have a question about the AM80 and is the answer not in the manual?
Questions and answers