
Related Manuals for HP ProCurve J8161A


Summary of Contents for HP ProCurve J8161A
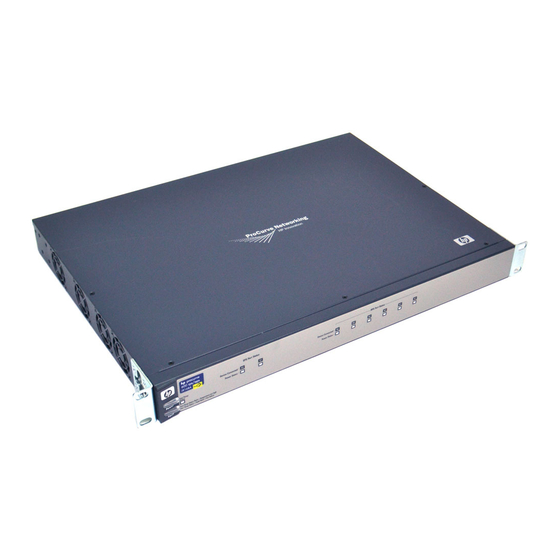
- Page 1 Installation and Getting Started Guide HP ProCurve 600/610 External Power Supplies www.hp.com/go/hpprocurve Power over Ethernet Devices...
- Page 3 HP ProCurve 600/610 External Power Supplies Installation and Getting Started Guide...
- Page 4 The only warranties for HP products and services are set forth in the express warranty statements accompanying such products and services. Nothing herein should be construed as constituting an additional warranty.
-
Page 5: Table Of Contents
EPS Ports on the HP 610 EPS ....... . . - Page 6 Testing Cabling ..........3-5 HP Customer Support Services ....... . . 3-6 LED Behavior: .
- Page 7 HP 600 RPS/EPS Ports ........
- Page 8 — This page is intentionally unused. —...
-
Page 9: Introducing The Hp Procurve 600/610 External Power Supplies
(EPS) ports that provide PoE power for up to two HP PoE switches. The HP 610 EPS has four EPS ports that provide PoE power for up to four HP PoE switches. The HP 610 EPS also has two backup ports for supporting backup power to other HP 610 EPS units connected in a group. - Page 10 Introducing the HP ProCurve 600/610 External Power Supplies This chapter describes your HP 600 RPS/EPS and HP 610 EPS including: front of the unit back of the unit RPS port operation EPS port operation backup power port operation supported switches...
-
Page 11: Front Of The Unit
The HP 610 EPS has four external power supply ports. You can connect one to four HP PoE capable switches to provide PoE power as a primary or backup source. Power is equally shared between the EPS ports in pair A (that is, port A1 and A2) and between the EPS ports in pair B (port B1 and B2);... - Page 12 The HP 610 EPS unit’s internal power supply is operating normally. Status (green) Blinking* The HP 610 EPS unit’s internal power supply has failed and the unit is being (also on back panel powered by another HP 610 EPS. The unit Fault LED will be blinking simultaneously.
- Page 13 Backup power is not available for other HP 610 EPS units. The unit’s internal power supply has failed and the unit is being powered by another HP 610 EPS. The unit’s Internal Power Status and Fault LEDs will be blinking simultaneously.
-
Page 14: Back Of The Unit
The HP 600 RPS/EPS has six redundant power supply ports. You can connect up to six HP ProCurve switch units, but backup power can be supplied to only one unit based on port priority. Port 1 has the highest priority and port 6 the lowest. -
Page 15: Port Status Leds
AC power source. The HP 600 RPS/ EPS automatically adjusts to any voltage between 100--240 volts and either 50 or 60 Hz, and the HP 610 EPS between 110--240 volts and either 50 or 60 Hz. There are no voltage range settings required. -
Page 16: Rps Port Operation
The EPS ports operate as a pair. The HP 600 RPS/EPS has one pair of EPS ports that can provide up to 408 W of PoE power at -50 VDC. The HP 610 EPS has two pairs of EPS ports, each of which can provide up to 408 W of PoE power at -50 VDC. -
Page 17: Eps Backup Power Port Operation
For example, the HP 600 RPS/EPS can allocate 408 W of power to port 1 and none to port 2, or each port can be allocated 204 W. The HP 610 EPS can allocate all 408 W of power to port A1 (in pair A) and none to port A2, or each port can be allocated 204 W. -
Page 18: Supported Switches
Introducing the HP ProCurve 600/610 External Power Supplies Supported Switches Supported Switches Switch HP ProCurve Switch 2824 HP ProCurve Switch 2848 HP ProCurve Switch 2626-PWR HP ProCurve Switch 2650-PWR HP ProCurve Switch xl PoE Module 1-10 HP Product Number EPS/RPS Support... -
Page 19: Installing And Connecting The Hp 600/610 External Power Supplies
The brackets are designed to allow mounting the unit in a variety of locations and orientations. This chapter shows you how to install the HP 600 RPS/EPS and HP 610 EPS including:... -
Page 20: Included Parts
* The mounting brackets differ from the 5069-6535 mounting brackets by being longer to support the increased depth of the unit. EPS cables; two for the HP 600 RPS/EPS, four for the HP 610 EPS Six RPS cables (HP 600 RPS/EPS only) -
Page 21: Installation Procedures
Installing and Connecting the HP 600/610 External Power Supplies Installation Procedures Summary Follow these easy steps to install your HP 600 RPS/EPS or HP 610 EPS. The rest of this chapter provides details on these steps. Prepare the installation site... -
Page 22: Installation Precautions
If this unit is placed in a fully enclosed rack, make certain the ambient temperature inside the rack near the unit does not exceed 55°C (131°F) for the HP 600 RPS/EPS or 50°C (122°F) for the HP 610 EPS. - Page 23 Installation Procedures For safe operation and to prevent equipment damage, DO NOT connect EPS, RPS, or HP 610 EPS backup power cables to non-supported equip- ment or in non-supported configurations. If the HP 610 EPS is actively providing backup power to another HP 610 EPS, disconnect AC power cord before removing backup power cables.
-
Page 24: Prepare The Installation Site
Cabling - Only use the EPS cables supplied with the unit for external power connections to switches. Only use the EPS backup power cables supplied with the HP 610 EPS to connect to other HP 610 EPS units in the backup power group. Only use the RPS cables supplied with the HP 600 RPS/EPS for redundant power connections to switches. - Page 25 Installing and Connecting the HP 600/610 External Power Supplies Installation Procedures Attaching brackets to the HP 600 RPS/EPS 8 mm M4 screws Attaching brackets to the HP 610 EPS 8 mm M4 screws...
-
Page 26: Horizontal Surface Mounting
Installing and Connecting the HP 600/610 External Power Supplies Installation Procedures W A R N I N G For safe reliable installation, only use the screws provided in the accessory kit to attach the mounting brackets to the unit. N o t e Note that the mounting brackets have multiple mounting holes and can be rotated allowing for a wide variety of mounting options. -
Page 27: Connect To Switches
3. Connect to Switches Connect the EPS and RPS cables from the supported network switches to the appropriate ports on the HP 600 RPS/EPS and HP 610 EPS. Connecting RPS Ports to Switches To connect: Push the RPS cable plug into the desired RPS port until the thumb screws engage with the screw holes in the unit. -
Page 28: Connecting Eps Ports To Switches
Installing and Connecting the HP 600/610 External Power Supplies Installation Procedures Connecting EPS Ports to Switches To connect: Push the EPS cable plug into the EPS port until the tab on the plug clicks into place. When power is on for the... -
Page 29: Hp 610 Eps Only: Connect The Eps Backup Power Ports
Attach the end of the backup power cable marked “IN” to the backup power “In” port on the first unit in the group of HP 610 EPS units. Push the cable plug into the port until the thumb screws engage with the screw holes in the unit. - Page 30 “Out” port on the first unit. See information on the ring topology. When power is on for each of the HP 610 EPS units in the group, the EPS Backup Power Port Status LEDs should go on to confirm that these ports are functioning properly, and backup power is available to other units in the group.
-
Page 31: Connect To Ac Power
AC cord and EPS Backup power cables to completely remove power from the unit. N o t e The HP 600 RPS/EPS and HP 610 EPS do not have a power switch. They are powered on when the power cord is connected to the unit and to a power source. -
Page 32: Verify Correct Operation
Installing and Connecting the HP 600/610 External Power Supplies Installation Procedures 6. Verify Correct Operation When the HP 600 RPS/EPS or HP 610 EPS is mounted in its location and powered on, you should first verify that it is working properly by checking the unit’s LEDs. - Page 33 Installing and Connecting the HP 600/610 External Power Supplies • The EPS and RPS Port Status LEDs on the HP 600 RPS/EPS and the EPS Port Status LEDs on the HP 610 EPS go into their normal opera- tional mode: –...
-
Page 34: Recommended Connection Topologies
Recommended Connection Topologies Recommended Connection Topologies This section shows you some recommended connection topologies using the HP 600 RPS/EPS and HP 610 EPS. For more topology information, see the HP ProCurve web site, http://www.hp.com/go/hpprocurve. RPS Connections on the HP 600 RPS/EPS... -
Page 35: Limitations
Status Indication The Power Status LEDs on the HP 600 RPS/EPS indicate if a port can provide power. For example, if six switches are connected to the HP 600 RPS/EPS and the power to the switch on port 4 fails, the Power Status LED for port 4 turns on and for ports 5 and 6 it blinks. -
Page 36: Limitations
EPS cables Limitations In the illustration above, the two switches connected to the HP 600 RPS/EPS are limited to 204 W of power on each EPS port. If a switch tries to draw more than 204 W of power from the HP 600 RPS/EPS, an over-current condition occurs and the EPS port shuts down. -
Page 37: Eps Connections On The Hp 610 Eps
The HP 610 EPS is designed to provide primary or backup PoE power to up to four HP PoE devices. It can be used to supply primary PoE power to up to four HP ProCurve Switch xl PoE modules (J8161A), after they have been installed in an HP ProCurve Switch 5308xl switch chassis. -
Page 38: Limitations
For example, if four switches are connected to the HP 610 EPS and the power to the switch on port A1 fails, the Power Status LED for port A1 turns off, but for ports A2, B1, and B2 it remains... -
Page 39: Eps Backup Power
PoE devices in the event of AC power failure or a power supply failure on a connected HP 610 EPS. Each HP 610 EPS incorporates a PoE power supply that is connected so it can provide power to itself or another HP 610 EPS connected by a cable. The back of the HP 610 EPS has backup power input and output connectors for connecting multiple units together to back up each other. - Page 40 The cable connectors are keyed so they must connect an output to an input. You cannot connect an input to an input. When HP 610 EPS units are connected in this manner, this allows the sharing of PoE power from one unit to the other, down the line, should a failure occur.
-
Page 41: Recommendations
Limitations (Calculating required number of HP 610 EPS units) The total PoE load on all HP 610 EPS units must be less than the total power available from N-1 of the power supplies, where N is the number of connected units. - Page 42 12 W each, this totals 1320 W. Now you must divide 1320 W by 850 W (the power of one HP 610 EPS) to get the number of units you will need to support the 1320 W. 1320 W divided by 850 W equals 1.55. Therefore, you need two HP 610 EPS units to support these devices.
-
Page 43: Status Indication
HP 610 EPS unit, and the other unit is powered on. On the front of the HP 610 EPS there are two LEDs indicating the status of the backup power. One LED is labeled “IN,” and when it is ON it indicates the backup power input is connected to another live HP 610 EPS backup power output. -
Page 44: Replacement Procedures
“IN” cable end before attaching the “OUT” cable end. UPS Support The HP 600 RPS/EPS and HP 610 EPS may be used in configurations where an Uninterruptible Power Supply (UPS) is desired. See Appendix A, cations,” for the power requirements of the HP 600 RPS/EPS and HP 610 EPS for use in determining your UPS requirements. -
Page 45: Troubleshooting
N o t e Use caution when power cycling the HP 600 RPS/EPS or HP 610 EPS as this may affect devices receiving operating power from the unit. (page... -
Page 46: Diagnosing With The Leds
Diagnosing with the LEDs Diagnosing with the LEDs Table 3-1 shows LED patterns on the HP 600 RPS/EPS and HP 610 EPS that indicate problem conditions. Check in the table for the LED pattern that you see on your unit. -
Page 47: Diagnostic Tips
See the Customer Support/Warranty booklet for more information. RPS power is not A higher priority RPS port is using RPS power from the HP 600 RPS/EPS. The LED blinks available to the even if the connected device does not require RPS power at this time. The blinking LED connected is indicating that there is no RPS power available to that device should it be required. - Page 48 See the Customer Support/Warranty booklet for more information. EPS Backup Verify the backup power cable is connected to each HP 610 EPS in the group. If the backup power is not power cable is properly connected, and the other units are powered on without internal available.
-
Page 49: Diagnostic Tests
Checking the Unit’s LEDs The self test passes if the Fault LED on the front of the HP 600 RPS/EPS or HP 610 EPS goes off after approximately 5 seconds. If this LED stays on longer than 15 seconds or begins blinking, there may be a problem with the unit. -
Page 50: Hp Customer Support Services
HP Customer Support Services HP Customer Support Services If you are still having trouble with your HP 600 RPS/EPS or HP 610 EPS, Hewlett-Packard offers support 24 hours a day, seven days a week through a number of automated electronic services. See the Customer Support/Warranty booklet that came with your HP 600 RPS/EPS or HP 610 EPS for information on how to use these services to get technical support. -
Page 51: Physical
Non-Operating Temperature -40°C to 70°C (-40°F to 158°F) -40°C to 70°C (-40°F to 158°F) Operating Relative humidity: (non-condensing) Non-Operating Relative humidity: (non-condensing) Maximum altitude: HP 600 RPS/EPS HP 610 EPS 44.3 cm (17.4 in) 44.3 cm (17.4 in) 32.6 cm (12.8 in) 48.3 cm (19.0 in) 4.4 cm (1.7 in) -
Page 52: Acoustic
Specifications Acoustic HP 600 RPS/EPS Geraeuschemission LwA=59.2 dB am fiktiven Arbeitsplatz nach DIN 45635 T.19 Noise Emission LwA=59.2 dB at virtual workspace according to DIN 45635 T.19 HP 610 EPS Geraeuschemission LwA=58 dB am fiktiven Arbeitsplatz nach DIN 45635 T.19 Noise Emission LwA=58 dB at virtual workspace according to DIN 45635 T.19... -
Page 53: B Connectors And Cables
Connectors and Cables This appendix includes connector and cable information for cables that should be used with the HP 600 RPS/EPS and HP 610 EPS, including minimum pin-out information and specifications for EPS, RPS, and backup power cables. HP 600 RPS/EPS Ports The EPS and RPS ports on the unit’s back panel accept only the EPS and RPS... -
Page 54: Connector Pin-Outs
RPS cables. The backup power ports must be connected to other HP 610 EPS units using the provided backup power cables. EPS Cable for HP PoE Switch Connections The EPS cables supplied with the HP 600 RPS/EPS and HP 610 EPS must be used for all EPS connections. Connector Diagram... -
Page 55: Rps Cable For Hp Procurve Switch Connections
RPS Cable for HP ProCurve Switch Connections The RPS cables supplied with the HP 600 RPS/EPS must be used for all RPS connections. Connector Diagram Pin Assignments Pins Signal Name Signal Description 12V power return Not used 3,4,5,6 12V power from the HP 600 RPS/EPS... -
Page 56: Eps Backup Power Cable For Hp 610 Eps Connections
Connector Pin-Outs EPS Backup Power Cable for HP 610 EPS Connections The EPS backup power cable supplied with the HP 610 EPS must be used for all connections to other HP 610 EPS units in the backup power group (string or ring). -
Page 57: C Safety And Emc Regulatory Statements
This product does not have a power switch; it is powered on when the power cord is plugged in. Documentation reference symbol. If the product is marked with this symbol, refer to the product documentation to get more information about the product. - Page 58 Safety and EMC Regulatory Statements Informations concernant la sécurité Informations concernant la sécurité WARNING Caution Cet appareil est un produit de classe I et possède une borne de mise à la terre. La source d'alimentation principale doit être munie d'une prise de terre de sécurité installée aux bornes du câblage d'entrée, sur le cordon d'alimentation ou le cordon de raccordement fourni avec le produit.
-
Page 59: Hinweise Zur Sicherheit
Hinweise zur Sicherheit Symbol für Dokumentationsverweis. Wenn das Produkt mit diesem Symbol markiert ist, schlagen Sie bitte in der Produktdokumentation nach, um mehr Informationen über das Produkt zu erhalten. WARNING Eine WARNING in der Dokumentation symbolisiert eine Gefahr, die Verletzungen oder sogar Todesfälle verursachen kann. Caution Caution in der Dokumentation symbolisiert eine Gefahr, die dis Gerät beschädigen kann. -
Page 60: Considerazioni Sulla Sicurezza
Safety and EMC Regulatory Statements Considerazioni sulla sicurezza Considerazioni sulla sicurezza WARNING Caution Questo prodotto è omologato nella classe di sicurezza I ed ha un terminale protettivo di collegamento a terra. Dev'essere installato un collegamento a terra di sicurezza, non interrompibile che vada dalla fonte d'alimentazione principale ai terminali d'entrata, al cavo d'alimentazione oppure al set cavo d'alimentazione fornito con il prodotto. -
Page 61: Consideraciones Sobre Seguridad
Consideraciones sobre seguridad Símbolo de referencia a la documentación. Si el producto va marcado con este símbolo, consultar la documentación del producto a fin de obtener mayor información sobre el producto. WARNING Una WARNING en la documentación señala un riesgo que podría resultar en lesiones o la muerte. -
Page 62: Safety Information
Safety and EMC Regulatory Statements Safety Information (Japan) Safety Information (Japan) - Page 63 Safety and EMC Regulatory Statements Safety Information (China) Safety Information (China)
-
Page 64: Emc Regulatory Statements
Safety and EMC Regulatory Statements EMC Regulatory Statements EMC Regulatory Statements U.S.A. FCC Class A This equipment has been tested and found to comply with the limits for a Class A digital device, pursuant to Part 15 of the FCC Rules. These limits are designed to provide reasonable protection against interference when the equipment is operated in a commercial environment. - Page 65 Safety and EMC Regulatory Statements EMC Regulatory Statements Korea Taiwan...
- Page 66 ISO/IEC Guide 22 and EN45014 Hewlett-Packard Company 8000 Foothills Blvd. Roseville, CA 95747-5502 U.S.A. Product Name: HP ProCurve 600 RPS/EPS, Model Number: J8168A Regulatory Model Number: RSVLC-0303 EN 55022 (1998) / CISPR-22 (1997) Class A EN55024 (1998) / CISPR-24 (1997)
-
Page 67: Declaration Of Conformity
Hewlett-Packard Company 8000 Foothills Blvd. Manufacturer's Address: Roseville, CA 95747-5502 U.S.A. declares that the product: HP ProCurve 610 EPS Product Name: Model Number: J8169A Regulatory Model Numbers: RSVLC-0403 conforms to the following Product Specifications: Safety: EN60950 (2000) / IEC 950 (1999) - Page 68 — This page is intentionally unused. —...
-
Page 69: Index
EPS … B-2 pin-outs … B-2 cables, EPS connector pin-outs … B-2 cables, RPS … B-3 unit-to-switch connection … B-3 cabling … 2-6 connecting the unit to a power source … 2-13 connector specifications … A-2 description … 1-6 back of unit …... - Page 70 … 2-6 regulatory statements … C-8 resetting the unit troubleshooting procedure … 3-5 ring … 1-1, 2-12, 2-21 RPS cable unit-to-switch connection … B-3 RPS connections sample topology … 2-16 RPS ports location on unit … 1-6 operation description … 1-6 safety and regulatory statements …...
- Page 71 Self Test LED behavior during self test … 2-14 specifications connectors … A-2 electrical … A-1 emmissions … A-2 environmental … A-1 physical … A-1 safety … A-2 string … 1-1, 2-21 summary of unit installation … 2-3 testing cabling … 3-5 checking the LEDs …...
- Page 72 — This page is intentionally unused. —...
- Page 74 Technical information in this document is subject to change without notice. ©Copyright 2001, 2004 Hewlett-Packard Development Company, L.P. Reproduction, adaptation, or translation without prior written permission is prohibited except as allowed under the copyright laws. Printed in Taiwan August 2004 Manual Part Number 5990-8800 *5990-8800*...
Need help?
Do you have a question about the ProCurve J8161A and is the answer not in the manual?
Questions and answers