Dacor Discovery DYRP48DS Use And Care Manual
Hide thumbs
Also See for Discovery DYRP48DS:
- Use and care manual (60 pages) ,
- Installation instructions manual (22 pages) ,
- Instruction manual (4 pages)
Table of Contents
Advertisement
Quick Links
®
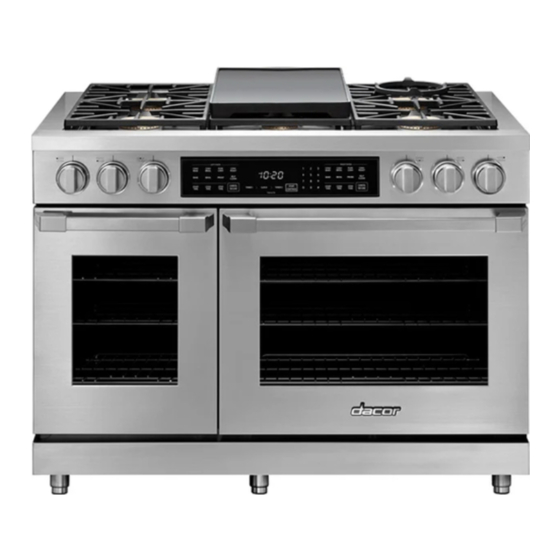
Discovery
Range
Models: DYRP48DS and DYRP48D-C-S
Important Safety Instructions ........................................................1
Getting to Know Your Range ..........................................................4
Setting Up Your Range .......................................................................8
Operating the Cooktop ................................................................... 14
Basic Oven Operation ...................................................................... 17
Deluxe Oven Features ..................................................................... 25
Additional Features ........................................................................... 43
Cooking Tips .......................................................................................... 44
Parts and Accessories ..................................................................... 45
Care and Cleaning .............................................................................. 46
Before You Call for Service ........................................................... 52
Warranty and Service ....................................................................... 55
T a b l e o f C o n t e n t s
Use and Care Manual
Advertisement
Table of Contents

Related Manuals for Dacor Discovery DYRP48DS


Summary of Contents for Dacor Discovery DYRP48DS
-
Page 1: Table Of Contents
Use and Care Manual ® Discovery Range Models: DYRP48DS and DYRP48D-C-S T a b l e o f C o n t e n t s Important Safety Instructions ............1 Getting to Know Your Range ............4 Setting Up Your Range ...............8 Operating the Cooktop .............. - Page 2 © Copyright 2014 Dacor Inc. All rights reserved.
-
Page 3: Important Safety Instructions
Use common sense and caution when installing, maintaining or operating this appliance. Visit www.dacor.com to download the latest version of this manual. Always contact the Dacor Customer Service Team about problems or conditions that you don’t understand. - Page 4 Important Safety Instructions WARNING WARNING • If you receive a damaged product, immediately contact your Tip-over hazard: dealer or builder. Do not install or use a damaged appliance. • A child or adult can tip the range and be killed. •...
- Page 5 Important Safety Instructions WARNING WARNING • To avoid the possibility of fire, do not leave the range • For your safety, do not use the ovens to cook without the unattended when using the cooktop. convection filters installed. When the filter is not installed, the •...
-
Page 6: Getting To Know Your Range
Smart-Flame extends grate life and protects the finish. SimmerSear™: Dacor’s exclusive precision burner control system. It allows you to cook with a wide range of heat settings, from simmer to sear. - Page 7 Getting to Know Your Range Oven Control Panel Layout Touch display The touch display allows you to navigate and select the various features and func- tions of the oven. It can be set to dim after 5 minutes of non-use (see Energy Saving Mode, page 11).
- Page 8 Hidden below the floor of each oven chamber is the bake element. It is the source of bottom heat. Oven Door Your oven is equipped with Dacor's SoftShut™ door system. Oven Door Switch The door switch controls the oven light(s) and self clean process.
- Page 9 Getting to Know Your Range...
-
Page 10: Setting Up Your Range
Setting Up Your Range Standard Burner Assembly Cooktop Assembly 4. Put the burner rings on the burner bases as shown below. The bottom of the burner ring fits inside the WARNING top of the burner base. To avoid the chance of fire, explosion or carbon monoxide 5. - Page 11 Setting Up Your Range Grates Control Panel Position Gently set the grates on top of the spill tray. Put the legs The control panel can be swiveled to a 50° angle for of each grate into the corresponding dimples. easier viewing and use. To pivot the control panel: •...
- Page 12 Setting Up Your Range ◊ Select date format - Touch to select the pre- Control Panel/Display Settings ferred date format shown on the display. • Touch Oven Preferences on the oven home screen. 3. Touch BACK on the control panel to save. •...
- Page 13 Setting Up Your Range Unit Settings (Temperature Scale) 3. Touch HOME on the control panel to return to the oven home screen. You can select the temperature scale (Fahrenheit or Cel- Oven Tone Settings sius) the range uses to display the cooking temperature. The range is preset at the factory to Fahrenheit.
- Page 14 Cooking Mode Temperature Right Oven • The Android operating system revision Left Oven • The Dacor software version temp • The range serial number • The range model number Remote Set Up 4. Touch the up (∧) and down (∨) Temperature arrows For remote operation set up, see page 40.
- Page 15 Setting Up Your Range Text Message Settings You can set the oven to send text messages when the fol- lowing events occur: • One of the timers has finished counting down. • Preheat cycle completed (food can be placed in the oven).
-
Page 16: Operating The Cooktop
Setting Up Your Range • From the Oven Preferences menu, touch Clear Control Panel/Display Settings (cont.) Data. Touch Clear Application Data to continue or Ok to cancel. Clear Data This option clears the user data entered during the setup process. Use this function if you need to enter new user information, for example, when the range is sold to a new owner. - Page 17 Dacor’s Smart Flame feature. A normal flame is steady and blue in color. Foreign material in the gas line, especially in new construction, may cause an orange flame during initial operation.
- Page 18 Operating the Cooktop 3. Turn the center front burner knob to the light (HIGH) Using the Griddle position. Once lit, turn the knob to the MAX GRIDDLE position, or lower if desired. DO NOT keep the burner For best results, allow the griddle to preheat for about 10 knobs higher than the MAX GRIDDLE setting after minutes before you start to cook.
-
Page 19: Basic Oven Operation
See the table • Dacor recommends turning the ovens on for one hour below. You have the choice (in most cooking modes) of at 500°F (260°C) to burn off any residual oils used cooking at the preset cooking temperature or selecting a during the manufacturing process. - Page 20 If you must reposition a rack when the oven is hot, food. It is great for heavier foods and the optional Dacor use pot holders. baking stone.
- Page 21 Basic Oven Operation Starting the Oven - Main Menu Starting the Oven - Quick Start 1. Adjust the racks to the appropriate level. The quick start feature allows you to start cooking quickly. Using the main menu (see next section), allows you more 2.
- Page 22 Basic Oven Operation 5. If you want to change the preset cooking tempera- 8. To turn off the oven, touch CANCEL RIGHT or ture, touch temp. CANCEL LEFT on the control panel. Changing the Temperature To change to a different temperature while the oven is on: 1.
- Page 23 Basic Oven Operation Changing the Oven Cooking Mode The temperature adjustment bar will appear. Touch and slide the pointer back and forth to select the To change to a different cooking mode while the oven is desired cooking temperature. Touch the arrows on on, for example to change from Bake to Convection Roast: either end of the adjustment bar to make minor adjustments.
- Page 24 Basic Oven Operation For multiple rack baking... Understanding the Various Oven • Typically, when baking on two racks with your oven, Modes use rack positions #3 and #5 (counting from the bottom up). When baking on three racks, use rack Your Oven's Two Pure Convection positions #2, #4 and #6.
- Page 25 Use this suggested rack positions for various foods. For cook- mode for single rack convection baking. The ing on multiple racks, Dacor recommends using one of combination of the convection fan and bottom heat source the convection modes.
- Page 26 Basic Oven Operation • Broil food on the first side for a little more than half of Understanding the Various Oven the recommended time, then season and turn. Season the second side just before removing the food from Modes (cont.) the oven.
-
Page 27: Deluxe Oven Features
Basic Oven Operation • When using the roast mode, do not use pans with tall • Remove meats from the oven when the thermometer sides. They interfere with the circulation of heated air registers 5 to 10°F (3 to 6°C) below the desired tem- over the food. - Page 28 Deluxe Oven Features 4. Touch START. Timers 5. The display will return to the oven home screen and the timer count will be displayed. WARNING The timers on your range do not turn the oven on or off. They are only for timing purposes. When you want to turn the oven off automatically, use the Delay Start/Cook Time Features (see page 30).
- Page 29 Deluxe Oven Features The temperature adjustment bar will appear. Touch Defrosting and slide the pointer back and forth to select the desired defrost temperature. Touch the arrows on The oven uses the convection element and fan for this either end of the adjustment bar to make minor process.
- Page 30 Deluxe Oven Features The temperature adjustment bar will appear. Touch Dehydrating and slide the pointer back and forth to select the desired dehydrate temperature. Touch the arrows on The oven uses the convection element and fan for this either end of the bar to make minor adjustments. process.
- Page 31 Deluxe Oven Features Solving Discoloration Problems Proofing To prevent darkening during dehydration and storage, you You can use the oven to proof yeasted doughs. should steam blanch apples, apricots, peaches, nectar- The oven uses the bake element for this pro- ines, pears or foods that will oxidize.
- Page 32 Deluxe Oven Features About Keep Warm Mode Delay Start/Cook Time Features • When you set the oven to stop cooking using Cook If you want to set the oven to automatically turn itself on Time, the oven will go into Keep Warm mode at the and off at a later time, you can use the Delay Start/Cook end of the cook time you have set.
- Page 33 Deluxe Oven Features 3. Select the desired cooking mode, sub-mode and tem- 5. Set the Cook Time: perature according to the Starting the Oven - Main ◊ Touch cook time. Menu section on page 19, but before touching Start, perform steps 4 and/or 5 below. ◊...
- Page 34 Deluxe Oven Features 3. Touch Right or Left Oven Menu to select the oven to Using the Meat Probe be used. When you cook foods like roasts and poultry, the internal temperature is the best way to tell when the food is properly cooked. The oven’s meat probe is an easy way to take the guess- work out of roasting.
- Page 35 Deluxe Oven Features To change the meat probe temperature 8. Allow the oven to preheat before placing the food in the oven. during cooking... 9. Once the oven has preheated (Insert Food appears), 1. Touch the probe icon. put the meat in the oven using pot holders. Insert the meat probe plug into the connector inside the oven and close the door.
- Page 36 Deluxe Oven Features Changing the cooking mode during meat 5. Touch and slide the pointer on the probe temperature adjustment bar back and forth to select the desired probe cooking (cont.) "cook to" (target) temperature. 2. The main cooking menu will appear. Touch the new desired cooking mode (and sub-mode).
- Page 37 After you select the type of meat, you can choose to cook The oven is equipped with the convenience of using the meat probe or to cook by weight. the Dacor Guided Cooking System. The Dacor • To use the meat probe, touch and slide the pointer...
- Page 38 Deluxe Oven Features Important Tips for Using Dacor Guide 4. Touch temp and select the cooking temperature if you want. You may also set cook time, (meat) probe and • For best results, follow the helpful instructions on the Delay Start.
- Page 39 Deluxe Oven Features How to use the oven settings you have To delete a mode that you have previously saved saved: 1. Adjust the racks to the appropriate level. 1. Touch Right or Left Oven Menu. 2. Touch Right or Left Oven Menu to select the oven to be used.
- Page 40 Deluxe Oven Features 5. Touch Edit Mode. My Modes (cont.) To Change the name of a mode that you have previously saved: 1. Touch Right or Left Oven Menu. Would you like to Delete this mode, or Edit the mode name? Confirm Edit Cancel...
- Page 41 Deluxe Oven Features 3. Touch Sabbath Convection or Sabbath Bake. Sabbath Mode 4. If you want to change the preset cooking tempera- The Sabbath mode complies with Jewish laws for ture, touch temp. use on the Sabbath and Holy Days. This feature allows the oven to perform two types of cooking, Pure Convection and Bake.
- Page 42 3. Open the Google Play Store app on your mobile Android device. 4. Search the word Dacor. 5. Select the Dacor iQ Remote app, then select Install. Initial Set-up - Apple Mobile Device 1. Go to the Apple App Store on your mobile Apple device.
- Page 43 OK on the range touch display. 8. Touch Save on the range touch display. 5. Run the Dacor iQ Remote App on the mobile device. The following icons indicate pairing status (they DO Enabling Remote Control Oven Operation NOT indicate WiFi connection status).
- Page 44 Deluxe Oven Features Disabling Remote Control Operation • During remote control, the ovens may be controlled via the mobile device or at the range touch screen. 1. Touch the remote icon on the range's touch display. • The oven doors must be closed to initiate remote control.
-
Page 45: Additional Features
Android operating the app icon to launch: system on your range, including: • Dacor iQ Cooking App - Takes you to the oven home • Accessing and browsing web sites on the internet. screen. This app starts automatically when the range is powered up, after a power failure or when you •... -
Page 46: Cooking Tips
When you are cooking a food item that is very heavy, Dacor cookie sheets (optional), with their low profiles, use a Dacor GlideRack oven rack. You can pull it out will give you the best results. further than a conventional rack, making it easier to check the food, stir or add ingredients. -
Page 47: Parts And Accessories
701938 GlideRack type oven rack (left oven) 701937 Large capacity roast/broil pan with “V” shaped rack AORPVR Pizza baking stone ABS16 Cooktop Griddle AG30 Cooktop Searing Grill AEGR30 To order parts or accessories, contact your Dacor dealer or visit www.everythingdacor.com. -
Page 48: Care And Cleaning
Care and Cleaning • Self Clean mode will not function if the meat probe WARNING is connected. Also Self Clean will not start when the oven is already over 400°F (204°C). Wait for the oven • Clean only the parts of the range listed in this manual. Clean to cool below 400°F before starting the Self Clean them only in the manner specified. - Page 49 Care and Cleaning 6. Touch Right or Left Oven Menu to select the oven to If you want to stop the Self Clean cycle, touch CANCEL be cleaned. RIGHT or CANCEL LEFT. Keep in mind that the oven door will remain locked until it is safe enough to open. Door is Locked will disappear from the display when the door lock is released.
- Page 50 Care and Cleaning 6. Touch Green Clean. GreenClean Feature (cont.) 3. Fold a dish towel in half and insert the end (double thickness) between the door and the door gasket (right to left) to catch water that may dribble out during the process.
- Page 51 If erratic sparking (clicking) is still Burner head present, make sure the igniter Igniter is completely dry. If the unit still exhibits problems after drying, call your local Dacor Authorized Service Agent. Igniter Burner base Normal Flame Burner base Standard Burners...
- Page 52 Use a mild glass cleaner to remove finger prints on glass • Turn the knobs to the off position to remove them for surfaces. You can also clean glass surfaces with Dacor cleaning or replacement. Cooktop Cleaning Creme. Use it according to the direc- •...
- Page 53 Care and Cleaning Convection Filters Cleaning the Interior WARNING Door Gaskets For your safety and proper oven performance, re-install the WARNING filter before using an oven to cook. If you don’t, the spinning fan blades at the back of the oven will be exposed. Take extreme caution when cleaning the door gaskets.
-
Page 54: Before You Call For Service
Care and Cleaning To replace the light bulbs... Replacing the Light Bulbs 1. Replace the light bulb only with Dacor part number 100429. See page 45 for ordering information. WARNING 2. Turn off power to the range at the circuit breaker •... - Page 55 Before You Call for Service Problem May Be Caused By What to Do Oven will not heat. Oven setting not correct. Touch CANCEL RIGHT or CANCEL LEFT, then follow instructions in Basic Oven Operation section. Oven set for Delay Start. Oven will turn on automatically at the preset time.
- Page 56 Before You Call for Service Problem Solution Guide - Oven (cont.) Problem May Be Caused By What to Do Timers will not stop. Using CANCEL RIGHT or CANCEL The timers cannot be canceled by using these LEFT to turn off timers. keys.
-
Page 57: Warranty And Service
For non-warranty repairs or questions in the US and Canada Phone: (800) 793-0093, extension 2813 Contact us through our web site at: www.dacor.com/contact-us Replacement Parts Replacement parts my be ordered through your dacor dealer, or contact Dacor Customer Service at (800) 793-0093, extension 2813. - Page 58 Service fees for travel to islands and remote areas, which FULL ONE-YEAR WARRANTY include but are not limited to, ferries, toll roads or other The warranty applies only to the Dacor appliance sold to the first travel expenses. use purchaser, starting from the date of original retail purchase •...
- Page 60 Dacor.com Part No. 108105 Rev. B Software Version 1.1.123 Dacor ● 14425 Clark Avenue, City of Industry, CA 91745 ● Phone: (800) 793-0093 ● Fax: (626) 403-3130 ● www.dacor.com...
Need help?
Do you have a question about the Discovery DYRP48DS and is the answer not in the manual?
Questions and answers