Table of Contents
Advertisement
Quick Links
Advertisement
Table of Contents

Subscribe to Our Youtube Channel
Related Manuals for Dacor Modernist Pro DOP36M94D


Summary of Contents for Dacor Modernist Pro DOP36M94D
- Page 1 User Manual Modernist Pro Range DOP48M96D/DOP36M94D Part No. 112161 Rev F...
-
Page 2: Table Of Contents
Contents Before You Begin Important Energy-Saving Tips Using the Water Reservoir About the Oven Vent Regulatory Notice Important Safety Instructions Overview External Features Control Panel (DOP48M96DL) Control Panel (DOP36M94DL) Display (DOP48M96DL) Display (DOP36M96DL) What Is Included Using the Cooktop About the Burners About Burner Ignition About Cookware Special Cooktop Features... - Page 3 Contents Using the Basic Oven, cont. Using the Special Functions Using Chef Mode Using iQ Control Starting the Oven Remotely Using Control Lockout Using Settings Using the Steam Oven Using the Oven Racks About Oven Functions Basic Baking and Broiling Instructions Using the Special Functions Cooktop Maintenance Cleaning the Cooktop Surface...
- Page 4 Website: www.dacor.com/customer-care/contact-us Thanks for choosing Dacor for your home. We are a company built by families for families, and we are dedicated to serving yours. We are confident that your new Dacor range will deliver a top-level performance and enjoyment for decades to come.
-
Page 5: Before You Begin
Before You Begin Important Installer • For best results, read this manual thoroughly before starting the installation. • Leave this manual with the user. • Write the range’s model/serial numbers in this manual for service/maintenance use. User Keep this manual for personal/professional use. Overall design/accessories vary with the model. - Page 6 Before You Begin Using the Water Reservoir, cont. 2. Open the reservoir cap, and then fill the reservoir with tap water. NOTE You can open the reservoir by removing the rubber cap or by removing the clear plastic top. To avoid spilling water, filling water through the hole after removing rubber cap is recommended.
-
Page 7: About The Oven Vent
Before You Begin About the Oven Vent The oven vent is under the oven door. Proper air circulation prevents burner combustion problems and ensures good performance. Do not block the vent or surrounding area. Be cautious near the vent. Steam can burn skin and melt certain items. English 7... -
Page 8: Regulatory Notice
Regulatory Notice 1. FCC Notice CAUTION Any modifications not expressly approved by the party responsible for compliance could void the user's authority to operate the equipment. This device complies with Part 15 of FCC Rules. Operation is subject to these conditions: 1) This device may not cause harmful interference; 2) This device must accept any interference received including that which causes undesired operation. -
Page 9: Important Safety Instructions
Important Safety Instructions Read All Instructions Before Using This Appliance • All electrical and gas equipment with moving parts can be dangerous. Read the Important Safety Information, and follow the instructions carefully to minimize risk of property damage, personal injury, and death. •... - Page 10 Important Safety Instructions General Safety WARNING To reduce risk of property damage, fire, personal injury, and death: • Do not touch any part of the range during or immediately after cooking. • Learn where and how to shut off the gas-supply valve. •...
- Page 11 Important Safety Instructions Gas Safety WARNING If you smell gas: • close the valve, and do not use the range; • do not light a match, candle, or cigarette; • do not turn on any appliances; • do not touch any electrical switches or plug in a power cord; •...
- Page 12 Important Safety Instructions Installation Safety WARNING To reduce risk of property damage, fire, personal injury, and death: • Have the range installed and grounded by a qualified installer per the Installation Instructions. • Do not service/modify/replace any parts unless as instructed in this manual. A qualified technician should perform all other service.
- Page 13 Important Safety Instructions Cooktop Safety WARNING To reduce risk of property damage, fire, personal injury, and death: • Turn off all unused burners. • Do not line any part of the range with aluminum foil. • Do not leave burners unattended on medium or high heat settings. •...
- Page 14 Important Safety Instructions Oven Safety WARNING To reduce risk of property damage, fire, personal injury, and death: • Use the oven for cooking only. • Ensure oven racks are level. • Do not remove or clean the door gasket. • Do not spray water on hot oven-door glass. •...
-
Page 15: Overview
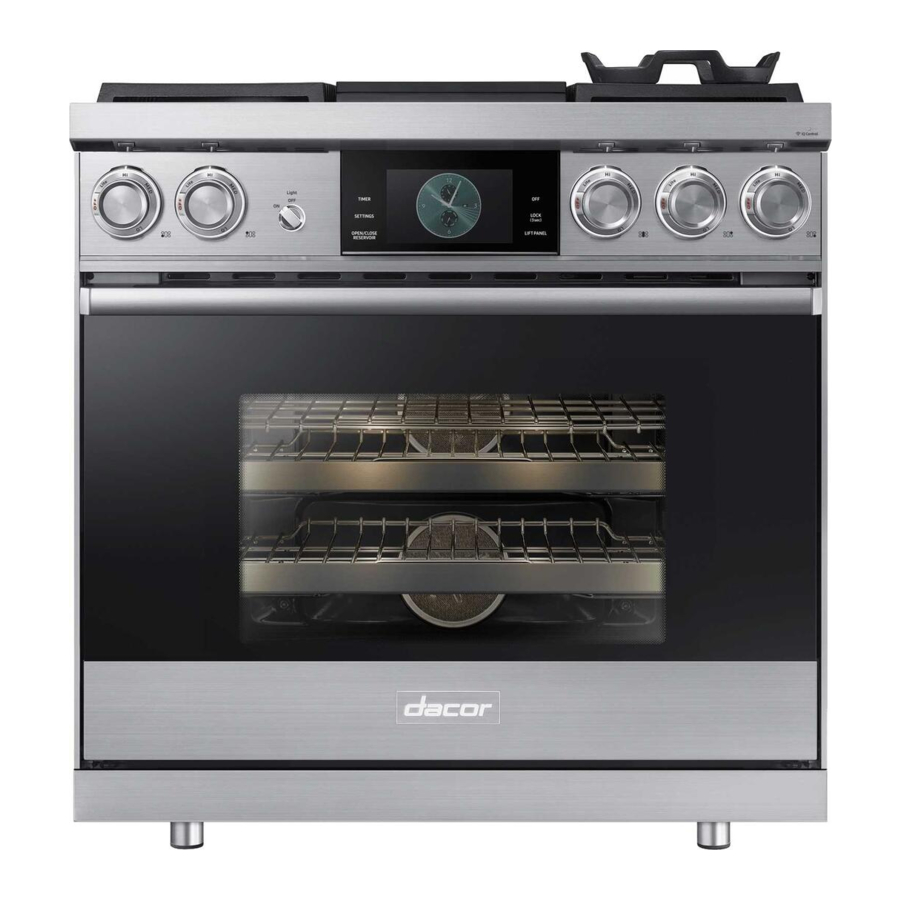
Overview External Features DOP48M96D 1 Spill tray 2 Surface burners 3 Removable oven door 4 Surface burner knobs (6) 5 Griddle knob 6 Knob (Manual oven lighting) 7 Control panel DOP36M94D 1 Spill tray 2 Surface burners 3 Removable oven door 4 Surface burner knobs (4) 5 Griddle knob 6 Knob (Manual oven lighting) -
Page 16: Control Panel (Dop48M96Dl)
Overview Control Panel (DOP48M96D) Tap the display with clean, bare fingers. Oven mitts and wet or dirty fingers block the electronic transfer between finger and panel. LEFT RIGHT LOCK TIMER SETTINGS LIFT PANEL 1 LEFT, RIGHT: Displays left/right oven mode. Shows status; does not turn ovens on/off. 2 OFF: Cancels cooking in the respective oven. -
Page 17: Display (Dop48M96Dl)
Overview Display (DOP48M96D) The display shown is for reference only and may differ somewhat from the actual display. 4:35 PM LEFT Convection Bake View OVEN MODE Summary Faster, more even baking °F Temp Probe Cook Time Delay Start InstantHeat™ ° None None START 1 Indicator area... -
Page 18: Display (Dop36M96Dl)
Overview Control Panel (DOP36M94D) Tap the display with clean, bare fingers. Oven mitts and wet or dirty fingers block the electronic transfer between finger and panel. 4:35 PM Convection Bake OVEN View MODE Summary Faster, more even baking °F Temp Probe Cook Time Delay Start InstantHeat™ None None START °... -
Page 19: What Is Included
Overview What is Included (DOP48M96) The range comes with brass and porcelain burner caps to suit customer preference. Grates (3) Burner heads (6), caps (7) Griddle (1) Convection filter (3) Temp. Probe (2) Glide racks (2) Anti-tip bracket (1) Wire rack (1) Wok ring (1) Small rack (1)* Steam tray (2)*... - Page 20 Overview What is included (DOP36M94D) The range comes with brass and porcelain burner caps to suit customer preference. Grates (2) Burner heads (4) and Burner Wire rack (1) caps (5) Convection filter (2) Temp. Probe (1) Glide racks (2) Griddle (1) Anti-tip bracket (1) Wok ring (1) 20 English...
-
Page 21: Using The Cooktop
Using the Cooktop About the Burners The graphic shows burner type and location. Burners spark when the knob is turned to the "flame symbol." When the burner ignites, sparking stops. Gaskets under the burners prevent spills from affecting internal parts. DOP48M96D DOP36M94D Dual burner... -
Page 22: About Burner Ignition
• The flame should burn evenly around the burner, except below each grate support, where flame height is reduced by Dacor’s Smart Flame feature. A normal flame is steady and blue. Foreign matter in the gas line, especially in new construction, may cause an orange color that disappears with use. -
Page 23: About Cookware
Using the Cooktop About Cookware WARNING • Cookware with rough bottoms can permanently damage the coated surfaces. • To avoid burns and scalding, turn handles away from the the front of the range and adjacent burners. Always center cookware on the grates for best balance. •... -
Page 24: Special Cooktop Features
Smart Flame technology reduces the temperature under the fingers of the porcelain-coated cast iron grates. Smart-Flame extends grate life and protects the finish. SimmerSear™ Dacor’s exclusive precision burner control system. It allows you to cook with a wide range of heat settings, from simmer to sear. About the Grates... -
Page 25: About The Wok Grate
Using the Cooktop CAUTION • Do not remove the griddle until the range and all accessories are cool. • The griddle may get hot when the range is on. Wear oven mitts to handle the griddle. • Overheating and using metal utensils can damage the griddle coating. •... -
Page 26: Using The Basic Oven
Using the Basic Oven Basic Settings: Clock, Date&Time, Language Clock Theme To change clock theme. 1. Tap SETTINGS > Display. 2. Tap Clock theme, swipt the display to view themems, and select a theme. Date & Time To enable automatic date and time 1. -
Page 27: Using The Gliding Rack
Using the Basic Oven Rack and Pan Placement Single-rack Multi-rack baking: Use baking: Use Level 3 or 4 Level 3 or 5 For best results, center pans in the oven as much as possible. If using multiple pans, each should have at least 1"... - Page 28 Using the Basic Oven Installing/Removing the Gliding Rack, cont. Grasp the handle to pull the gliding rack (left). Pulling by the frame may cause the rack to come off the guides, possibly harming the rack and the user. Wear oven mitts when handling the gliding rack during cooking.
-
Page 29: Using The Temp Probe
Using the Basic Oven Using the Temp Probe For many foods, especially roasts and poultry, measuring the internal temperature is the best way to determine proper doneness. This feature lets you cook meat to an exact internal temperature. Use it with Bake, Convection Bake, Convection Roast, Pure Conv.Sear, or Dual Four-Part Pure Convection. -
Page 30: About Oven Functions
Using the Basic Oven Using the Temp Probe, cont. CAUTION To protect the probe tip, defrost food fully, and do not let the tip poke out of the meat. • The probe should only be in the oven if the probe is in use. •... - Page 31 Using the Basic Oven About Oven Functions, cont. Mode Instruction • This mode is for baking cakes, cookies, casseroles. Always preheat the oven. • Baking temps/times vary with ingredients and size/shape of the baking pan. Bake • Dark or nonstick coatings may cook faster with more browning. •...
- Page 32 Using the Basic Oven About Oven Functions, cont. Broiling Recommendation Guide The size, weight, thickness, starting temperature, and your doneness preference will affect broiling times. This guide is based on meats at refrigerator temperature. Always use a broiler pan and its grid when broiling.
-
Page 33: Setting The Cooking Mode
Using the Basic Oven Setting the Cooking Mode • Swipe the screen left/right to select a mode. RIGHT 4:35 PM LEFT Convection Bake RIGHT OVEN MODE Faster, more even baking °F LOCK TIMER Cook Time Delay Start InstantHeat™ SETTINGS LIFT PANEL None None START •... -
Page 34: Basic Baking And Broiling Instructions
Using the Basic Oven Basic Baking and Broiling Instructions 1. (48" range) Tap RIGHT, and swipe to select a cook 4:35 PM RIGHT LEFT Convection Bake RIGHT OVEN mode. MODE Faster, more even baking °F (36" range) Select a cook mode. LOCK TIMER Cook Time... -
Page 35: Using The Kitchen Timer
Using the Basic Oven Basic Baking and Broiling Instructions, cont. Adjusting the Temperature While Cooking If using single mode, do one of these: 4:35 PM LEFT RIGHT LEFT RIGHT • Tap RIGHT (area or button), then tap the Convection Bake Bake 175°F 325°F... - Page 36 Using the Basic Oven Using the Kitchen Timer, cont. How to Set the Timer, cont. 3. Use the numeric pad to set the time from 1 sec to 4:35 PM LEFT RIGHT 23 hr, 59 min, 59 sec. LOCK TIMER SETTINGS LIFT PANEL 4.
-
Page 37: Using Timed Cooking
Using the Basic Oven Using Timed Cooking The oven turns on immediately, cooks for the set time period, then turns itself off when cooking is done. Timed Cooking only operates with another cooking operation (Bake, Convection Bake, Convection Roast, Pure Conv.Sear, Convection Broil, Steam Bake, Steam Roast, Dual Four-Part Pure Convection, Proof, Stone Mode, Dehydrate). -
Page 38: Using Delay Start
Using the Basic Oven Using Delay Start In this mode, the oven timer turns the oven on according to the set time. You can have the oven turn itself off when a preset time elapses by setting Timed Cooking as well. •... - Page 39 • Do not clean the gasket. Its fiberglass material cannot withstand abrasion. The gasket must remain intact. If it becomes worn, replace it. • Dacor recommends self-cleaning only once per year. If additional cleaning is needed throughout the year, use the green-cleaning function. (See Pg. 41.) 1.
- Page 40 Using the Basic Oven Using the Cleaning Features, cont. Self-Cleaning, cont. 4. Tap Clean Time. 4:35 PM Self clean Oven cleaning TIMER LOCK SETTINGS Clean Time Delay Start OPEN/CLOSE LIFT PANEL None START RESERVOIR 5. Tap the screen to set the clean time (2, 3, or 5 hrs (default: 3), and tap OK.
- Page 41 Using the Basic Oven Using the Cleaning Features, cont. GreenClean™ This function saves time and energy by heating the oven chamber enough to loosen cooking residue so it can be wiped away with a damp cloth. CAUTION The oven door locks during GreenClean™. Forcing the door open can harm the auto-lock system. Before a GreenClean™...
- Page 42 Using the Basic Oven Using the Cleaning Features, cont. Running a GreenClean™ Cycle, cont. NOTE • (Basic oven) For best results, pour exactly 10 oz (300 ml) of water on the oven floor. • (Steam oven) Operates with the steam function. Add 33.8 oz (1,000 ml) of water to the reservoir. •...
- Page 43 Using the Basic Oven Descale (steam oven), cont. 3. Tap START. 4:35 PM Descale Please descale Water Reservoir to improve quality. TIMER Follow the onscreen instructions. The cycle lasts LOCK SETTINGS 3 hours. Empty and clean the reservoir, then pour Clean Time OPEN/CLOSE LIFT PANEL...
-
Page 44: Using Sabbath Mode
Using the Basic Oven Draining (48" oven only) When a steam function is complete, you must drain the remaining water to prevent the water from affecting other cooking modes. To drain the water, follow these steps: 1. Swipe to the Clean screen, and tap Draining. 4:35 PM Clean OVEN... -
Page 45: Using The Basic Oven, Cont
Using the Basic Oven Using the Sabbath Feature, cont. 4. Tap SETTINGS > Sabbath, then tap Sabbath to Settings LEFT RIGHT Help start Sabbath mode. (The oven will not beep or About device show changes; you may change the oven temp LOCK Sabbath TIMER... - Page 46 Using the Basic Oven Using the Special Functions, cont. Mode Instruction • Keeps cooked food warm for serving up to 3 hours after cooking is done. • Use this mode by itself, or set it to activate after timed or delay timed cooking. Keep Warm •...
-
Page 47: Using Chef Mode
Fifteen Chef Mode dishes simplify cooking for novice users, saving time or shortening the learning curve. Cook time and temperature are adjusted according to the selected recipe. You can download detailed recipes for each feature from the Dacor website. 1. Swipe to the Chef Mode screen. -
Page 48: Using Iq Control
To use this feature, download the Dacor iQ Kitchen app to a mobile device. Functions operated via Dacor iQ Kitchen app may not work well if communication conditions are poor or if the Wi-Fi signal is weak at the oven location. See the table for the main functions that can be operated from the app. -
Page 49: Using Control Lockout
1. Tap SETTINGS > Connections > Wi-Fi, then tap ON in the right screen. 2. Tap Wi-Fi > Add Network. 3. Enter an IP manually, then tap CONNECT to apply your settings. NOTE For details on the above features, see the Dacor iQ Kitchen User Manual. English 49... - Page 50 • Tap SETTINGS > Volume, then use the adjacent bar to adjust the volume. Lighting Dacor's Pro range has two distinctive lighting features: "Shower lighting" shines on knobs from above; "Welcome lighting" is an array that appears when you lift the LCD panel.
- Page 51 Using the Basic Oven Using Settings, cont. iQ Control To start the oven remotely. • Tap SETTINGS > Connections > iQ Control, then tap ON on the appropriate oven. (See Using iQ Control, Pg. 48.) Easy Connection Easily configure network settings, including the authentication procedure. •...
-
Page 52: Using The Steam Oven
Using the Steam Oven Using the Oven Racks DOP48M96D Left Oven Rack levels for certain cooking tasks (reference only) Rack Level Type of Food Broiling hamburgers Broiling meats or small cuts of poultry, fish Bundt cakes, pound cakes, frozen pies, Angel food cakes, casseroles, small roasts Large roasts, hams, fresh pizza Each rack has stops that need to be placed correctly on the supports. - Page 53 Using the Steam Oven About Oven Functions, cont. Cooking Mode Tap LEFT, swipe to select a cooking mode, and set a temperature. (See Setting the Temperature, pg. 33 and Basic Baking and Broiling Instructions, pg. 55.) 48" Model 36" Temp Mode Temperature range InstantHeat™...
- Page 54 Using the Steam Oven About Oven Functions, cont. Recommended Cook Times for Steam Mode Meat, poultry, fish 1. Vegetables Put veggies in the perforated tray at rack Level 2 with Put food in the perforated tray at rack Level 2 with the the unperforated tray at Level 1 to catch drippings.
-
Page 55: Basic Baking And Broiling Instructions
Using the Steam Oven Basic Baking and Broiling Instructions Tap LEFT, and swipe to select a cook mode. Set the LEFT 4:35 PM LEFT Convection Bake RIGHT OVEN temperature. (See Setting the Temperature, pg. 33.) MODE Faster, more even baking °F •... - Page 56 Using the Steam Oven Basic Baking and Broiling Instructions, cont. Broiling Recommendation Guide The size, weight, thickness, start temperature, and your doneness preference affect broil times. This guide is based on meats at refrigerator temperature. Always use a broiler pan and its grid when broiling.
-
Page 57: Using The Special Functions
Using the Steam Oven Using the Special Functions Special function provides 2 specialized cooking options. Mode Temperature range 48" Pro range Steam oven ** A non-adjustable, factory- Keep Warm **None set temperature is applied Proof 85 °F (29 °C) / 95 °F (35 °C) ... -
Page 58: Cooktop Maintenance
Cooktop Maintenance WARNING Turn off power, and let all surfaces cool before cleaning the cooktop. Wear rubber gloves, and be mindful of sharp edges. Cleaning the Cooktop Surface Clean up spills immediately. 1. Turn off all burners. 2. When the grates have cooled, remove them. 3. -
Page 59: Removing/Installing The Burners And Grates
Cooktop Maintenance Disassembling/Assembling the Burners and Grates Turn off burners, and wait for all surfaces to cool down. 1. Remove the burner grates. 2. Remove the burner caps and heads. Grate 3. Clean the grates and burner parts in warm, soapy water. -
Page 60: About Burner Bases
Cooktop Maintenance About Burner Bases CAUTION • The burner bases are not removable. • Allow no water in the burner bases and the brass gas orifices. • Wipe them clean with a damp cloth, being careful not to damage the bases. Dry the bases completely before using the cooktop. -
Page 61: Assembling The Burner Heads And Caps
Cooktop Maintenance Assembling the Burner Caps and Heads Dual-Burner Head/Caps 1. Orient the burner head so the electrode opening aligns with the electrode. 2. Install the burner head so the electrode passes through its hole in the head. (Ensure the burner head lies flat on the cooktop.) 3. - Page 62 Cooktop Maintenance Assembling the Burner Heads and Caps, cont. SimmerSear Burner Assembly 1. With power off and all surfaces cool, place the Burner head burner head so the locating tab goes into the Locating keyed hole. Burner base Keyed hole 2.
-
Page 63: Oven Maintenance
Oven Maintenance Oven Care and Cleaning WARNING Be sure electrical power is off and all surfaces are cool before cleaning any part of the appliance. Cleaning Painted Parts and Decorative Trim • For general cleaning, use a cloth with hot, soapy water. •... - Page 64 Oven Maintenance Oven Care and Cleaning, cont. Removing/Re-installing the Convection Filter, cont. Centering the filter over the fan hole, carefully hook the metal clips (back of filter) over the metal bar across the hole. Do not scratch the oven's porcelain with the filter. Clips Oven Racks •...
- Page 65 Oven Maintenance Oven Care and Cleaning, cont. Removing/Re-installing the Rack Supports Rack supports can be removed for cleaning. (Self-Cleaning, GreenClean™ and Manual cleaning). 1. Grasp the bottom-center of the support, and lift. 2. Swing the support bottom outward about 45°. 3.
- Page 66 Oven Maintenance Oven Care and Cleaning, cont. Removing/Re-installing the Rack Supports, cont. 4. Insert the rack-support prongs into the holes near the top of the oven-chamber wall. 5. Swing the bottom of the rack support toward the oven-chamber wall. 6. Pull the rack support down, making sure the two humps on the support bar rest upon the nuts attached to the oven-chamber wall.
-
Page 67: Removing/Re-Installing The Oven Door
Oven Maintenance Removing/Re-installing the Oven Door Spread a blanket on a stable, flat surface where you can lay the door once you have removed it. CAUTION The 30" oven door weighs 42 lbs (19 kg). Grasp the door with both hands. Do not lift by the handle. 1. -
Page 68: Changing The Oven Light
Oven Maintenance Changing the Oven Light The oven light is a standard 40-watt halogen appliance bulb. It comes on when the oven door is opened. When the door is closed, touch LIGHT to turn the light on/off. The light does not work during self-cleaning. -
Page 69: Troubleshooting
Troubleshooting If you experience an issue with your range, review the tables in this section to resolve it. If you cannot find a solution, call Dacor Customer Assurance (800-793-0093) for assistance. Gas Safety Problem Possible cause Action You smell gas Turn the burner knob to OFF. - Page 70 Troubleshooting Oven Problem Possible cause Solution Oven not turning on Verify the range plug is properly inserted in its outlet. Oven not fully plugged in. Bad fuse/tripped circuit breaker. Replace fuse/reset circuit breaker. Oven controls improperly set. See Using the Steam Oven, Pgs. 55, 56. Let oven cool.
-
Page 71: Information Codes
Troubleshooting Oven, cont. Problem Possible cause Solution Oven still dirty after Oven controls incorrectly set. See Self-Cleaning, Pg. 39. self-cleaning. Oven too heavily soiled. Wipe up food residue, then start self-cleaning; very dirty ovens may need two self-cleaning cycles or longer cycles. Steam emitting When using convection, steam This is normal operation. -
Page 72: Warranty And Service
OUTSIDE THE 50 STATES OF THE USA, THE DISTRICT OF COLUMBIA, AND CANADA: LIMITED FIRST-YEAR WARRANTY If your Dacor product malfunctions within 1 year of the original purchase date due to a defect in material or workmanship, Dacor will furnish a new part, FOB factory to replace the defective part. - Page 73 Out-of-Warranty Products Should you experience a service issue after the standard warranty period expires, contact us nonetheless. Dacor reviews each issue and customer concern to provide the best possible solution for the customer under the individual circumstances. THE REMEDIES IN THE ABOVE EXPRESS WARRANTIES ARE THE SOLE AND EXCLUSIVE REMEDIES;...
-
Page 74: Open-Source Announcement
Open-Source Announcement The software included in this product contains open-source software. You may obtain the complete corresponding source code for 3 years after the last shipment of this product by emailing: mailto:oss.request@samsung.com. You may also obtain the complete corresponding source code via physical medium (e.g., CD-ROM) at a minimal charge. - Page 75 Dacor product, please return all forms in one envelope, or activate the warranty online for each product. Please be assured that Dacor will never sell your name or any information on this form for mailing-list purposes, as we do not...
- Page 76 NO POSTAGE NECESSARY IF MAILED UNITED STATES BUSINESS REPLY MAIL FIRST-CLASS MAIL PERMIT NO 1600 CITY OF INDUSTRY CA POSTAGE WILL BE PAID BY ADDRESSEE DACOR ATTN WARRANTY PROCESSING DEPT PO BOX 90070 CITY OF INDUSTRY CA 91715-9907...
Need help?
Do you have a question about the Modernist Pro DOP36M94D and is the answer not in the manual?
Questions and answers