Will Burt POSITIONIT PI-150 Operator's Manual
Hide thumbs
Also See for POSITIONIT PI-150:
- Operator's manual (32 pages) ,
- Operator's manual (64 pages)
Table of Contents
Troubleshooting

Subscribe to Our Youtube Channel
Related Manuals for Will Burt POSITIONIT PI-150

Summary of Contents for Will Burt POSITIONIT PI-150
- Page 1 PI-150 (P/N: 5061001) AND PI-75 (P/N: 5191201) OPERATOR’S MANUAL The Will-Burt Company (PI-150 shown) 401 Collins Blvd Orrville, OH 44667 www.willburt.com TP-5129001-J, January 2022 © 2022 The Will-Burt Company...
- Page 3 PI-150 PI-75 OSITION Warranty Will-Burt warrants its PositionIt™ to be free from defects in material and workmanship for a period of two (2) years, with such time period running from the date of shipment by Will-Burt. Will-Burt shall not be responsible for any damage resulting to or caused by its products by reason of failure to properly install, maintain or store the product;...
- Page 4 PI-150 PI-75 OSITION Document History Document Numbers Dates Remarks TP-5219001-00 July 8, 2015 Initial Release. TP-5219001-A July 31, 2015 Added Section 1.7. Updated positioner name. Updated Table 1-1, Section 1.6.3 and Section 7. Simplified menu function references throughout Section 3. Removed Section 5 Reference.
-
Page 5: Table Of Contents
PI-150 PI-75 OSITION Table of Contents Section 1 Introduction ......................1-1 1.1 Safety Precautions ........................... 1-1 1.2 How this Manual is Organized ......................1-1 1.3 Additional Documentation ........................ 1-2 1.4 Definitions of Terms and Symbols ....................1-2 1.5 Specifications ........................... 1-4 1.6 Major Components ........................... - Page 6 PI-150 PI-75 OSITION Section 4 Maintenance ......................4-1 4.1 Routine Maintenance ........................4-1 4.2 Replacement Parts ........................... 4-1 Section 5 Troubleshooting ....................5-1 5.1 Troubleshooting Guide ........................5-1 5.2 Restoring Factory Defaults ....................... 5-3 5.2.1 CamID ............................5-3 5.2.2 MonID ............................5-3 5.2.3 Protocol .............................
- Page 7 PI-150 PI-75 OSITION Figure 2-14 PI-150 Payload Mounting Hole Pattern ................2-12 Figure 2-15 PI-75 Payload Mounting Hole Pattern ................. 2-13 Figure 3-1 Keyboard Keys ........................3-3 Figure 3-2 Menu Screen ........................... 3-4 Figure 5-1 Start Up Screen ........................5-3 Figure 5-2 Menu Screen ...........................
- Page 8 PI-150 PI-75 OSITION TP-5129001-J January 2022...
- Page 9 PI-150 PI-75 OSITION Safety Summary This section describes safety information for the PositionIt and its default joystick controller. These are recommended precautions that personnel must understand and apply throughout installation, operation, maintenance, and troubleshooting. Be sure to read and understand the entire manual before performing any procedure outlined in this manual.
- Page 10 PI-150 PI-75 OSITION Crush Hazard! Do not stand directly beneath the positioner or payload. Be certain payload is properly installed and secured. In locations or areas where the risk of injury occurs, or any part of the assembly may become detached or fall for any reason, a strong safety chain or wire hawser should be attached between the equipment and the mounting surface.
-
Page 11: Section 1 Introduction
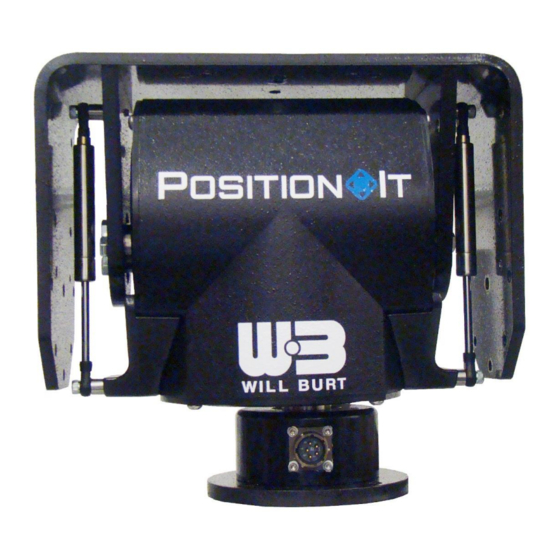
PI-150 PI-75 OSITION Section 1 Introduction Review this manual in its entirety. Contact the Will-Burt Company with any questions before performing any procedure outlined in this manual. The PositionIt™ system is a pan and tilt positioner system used as a platform for many different applications. -
Page 12: Additional Documentation
PI-150 PI-75 OSITION 1.3 Additional Documentation In addition to this manual, the controller ships with the controller manual. Reference this manual for additional information on the function of the controller. 1.4 Definitions of Terms and Symbols Throughout this manual, the following will be used: General Terms: •... -
Page 13: Figure 1-2 Positioner Directions (Pi-150 Shown)
PI-150 PI-75 OSITION • Stowed refers to a customer-set preset position which the positioner moves the payload to a desired pan and tilt position for travel or safe storage. The customer should set this as preset [1]. • Unstowed refers to a customer-set preset position which the positioner moves the payload to a desired pan and tilt position from the stowed position. -
Page 14: Specifications
PI-150 PI-75 OSITION 1.5 Specifications Table 1-1 lists specifications for the positioner. Table 1-2 lists specifications for the default joystick controller. Table 1-1 Positioner Specifications PI-150 PI-75 Payload Capacity 150 ft.-lb. (202 Nm) 75 ft.-lb. (101 Nm) Overall Height 11.32 in. (287.7 mm) 11.32 in. -
Page 15: Major Components
Contains an internal tether to prevent the pan and tilt head from separating from the mast in the event of an impact load separating the pan and tilt head from the base • Ships with the PositionIt PI-150 and PI-75 Operator’s Manual (this manual) Payload Platform... -
Page 16: Controller
PI-150 PI-75 OSITION 1.6.2 Controller The default joystick controller (P/N: 5098901) (Figure 1-4): • Controls pan and tilt functions • Is Pelco D compatible • Has a joystick, LCD Screen and a keyboard • Has programmable presets • Has programmable electronic limits •... -
Page 17: Power/Data Cable
PI-150 PI-75 OSITION 1.6.3 Power/Data Cable The power/data cable (Figure 1-5) consists of (2) power wires (16 AWG twisted pair) and (2) control wires (22 AWG twisted pair). The cable ships with a straight connector (PT06W14-5S) installed on one end and loose wires on the other end to allow for a Nycoil pull. The end with the loose wires can be cut if the customer requires a shorter length. -
Page 18: Positioner Power Supply
PI-150 PI-75 OSITION 1.6.4 Positioner Power Supply The positioner power supply (P/N: 208016) (Figure 1-6) is used in systems using 120 VAC (50 or 60 Hz) or 240 VAC (50 or 60 Hz) to convert the AC power to 24 VDC input power for the positioner. -
Page 19: Step Down Converter
PI-150 PI-75 OSITION 1.6.6 Step Down Converter The step down converter (P/N: 208017) (Figure 1-8) is used in systems with 24 VDC input power to step down the power to 12 VDC to power the default joystick controller if the AC power supply supplied with the joystick is not used to provide power. -
Page 20: Quick Overview
PI-150 PI-75 OSITION 1.7 Quick Overview This section provides a quick overview of the system. Be aware of and follow all associated precautions when performing these procedures. To install the positioner (Section 2 ): 1. Mount the positioner with (4) high-strength ⅜ in. or M8 stainless steel bolts and nuts. See Section 2.5 for additional detail and bolt pattern. -
Page 21: Section 2 Installation
PI-150 PI-75 OSITION Section 2 Installation This section describes the installation of the system and provides general procedures that must be followed to ensure a successful installation. 2.1 Pre-Installation Check Before installing the system: • Be sure to read and understand the entire installation procedure before beginning installation. -
Page 22: Installation Tools
• Controller • Controller Manual (ships with controller) • PositionIt PI-150 and PI-75 Operator’s Manual (this manual) • Power/Data Cable (used to connect positioner to the controller and the power supply) • Some combination of the following: o Positioner Power Supply (used in systems with AC input power) -
Page 23: Mounting The Positioner
PI-150 PI-75 OSITION 2.5 Mounting the Positioner When installing, the front of the positioner can be identified as the side of the positioner opposite of the side egress on the mounting pedestal while the positioner is in the home position (Figure 2-1). -
Page 24: Wiring The System
PI-150 PI-75 OSITION 2.6 Wiring the System This section discusses wiring the system assuming the default joystick controller (P/N: 5098901) is being used. 2.6.1 Positioner Plugs The positioner has (2) plug locations on the mounting pedestal for wiring. The side egress (Figure 2-3) on the mounting pedestal ships from the factory with a removable plug installed. -
Page 25: Figure 2-4 Carefully Pull Out The Removable Plug, Gasket, And Attached Wires
PI-150 PI-75 OSITION 3. Carefully pull away the removable plug and gently pull out the attached wires and gasket behind it (Figure 2-4). Gasket Wires Plug Connector Figure 2-4 Carefully Pull Out the Removable Plug, Gasket, and Attached Wires 4. Disconnect the wires from the positioner. The wires are connected to the positioner with a quick connect (Figure 2-5). -
Page 26: Figure 2-6 Remove The (4) Bolts Securing The Plug Plate
PI-150 PI-75 OSITION 5. Remove the (4) bolts securing the plug plate to the bottom of the mounting pedestal (Figure 2-6). Bolt Plug Plate Figure 2-6 Remove the (4) Bolts Securing the Plug Plate 6. Remove the plug plate and the gasket behind it (Figure 2-7). Set the gasket and plug plate aside. -
Page 27: Figure 2-8 Pull The Wires Out The Bottom Of The Positioner
PI-150 PI-75 OSITION 7. Pull the wires still in the positioner through the hole at the side egress. Figure 2-8 Pull the Wires out the Bottom of the Positioner 8. Reconnect the quick connect between the wires from the positioner and the plug making sure the gasket is in place. -
Page 28: Connecting Power And Controls
PI-150 PI-75 OSITION 10. Secure plug plate and its gasket at the side egress where the removable plug had previously been installed from the factory (Figure 2-10). If the gasket is not properly installed, the positioner will leak and become damaged voiding the warranty. Figure 2-10 Secure the Plug Plate and Gasket to the Side Egress 11. -
Page 29: Figure 2-11 Powered With 12 Vdc
PI-150 PI-75 OSITION If the input power supply is 12 VDC, the system will require: • A step up converter (P/N: 208012) from 12 VDC to 24 VDC to power the positioner • A connector (P/N: 5195601) to connect 12 VDC to the controller Figure 2-11 provides a quick overview of the wiring for a system powered with 12 VDC input. -
Page 30: Figure 2-12 Powered With 24 Vdc
PI-150 PI-75 OSITION Figure 2-12 provides a quick overview of the wiring for a system powered with 24 VDC input. (Optional) 24 VDC Step Up Power 2 Amp Fuse Converter Supply (P/N: 208012) Power Power Wires Wires Positioner Step Down Control Default Joystick Converter... -
Page 31: Figure 2-13 Powered With Vac
PI-150 PI-75 OSITION Figure 2-13 provides a quick overview of the wiring for a system powered with AC input. Positioner Power Supply 2 Amp Fuse (P/N: 208016) Power Power Wires Wires Positioner (Optional) Control Default Joystick Step Down Wires Controller Converter (P/N: 5098901) (P/N: 208017) -
Page 32: Mounting The Payload
PI-150 PI-75 OSITION 2.7 Mounting the Payload This section discusses mounting the payload. Safety Instruction – Mounting Instructions! Before operation, be certain the positioner is capable of resisting forces generated from all loading and environmental conditions including, but not limited to payload size and weight, sail size, and wind and ice loading. The mounting hardware must include proper means to resist vibration loosening such as thread-locking compound or locking hardware. -
Page 33: Setting Presets And Electronic Limit Stops
PI-150 PI-75 OSITION Figure 2-15 PI-75 Payload Mounting Hole Pattern 2.8 Setting Presets and Electronic Limit Stops As part of the installation process, the operator may wish to set preset positions or adjust the electronic limit stops. For information on how to do this, see: •... - Page 34 PI-150 PI-75 OSITION 2-14 TP-5129001-J January 2022...
-
Page 35: Section 3 Operation
PI-150 PI-75 OSITION Section 3 Operation This section describes the operation of the system. 3.1 Pre-Operation Check Before operating the system: • Be sure to read and understand the entire operation procedure before beginning operation. • Visually inspect the system for damage. If damage is apparent, do not use the system, and have it serviced prior to use. -
Page 36: Operation Tools
PI-150 PI-75 OSITION Entanglement Hazard! Ensure cables are not tangled and are free to play out as the mast is extended. Tangled cables can cause equipment damage. 3.2 Operation Tools Table 3-1 lists tools and materials recommended for operation Table 3-1 Tools and Materials Recommended for Operation Tools and Materials Safety Glasses Safety Gloves... -
Page 37: Keyboard
PI-150 PI-75 OSITION 3.3.1 Keyboard The controller contains functions and keys which are not used with the positioner. Keys (Figure 3-1) which are used for operation include: • [Menu] which is used to access menu functions • [Ent] (enter) which is used to make selections within the menu •... -
Page 38: Menu Functions
PI-150 PI-75 OSITION Panning and Tilting When moving the positioner with the joystick, arrows pointing in the direction of the movement will display in the lower right corner of the LCD screen. The greater the lean of the joystick, the faster the movement. -
Page 39: Presets
PI-150 PI-75 OSITION 3.3.4 Presets Preset positions can be stored to a preset number between (1) and (50). The controller comes from the factory with the preset [0] (zero) set to move the positioner to the mid-point of both the pan and tilt. In this position the tilt platform will be horizontal and the pan axis will be in the center position. -
Page 40: Electronic Limit Stops
PI-150 PI-75 OSITION 3.3.5 Electronic Limit Stops The positioner uses electronic limit stops. The positioner does not have mechanical hard stops. The positioner comes from the factory with electronic limit stops set to the maximum recommended pan and tilt. The limit stops can be adjusted through the controller, but it is not possible to remove the limit stops completely. -
Page 41: Restore Limit Stops With The Keyboard
PI-150 PI-75 OSITION 3.3.5.2 Restore Limit Stops with the Keyboard To restore the electronic limit stops to factory settings with the keyboard: 1. Press [Set]. 2. Press [N] where “N” represents the number which corresponds to the preset being restored. Reference Table 3-3 to determine which number to use to change each electronic limit stop. -
Page 42: Stowing The Positioner
PI-150 PI-75 OSITION 3.5 Stowing the Positioner The customer may desire to adjust preset position [1] before using this function. To stow the positioner: 1. Perform the pre-operation check (Section 3.1). 2. Press [1]. 3. Press [Pre]. The positioner will move to the preset stowed position. When moving to the stowed position, the positioner will first pan and then tilt. -
Page 43: Section 4 Maintenance
PI-150 PI-75 OSITION Section 4 Maintenance This section describes maintenance of the system. Be sure to read and understanding the entire maintenance procedure before beginning maintenance. 4.1 Routine Maintenance Maintain the positioner as follows: • Visually inspect to ensure the positioner is kept clean. •... - Page 44 PI-150 PI-75 OSITION TP-5129001-J January 2022...
-
Page 45: Section 5 Troubleshooting
PI-150 PI-75 OSITION Section 5 Troubleshooting This section describes troubleshooting of the system. Do not open the positioner. Opening the positioner will break the environmental seal and potentially cause improper stop limit settings. This will void the warranty. This troubleshooting guide assumes: •... -
Page 46: Table 5-2 Troubleshooting The Controller
PI-150 PI-75 OSITION Table 5-2 Troubleshooting the Controller Symptoms Possible Cause Remedy Cannot Access the Controller Menu The operator cannot The controller is not Power on the system. access the controller receiving power and the Check the schematics (Section 7). menu. -
Page 47: Restoring Factory Defaults
PI-150 PI-75 OSITION 5.2 Restoring Factory Defaults The system is designed to function using the factory defaults shown in Figure 5-1. This settings will display when the controller is powered on. If these defaults are changed, the system may not function properly. There is no single key or command sequence to reset all factory settings. CamID: 001 MonID: 001 Protocol:... -
Page 48: Protocol
PI-150 PI-75 OSITION 5.2.3 Protocol When the controller is powered on, the protocol will be displayed. The protocol should be Pelco D. If necessary, reset the protocol to Pelco D. A quick guide to resetting the protocol can be found in Table 5-3. Table 5-3 Resetting the Protocol 1. -
Page 49: Baud Rate
PI-150 PI-75 OSITION 5.2.4 Baud Rate When the controller is powered on, the baud rate will be displayed. The baud rate should be 2400 bps. If necessary, reset the baud rate to 2400. A quick guide to resetting the baud rate can be found in Table 5-4. - Page 50 PI-150 PI-75 OSITION TP-5129001-J January 2022...
-
Page 51: Section 6 Appendix
PI-150 PI-75 OSITION Section 6 Appendix This section contains the appendix for your system. Follow all precautions when installing and operating components discussed in this section. Contact the Will-Burt Company with any questions before performing any procedure outlined in this manual. 6.1 Communications Bridge Board Interface (optional) Will-Burt offers an optional communications bridge board interface (P/N: 5090411). -
Page 52: Figure 6-1 Contact Closure
PI-150 PI-75 OSITION Contact Closure Wires Figure 6-1 Contact Closure Table 6-1 Contact Closure Wires Wire Color Function Power+ 24 VDC (to switch) Brown Stow (preset 1) Orange Unstow (preset 2) Yellow Counter Clockwise Green Clockwise Blue Violet Down TP-5129001-J January 2022... -
Page 53: Set Stow And Unstow
PI-150 PI-75 OSITION 6.1.3 Set Stow and Unstow This section describes how to set the stow and unstow presets. 6.1.3.1 With a Push Button Controller With a push button controller: 1. Pan and tilt the positioner until it reaches the desired position. 2. -
Page 54: Panel Mount Controller Assembly (Optional)
PI-150 PI-75 OSITION 6.2 Panel Mount Controller Assembly (optional) Will-Burt offers an optional panel mount controller assembly (P/N: 4270601) for the positioner. The panel mount controller assembly requires the communications bridge board interface (P/N: 5090411) (section 6.1). Electronic limit stops cannot be programmed using the bridge board with contact switch arrangement. -
Page 55: Section 7 Drawings
PI-150 PI-75 OSITION Section 7 Drawings This section contains drawings of the system. TP-5129001-J January 2022... - Page 56 PI-150 PI-75 OSITION TP-5129001-J January 2022...
- Page 57 PI-150 PI-75 OSITION TP-5129001-J January 2022...
- Page 58 PI-150 PI-75 OSITION POSITION-IT 100 FT-LB POSITIONER 24 V BLK Drawing: 50610 TP-5129001-J January 2022...
- Page 59 PI-150 PI-75 OSITION TP-5129001-J January 2022...
- Page 60 PI-150 PI-75 OSITION POSITION-IT 50 FT-LB POSITIONER 24 V BLK Drawing: 51912 TP-5129001-J January 2022...
- Page 61 PI-150 PI-75 OSITION TP-5129001-J January 2022...
- Page 62 PI-150 PI-75 OSITION PositionIT Wiring Diagram 12 VDC Application Sheet 1 of 4 Drawing: WD-50610 TP-5129001-J January 2022...
- Page 63 PI-150 PI-75 OSITION TP-5129001-J January 2022...
- Page 64 PI-150 PI-75 OSITION PositionIT Wiring Diagram 24 VDC Application Sheet 2 of 4 Drawing: WD-50610 TP-5129001-J January 2022...
- Page 65 PI-150 PI-75 OSITION TP-5129001-J January 2022...
- Page 66 PI-150 PI-75 OSITION PositionIT Wiring Diagram 120/240 VAC Application Sheet 3 of 4 Drawing: WD-50610 7-10 TP-5129001-J January 2022...
- Page 67 PI-150 PI-75 OSITION TP-5129001-J 7-11 January 2022...
- Page 68 PI-150 PI-75 OSITION PositionIT Wiring Diagram Communications Bridge Board Sheet 4 of 4 Drawing: WD-50610 7-12 TP-5129001-J January 2022...
Need help?
Do you have a question about the POSITIONIT PI-150 and is the answer not in the manual?
Questions and answers