Table of Contents
Advertisement
Models:
WTC8002WCO
WTC10002WCO115V
WTC12002WCO115V
For more information on other great Koldfront products on the web, go to
To use the self-diagnostic tool, go to
V2.8 10142020
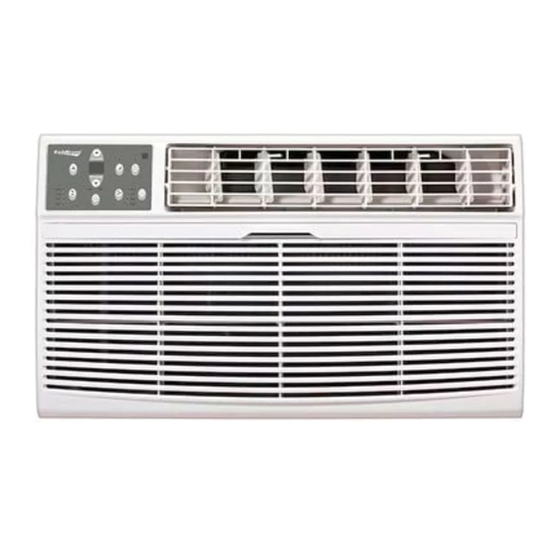
Through The Wall
Air Conditioner
Owner's Manual
https://support.edgestar.com
WTC10012WCO230V
WTC12012WCO230V
WTC14012WCO230V
www.koldfront.com
Advertisement
Table of Contents

Related Manuals for Koldfront WTC8002WCO


Summary of Contents for Koldfront WTC8002WCO
- Page 1 Through The Wall Air Conditioner Models: WTC8002WCO WTC10012WCO230V WTC10002WCO115V WTC12012WCO230V WTC12002WCO115V WTC14012WCO230V Owner’s Manual For more information on other great Koldfront products on the web, go to www.koldfront.com To use the self-diagnostic tool, go to https://support.edgestar.com V2.8 10142020...
- Page 2 Important Safety Information Warning: The water produced by the window AC is not potable or suitable for drinking. Do not drink the water drained from the unit as it contains contaminates and could make you sick. Improper handling can cause serious damage to the appliance and/or to the user. Please read the following safety information Electrical Safety •...
-
Page 3: Operation Of Safety Plug
Operation of Safety Plug Note: Electrical products should not be disposed of with household waste. Please contact your local recycling center for more information on how to recycle electronic waste. Your air conditioner is supplied with a Leakage-Current Detection and Interruption (LCDI) safety plug. -
Page 4: Table Of Contents
Completing Installation ..............................10 Alternate and Supplemental Installation Instructions ....................11 Install Rear Louver Panel / Grille Directly on Back of Air Conditioner ................11 Non-Koldfront Wall Sleeve Types ..........................11 CONTROL PANEL OPERATIONS ..........................12 Using the Control Panel ..............................12 To Turn Unit on: ................................ - Page 5 TROUBLESHOOTING TIPS ............................20 SPECIFICATIONS ................................ 22 EDGESTAR LIMITED WARRANTY ..........................23...
-
Page 6: Introduction
Introduction Thank you for purchasing this Koldfront by EdgeStar air conditioner. We hope that this purchase will be the beginning of a lasting and rewarding relationship between you and EdgeStar. We will provide the customer support and exemplary products necessary to nurture that relationship. -
Page 7: Parts Identification
Parts Identification Air Conditioner Unit Wall Sleeve (purchased or provided separately) -
Page 8: Preparations For Installation
Tools You May Need: • Flat Screwdriver or Putty Knife • Phillips Screwdriver • Tape Measure • Level • Drill Parts Supplied: The parts below are intended to be used in conjunction with a Koldfront branded Wall Sleeve. Part Name... -
Page 9: Installation Instructions
• Attach Front Frame pieces Before Getting Started Your Koldfront though the wall air conditioner is designed to be installed in conjunction with a wall sleeve. If you are installing your new Koldfront air conditioner into an existing wall sleeve, please check to confirm that the wall sleeve is in sound structural condition and that is sized appropriately to accommodate your Koldfront air conditioner. -
Page 10: Preparing The Wall Sleeve
Koldfront’s line of through the wall air conditioners and can be purchased at www.edgestar.com. To properly install your new Koldfront Through The Wall Air Conditioner into a wall sleeve, it is required that you use the Rear Louver Panel / Grille that was shipped with your new air conditioning unit. -
Page 11: Rear Louver Panel / Grille Installation Into Wall Sleeve Diagram
Also, please note that when aligned as instructed above, the holes in the louver panel / grille will properly line up to the holes in the Koldfront wall sleeve. If you are unable to secure the Rear Panel Louver / Grille to the wall sleeve, it may be attached directly to the rear of the air conditioning unit. -
Page 12: Attach Seals And Support Blocks To Wall Sleeve
Important: The below instructions are to be used in conjunction with the Koldfront Wall Sleeve model WTCSLV. Instructions for other compatible wall sleeves can be found in the “Alternate... -
Page 13: Prepare Ground Wire
If using the Koldfront wall sleeve (model WTCSLV), the hole should be pre-drilled for you. Also, please note that additional fastener types may have been included and may be used to suit your particular installation setup. -
Page 14: Install Air Conditioner Unit Into Wall Sleeve
Install Air Conditioner Unit into Wall Sleeve With the wall sleeve fully prepared, you are now ready to insert the air conditioner unit into the wall sleeve. Two or more people may be required for this step. 1. Remove the cabinet screw on the left lower side of the air conditioner cabinet. Set aside and/or discard the plastic washer. -
Page 15: Completing Installation
Completing Installation With the air conditioner installed into the Wall Sleeve and the ground wire properly attached, it is time to complete installation by inserting the Main Insulating Seal (stuffer seal) and attaching the Trim Frame. 1. Locate the Main Insulating Seal (stuffer seal) included with the installation kit. This is the longest seal and measures 1”... -
Page 16: Alternate And Supplemental Installation Instructions
5. Install the unit into the sleeve. Non-Koldfront Wall Sleeve Types The below diagrams may be used as a reference when installing your Koldfront Through The Wall Air Conditioner into a non-Koldfront branded Wall Sleeve. Regardless of brand, please ensure that your wall sleeve is securely installed into the wall opening and is properly sealed. -
Page 17: Control Panel Operations
Control Panel Operations On/Off Energy Saver Timer Mode Check Filter Fan Speed Sleep Temp/Timer Up Temp/Timer Down Using the Control Panel To Turn Unit on: Press the On/Off button Note-The Energy Saver feature will automatically turn on in “Cool”, “Dry”, and “Auto” mode. To Change Temperature: Press or hold either the Up or Down... -
Page 18: To Select Operating Mode
To Select Operating Mode: To choose the operating mode press the Mode button . Each time you press the button a mode is selected in a sequence that goes from Auto, Cool, Dry, to Fan. The indicator light beside the Mode button will be illuminated and remain on once the mode is selected. To Operate in Auto Mode: •... -
Page 19: To Use Timer (Auto Start/Stop) Feature
To Use Timer (Auto Start/Stop) Feature: • When the unit is on or off, press the Timer button and the “Timer On” indicator light illuminates. It indicates that the Auto Start/Stop program is initiated. • To switch to off press the Timer button again and the “Timer Off”... -
Page 20: Air Directional Louvers
Air Directional Louvers: The 4-way air directional louvers allow you to direct the air flow Up, Down, Left, and Right throughout the room as needed. To adjust the air directional louvers side to side use the center handles as you move side to side. Pivot the louvers by pressing with your fingers until the desired airflow direction is obtained. -
Page 21: Remote Operations
Remote Operations Warning: • This product contains a lithium button/coin cell battery which is a potential Chemical Burn Hazard. Keep away from children. • Always completely secure the battery compartment. If the battery compartment does not close securely, stop using the product, remove the batteries, and keep away from children. If a new or used lithium button/coin cell battery is swallowed or enters the body, it can cause severe internal burns and can lead to death in as little as 2 hours. -
Page 22: Additional Notes On Remote Operations
Additional Notes on Remote Operations • The remote control has an operating range of 16 ft from the appliance. • The remote signal receiver/sensor is located on the control panel of the air conditioner. • Reception of signal commands is confirmed by an audible beep. •... -
Page 23: Maintenance
Maintenance Clean the air conditioner and filters regularly to maximize performance and efficiency, and prolong the unit’s life. Be sure to always unplug the air conditioner from the power outlet before cleaning. Air Filter Cleaning The air filter should be checked at least once a month to see if cleaning is necessary. Trapped particles in the filter can build up, preventing proper air flow and potentially resulting in an accumulation of frost on the cooling coils. -
Page 24: Cabinet Cleaning
Cabinet Cleaning • Be sure to unplug the air conditioner to prevent shock or fire hazard. The cabinet and front may be dusted with an oil-free cloth or washed with a cloth dampened in a solution of warm water and mild dishwashing detergent. Rinse thoroughly and wipe dry. •... - Page 25 Troubleshooting Tips Follow the troubleshooting guide below to resolve common issues. Issue Possible Cause Solution My air conditioner is not The wall plug is disconnected. Make sure the unit is plugged functioning at all. The LCDI power cord is Press the Reset button on the tripped.
- Page 26 Troubleshooting Tips Continued… Issue Possible Cause Solution The air conditioner is cooling but The front of the unit is blocked Clear any blockage in front of the room is too warm. NO ice is by drapes, blinds, furniture, or the unit. forming on the cooling coil other objects that restrict air behind the decorative front.
- Page 27 76.1 lbs ” WCO230V 11700 21.87 oz x 14 60Hz 230V / ” x 20 ” WTC14012 14000 / R410A 208V 6-15P 6.9 / 7.5 75.2 lbs ” WCO230V 13600 21.52 oz x 14 60Hz WTC8002WCO WTC10012WCO230V WTC10002WCO115V WTC12012WCO230V WTC12002WCO115V WTC14012WCO230V...
- Page 28 EdgeStar Limited Warranty Full Two-Year Parts and Labor This product is warrantied by EdgeStar and is subject to any conditions set forth as follows: WHAT IS COVERED: For a period of TWO (2) YEARS from the date of original retail purchase, EdgeStar will repair or replace any part free of charge, including labor, that fails due to a defect in materials or workmanship.
Need help?
Do you have a question about the WTC8002WCO and is the answer not in the manual?
Questions and answers
I see water in the pan but never see it drip out the back, where is the hole the water is supposed to escape out of?