Koldfront WAC8001W Owner's Manual
Window air conditioner
and heater
Hide thumbs
Also See for WAC8001W:
- Owner's manual (23 pages) ,
- Installation instructions manual (10 pages) ,
- Service manual (31 pages)

Related Manuals for Koldfront WAC8001W


Summary of Contents for Koldfront WAC8001W
- Page 1 Window Air Conditioner and Heater WAC8001W / WAC12001W Owner’s Manual For more information on other great EdgeStar products on the web, go to http://www.edgestar.com...
-
Page 2: Important Safety Information
Important Safety Information Improper handling can cause serious damage to the appliance and/or to the user. Please read the following safety information. Electrical Safety Make sure your hands are dry before operating the unit. Do not wet the front housing or control panel. ... - Page 3 Do not use the TEST and RESET buttons as an ON/OFF switch. Electrical products should not be disposed of with household waste. Please contact your local recycling center for more information on how to recycle electronic waste. Koldfront Window Air Conditioner...
-
Page 4: Table Of Contents
Table of Contents IMPORTANT SAFETY INFORMATION ..............I ................PERATION OF AFETY TABLE OF CONTENTS ..................III INTRODUCTION ....................1 PARTS IDENTIFICATION ..................2 ......................2 ....................... 2 RONT PREPARATIONS FOR INSTALLATION .............. 3 : ....................3 ARTS UPPLIED WINDOW INSTALLATION INSTRUCTIONS ............4 .......... -
Page 5: Introduction
Introduction Thank you for purchasing this Koldfront by EdgeStar window air conditioner. We are glad you chose us. We believe that your purchase of this product opens a relationship between you and EdgeStar. We will provide the customer support needed to nurture that relationship. -
Page 6: Parts Identification
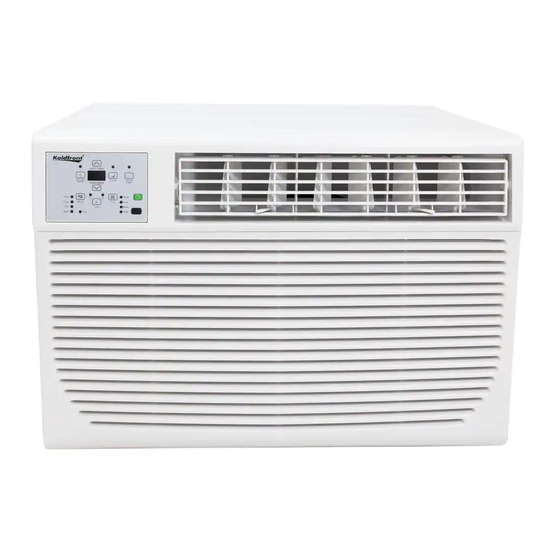
Side View Control Panel Air Outlet Front Air Intake Panel Side and Back Vent Front View Top Channel CAUTION: Make sure the drain plug is firmly installed before using the unit to Side Curtains prevent leaking. Koldfront Window Air Conditioner... -
Page 7: Preparations For Installation
Preparations for Installation Tools Needed: NOTE: To avoid risk of injury and/or product/property damage, please take the following precautions: Flat Screwdriver Two or more people are needed to properly handle and install. Phillips Screwdriver Use proper lifting and carrying techniques. Tape Measure Before installation, make sure to inspect the window and sill are Level... -
Page 8: Window Installation Instructions
3. Using the indicated screws in figure below attach the top channel to the air conditioner cabinet. A. # 10 x ¼” Phillips Screw B. Top Channel Koldfront Window Air Conditioner... -
Page 9: Attaching Foam Adhesive
4. To attach the side curtains to the air conditioner, insert the right-hand curtain connector tab into the curtain housing channels on the air conditioner. A. Side Curtain 5. Insert the top of the right-hand curtain housing to the top curtain channel as shown below: Top View: A. -
Page 10: Installing Cabinet Into Window
Place two safety locks into the holes that are located at the bottom of the cabinet and drive two locking screws through the safety locks into the cabinet as shown below. A. #10 x ¾“ Phillips Screw B. Safety Locks (Only for Vinyl Windows) Koldfront Window Air Conditioner... -
Page 11: Attach Side Curtains To Window Frame
3. Check that the air conditioner cabinet is tilted back about 1 ⅛” to 1 ½“, which should be about 3-4 degrees downward to the outside. After proper installation, condensation should not drain from the overflow drain hole during normal use, correct slope or otherwise. -
Page 12: Completing Installation
7. Attach bottom front of panel with the front panel screws. 8. Plug into a grounded 3-prong outlet. 9. Press “Reset” on power cord supply. 10. Press the on/off button to power on the unit. Read control panel operations section for proper use. Koldfront Window Air Conditioner... -
Page 13: Control Panel Operations
Control Panel Operations On/Off Energy Saver Timer Mode Check Filter Fan Speed Sleep Temp/Timer Up Using the Control Panel Temp/Timer Down To Turn Unit on: Press On/Off Button. NOTE- The Energy Saver feature will automatically turn on in “Cool”, “Dry”, and “Auto” mode. To Change Temperature: Press or hold either Up or Down... -
Page 14: To Operate In Fan Only
“Timer On” indicator light illuminates. It indicates the Auto Start program is initiated. To switch to off press the Timer button again and the “Timer Off” indicator light illuminates. It indicates the Auto Stop program is initiated. Koldfront Window Air Conditioner... -
Page 15: To Check Filter Feature
Press or hold the Up or Down to change the Auto Time by ½ hour increments up to 10 hours or 1 hour increments up to 24 hours. The control will count down the time remaining until start. The selected time will register in five (5) seconds and the system will automatically revert back to display the previous temperature setting or room temperature when the unit is on. -
Page 16: Additional Tips
The control is capable of displaying the temperature in degrees Fahrenheit or degrees Celsius. To convert from one to the other, press and hold the Up and Down Temp/Timer buttons at the same time for 3 seconds Koldfront Window Air Conditioner... -
Page 17: Remote Operationsmaintenance
Remote Operations MODE button- Press ON/OFF button- this button to select Select to turn unit desired operation off and on. mode from AUTO, COOL, DRY, HEAT, and FAN. TEMP UP button- Push this button to increase the TEMP DOWN button – MODE temperature setting in Push this button to... -
Page 18: Air Filter Cleaning
Never use harsh cleaners, wax, or polish on the cabinet front. Be sure to wring excess water from the cloth before wiping around the controls. Excess water in or around the controls may cause damage to the air conditioner. Koldfront Window Air Conditioner... -
Page 19: Normal Sounds
Normal Sounds High Pitched Chatter- High efficiency compressors may have a high pitched chatter during the cooling cycle. Sound of Rushing Air- At the front of the unit, you may hear the sound of rushing air being moved by the fan. ... -
Page 20: Troubleshooting
High setting. decorative front. Air directional louvers Position louvers for better positioned improperly air distribution. Front of unit is blocked Clear blockage in front of by drapes, blinds, unit. furniture, etc., restricts air distribution Koldfront Window Air Conditioner... - Page 21 Issue Possible Cause Solution Air conditioner is cooling Open doors, windows, Open = cold air but room is too warm, NO etc. escapes. Close doors, ice is forming on cooling windows, etc. coil behind decorative Unit recently turned on Allow additional time to remove “stored heat”...
-
Page 22: Specifications
Color White White Coolant R410A: 13.4 oz. R410A: 22.22 oz. Timer 24 Hour 24 Hour 22.6” x 23.0” x 16.1” 22.6” x 23.0” x 16.1” Dimensions W x D x H Weight 70.5 lbs. 88.4 lbs. Koldfront Window Air Conditioner... -
Page 23: Edgestar Limited Warranty
EdgeStar Limited Warranty One (1) Year Parts & Ninety (90) Days Labor This product is warranted by EdgeStar to be free from defective workmanship and materials, subject to any conditions set forth as follows: WHAT IS COVERED: LABOR: For a period of NINETY (90) DAYS from the date of original purchase, labor will be performed free of charge at an authorized EdgeStar repair facility. - Page 24 Register your product, download owner’s manuals, access additional troubleshooting resources, and obtain more information on other great EdgeStar & Koldfront products on the web at: http://www.edgestar.com Product contents and specifications may change without notice. Copyright © 2014 Living Direct, Inc.
Need help?
Do you have a question about the WAC8001W and is the answer not in the manual?
Questions and answers