Koldfront WAC8001W Owner's Manual
Window air conditioner
with supplemental
heater
Hide thumbs
Also See for WAC8001W:
- Owner's manual (24 pages) ,
- Installation instructions manual (10 pages) ,
- Service manual (31 pages)
Table of Contents
Advertisement
Advertisement
Table of Contents

Related Manuals for Koldfront WAC8001W


Summary of Contents for Koldfront WAC8001W
- Page 1 Window Air Conditioner with Supplemental Heater WAC8001W / WAC12001W Owner’s Manual For more information on other great EdgeStar products on the web, go to http://www.edgestar.com To use the EdgeStar self-diagnostic tool, go to https://support.edgestar.com V2.2-06232017...
-
Page 2: Important Safety Information
Important Safety Information Warning: The water produced by the window AC is not potable or suitable for drinking. Do not drink the water drained from the unit as it contains contaminates and could make you sick. Improper handling can cause serious damage to the appliance and/or to the user. Please read the following safety information Electrical Safety •... -
Page 3: Operation Of Safety Plug
Operation of Safety Plug Note: Electrical products should not be disposed of with household waste. Please contact your local recycling center for more information on how to recycle electronic waste. Your window air conditioner is supplied with a Leakage-Current Detection and Interruption (LCDI) safety plug. -
Page 4: Table Of Contents
Table of Contents IMPORTANT SAFETY INFORMATION ......................... I OPERATION OF SAFETY PLUG…….......................... II TABLE OF CONTENTS………………......................... III INTRODUCTION………………………........................... 1 PARTS IDENTIFICATION…………..........................2 ……………………………………........................2 ………………………………………......................2 RONT PREPARATIONS FOR INSTALLATION ........................3 ………………………………........................3 ARTS UPPLIED WINDOW INSTALLATION INSTRUCTIONS ........................ -
Page 5: Introduction
Introduction Thank you for purchasing this Koldfront by EdgeStar window air conditioner. We hope that this purchase will be the beginning of a lasting and rewarding relationship between you and EdgeStar. We will provide the customer support and exemplary products necessary to nurture that relationship. -
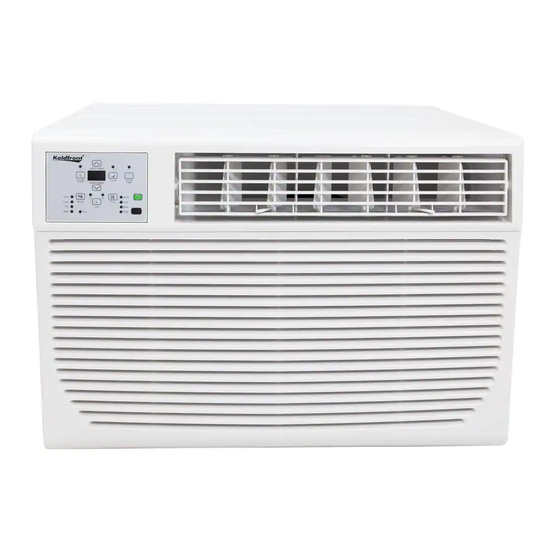
Page 6: Parts Identification
Parts Identification CAUTION: Make sure the drain plug is firmly installed before using the unit to prevent leaking. Side View Front View... -
Page 7: Preparations For Installation
Preparations for Installation Note: You may need to contact your electrician if your room’s circuit is not able to power your unit. Note: To avoid risk of injury and/or product/property damage, please take the following precautions: - Two or more people are needed to properly handle and install. - Use proper lifting and carrying techniques. -
Page 8: Window Installation Instructions
Window Installation Instructions Note: When choosing your window make sure power supply cord is within 4 feet of a grounded 3- prong outlet. Preparing the unit for Window Installation Remove the Air Conditioner Unit from Cabinet 1. Remove the air conditioner from the carton and place on cardboard. 2. -
Page 9: Attaching Foam Adhesive
4. To attach the side curtains to the air conditioner, insert the right-hand curtain connector tab into the curtain housing channels on the air conditioner. A. Side Curtain 5. Insert the top of the right-hand curtain housing into the top curtain channel as shown below: A. -
Page 10: Installing Cabinet Into Window
Installing Cabinet into Window Note: When choosing your window make sure the power supply cord is within 4 feet of a grounded 3-prong outlet. Follow the steps listed below to install the cabinet into the window. 1. Center empty cabinet into window: •... -
Page 11: Attach Side Curtains To Window Frame
3. Check that the air conditioner cabinet is tilted back about 1 ⅛” to 1 ½“, which should be about 3-4 degrees downward to the outside. After proper installation, condensation should not drain from the overflow drain hole during normal use, correct slope or otherwise. Attach Side Curtains to Window Frame 1. -
Page 12: Completing Installation
Completing Installation 1. Insert the window sash seal (C) behind the top of the lower window sash and against the glass of the upper window (B). 2. Place the window-lock bracket (A) on top of lower window and against upper window sash on right side of the window. -
Page 13: Control Panel Operations
Control Panel Operations On/Off Energy Saver Timer Mode Check Filter Fan Speed Sleep Temp/Timer Up Temp/Timer Down Using the Control Panel To Turn Unit on: Press the On/Off Button Note-The Energy Saver feature will automatically turn on in “Cool”, “Dry”, and “Auto” mode. To Change Temperature: Press or hold either the Up or Down... -
Page 14: To Select Operating Mode
To Select Operating Mode: To choose the operating mode press Mode . Each time you press this button a mode is selected in a sequence that goes from Auto, Cool, Dry, Heat, to Fan. The indicator light beside the mode button will be illuminated and remain on once the mode is selected. Note: Heat function is intended to provide supplemental heating in addition to an existing heat source. -
Page 15: To Use The Sleep Feature
To Use the Sleep Feature: To initiate, press the Sleep button . In this mode the selected temperature will increase (cooling) or decrease (heating) by 2°F (1°C) 30 minutes after the mode is selected. The temperature will then increase (cooling) or decrease (heating) by another 2°F (1°C) after an additional 30 minutes. -
Page 16: Air Directional Louvers
Air Directional Louvers: The 4-way air directional louvers allow you to direct the air flow Up, Down, Left, and Right throughout the room as needed. To adjust the air directional louvers side to side use the center handles as you move side to side. Additional Tips: The “Cool”... -
Page 17: Remote Operations
Remote Operations... -
Page 18: Maintenance
Maintenance Clean the air conditioner and filters regularly to maximize performance and efficiency, and prolong the unit’s life. Be sure to always unplug the air conditioner from the power outlet before cleaning. Air Filter Cleaning The air filter should be checked at least once a month to see if cleaning is necessary. Trapped particles in the filter can build up and cause an accumulation of frost on the cooling coils. -
Page 19: Cabinet Cleaning
Cabinet Cleaning • Be sure to unplug the air conditioner to prevent shock or fire hazard. The cabinet and front may be dusted with an oil-free cloth or washed with a cloth dampened in a solution of warm water and mild dishwashing detergent. Rinse thoroughly and wipe dry. •... -
Page 20: Troubleshooting
Troubleshooting Follow the troubleshooting guide below to resolve common issues. Issue Possible Cause Solution My air conditioner is not The wall plug is disconnected. Make sure the unit is plugged functioning at all. The LCDI power cord is Press the Reset button on the tripped. - Page 21 Issue Possible Cause Solution The air conditioner is cooling but The air directional louvers are Reposition the louvers for the room is too warm. NO ice is positioned improperly. better air distribution. forming on the cooling coil The front of the unit is blocked Clear any blockage in front of behind the decorative front.
-
Page 22: Specifications
Specifications Description of Product Window Air Conditioner with Window Air Conditioner with Supplemental Heater Supplemental Heater Model WAC8001W WAC12001W Voltage / Frequency 115V / 60Hz 208-230V / 60Hz BTUs (cooling / heating) 8000 / 3500 12,000 / 11,000 Current (cooling / heating) 6.3A / 11.6A... -
Page 23: Edgestar Limited Warranty
EdgeStar Limited Warranty Full Two-Year Parts and Labor This product is warrantied by EdgeStar and is subject to any conditions set forth as follows: WHAT IS COVERED: For a period of TWO (2) YEARS from the date of original retail purchase, EdgeStar will repair or replace any part free of charge, including labor, that fails due to a defect in materials or workmanship.
Need help?
Do you have a question about the WAC8001W and is the answer not in the manual?
Questions and answers