Table of Contents
Advertisement
Quick Links
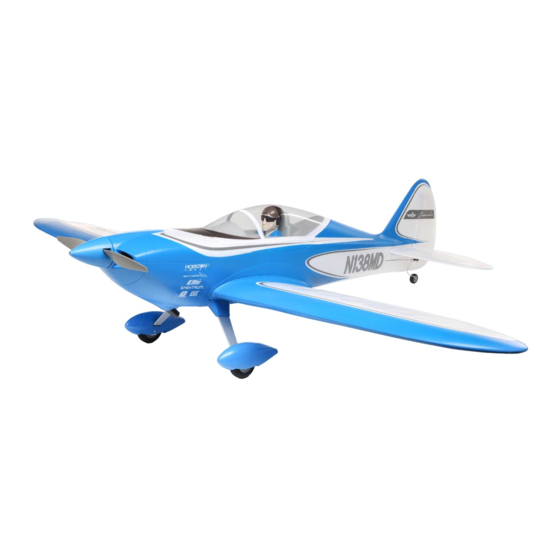
Commander mPd 1.4m
Scan the QR code and select the Manuals and Support quick links from the
product page for the most up-to-date manual information.
Scannen Sie den QR-Code und wählen Sie auf der Produktseite
die Quicklinks Handbücher und Unterstützung, um die aktuellsten
Informationen zu Handbücher.
Scannez le code QR et sélectionnez les liens rapides Manuals and Support
sur la page du produit pour obtenir les informations les plus récentes sur
le manuel.
Scannerizzare il codice QR e selezionare i Link veloci Manuali e Supporto
EFL14850
EFL14875
dalla pagina del prodotto per le informazioni manuali più aggiornate.
Instruction Manual
Bedienungsanleitung
Manuel d'utilisation
Manuale di Istruzioni
Advertisement
Table of Contents
Troubleshooting

Related Manuals for Horizon Hobby E-flite Commander mPd 1.4m


Summary of Contents for Horizon Hobby E-flite Commander mPd 1.4m
- Page 1 Commander mPd 1.4m Scan the QR code and select the Manuals and Support quick links from the product page for the most up-to-date manual information. Scannen Sie den QR-Code und wählen Sie auf der Produktseite die Quicklinks Handbücher und Unterstützung, um die aktuellsten Informationen zu Handbücher.
- Page 2 This product is not intended for use by children without direct adult supervision. Do not use with incompatible components or alter this product in any way outside of the instructions provided by Horizon Hobby, LLC. This manual contains instructions for safety, operation and maintenance.
-
Page 3: Table Of Contents
Included / Recommended Equipment Specifications 55.12 in (1400 mm) Motor: 3720-800Kv Brushless Outrunner Motor, 14 pole Included Included (SPMXAM2500) ESC: Avian 45 Amp Brushless ESC 3-4S (SPMXAE45A) Installed Installed Servos: Aileron, Rudder, Elevator, Flaps: A332 9g Sub-Micro MG Servo; Installed Installed (240mm Lead). -
Page 4: Transmitter Setup
Transmitter Setup Computerized Transmitter Setup WARNING: If your transmitter allows it, enable the throttle cut feature. Always engage throttle cut before approaching the aircraft. Start all transmitter programming with a blank ACRO model (perform a model reset), then name the model. IMPORTANT: After you set up your model, always rebind the transmitter and 2 Position switch 3 Position switch... -
Page 5: Pnp Receiver Selection And Installation
PNP Receiver Selection and Installation The recommended receiver for this aircraft is the Spektrum AR631. If you choose to AR631 Port install a different receiver, ensure that it is at least a 6-channel full range receiver. Assignments Refer to the manual of your chosen receiver for correct installation and operation instructions. -
Page 6: Battery Installation And Esc Arming
Battery Installation and ESC Arming Battery Selection We recommend the Spektrum 2200mAh 14.8V 4S 30C Li-Po battery (SPMX22004S30). Refer to the Optional Parts List for other recommended batteries. If using a battery other than those listed, the battery should be within the range of capacity, dimensions and weight of the Spektrum Li-Po battery packs to fit in the fuselage. -
Page 7: Binding
Binding General Binding Tips and Failsafe • The included receiver has been specifically programmed • Once bound, the receiver will retain its bind settings for operation of this aircraft. Refer to the receiver manual for that transmitter until you re-bind. for correct setup if the receiver is replaced. -
Page 8: Safe ® Select Switch Designation Bnf
SAFE Select Switch Designation BNF ® Stick Inputs Assigning a Switch 1. Power on the transmitter. Once SAFE Select is enabled, you can choose to fly in SAFE mode full-time, or assign a switch. Any switch on any channel between 5 and 9 can be used on your 2. -
Page 9: Factory Installed Propeller Removal
Factory Installed Propeller Removal CAUTION: Before connecting a flight battery and binding to a transmitter, remove the factory installed propeller. 1. Remove the spinner screw (M3 x 30mm) (A) and spinner (B). Put the shaft of a tool (for example, a screw driver) in the hole in the side of the spinner nut (C). Turn the spinner nut counter clockwise to loosen and remove. - Page 10 Horizontal Tail Installation 1. Slide the horizontal stabilizer joiner tube (A) into the hole in the fuselage. 2. Slide the left and right horizontal tail halves (B) over the joiner tube and into place in the fuselage. Ensure the control horn faces down. 3.
-
Page 11: Install The Propeller
Wing Installation IMPORTANT: Integrated servo connectors are in the wing and fuselage. Ensure that they slide together correctly. 1. Insert the wing joiner tube (10mm x 585mm) into one of the wings and slide into the hole in the fuselage. 2. -
Page 12: Control Direction Test
Control Direction Test Switch on the transmitter and connect the battery. Use the transmitter to operate Transmitter Command Control SurfaceResponse the aileron, elevator and rudder controls. View the aircraft from the rear when checking the control directions. The BNF Basic version of this model has a built in aileron to rudder mix, when the ailerons are deflected the rudder will move. -
Page 13: As3X Response Test
AS3X Response Test This test ensures that the AS3X ® control system is functioning properly. Aircraft movement AS3X Reaction Assemble the aircraft and bind your transmitter to the receiver before performing this test. 1. Raise the throttle just above 25%, then lower the throttle to activate AS3X. CAUTION: Keep all body parts, hair and loose clothing away from a moving propeller, as these items could become entangled. -
Page 14: Control Horn And Servo Arm Factory Settings
Flaps Flaps Control Horn and Servo Arm Factory Settings The table to the right shows the factory settings for the control horns and servo Control Horns Servo Arms arms. Fly the aircraft at factory settings before making changes. Flaps Elevator Elevator Elevator Flaps... -
Page 15: Safe Select Flying Tips Bnf
SAFE Select Flying Tips BNF Differences between SAFE Select and AS3X modes When flying in SAFE Select mode the aircraft will return to level flight any time the aileron and elevator controls are at neutral. Applying aileron or elevator control This section is generally accurate but does not take into account flight speed, will cause the airplane to bank, climb or dive. -
Page 16: Motor Service
Motor Service CAUTION: Always disconnect the flight battery before performing motor service. Disassembly 1. Remove the spinner screw (M3 x 30mm) (A) and the spinner (B). 2. Use a tool to remove the spinner nut (C), and then remove the propeller (D), spinner backplate (E), hub (F), and collet (G), from the motor shaft. -
Page 17: Troubleshooting Guide As3X
Troubleshooting Guide AS3X Problem Possible Cause Solution Damaged propeller or spinner Replace propeller or spinner Imbalanced propeller Balance the propeller. Motor vibration Replace parts or correctly align all parts and tighten fasteners as needed Oscillation Loose receiver Align and secure receiver in fuselage Loose aircraft controls Tighten or otherwise secure parts (servo, arm, clevis, horn and control surface) Worn parts... -
Page 18: Troubleshooting Guide Continued
Troubleshooting Guide Continued Problem Possible Cause Solution ESC uses default soft Low Voltage Cutoff (LVC) Recharge flight battery or replace battery that is no longer performing Weather conditions might be too cold Postpone flight until weather is warmer Motor power pulses then motor loses power Battery is old, worn out, or damaged Replace battery... -
Page 19: Important Federal Aviation Administration (Faa) Information
This warranty gives you specific legal rights, and you may also have other rights which of the Product, (iv) attempted service by anyone other than a Horizon Hobby authorized vary from state to state. Horizon reserves the right to change or modify this warranty service center, (v) Product not purchased from an authorized Horizon dealer, (vi) at any time without notice. -
Page 20: Contact Information
Horizon Technischer Service service@horizonhobby.de Hanskampring 9 European Union D 22885 Barsbüttel, Germany Sales: Horizon Hobby GmbH +49 (0) 4121 2655 100 FCC Information FCC ID:BRWSPMSR6200A NOTE: This equipment has been tested and found to comply with the limits for a Class B digital device, pursuant to part 15 of the FCC Rules. These limits are Supplier’s Declaration of Conformity... -
Page 21: Compliance Information For The European Union
It should be deposited at an appropriate facility to enable recovery and recycling. EFL Commander mPd 1.4M BNF Basic (EFL14850); Hereby, Horizon Hobby, EU Manufacturer of Record: LLC declares that the device is in compliance with the following: EU Radio... - Page 22 E-flite, Avian, Plug-N-Play, Bind-N-Fly, BNF, the BNF logo, DSM, DSM2, DSMX, Spektrum AirWare, EC3, IC3, IC5, AS3X, SAFE, the SAFE logo, the Smart Technology logo, ModelMatch, and the Horizon Hobby logo are trademarks or registered trademarks of Horizon Hobby, LLC.
Need help?
Do you have a question about the E-flite Commander mPd 1.4m and is the answer not in the manual?
Questions and answers