
Related Manuals for Horizon Hobby UMX MiG 15 DF


Summary of Contents for Horizon Hobby UMX MiG 15 DF
- Page 1 ™ MiG 15 DF Instruction Manual Bedienungsanleitung Manuel d’utilisation Manuale di Istruzioni SAFE ® Select Technology, Optional Flight Envelope Protection...
- Page 2 NOTICE All instructions, warranties and other collateral documents are subject to change at the sole discretion of Horizon Hobby, LLC. For up-to-date product literature, visit www.horizonhobby.com and click on the support tab for this product. Meaning of Special Language The following terms are used throughout the product literature to indicate various levels of potential harm when...
-
Page 3: Table Of Contents
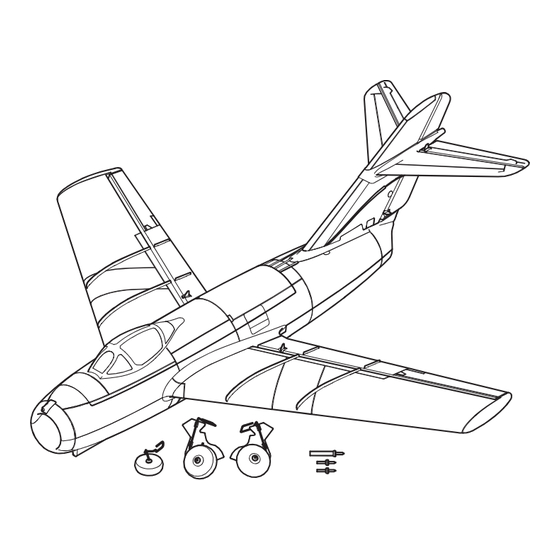
Box Contents Table of Contents Specifi cations ..............3 Control Direction Test ............8 Components ..............3 Flying Tips and Repairs ............. 9 Prefl ight Checklist ............. 4 Post Flight Checklist ............9 Installing the Optional Landing Gear ........4 Service of Power Components ........ -
Page 4: Prefl Ight Checklist
Prefl ight Checklist 1 Remove and inspect contents. 8 Bind the aircraft to your transmitter. 2 Read the instruction manual thoroughly. 9 Make sure all linkages move freely. 3 Charge the fl ight battery. 10 Perform the control direction test. 4 Install the optional landing gear. -
Page 5: Transmitter Setup
Transmitter Setup IMPORTANT: After you set up your model, always rebind Computerized Transmitter Setup the transmitter and receiver to set the desired failsafe (DX6i, DX6, DX6e, DX7, DX7S, DX8, DX8e, positions. DX9, DX10t, DX18, DX20 and iX12) If your transmitter allows it, enable the throttle cut feature. Start all transmitter programming with a blank ACRO model Always engage throttle cut before approaching the aircraft. -
Page 6: Transmitter And Receiver Binding
Transmitter and Receiver Binding Binding is the process of programming the receiver of the control unit to recognize the GUID (Globally Unique Identifi er) code of a single specifi c transmitter. You need to ‘bind’ your chosen Spektrum DSM2 ® /DSMX ®... -
Page 7: Safe ® Select Technology
® SAFE Select Technology When SAFE Select is activated, bank and pitch limitations keep you from over-controlling the aircraft. Additionally, by releasing the controls in the event you lose orientation, SAFE Select will keep the aircraft level. ® To activate SAFE Select, fl... -
Page 8: Control Centering
Control Centering Before the fi rst fl ights, or in the event of an accident, make sure the fl ight control surfaces are centered. Adjust the linkages mechanically if the control surfaces are not centered. Use of the transmitter sub-trims may not correctly center the aircraft control surfaces due to the mechanical limits of linear servos. -
Page 9: Flying Tips And Repairs
Flying Tips and Repairs Range Check your Radio System Landing After fi nal assembly, range check the radio system with Always land into the wind. Fly the landing pattern with a the aircraft. Refer to your specifi c transmitter instruction slightly nose high attitude. -
Page 10: Service Of Power Components
Service of Power Components Disassembly CAUTION: DO NOT handle the rotor or motor while the fl ight battery is connected. Personal injury could result. 1. The canopy hatch is secured to the fuselage using double-sided tape under the outside edge. Carefully remove the canopy hatch, the screw (A) and nose gear arm (B);... -
Page 11: As3X Troubleshooting Guide
AS3X Troubleshooting Guide Problem Possible Cause Solution Control surfaces not mechanically centered Center control surfaces mechanically by Control surfaces not at neutral from factory adjusting the U-bends on control linkages position when transmitter Aircraft was moved after the fl ight battery Disconnect and reconnect the fl ight battery controls are at neutral was connected and before sensors initialized... -
Page 12: Replacement Parts List
Problem Possible Cause Solution Do a check of motor and power components Motor loses power Damage to motor or power components for damage (replace as needed) Motor power quickly Battery power is down to the point of Recharge fl ight battery or replace battery that decreases and increases receiver/ESC Low Voltage Cutoff (LVC) is no longer performing... -
Page 13: Limited Warranty
What this Warranty Covers please visit our website at www.horizonhobby.com, submit a Horizon Hobby, LLC, (Horizon) warrants to the original purchaser Product Support Inquiry, or call the toll free telephone number that the product purchased (the “Product”) will be free from referenced in the Warranty and Service Contact Information defects in materials and workmanship at the date of purchase. -
Page 14: Warranty And Service Contact Information
Hanskampring 9 European Union D 22885 Barsbüttel, Germany Sales: Horizon Hobby GmbH +49 (0) 4121 2655 100 FCC Information Contains FCC ID: BRWBLH03201 This equipment has been tested and found to comply with the limits for a Class B digital device, pursuant to part 15 of the FCC Rules. -
Page 15: Compliance Information For The European Union
EU Compliance Statement: UMX Mig 15 BNF Basic SAFE (EFLU6050) Horizon Hobby, LLC hereby declares that this product is in compliance with the essential requirements and other relevant provisions of the RED Directive. A copy of the EU Declaration of Conformity is available online at: http://www.horizonhobby.com/content/support-render-compliance. - Page 16 E-fl ite, UMX, SAFE, the SAFE logo, AS3X, DSM, DSM2, DSMX, Bind-N-Fly, BNF, the BNF logo, ModelMatch, Celectra, Delta-V, and the Horizon Hobby logo are trademarks or registered trademarks of Horizon Hobby, LLC. The Spektrum trademark is used with permission of Bachmann Industries, Inc. All other trademarks, service marks and logos are property of their respective owners.
Need help?
Do you have a question about the UMX MiG 15 DF and is the answer not in the manual?
Questions and answers