Table of Contents
Advertisement
Quick Links
Advertisement
Table of Contents

Related Manuals for Lilliput 664/P


Summary of Contents for Lilliput 664/P
- Page 1 User Guide * Option for product model with"/P" only.
- Page 2 Field Monitor * Option for product model with"/P" only.
- Page 3 FPV Monitor * Option for product model with"/P" only.
- Page 4 IMPORTANT SAFETY INSTRUCTIONS: Please read User Guide before using this product. Please keep User Guide for future reference. Please read the cautions to prevent possible danger and loss of property. FEATURES: Shutter shortcut button; 178° Wide viewing angles; ...
-
Page 5: Table Of Contents
Contents 1. PRODUCT DESCRIPTION ..............6 2. AERIAL PHOTOGRAPHY SIGNAL RECEIVER ....... 8 3. INSTALLATION OF SUNSHADE AND BATTERY PLATE ....9 4. DV BATTERY MOUNT PLATE ............10 5. WIRING INSTRUCTIONS ..............11 6. MENU SETTING ................. 12 7. ACCESSORIES ..................16 8. -
Page 6: Product Description
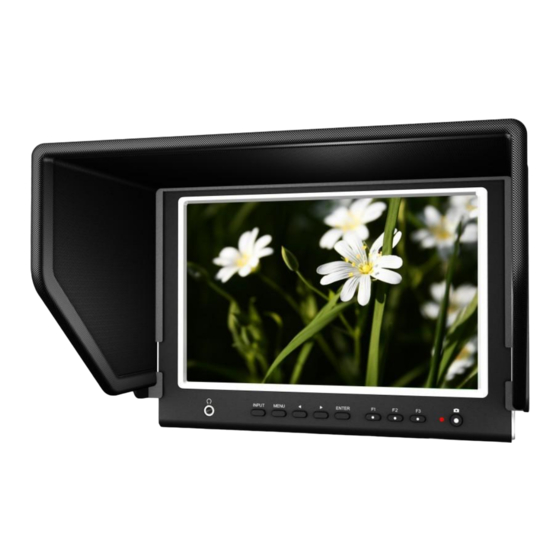
1. PRODUCT DESCRIPTION 1.Shutter shortcut button. 2.Power indicator light: ON/OFF (Light turns to red when power on). 3.F1、F2、F3 User-definable buttons. Default functions: F1 Safety Marker F2 Check Field F3 Freeze Input * F1 Peaking F2 Exposure F3 Histogram (function customized to meet your needs) 4.... - Page 7 1. Frequency Control (for aerial photography). 2. Battery plate slot. 3. Sun shade fixing slots 1. A / V input. 2. Shutter release cable interface. 3. HDMI signal loop output (Optional). 4. HDMI signal input. 5. DC 12V power input. 6....
-
Page 8: Aerial Photography Signal Receiver
2. AERIAL PHOTOGRAPHY SIGNAL RECEIVER 2-1 Radio signal receiving antenna 1. Connected to the wireless receiving antenna port. 2. When a product with wireless module connected with antenna, and then connecting with flying camera system, you can receive the sound and image signals. 2-2 5.8GHz 8 Channel AV receiver >... -
Page 9: Installation Of Sunshade And Battery Plate
3. INSTALLATION OF SUNSHADE AND BATTERY PLATE Installation of sunshade: ① As shown, buckle the sunshade on the device. ② As shown, cover buttoned into the appropriate slot, and fastened in accordance with the order of the both sides. ③ As shown, bend sunshade panel to meet and paste with sunshade interlocking. -
Page 10: Dv Battery Mount Plate
4. DV BATTERY MOUNT PLATE Standard mounts process Following three types of battery plates are suitable for this device, model F970, QM91D, DU21 & LP-E6 (choose 2 out of 4). MODEL: F-970 MODEL: QM91D MODEL: DU21 MODEL: LP-E6 DV Battery Mount Plate: DV Battery Mount Plate Specification: Model DU21 for battery of Panasonic DV: NV-GS/PV-GS/DZ-MV/GS/H28/H258/H288GK series, comply with... -
Page 11: Wiring Instructions
V-mount battery plate (optional): Please refer to GP-L130AB type battery specifications. V-mount Battery Plate Plate Bracket Anton Bauer mount battery plate (optional): Please refer to GP-L130B type battery specifications. Anton Bauer Mount Battery Plate Plate Bracket 5. WIRING INSTRUCTIONS Composite cable White: audio L Red: audio R Yellow: video... -
Page 12: Menu Setting
6. MENU SETTING Before setting the functions, please make sure the device is connected correctly. 6-1. Shortcut keys: 6-1-1. the image menu When power on, press “ ” key on the device, brightness will ◄ / ► appear at the bottom of the screen, then press the MENU button to select brightness, sharpness, contrast, saturation, volume, tint, MENU and Exit. - Page 13 6-2. MENU Operation When power on, press “MENU” on the device. The menu of function setting will display on the screen. Press ◄/► buttons to choose menu; then press ENTER to confirm; after that, press MENU to return. 6-2-1. Picture ITEMS OPTIONS Brightness...
- Page 14 6-2-2. Marker ITEMS OPTIONS *Marker Enable ON, OFF Center Marker ON, OFF *Aspect Marker OFF, 16:9, 4:3, 14:9, 13:9, 15:9, 1.85:1, 2.35:1, Safety Marker OFF, 95%, 93%, 90%, 88%, 85%, 80% *Marker Color Red, Green, Blue, White, Black OFF 0 – 6 *Marker Mat 1 –...
- Page 15 6-2-4. DSLR Aux& Audio ITEMS OPTIONS Camera 480P / 1080I (5D-II Mode) (5D-Ⅲ Mode) *Peaking OFF, MONO, Color *Peaking Color Red, Green, Blue, White, Black 0 – 100 *Peaking Level *False Color OFF, ON *Exposure OFF, ON 0 – 100 *Exposure Level *Histogram OFF, ON...
-
Page 16: Accessories
7. ACCESSORIES Field Monitor Name Quantity Name Quantity Sun Shade 1 Piece HDMI A/C cable 1 Piece Composite cable 1 Piece Shutter release cable 2 Pieces (Choose 2 out of 7) 12V DC adapter 1 Piece Shoe Mount 1 Piece (for camera only) Battery Plate 2 Pieces... - Page 17 FPV Monitor Name Quantity Name Quantity Sun Shade 1 Piece 5.8GHz wireless AV receiver 1 Piece 12V DC adapter 1 Piece Shoe Mount 1 Piece (for camera only) Battery Plate 2 Pieces Battery plate bracket 1 Piece (Choose 2 out of 4) Composite cable 1 Piece Manual...
-
Page 18: Parameters
8. PARAMETERS Panel 7 inch LED Backlit (IPS) Aspect Ratio 16:10 Physical Resolution 1280×800 Brightness 400 cd/㎡ Contrast 800: 1 Viewing Angle 178° / 178° (H/V) Input Voltage DC 7-24V Input Signal AV1、AV2 (for aerial photography)、HDMI Current 960mA ≤12W Power Consumption Operating Temperature -20℃~60℃...
Need help?
Do you have a question about the 664/P and is the answer not in the manual?
Questions and answers