Advertisement
Order #XXXXX - LTK-1139 - General Layout
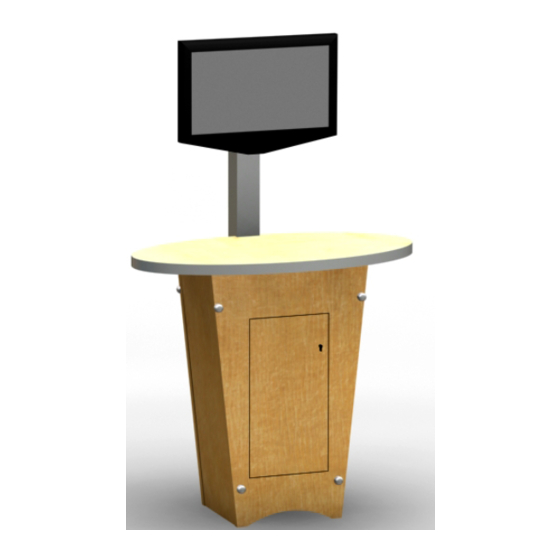
Modul Vertical Stand
Item
Qty.
Description
1
1
Base Plate
2
1
36"h Lower Vertical Extrusion
3
1
36"h Upper Vertical Extrusion
Steps:
1) Attach lower vertical extrusion [2] to base plate [1],
See detail D on general info page.
2) Attach upper vertical extrusion [3] to
lower vertical extrusion [2].
3
2
1
w w w . c l a s s i c e x h i b i t s . c o m
Pedestal Base
Setup:
3) Use standoff screws to secure the front panel with
door and back panel of the pedestal to the side panels.
4) After assembling front, back, and side panels,
slide floor into the bottom of the pedestal. The
floor will sit on pins on the inside of the side panels.
5) After floor is in place, use Velcro attachments to
install shelf.
6) Slide assembled base againt assembled vertical stand,
then secure with thumbscrews, see NOTE.
Shelf with
Velcro Supports
Floor
WHEN DISASSEMBLING ALUMINUM EXTRUSION, TIGHTEN ALL
SETSCREWS AND LOCKS TO PREVENT LOSS DURING SHIPPING
*
M
M
A
ONITOR
OUNT
TTACHMENT
Attach monitor mount to vertical
extrusions after assembly.
Slide Mount into Groove
Tighten
Attach top Plate
of Vertical Extrusion.
Setscrew
and tighten screws
Front Panel
with Door
NOTE:
Using door opening go
inside base and attach thumbscrews
to secure pedestal to vertical extrusion.
Standoff
Screw
Step 1
866.652.2100
QTY. 2
Thumbscrew
attachment
See Note
© 2011
Page 1 of 4
Advertisement
Table of Contents

Related Manuals for Classic Exhibits LTK-1139


Summary of Contents for Classic Exhibits LTK-1139
- Page 1 Step 1 Order #XXXXX - LTK-1139 - General Layout 866.652.2100 Modul Vertical Stand Pedestal Base Item Qty. Description Setup: ONITOR OUNT TTACHMENT Base Plate 3) Use standoff screws to secure the front panel with Attach monitor mount to vertical QTY. 2 36”h Lower Vertical Extrusion...
- Page 2 Step 2 General Setup Instructions Order #XXXXX - 866.652.2100 Level 1 = Blue Panel Lock Level 2 = When Required Level 3 = Green Level 4 = Black Panel Lock With Right Hand Thumb When Required Using Your Setup Instructions Color Coded Clip Close to Seam Left Hand...
Need help?
Do you have a question about the LTK-1139 and is the answer not in the manual?
Questions and answers