Table of Contents
Advertisement
Quick Links
HI-RES VGA USB KVM EXTENDERS
With Optional Audio Support and Additional USB Port
for CAC Card Reader, Touch Screen Monitor, SMART
Board™ Interactive Whiteboard and USB Printer
Installation and Operation Manual
ST-C5USBVUA-1000S
Remote and Local Units
XTENDEX
ST-C5USBV-1000S
ST-C5USBVA-1000S
ST-C5USBVU-1000S
ST-C5USBVUA-1000S
®
Series
MAN063 Rev 10/13/15
Advertisement
Table of Contents

Related Manuals for NTI XTENDEX ST-C5USBVA-1000S


Summary of Contents for NTI XTENDEX ST-C5USBVA-1000S
- Page 1 ® XTENDEX Series ST-C5USBV-1000S ST-C5USBVA-1000S ST-C5USBVU-1000S ST-C5USBVUA-1000S HI-RES VGA USB KVM EXTENDERS With Optional Audio Support and Additional USB Port for CAC Card Reader, Touch Screen Monitor, SMART Board™ Interactive Whiteboard and USB Printer Installation and Operation Manual ST-C5USBVUA-1000S Remote and Local Units MAN063 Rev 10/13/15...
- Page 2 Local Port Controller Version 1.4 Remote Controller Version 1.12. Note: CAT5 connection cable used between NTI XTENDEX Series Local and Remote or any XTENDEX Series products should not be run underground, outdoors or between buildings. WARNING: Outdoor or underground runs of CAT5 cable could be dangerous and will void the warranty.
-
Page 3: Table Of Contents
Table of Contents Introduction..................................1 Types of User Input Devices Supported........................1 Operating Systems Supported ............................ 2 Limitations..................................2 Materials ..................................2 Features and Functions..............................3 Preparation for Installation............................4 Installation..................................5 The Local Unit................................5 Connect to the CPU ..............................5 Connect the Local Devices ............................ -
Page 4: Introduction
The ST-C5USBV-1000S HI-RES VGA USB KVM Extender (XTENDEX) is designed to enable the relocation of a monitor, USB keyboard, and USB mouse from a USB CPU or NTI USB KVM switch by as much as 1000 feet via CAT5/5e/6 cable. The option to extend stereo audio speakers, USB touch screen monitor, CAC card reader, or SMART Board is also available. -
Page 5: Operating Systems Supported
CAT5/5e/6 shielded/unshielded twisted-pair cable(s) terminated with RJ45 connectors wired straight thru- pin 1 to pin 1, etc. (see pg. 13 for proper EIA/TIA 568B wiring method) Contact your nearest NTI distributor or NTI directly for all of your KVM needs at 800-742-8324 (800-RGB-TECH) in US & Canada or 330-562-7070 (Worldwide) or at our website at http://www.networktechinc.com... -
Page 6: Features And Functions
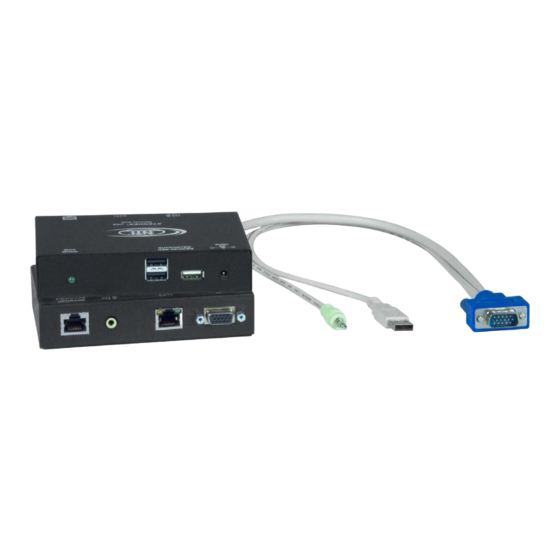
FEATURES AND FUNCTIONS ST-C5USBVUA-1000S Local Unit Rear View Front View ST-C5USBVUA-1000S Remote Unit Rear View Front View Video Cable- 15HD male for connection to video connector of CPU Audio Cable- 3.5mm plug- for connection to audio connector of CPU Devices Cable- USB Type A male connector for connection to CPU USB DEVICES- USB Type A female for connection of local user USB device(s) USB DEVICE- USB Type A female for local connection of additional USB device (any) 5VDC- connection jack for Local Unit AC adapter... -
Page 7: Preparation For Installation
Note: CAT5 connection cable used between NTI XTENDEX Series Local and Remote or any XTENDEX Series products should not be run underground, outdoors or between buildings. -
Page 8: Installation
INSTALLATION The Local Unit Connect to the CPU Plug the cables of the Local Unit into the back of the CPU. (See Fig. 1.) Connect the blue 15HD cable from the Local Unit to the female VGA port on the back of the CPU. -
Page 9: Connect The Local Devices
Connect the Local Devices If desired, connect the local user devices to the Local Unit as shown in Fig. 2. Connect a USB keyboard and mouse to the USB type A female connectors on the Local Unit. Connect a monitor to the 15HD female connector on the Local Unit. If the unit has audio support, connect self-powered stereo speakers to the audio out port ( ) on the Local Unit. -
Page 10: The Remote Unit
The Remote Unit Position the Remote Unit such that each cable to be connected to it can reach the Remote Unit comfortably. Connect a USB keyboard and mouse to the USB type A female connectors on the Remote Unit. Connect the monitor cable to the 15HD female connector on the back of the Remote Unit. (See Fig. 3) If the unit has audio support, connect self-powered stereo speakers to the audio out port ( ) on the Remote Unit. -
Page 11: Connect The Cat5 Cable
Connect the CAT5 Cable Make sure the CAT5/5e/6 cable has been installed in accordance with the “Preparation for Installation” instructions on page 4. Connect one end of CAT5 cable to the “CATx” port on the back of the Remote Unit, and the other end to the “CATx” port on the Local Unit. -
Page 12: Plug-In And Boot Up
Plug-in and Boot Up Plug the power cord from the monitor into the power outlet. Connect one AC adapter power connector to the 5VDC port on the back of the Local Unit. (AC adapter shown in Fig. 5) Plug the AC adapter into a power outlet. The green “Power” LED on the Local Unit should illuminate, indicating that a proper power connection has been made to the Local Unit. -
Page 13: Configuration And Command Mode
CONFIGURATION AND COMMAND MODE Command Mode All models are enabled with a Command Mode feature to perform the following: fine adjustment of the general video quality fine adjustment of color skew (alignment of red, green, and blue signals on the monitor) update DDC information between the monitor(s) and CPU toggle between MAC mode and non-MAC mode Command Mode can be enabled by two keys at the same time;... -
Page 14: Fine Video Quality Adjustment
Fine Video Quality Adjustment General Video Quality Adjustment Command Mode opens into General Video Quality Adjustment mode. To fine tune the general video quality, press the <Left Arrow> or <Right Arrow> keys until the desired improvement in the display has been achieved. Color Skew Adjustment If a specific color appears to be skewed and is in need of fine adjustment, the user can switch to Red, Green, or Blue Skew Adjustment mode by pressing <R>, <G>... -
Page 15: Toggle Mac Mode
Toggle MAC Mode MAC Mode enables the user to connect the Local Unit to a MAC CPU. MAC Mode configures the Local Unit for passing mouse information to the MAC CPU. This is useful when the user wants to use mouse drivers provided by the mouse vendor, which allows the use of programmable functions for each mouse button. -
Page 16: Common Applications
COMMON APPLICATIONS Figure 7 (below) illustrates three common applications for the ST-C5USBV-1000S USB KVM Extender. USBVEXT-xx-MM Existing Local Unit Cable Existing Local Unit Cable NTI USB Multi-Scan Multi-Scan XTENDEX XTENDEX Monitor Monitor LOCAL UNIT LOCAL UNIT SWITCH (UNIMUX-xU) Existing Local Unit Cable... -
Page 17: Firmware Upgrade Procedure
FIRMWARE UPGRADE PROCEDURE This procedure describes how to upgrade the firmware in this XTENDEX. Only models with Additional USB Support can be upgraded. If you are not certain whether this XTENDEX has the most up-to-date firmware available, simply download the latest version and follow the upgrade procedure. -
Page 18: Prepare To Upgrade The Firmware
Prepare to Upgrade the Firmware With the power to the PC and XTENDEX OFF, connect a PC to the XTENDEX using the supplied 5 foot patch cable and 9DB-to- RJ45 adapter. Connect the patch cable to the “FIRMWARE UPGRADE” port on the Local Unit, attach the supplied 9DB-to-RJ45 adapter to the patch cable, and connect the 9DB adapter to an available COM port on the PC. -
Page 19: Upgrade Procedures
Upgrade Procedures Start the Bootloader In the HyperTerminal window on the attached computer, press and hold the <Tab> key and power ON the XTENDEX. The following message (or one similar) will be displayed on the screen: ST-C5-USBVA Bootloader Revision: 1.1 Date: 2010/01/11 15:40:16 Copyright (C) Network Technologies Inc. -
Page 20: Upgrade The Local Port Controller Firmware
Upgrade the Local Port Controller Firmware The Local port controller firmware comes as a file in Intel Hex format and has the extension .hex (i.e. filename.hex). To upgrade any of Local Port controller with this firmware, press <p> from the terminal window. The following message should appear on the screen: Send .hex file using XModem protocol... - Page 21 At this point the binary file c5usbvu-rcsx-x.bin must be sent. To do this, from HyperTerminal: 1. go to “Transfer” menu in the Menu Bar of the HyperTerminal window 2. click the item “Send File …” 3. in the dialog box which pops up on the screen, browse for the file to be sent and select it 4.
-
Page 22: Technical Specifications
TECHNICAL SPECIFICATIONS Video Compatibility SVGA, XGA, VGA Video Quality Variable for up to 1000 feet of CAT5 cable Video Coupling Video Connectors HD15 male to CPU HD15 female to local and remote monitors Sync Types Supported Separate and composite TTL Level and sync on green Video Signal Type Analog RGBHV,RGBS, RGsB Maximum Input/Output Levels... -
Page 23: Interconnection Cable Wiring Method
(View looking into RJ45 female) Figure 9- Pin positions in female RJ45 connector Note: CAT5 connection cable used between NTI XTENDEX Series Local and Remote or any XTENDEX Series products should not be run underground, outdoors or between buildings. WARNING: Outdoor or underground runs of CAT5 cable could be dangerous and will void the warranty. -
Page 24: Sun's 16 Extra Keys
SUN’s 16 Extra Keys Use the chart below to type SUN's additional 16 keys using a 101, WINxx, or MAC (Apple) USB keyboard). 101,WINxx,MAC SUN Extras 101,WINxx,MAC SUN Extras Keyboards Keyboards SB+F1 Stop (L1) SB+F9 Find (L9) SB+F2 Again (L2) SB+F10 Cut (L10) SB+F3... -
Page 25: Figure 10- Keyboard Layouts
Backspace Lock Enter Caps Lock Shift Shift Enter Ctrl Ctrl Typical 101 Keyboard Print Scroll Screen Pause Lock SysRq Break Backspace Lock Enter Caps Lock Shift Shift Enter Ctrl Ctrl Windows Logo Key Application Key Windows Logo Key Windows USB Keyboard CD Eject lock delete... -
Page 26: Troubleshooting
TROUBLESHOOTING Each and every piece of every product produced by Network Technologies Inc is 100% tested to exacting specifications. We make every effort to insure trouble-free installation and operation of our products. If problems are experienced while installing this product, please look over the troubleshooting chart below to see if perhaps we can answer any questions that arise. If the answer is not found in the chart, please check the FAQs (Frequently Asked Questions) at our website at http://www.networktechinc.com or contact us directly for help at 1-800-742-8324 (800-RGB-TECH) in US &... -
Page 27: Index
A return authorization number is required for all repairs/returns. Note: CAT5 connection cable used between NTI XTENDEX Series Local and Remote or any XTENDEX Series products should not be run underground, outdoors or between buildings.
Need help?
Do you have a question about the XTENDEX ST-C5USBVA-1000S and is the answer not in the manual?
Questions and answers