Table of Contents
Advertisement
Quick Links
o o o o o o o o o o o o o o o o o o o o o o o o o o o o o o o o o o o o o o o o o o o o o o o o o o o o o o o o o o o o o o o o o o o o o o o o o o o o o o o o o o o o o
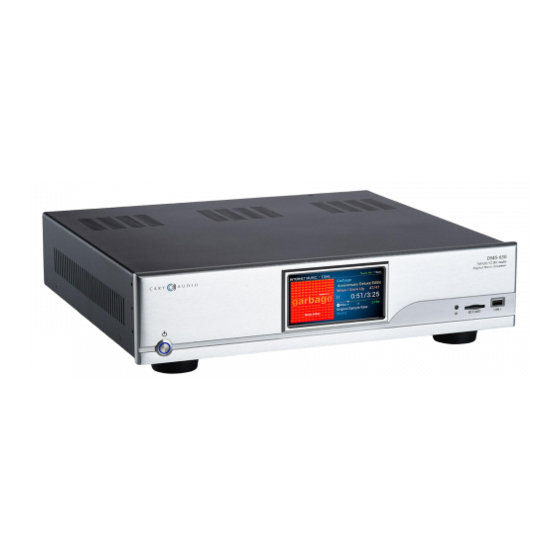
DMS-650
Network Audio Player
NOTE: Before installing your new component, please read this manual
carefully as it will inform you of the product specifications, proper
installation and correct operating procedures for your unit. Also included
in this manual are guidelines on how to service and care for your new
Cary Audio Design product.
Advertisement
Table of Contents

Related Manuals for Cary Audio Design DMS-650


Summary of Contents for Cary Audio Design DMS-650
- Page 1 NOTE: Before installing your new component, please read this manual carefully as it will inform you of the product specifications, proper installation and correct operating procedures for your unit. Also included in this manual are guidelines on how to service and care for your new Cary Audio Design product.
-
Page 2: Table Of Contents
TABLE OF CONTENTS Important Safety Instructions ...............................5 Welcome .......................................8 Thank You ....................................8 Useful Terms....................................9 About the DMS-650 ................................10 Installation ....................................11 Unpacking ....................................11 Warranty Card ..................................11 Placement ....................................11 Features ...................................... 12 USB and SD Card NAS Drive..............................12 MQA Certified Full Decoding to 768 KHZ .......................... - Page 3 Alternate Now Playing Display Screens ..........................21 App Control for iOS and Andriod............................22 Tutorial Videos for Controlling DMS via App ......................... 22 Volume Control and Output ............................... 23 Using as a Source (Connecting to a Preamplifier, etc.) ......................23 Using as a Digital Preamplifier (Connecting Directly to an Amplifier) ...................
- Page 4 Spotify Connect ..................................38 USB and SD Card Operation ............................... 39 USB and SD Card Playback (Direct Method) .......................... 39 USB and SD Card NAS Setup ..............................40 USB and SD Card NAS Playback .............................. 41 Queues and Playlists................................... 46 Queues....................................
- Page 5 ROON Setup .................................... 61 Balanced Operation ..................................64 Specifications ....................................65 DMS-650 Basic Specifications..............................65 Service and Care ..................................67 Care and Cleaning ................................... 67 AC Power Fuse Replacement ..............................67 Factory Service ..................................67 Non-Warranty Repairs................................67 Product Warranty and Registration …………………………………………………………………………………………………………………………………….68...
-
Page 6: Important Safety Instructions
(such as a paper clip, coin, or staple) accidentally falls inside the unit, disconnect it from the AC power source immediately and contact Cary Audio Design for further instructions. Position the unit away from heat sources such as radiators, heat registers, stoves, or other units (including amplifiers) that produce heat. - Page 7 FCC INFORMATION FOR USER: • CAUTION: Any changes or modifications not expressly approved by Cary Audio Design could void the user's authority to operate the equipment. •...
- Page 8 television reception, which can be determined by turning the equipment off and on, the user is encouraged to try to correct the interference by one or more of the following measures: Reorient or relocate the receiving antenna. Connect the equipment into an outlet on a circuit different from where the receiver is connected. OUTDOOR ANTENNA INSTALLATION/SAFE ANTENNA AND CABLE CONNECTION: •...
-
Page 9: Welcome
WELCOME THANK YOU Cary Audio would like to thank you for purchasing our products. Since its founding in 1989, Cary Audio has stayed at the forefront of home entertainment equipment by stubbornly adhering to the principles of quality and musicality upon which it was founded. It’s not enough just to be able to build great sounding gear, but it needs to be well-made, reliable, and maintain its performance and value for many years. -
Page 10: Useful Terms
Network Music – A broad term that refers to music originating from a computer or NAS drive that is connected to a home network for playback over a Digital Music Streamer/Network Audio Player. Digital Music Streamer/Network Audio Player – An audio component like the DMS-650 that connects to a home network that can access Network Music for playback. -
Page 11: About The Dms-650
ABOUT THE DMS-650 The DMS-650 is the latest product in our DMS platform. While it replaces the DMS-550, it surpasses the renown DMS-600 in performance. The DMS-650 packs a BIG punch! Much more so than just calling it a “replacement.” Built around the AK4497EQ VERITA DAC (same as our previous flagship DMS-600), the DMS-650 is a no-compromise killer. -
Page 12: Installation
Power Requirements The DMS-650 Digital to Analog Converter is designed to operate from AC main current. The design AC voltage is either 110V-120V or 220V-240V AC at 50-60 Hz. In the Box When unpacking your DMS-650, make sure the following accessories are included. -
Page 13: Features
5Ghz band. So, if you have a MU-MIMO capable router and the DMS-650 is within a reasonable distance, set the router to 5Ghz. If the DMS-650 is much further away or on different floors than the router, the 2.4 gHz band may be better since it uses the SU-MIMO protocol. -
Page 14: Trubit™ Dsd And Pcm Upsampling And Pcm To Dsd Conversion
TRUBIT™ DSD AND PCM UPSAMPLING AND PCM TO DSD CONVERSION Upsampling can be messy, leaving behind lots of digital artifacts resulting in noise and inaccurate signal generation. On the surface, upsampling may seem like a good idea. But if not implemented properly it can be disastrous. Typically, upsampling is done as a predefined one-size-fits-all approach, such as 96 kHz or 384 kHz. - Page 15 THE OPERATION OF THE DMS-650 ASSUMES ALL USERS HAVE A MINIMUM OF A MODERATE LEVEL OF UNDERSTANDING OF COMPUTERS, PHONES OR TABLETS, FILE SHARING PRINCIPLES, COMPUTER NETWORKS, AND OTHER ASSOCIATED PERIPHERALS SUCH AS: ROUTERS, ETHERNET, WI-FI, USB HARD DISC AND FLASH DRIVES, SD CARDS, NAS DRIVES, COMPUTER OPERATING...
-
Page 16: Controls And Displays
CONTROLS AND DISPLAYS FRONT PANEL POWER Press once to turn the power ON. The blue indicator ring will blink until the unit is ready to operate. Press again to turn the power OFF. LCD FRONT PANEL DISPLAY The color LCD panel displays all playback information, navigation, and user settings in a simple easy to use user interface. -
Page 17: Rear Panel
REAR PANEL 1. RIGHT CHANNEL ANALOG OUTPUT JACK (XLR BALANCED) Use this jack for connecting to the preamplifier/amplifier’s balanced XLR input jack. 2. RIGHT CHANNEL ANALOG OUTPUT JACK (RCA UNBALANCED) Use this jack for connecting to the preamplifier/amplifier’s RCA unbalanced input jack. 3. - Page 18 16 – 24 Bit, 44.1 kHz - 384 kHz, DSD64, DSD128 (DoP)digital data Input. MQA files cannot be inputted. 17. DC TRIGGER INPUT TERMINALS Connection of devices that have DC + 12V output for remote turn-on/off the DMS-650. 18. IR INPUT Connection of external IR sensors.
-
Page 19: Ir Remote Control
IR REMOTE CONTROL This section explains how to use the remote control to set up and operate the DMS-650. 1. POWER Use to turn the power on and off. 2. ALPHANUMERIC KEYS Use for searching music library as well as entering network settings, such as Wi-Fi security key, etc. -
Page 20: Using Remote Alphanumeric Keys
Simply scroll up to the Tip by pressing the Up-Arrow key on the remote twice and press enter to show the tutorial. Once you are familiar with all the screens and can command control of the DMS-650,... -
Page 21: Now Playing Screen (Network, Usb, Sd, Internet)
NOW PLAYING SCREEN (NETWORK, USB, SD, INTERNET) MQA NOW PLAYING SCREEN (NETWORK, USB, SD, INTERNET) NOW PLAYING SCREEN (SPDIF) -
Page 22: Alternate Now Playing Display Screens
ALTERNATE NOW PLAYING DISPLAY SCREENS To change the DMS-650 front panel display from the default display to high contrast or large font/icon-based displays, press the IR remote UP button 3 times to highlight “Theme” on the DMS front panel. Use the IR up/down keys to select the desired theme. -
Page 23: App Control For Ios And Andriod
APP CONTROL FOR IOS AND ANDRIOD You can download a free Control App for either iOS on iTunes Store, or Android on Google Play Store. Each app is highly intuitive and easy to operate. The app has user tips built into them (which can also be hidden) and they are much more powerful and feature laden then they may appear. -
Page 24: Volume Control And Output
PURE AUDIO MODE For the greatest sonic benefit when using the DMS-650 as a source, it is recommended to set and leave the volume to +8.0, controlling subsequent volume via your preamplifier, integrated amplifier, or receiver. Doing so will activate PURE AUDIO MODE. -
Page 25: Settings Menu Overview
Using the Up/Down arrow keys on the IR remote to scroll to the desired selection and press Enter or press the Right arrow key to expand. VOLUME MENU Select Master when using the DMS-650 as a digital preamplifier. Select Independent when connecting the DMS-650 to a preamplifier, integrated amplifier, or receiver. -
Page 26: Ir Control Menu
IR CONTROL MENU This selects which IR sensors are activated. WARNING: Do not select Rear if you do not have a rear mounted IR sensor. Otherwise, you could be locked out of all IR command control. If this happens and you have previously connected an iOS or Android app to the DMS, you can use the app to change this setting. -
Page 27: User Tip Menu
USER TIP MENU This turns the on-screen user tips on or off as desired. STARTUP MENU This sets the default input at system startup. Only one input from all available inputs can be selected. Network ✓ Source Screen (List of available servers/PC Share’s on network). ✓... -
Page 28: Firmware Update Menu
Conversely, if you notice there has been a Cary Audio Streamer 2.0 app update, check if there is also a firmware update. If after doing a firmware update the DMS-650 or app are acting not as expected, you should do as mentioned above and do a factory reset of the unit. -
Page 29: Change The Ir Code
Highlight IR Code A (Red Power LED) and press Enter on the IR remote. You will notice the IR remote no longer works after change the setting in the DMS-650. You now need to match the IR remote codes to the same IR Code set of the DMS. -
Page 30: Wired (Ethernet)
This step assumes you have an active home network and router installed in your home. Place the DMS-650 within a cable run of your router or Ethernet port of which is wired back to the router. Connect an Ethernet cable to the back of the DMS-650 and plug the other end into your router, or Ethernet Port. -
Page 31: Wireless (Wi-Fi) Setup
Turn on the DMS-650. If the below screen does not appear, press Network input source on IR handheld remote. Use the IR handheld remote to select “Connect to Wi-Fi with App.” Once selected or if no action is taken within 30 seconds, the DMS-650 will open a Wi-Fi Hotspot called “DMS- WiFi.” Make not of the password; 12345678. -
Page 32: Wifi Setup Using Ir Remote Only
Place the DMS-650 anywhere within the routers Wi-Fi range. Make sure Wi-Fi antenna are connected. (Do NOT connect the Ethernet cable). Turn on the DMS-650. Once on, press the Network Input Source on the IR remote. The following prompt will display. Select “Connect to Wi-Fi with IR Remote.”... - Page 33 Using the alphanumeric keys on the hand-held IR remote, enter your Security Key, and select Connect. If you selected Static, enter your Port number and IP address as well. A message will appear confirming connection to Wi-Fi. Select your desired input source.
-
Page 34: Network And Internet Playback Operation
NETWORK AUDIO SETUP Make sure the DMS-650 is connected to your network either by a wired Ethernet connection, or via Wi-Fi (but not both) as outlined in the Establishing a Network Connection section of this manual. This section assumes you are familiar with third party media server software, computers, file sharing settings, etc. -
Page 35: Local Master Browser And Start Samba (Smb)
Press the Network button on the IR remote. This will show a list of all available “PC Share” and/or “Media Servers” on the network. The DMS-650 also lets you filter by PC Share or Media Servers by checking the associated box to the right of the list. - Page 36 NOTE: When selecting a PC Share for the first time it must index the PC Share library. This can take a while depending on the size of the library. While indexing, you will see the below pop-up. Navigate to your selections by using the up and down keys. To expand the selection, press Enter or press >...
-
Page 37: Renderer Method
JRiver’s JRemote or Gizmo, Bubble UPnP, Plug Player, 8Player, etc. The disadvantage is that the third-party app can only play network audio and cannot access all features of the DMS-650, so a combination of a third-party app and IR remote must be used. - Page 38 JRiver MC21 Example Window Media Player 12 Example The Now Playing screen of the DMS-650 will display your selection.
-
Page 39: Internet Music Services
SPOTIFY CONNECT For Spotify users, the DMS-650 includes a feature called Spotify Connect. Spotify Connect allows you to use Spotify’s own native app (instead of the Cary Streamer 2.0 app) to control and playback Spotify over the DMS. Your smartphone simply acts as a remote while the DMS accesses the music services stream directly from Spotify’s servers. -
Page 40: Usb And Sd Card Operation
The audio signal path will still bypass all network and computer routing. The USB and SD Card inputs include USB 1 (Front), USB 2, 3 (Rear), and SD Card (Front). Like PC Share, The DMS-650 must index the drive’s library the first time it is selected. -
Page 41: Usb And Sd Card Nas Setup
DMS-650 from a computer, making these inputs Network Attached Storage (NAS). To view these drives, the DMS-650 must be powered on and all permissions for these drives must be set to share. Once this feature is turned on, you may need to reboot your computer to see and access these drives. -
Page 42: Usb And Sd Card Nas Playback
This will vary depending on the Media Server Software you are using. However, in principle they will all be similar in that you will need to create a new Library, then navigate to the DMS-650’s USB or SD location and select it. - Page 43 Find the IP address of the DMS-650. The easiest way is to open the Cary Streamer 2.0 app and go to Settings>>PC Share Open Roon Core Go to Settings>>Storage Click + Add Network share Type the IP address of the DMS-650 and path of the USB/SD drive as example below.
- Page 44 Select the USB HDD or SD Folder you just added in the Folder list on the left (select a specific sub folder on the right, if applicable), then click, "Select This Folder" to add.
- Page 45 Select other options according to your needs, click "Add" to complete.
- Page 46 Monitor/Play USB and SD Card Storage via PC Share method from another DMS/AiOS unit located on the same network. This method is just like using PC Share function as outlined above. Make sure “Local Master Browser” and “Samba” are enabled in the DSM Setup Menu. Select NETWORK input source and be sure “PC Share”...
-
Page 47: Queues And Playlists
QUEUES AND PLAYLISTS QUEUES A Queue is a temporary list of music. This includes all music that is played during a given session from multiple sources, or manually added to the queue while listening. All music played during a session is stored in the Queue with the most current selection(s) being added to the bottom of the list. - Page 48 To Edit a Queue While viewing the Queue, highlight any track and press the Delete key on the remote to remove that selection from the Queue. To Play the Queue While viewing the Queue, press the Play command in the blue box to the right of the list. To Clear a Queue While viewing the Queue, press the Clear command in the blue box to the right of the list.
-
Page 49: Playlists
MY (Qobuz, TIDAL, Spotify) Playlists. – When creating or saving a playlist from any given services whether from the services own app, desktop software, or Cary Audio Streamer 2.0 App, it will carry over to the DMS-650 upon logging into the service from the Cary Audio Streamer 2.0 app. - Page 50 NOTE: Pressing and holding the Add Button for more than 2 seconds on an item will pop-up additional options for Queue and Playlist (specific to the source). To View Playlists Press the Home button on the remote to go to the current Home Screen. Highlight DMS Playlists then select the Playlists of choice and press enter.
- Page 51 To Edit a Playlist While viewing Playlists, highlight the desired Playlist and press the > button on the remote. Select EDIT from the blue box to the right and press Enter. Highlight the selection you wish to remove from the Playlist and press the Delete button on the remote.
-
Page 52: Spdif Source Operation
SPDIF SOURCE OPERATION SPDIF INPUTS The SPDIF inputs include COAXIAL 1, COAXIAL 2, OPTICAL, and AES/EBU. Select the desired input by pressing COAXIAL 1 or 2, AES/EBU or OPTICAL button on the IR remote or control App. If no source is connected to the selected input, it will say so. Initiate playback of the corresponding SPDIF source. -
Page 53: Playing Music From And To Portable Devices
Airplay is primarily for iOS devices while PhoneShare is for Android devices. They both require a wireless Wi-Fi connection from your portable device to your network router. The DMS-650 must also be connected to your router (either via Wi-Fi or wired Ethernet). -
Page 54: Phoneshare Playback
From the Cary Streamer 2.0 app on your Android device, select Phoneshare from “Stream” input source on app Main Screen. 2. Navigate to your music selection as you would with a PC Share source and play selection. Notice DMS-650 Now Playing Screen will show “Phoneshare” as the source. -
Page 55: Bluetooth Connection
Wi-Fi or router connection is required to work. However, the range of Bluetooth is much shorter. Qualcomm aptX™ HD Bluetooth audio is capable of 24 Bit / 48 kHz better than CD quality audio with the DMS-650 when using Bluetooth devices capable of aptX™... -
Page 56: Bluetooth Playback (Receive)
(right picture below). NOTE: If unable to connect to the DMS-650, you may have to tap the blue “I” information button to the right and select “Forget Device” and reconnect as per the above steps. This is because the DMS-650 includes a Bluetooth Send function and only send or receive can be functioning at any given time. -
Page 57: Bluetooth Output (Send)
BLUETOOTH OUTPUT (SEND) Bluetooth output (or SEND) is different. This sends a Bluetooth signal out of the DMS-650 to a Bluetooth receiver, such as Bluetooth speakers or headphones. Bluetooth Receive, as per the previous steps, is sending a Bluetooth signal to the DMS- 650 from a phone or tablet. -
Page 58: File Conversion And Upsampling
DSD64 file to a higher level of DSD128 or DSD256. By using superior no compromise AKM DACs, any native DSD or PCM to DSD converted signal is processed as true DSD. In other words, the DMS-650 does NOT convert a DSD signal to PCM within the DAC chips. - Page 59 When an upsample rate is selected higher than the native input rate, the DMS-650 will upsample all incoming rates lower than the selected upsample rate up to the selected upsample rate (as well as change the bit depth to 32-bits for PCM or 1- bit for DSD).
-
Page 60: Dsd Operation
DSD PLAYBACK The DMS-650 is capable of playing native DSD files up to 512 via both wired Ethernet and wireless Wi-Fi inputs as well as from USB-A and SD Card inputs. If using Wi-Fi as your network connection, it is recommended to have a very robust signal at the DMS-650 location. -
Page 61: Mqa Operation
650. Ethernet, Wi-Fi, USB-A, and SD Card inputs are all MQA capable. SPDIF inputs of the DMS-650 is not capable of MQA playback. However, the DMS-650 can play a MQA stream from the SPDIF inputs at better than CD quality standard FLAC. -
Page 62: Roon Ready Operation
Before proceeding you must download and install the Roon Core software on your computer (https://roonlabs.com/downloads.html) and setup your library monitoring and other personal preferences within the Roon Core software. Below are details how to enable the DMS-650 as a Roon Ready endpoint within Roon Core and select it as a Play to Zone. - Page 63 In Roon Core software, select Settings, then Audio. Go down to the “Roon Ready” section to find the DMS-650. Click the “Enable” box. Once you click on “Enable” it will ask you to name the device.
- Page 64 Click the “Play to Zone” icon in the lower right and select the DMS-650.
-
Page 65: Balanced Operation
Refer to your amplifier's operating manual to verify that the XLR pin assignments of its input connectors correspond to the DMS-650. If they are different, wire the XLR cable so that the appropriate XLR output pin connects to the equivalent XLR input pin. -
Page 66: Specifications
SPECIFICATIONS This section describes the basic specifications of the DMS-650 at the time of printing. Specifications are subject to change without notice or obligation. When the following cautionary terms are used in this manual, these definitions apply: WARNING: ELECTRICAL HAZARD! MISUSE OR FAILURE TO FOLLOW INSTRUCTIONS PROPERLY MAY RESULT IN PERSONAL INJURY OR DEATH! CAUTION: NO RISK OR PERSONAL INJURY;... - Page 67 Master Quality Authenticated (MQA) The DMS-650 includes MQA technology, which enables you to play back MQA audio files and streams, delivering the sound of the original master recording. This ensures that MQA-encoded audio files and streams sound exactly like the source.
-
Page 68: Service And Care
CARE AND CLEANING The cabinet housing and front panel of the DMS-650 may be cleaned with a soft cloth and Windex or a window cleaner. The frequency of cleaning will be governed by how many hours the DMS-650 is operated and by operating environment cleanliness. -
Page 69: Product Warranty And Registration
Logos, Trademarks, and Licensing The Cary Audio Design AiOS incorporates copyright protected technology that is protected by U.S. patents and other intellectual property rights. The AiOS uses the following technologies: The MQA logo is a trademark of MQA Limited. © MQA Limited 2021 Roon Ready is a trademark of Roon Labs ©... - Page 70 CARY AUDIO 6301 Chapel Hill Road Raleigh, NC 27607 919.355.0010 caryaudio.com carydirect.com o o o o o o o o o o o o o o o o o o o o o o o o o o o o o o o o o o o o o o o o o o o o o o o o o o o o o o o o o o o o o o o o o o o o o o o o o o o o o o o o o o o o o o...
Need help?
Do you have a question about the DMS-650 and is the answer not in the manual?
Questions and answers