Xerox VersaLink C8000W User Manual
Hide thumbs
Also See for VersaLink C8000W:
- Quick use manual (5 pages) ,
- Quick use manual (5 pages) ,
- Quick use manual (5 pages)

Subscribe to Our Youtube Channel
Related Manuals for Xerox VersaLink C8000W


Summary of Contents for Xerox VersaLink C8000W
- Page 1 Version 1.0 September 2020 702P08317 Xerox VersaLink C8000W Color ® ® Printer User Guide...
- Page 2 ® , Xerox Extensible Interface Platform ® , Global Print Driver ® , and Mobile Express Driver ® are trademarks of Xerox Corporation in the United States and/or other countries. Adobe ® , Adobe PDF logo, Adobe ® Reader ®...
-
Page 3: Table Of Contents
Accessing the Embedded Web Server ................35 Finding the IP Address of Your Printer ................35 Certificates for the Embedded Web Server ............... 36 Downloading the Configuration Report from the Embedded Web Server ......36 Xerox ® VersaLink ® C8000W Color Printer... - Page 4 Operating System Requirements ..................52 Driver and Firmware Updates................... 52 Installing the Print Drivers for a Windows Network Printer ..........52 Installing the Print Driver Without Using the Xerox ® Smart Start Installer ......52 Installing the Print Drivers for a Windows USB Printer ............53 Installing the Printer as a Web Service on Devices ............
- Page 5 Using Custom Paper Sizes ....................103 Printing on Custom Paper Sizes ..................103 Defining Custom Paper Sizes..................103 6 Paper and Media ......................... 107 Paper and Media Overview....................108 Supported Paper ........................109 Ordering Paper....................... 109 Xerox ® VersaLink ® C8000W Color Printer User Guide...
- Page 6 Replacing Staples in the Business Ready Finisher............169 Emptying the Hole Punch Waste Container ..............174 Managing the Printer ......................179 Viewing the Meter Reading.................... 179 Printing the Billing Summary Report................179 Moving the Printer ....................... 180 Xerox ® VersaLink ® C8000W Color Printer User Guide...
- Page 7 Printer Configurations and Options ..................234 Available Configurations ....................234 Standard Features......................234 Options and Upgrades ....................235 Physical Specifications ......................236 Weights and Dimensions....................236 Total Space Requirements ....................238 Environmental Specifications ....................242 Xerox ® VersaLink ® C8000W Color Printer User Guide...
- Page 8 North America ........................257 European Union........................258 Domestic/Household Environment ................. 258 Professional/Business Environment................. 258 Collection and Disposal of Equipment and Batteries............258 Battery Symbol Note...................... 259 Battery Removal ......................259 Other Countries........................260 Xerox ® VersaLink ® C8000W Color Printer User Guide...
-
Page 9: Safety
• Environmental, Health, and Safety Contact Information............. 18 Your printer and the recommended supplies have been designed and tested to meet strict safety requirements. Attention to the following information ensures the continued safe operation of your Xerox printer. Xerox ®... -
Page 10: Notices And Safety
These include safety agency evaluation and certification, and compliance with electromagnetic regulations and established environmental standards. The safety and environment testing and performance of this product have been verified using Xerox ® materials only. -
Page 11: Electrical Safety
• Verify that the printer is plugged into an outlet that is providing the correct voltage and power. Review the electrical specification of the printer with an electrician if necessary. • Do not place the printer in an area where people can step on the power cord. Xerox ® VersaLink ®... -
Page 12: Emergency Power Off
E E m m e e r r g g e e n n c c y y P P o o w w e e r r O O f f f f If any of the following conditions occur, power off the printer immediately and disconnect the power cord from the electrical outlet. Contact an authorized Xerox service representative to correct the problem if: •... -
Page 13: Operational Safety
Ozone is heavier than air and is not produced in amounts large enough to harm anyone. Install the printer in a well-ventilated room. For more information in the United States and Canada, go to www.xerox.com/environment. In other markets, please contact your local Xerox representative or go to www.xerox.com/environment_europe. -
Page 14: Printer Supplies
Agreement, and Total Satisfaction Guarantee do not cover damage, malfunction, or degradation of performance caused by use of non-Xerox supplies, or the use of Xerox supplies not specified for this printer. The Total Satisfaction Guarantee is available in the United States and Canada. -
Page 15: Maintenance Safety
• Do not attempt any maintenance procedure that is not specifically described in the documentation supplied with your printer. • Clean with a dry lint-free cloth only. • Do not burn any consumables or routine maintenance items. For information on Xerox supplies ®... -
Page 16: Printer Symbols
Safety Printer Symbols For details about all the printer symbols that appear on your printer, refer to the Printer Symbols guide at www.xerox.com/office/VLC8000Wdocs. Symbol Description Warning: Indicates a serious hazard that can result in death or serious injury if not avoided. - Page 17 Do not use folded, creased, curled, or wrinkled paper. Do not use inkjet paper. Do not use transparencies or overhead projector sheets. Do not reload paper previously printed on or used. Do not copy money, revenue stamps, or postage stamps. Xerox ® VersaLink ® C8000W Color Printer...
-
Page 18: Environmental, Health, And Safety Contact Information
Safety Environmental, Health, and Safety Contact Information For more information on Environment, Health, and Safety in relation to this Xerox product and supplies, contact: • United States and Canada: 1-800-ASK-XEROX (1-800-275-9376) • Europe: EHS-Europe@xerox.com For product safety information in the United States and Canada, go to www.xerox.com/environment. -
Page 19: Getting Started
• Information Pages ........................33 • The Embedded Web Server ......................35 • Installation and Setup ....................... 38 • Connecting the Printer ....................... 40 • Installing the Software....................... 52 • More Information ........................56 Xerox ® VersaLink ® C8000W Color Printer User Guide... -
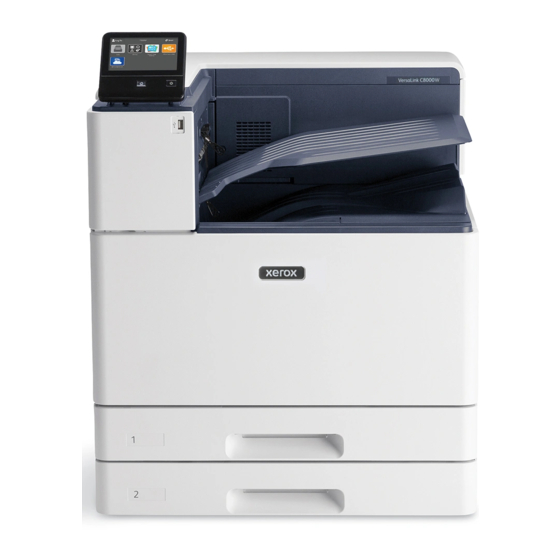
Page 20: Parts Of The Printer
F F r r o o n n t t V V i i e e w w 1. Paper Trays (configurations vary from 2 to 4. Center Top Tray 4 trays) 5. Center Bottom Tray 2. USB Port 6. Front Door 3. Control Panel Xerox ® VersaLink ® C8000W Color Printer User Guide... -
Page 21: Internal Parts
6. Transfer Belt Cleaner 2. Fuser 7. Waste Cartridge 3. White Toner Cartridge 8. Drum Cartridges 4. Cyan, Magenta, and Yellow Toner 9. Waste Toner Transport Unit Cartridges 5. Main Power Switch Xerox ® VersaLink ® C8000W Color Printer User Guide... -
Page 22: Rear View
1. Power Connection 6. Right Rear Cover 2. Wi-Fi Connectivity Port 7. Door A 3. Ethernet Port 8. Bypass Tray 4. USB Host Port 9. Door B 5. USB Device Port Xerox ® VersaLink ® C8000W Color Printer User Guide... -
Page 23: Paper Tray Options
P P a a p p e e r r T T r r a a y y O O p p t t i i o o n n s s 1. Base Model 3. Printer with Two-Tray Module 2. Printer with Tandem Tray Module 4. Printer with Two-Tray Module and High- Capacity Feeder Xerox ® VersaLink ® C8000W Color Printer User Guide... -
Page 24: Finishing Options
1. Horizontal Transport Unit (Center Tray) 5. Staple Cartridge 2. Finisher Front Cover 6. Booklet Maker Tray (Right Bottom Tray) 3. Right Top Tray 7. Booklet Staple Unit 4. Right Middle Tray 8. Booklet Maker Unit Xerox ® VersaLink ® C8000W Color Printer User Guide... - Page 25 4. Booklet Maker Staple Cartridge (optional) 10. Hole Punch Waste Container (optional) 5. Finisher Top Cover 11. Hole Punch Unit (optional) 6. Creaser Unit (optional) 12. Horizontal Transport Cover, Center Catch Tray Xerox ® VersaLink ® C8000W Color Printer User Guide...
-
Page 26: Control Panel
The screen displays information and provides access to printer functions. Power/Wake Button This button serves several power-related functions. • When the printer is powered off, this button powers on the printer. Xerox ® VersaLink ® C8000W Color Printer User Guide... - Page 27 Notifications and messages are displayed in a pop-up banner below the apps area. To view the full notification, touch the center of the banner. After you have reviewed the information, touch X to close. Xerox ® VersaLink ® C8000W Color Printer...
-
Page 28: Power Options
• The touch screen appears blank and unresponsive. • The printer exits Low-Power mode or Sleep mode automatically when it receives data from a connected device. To wake the printer manually, press the Power/Wake button. Xerox ® VersaLink ® C8000W Color Printer... -
Page 29: Powering On The Printer
2. Close the front door. 3. At the printer control panel, press the Power/Wake button. Caution: To avoid damage to the printer, do not unplug the power cord while the printer powers up. Xerox ® VersaLink ® C8000W Color Printer... -
Page 30: Powering Off The Printer
To avoid damage to the printer, do not unplug the power cord while the printer powers down. 3. Open the front door, then press the main power switch to the Off position. 4. Close the front door. Xerox ® VersaLink ®... -
Page 31: Accessing The Printer
When Convenience Authorization is enabled, users swipe a pre-programmed identification card through a Proximity Card Reader at the control panel. To use this method, purchase and install a USB card reader and an authentication server that supports the Xerox Convenience Authentication API. -
Page 32: Introduction To Apps
Getting Started Introduction to Apps Xerox Apps are a gateway to the features and functions of your device. Standard Apps are already installed on the device and appear on the Home screen. Some Apps are installed as standard, but hidden the first time you use the device. -
Page 33: Information Pages
C C o o n n f f i i g g u u r r a a t t i i o o n n R R e e p p o o r r t t The Configuration Report provides product information including installed options, network settings, port setup, tray information, and more. Xerox ® VersaLink ®... - Page 34 P P r r i i n n t t i i n n g g t t h h e e C C o o n n f f i i g g u u r r a a t t i i o o n n R R e e p p o o r r t t 1. At the printer control panel, press the Home button. 2. Touch Device→About→Information Pages. 3. Touch Configuration Report. 4. To return to the Home screen, press the Home button. Xerox ® VersaLink ® C8000W Color Printer...
-
Page 35: The Embedded Web Server
2. Touch Device→About→Information Pages. 3. Touch Configuration Report. The IP address appears in the Connectivity section of the Configuration Report for IPv4 or IPv6. 4. To return to the Home screen, press the Home button. Xerox ® VersaLink ® C8000W Color Printer... -
Page 36: Certificates For The Embedded Web Server
Xerox device. Note: • The Embedded Web Server page for your Xerox device can display an error message that the security certificate is not trusted. This configuration does not lessen the security of the communications between your computer and the Xerox device. -
Page 37: Using The Remote Control Panel Feature
Note: To access the Remote Control Panel, first enable the feature. For details, contact your system administrator or refer to the System Administrator Guide at www.xerox.com/office/ VLC8000Wdocs. To access the Remote Control Panel feature: 1. At your computer, open a Web browser. In the address field, type the IP address of the printer, then press Enter or Return. -
Page 38: Installation And Setup
Routers, network hubs and switches, modems, Ethernet cables, and USB cables are not included with your printer and must be purchased separately. Xerox recommends an Ethernet connection because it is typically faster than a USB connection, and it provides access to the Embedded Web Server. -
Page 39: Removing And Replacing The Rear Access Cover
1. To remove the cover, remove the two thumbscrews securing the cover. Lift the cover away from the printer. 2. To replace the cover, place the bottom hooks over the slots in the printer frame. Raise the cover into place, then replace the two screws. Xerox ® VersaLink ®... -
Page 40: Connecting The Printer
2. Connect the A end of the USB cable to the USB port on the computer. 3. If the Windows Found New Hardware Wizard appears, cancel it. 4. Install the print driver. Xerox ® VersaLink ® C8000W Color Printer... -
Page 41: Connecting To A Wired Network
Connect to any port on the switch or router except the uplink port. 4. To replace the cover, position the tabs on each side of the cable, then raise the cover until it clicks into place. Xerox ® VersaLink ®... -
Page 42: Connecting To A Wireless Network
C C o o n n f f i i g g u u r r i i n n g g t t h h e e P P r r i i n n t t e e r r f f o o r r a a W W i i r r e e l l e e s s s s N N e e t t w w o o r r k k Note: Before you configure wireless network settings, install the Xerox ®... - Page 43 4. Configure the Wi-Fi settings. For details about configuring the Wi-Fi settings, refer to the System Administrator Guide at www.xerox.com/office/VLC8000Wdocs. R R e e m m o o v v i i n n g g t t h h e e W W i i r r e e l l e e s s s s N N e e t t w w o o r r k k A A d d a a p p t t e e r r To remove the Wireless Network Adapter: 1.
- Page 44 Caution: Do not use force to pull on the Wireless Network Adapter. If the latch is released properly, the adapter pulls out easily. Pulling on the adapter can damage it. Xerox ® VersaLink ® C8000W Color Printer...
- Page 45 If the printer was installed previously in a wireless network environment, it could retain setup and configuration information from that environment. To prevent the printer from attempting to connect to the previous network, reset the wireless settings. For more information, refer to the System Administrator Guide at www.xerox.com/office/VLC8000Wdocs. Xerox ®...
- Page 46 To connect to a Wi-Fi network at the control panel: 1. At the printer control panel, press the Home button. 2. Log in as administrator. For details, refer to the System Administrator Guide at www.xerox.com/ office/VLC8000Wdocs. 3. Touch Device→Connectivity→Wi-Fi. 4. To enable the Wi-Fi feature, touch the enable toggle button.
- Page 47 To configure the primary network at the control panel: 1. At the printer control panel, press the Home button. 2. Log in as administrator. For details, refer to the System Administrator Guide at www.xerox.com/ office/VLC8000Wdocs. 3. Touch Device→Connectivity→Primary Network. 4. Select the appropriate network connection type for the device.
- Page 48 6. Touch Manual Setup. 7. Touch Wi-Fi Protected Setup (WPS). Note: If Wi-Fi Protected Setup (WPS) is not visible, at the top of the screen, touch Manual Setup. 8. Touch PIN. Xerox ® VersaLink ® C8000W Color Printer User Guide...
-
Page 49: Initial Printer Setup
You can connect to your printer from a Wi-Fi mobile device, such as a tablet, computer, or smartphone, using Wi-Fi Direct. Wi-Fi Direct is disabled by default. For more information, refer to the System Administrator Guide at www.xerox.com/office/VLC8000Wdocs. Note: Wireless networking is available only on printers with the optional Wireless Network Adapter installed. -
Page 50: Configuring Airprint
For more information on configuring the printer settings, refer to the System Administrator Guide at www.xerox.com/office/VLC8000Wdocs. C C o o n n f f i i g g u u r r i i n n g g A A i i r r P P r r i i n n t t AirPrint ®... -
Page 51: Configuring Google Cloud Print
After the printer is registered, a confirmation status window appears. 11. To access the Google Cloud Print feature, in your Google account, click Manage Your Printer. Note: The default printer name appears in this format: Model name (MAC address). Xerox ® VersaLink ®... -
Page 52: Installing The Software
D D r r i i v v e e r r a a n n d d F F i i r r m m w w a a r r e e U U p p d d a a t t e e s s Xerox is dedicated to providing you with the best possible performance and reliability. To stay current, download and install updates to the device firmware and client print drivers from www.xerox.com/... -
Page 53: Installing The Print Drivers For A Windows Usb Printer
Setup.exe installer file. 5. Click Xerox Smart Start - Driver Installer. 6. Click Agree. 7. At the License Agreement, from the list of discovered printers, select your printer, then click Quick Install. -
Page 54: Installing The Drivers And Utilities For Macos
I I n n s s t t a a l l l l i i n n g g t t h h e e D D r r i i v v e e r r s s a a n n d d U U t t i i l l i i t t i i e e s s f f o o r r M M a a c c O O S S 1. Download the latest print driver from www.xerox.com/office/VLC8000Wsupport. - Page 55 7. In the Name field, enter a name for the printer. 8. From the Use list, choose Select a driver to use. 9. From the printer software list, select the print driver for your printer model. 10. Click Add. Xerox ® VersaLink ®...
-
Page 56: More Information
Online Support Assistant, and print driver downloads. Note: On the Xerox support site, locate and download printer-specific assets for printing cyan, magenta, and yellow on white toner. A resource that you will find especially helpful is the Xerox ®... -
Page 57: Customize And Personalize
Customize and Personalize This chapter contains: • Customize and Personalize Overview ..................58 • Customizing or Personalizing the Home Screen................59 • Customizing or Personalizing the Apps ..................60 Xerox ® VersaLink ® C8000W Color Printer User Guide... -
Page 58: Customize And Personalize Overview
Note: The customize and personalize settings are configured by a system administrator. For details, contact your system administrator, or refer to the System Administrator Guide at www. xerox.com/office/VLC8000Wdocs. Xerox ® VersaLink ®... -
Page 59: Customizing Or Personalizing The Home Screen
3. Touch and hold the required app. 4. Drag the app to the new location. 5. Release the app. 6. Touch Done. 7. Verify that the app appears in the correct location on the Home screen. Xerox ® VersaLink ® C8000W Color Printer... -
Page 60: Customizing Or Personalizing The Apps
6. Touch Enter Preset Name, then to enter a preset name, use the keypad. 7. Touch Next. 8. Select an icon that best suits the preset that you are creating. 9. Touch Done. Note: The preset is stored within the Preset feature. Xerox ® VersaLink ® C8000W Color Printer User Guide... -
Page 61: Removing App Customization Using The Control Panel
1. At the control panel, press the Home button. 2. Touch the app required. 3. Configure the required default settings. 4. Touch Save. 5. Touch Save Defaults. The new settings override the previous default settings. Xerox ® VersaLink ® C8000W Color Printer... - Page 62 Customize and Personalize Xerox ® VersaLink ® C8000W Color Printer User Guide...
-
Page 63: Xerox ® Apps
For more information about customizing the Home screen and the apps features, refer to Customize Personalize. A range of apps is available for download and installation from the Xerox ® App Gallery. These include Xerox ®... -
Page 64: Xerox ® App Gallery
4. Enter a valid email address using the touch screen keypad, then touch Enter. A message appears stating that completion instructions have been sent to the email address that you entered. Touch Close. 5. Access the email account for the email address that you provided to the Xerox ® App Gallery. -
Page 65: App Gallery Account
G G a a l l l l e e r r y y Xerox ® Apps add, extend, or customize the functionality of your device. You can use the Xerox ® Gallery to browse and install apps at your device control panel. -
Page 66: Logging Out Of Your App Gallery Account
® App Gallery: 1. At the printer control panel, press the Home button. 2. Touch Xerox App Gallery. The App Gallery opens. Note: You can browse the App Gallery and view app descriptions without being logged in. To update apps, you must be logged in to the App Gallery. -
Page 67: Device
You can configure many Device options to meet your individual needs. For details about configuring all Device settings, refer to the System Administrator Guide at www.xerox.com/office/VLC8000Wdocs. D D e e v v i i c c e e O O p p t t i i o o n n s s... -
Page 68: Supply Status
To configure Device settings using the Embedded Web Server, refer to the System Administrator Guide at www.xerox.com/office/VLC8000Wdocs. S S u u p p p p l l y y S S t t a a t t u u s s You can check the status and percentage of life remaining for your printer supplies at the control panel or from the Embedded Web Server. -
Page 69: Billing And Usage Counters
You can use the Remote Services option in the Embedded Web Server to send error and usage information to the Xerox support team to help them resolve problems quickly. For information about enabling Remote Services and uploading information to Xerox, refer to the System Administrator Guide at www.xerox.com/office/VLC8000Wdocs. -
Page 70: Jobs
Xerox ® Apps Jobs J J o o b b s s O O v v e e r r v v i i e e w w Use Jobs to view current jobs, print saved, personal, and secure jobs, and view details of completed jobs. -
Page 71: Managing Special Job Types
Xerox ® Apps 3. To view a list of specific job types, touch an option. • To view Saved Jobs, touch Saved Jobs. To print the job, touch the job, enter the quantity, then touch OK. To delete the job, touch the Trash icon, then touch Delete. - Page 72 Xerox ® Apps S S e e c c u u r r e e P P r r i i n n t t Use Secure Print to print sensitive or confidential information. After you send the job, it is held at the printer until you enter your passcode at the printer control panel.
-
Page 73: Managing Jobs Using The Embedded Web Server
Xerox ® Apps 6. Select an option. • To print a Personal Print job, touch the job. • To print all the jobs in the folder, touch Print All. • To delete all the jobs in the folder, touch Delete All. - Page 74 Xerox ® Apps 4. Do one of the following: • To delete the print job, click Delete. At the confirmation prompt, click Delete. • To close the window, click Close. 5. To return to the Home screen, click Home. S S u u b b m m i i t t t t i i n n g g J J o o b b s s f f o o r r P P r r i i n n t t i i n n g g U U s s i i n n g g t t h h e e E E m m b b e e d d d d e e d d W W e e b b S S e e r r v v e e r r 1.
-
Page 75: Print From Usb
Xerox ® Apps Print from USB P P r r i i n n t t f f r r o o m m U U S S B B O O v v e e r r v v i i e e w w Use Print from USB to print jobs already stored on a USB drive. -
Page 76: Printing From A Usb Flash Drive Already Inserted In The Printer
Xerox ® Apps P P r r i i n n t t i i n n g g f f r r o o m m a a U U S S B B F F l l a a s s h h D D r r i i v v e e A A l l r r e e a a d d y y I I n n s s e e r r t t e e d d i i n n t t h h e e P P r r i i n n t t e e r r 1. -
Page 77: Printbyxerox
You can use the Xerox ® @PrintByXerox App to print email attachments and documents sent to your printer from mobile devices. When your Xerox device is connected to the Internet, the @PrintByXerox App works with the Xerox ® Workplace Cloud for simple email-based printing. - Page 78 Xerox ® Apps Xerox ® VersaLink ® C8000W Color Printer User Guide...
-
Page 79: Printing
This chapter contains: • Printing Overview ........................80 • Selecting Printing Options ......................81 • Print Jobs ........................... 90 • Printing Features ........................95 • Using Custom Paper Sizes ......................103 Xerox ® VersaLink ® C8000W Color Printer User Guide... -
Page 80: Printing Overview
Before you print, ensure that your computer and the printer are plugged in, powered on, and connected to an active network. Xerox is dedicated to offering you the best product available, and drivers are updated periodically. Ensure that you have the correct and most recent print driver software installed on your computer. -
Page 81: Selecting Printing Options
Printing Selecting Printing Options Printing options, also called print driver software options, are specified as Printing preferences in Windows and Xerox Features in Macintosh. Printing options include settings for 2-sided printing, ® page layout, and print quality. Printing options that are set from Printing preferences within the Devices and Printers window become the default setting. -
Page 82: Selecting Paper Color
• No Background Your toner adjustment setting along with your color information, Composite RGB, or Composite CMYK, affects how the toner is applied during the printing process. The following explains this process for several settings. Xerox ® VersaLink ® C8000W Color Printer... - Page 83 • Adjust for Black Paper Note: The value 64/64/64 is used as the RGB no-toner value. For more information, refer to the Xerox ® VersaLink ® C8000W Color Printer Essential Guide to Successful Printing at www.xerox.com/versalinkwhite.
-
Page 84: Windows Printing Options
3. In the Printing Preferences window, click a tab, then select the options. To save the settings, click Note: For more information about Windows print driver options, click the Help button (?) in the Printing Preferences window. Xerox ® VersaLink ®... - Page 85 Ready Finisher. • Right Bottom Tray: Use this option to select the output tray on the bottom of the Business Ready Booklet Maker Finisher. 4. To send the job to the printer, click OK, then click Print. Xerox ® VersaLink ®...
- Page 86 The One Touch tab shows previously defined print presets that have been marked as One Touch presets. The presets include the default Xerox options and the options you define. When you select a One Touch preset button, it enables the settings and closes the Printer Preferences window.
-
Page 87: Macintosh Printing Options
To use specific printing options, change the settings before sending the job to the printer. 1. With the document open in your application, click File→Print. 2. Select your printer. 3. In the Print window, in the list, select Printer, then selectLayout or Paper/Output. To access Xerox features, selectXerox Features. Note: •... -
Page 88: Mobile Printing Options
This method is not recommended because output does not go through the color lookup tables and white toner is not accounted for. This printer can print from iOS and Android mobile devices. For more information, refer to Connecting to Wi-Fi Direct. Xerox ® VersaLink ® C8000W Color Printer User Guide... - Page 89 • The name and location of your printer appears in a list of MOPRIA ™ -enabled printers on connected devices. To print using MOPRIA ™ , follow the directions provided with your mobile device. Xerox ® VersaLink ® C8000W Color Printer User Guide...
-
Page 90: Print Jobs
OK. To print a Secure Job, touch the job. To print or delete all the jobs in the folder, touch Print All, or Delete All. 4. To view details about a job, touch the job. 5. To return to the Home screen, press the Home button. Xerox ® VersaLink ®... -
Page 91: Printing Special Job Types
• For Windows, click Printer Properties. Depending on your application, the title of the button can vary. • For Macintosh, in the Print window, in the print options list, click Xerox Features. 3. For Job Type, select Saved Job. a. Type a job name or select a name from the list. - Page 92 • For Windows, click Printer Properties. Depending on your application, the title of the button varies. • For Macintosh, in the Print window, in the print options list, click Xerox Features. 3. For Job Type, select Secure Print. 4. Type the passcode, confirm the passcode, then click OK.
- Page 93 • For Windows, click Printer Properties. Depending on your application, the title of the button varies. • For Macintosh, in the Print window, in the print options list, click Xerox Features. 3. For Job Type, select Personal Print. 4. Select any other required printing options.
- Page 94 • For Windows, click Printer Properties. Depending on your application, the title of the button varies. • For Macintosh, in the Print window, in the print options list, click Xerox Features. 3. For Job Type, select Sample Set. 4. Select any other required printing options.
-
Page 95: Printing Features
Alternatively, you can select a specific tray loaded with the required paper. Note: To reduce the appearance of margins, ensure that your output paper size matches your design file document size. For more information, refer to the Xerox ® VersaLink ®... -
Page 96: Print Quality
When printing a multiple-page document, you can print more than one page on a single sheet of paper. To print 1, 2, 4, 6, 9, or 16 pages per side, select Pages Per Sheet on the Layout tab. Xerox ® VersaLink ®... -
Page 97: Printing Booklets
• For Windows, Booklet Layout is on the Page Layout tab. Page Layout is on the Document Options tab. • For Macintosh, in the Print window, in Xerox Features, Booklet Layout is on the Paper/Output list. When you print booklets using the Windows PostScript or Macintosh driver, you can specify the gutter and creep. - Page 98 1, 6, 9, 10, and 11, type 1,6,9-11. • Paper: Displays the default size, color, and type of paper selected in Use Job Settings. • 2-Sided Printing allows you to select 2-sided printing options. Click the Down arrow to select an option: Xerox ® VersaLink ®...
-
Page 99: Printing Annotations For Windows
4. For a date or time stamp, click Add Time Stamp. Specify the date and time option, select the required settings, then click OK. 5. To add a picture annotation, click Add Picture. To locate the picture, click the Browse icon. Select the required settings, then click OK. Xerox ® VersaLink ®... -
Page 100: Printing Watermarks For Windows
1. In the print driver, click the Document Options tab. 2. Click the Watermark tab. 3. From the Watermark menu, select the watermark. You can choose from preset watermarks, or create a customized watermark. You can also manage watermarks from this menu. Xerox ® VersaLink ®... -
Page 101: Orientation
• Landscape: Orients the paper so that the text and images print across the long dimension of the paper. • Rotated Landscape: Orients the paper so that the content is rotated 180 degrees and with the long bottom side up. Xerox ® VersaLink ®... -
Page 102: Advanced Printing Options
• Notify for Failed or Canceled Jobs: This option provides notification of all jobs that failed to print or were canceled. • Play Alert Tone: This option sounds an alert tone when a notification appears. Xerox ® VersaLink ®... -
Page 103: Using Custom Paper Sizes
Before printing on a custom paper size, use the Custom Paper Sizes feature in Printer Properties to define the custom size. Note: To reduce the appearance of margins, ensure that your output paper size matches your design file document size. For more information, refer to the Xerox ® VersaLink ®... - Page 104 Configuring Tray Settings. 1. Open the paper tray, then load the custom-size paper. 2. Close the tray. 3. At the control panel, to define the new paper size, touch Size, then touch Custom. Xerox ® VersaLink ® C8000W Color Printer...
- Page 105 Printing 4. In the Custom Paper Size window, enter the height and width of the new paper size, then touch 5. To confirm the settings, touch Confirm. Xerox ® VersaLink ® C8000W Color Printer User Guide...
- Page 106 Printing Xerox ® VersaLink ® C8000W Color Printer User Guide...
-
Page 107: Paper And Media
Paper and Media This chapter contains: • Paper and Media Overview....................... 108 • Supported Paper ........................109 • Configuring Tray Settings......................116 • Loading Paper.......................... 120 • Printing on Special Paper......................132 Xerox ® VersaLink ® C8000W Color Printer User Guide... -
Page 108: Paper And Media Overview
Ensure that you use the correct media for the tray that you load. Labels are affixed inside each tray to show how to load certain types of media in the correct orientation. The MAX label shows the maximum fill line for the tray. Xerox ® VersaLink ®... -
Page 109: Supported Paper
Caution: The Xerox Warranty, Service Agreement, or Xerox Total Satisfaction Guarantee does not cover damage caused by using unsupported paper or specialty media. The Xerox Total Satisfaction Guarantee is available in the United States and Canada. Coverage could vary outside these areas. Please contact your local representative for details. -
Page 110: Paper Storage Guidelines
Module Letterhead Plain Pre-Printed Recycled Custom Lightweight Cardstock 106–176 g/m² Lightweight Glossy Cardstock Cardstock 177–220 g/m² Glossy Cardstock Heavyweight Cardstock 221–300 g/m² Heavyweight Glossy Cardstock Labels 106–176 g/m² Postcards 106–220 g/m² Xerox ® VersaLink ® C8000W Color Printer User Guide... - Page 111 Pre-Printed Recycled Custom Lightweight Cardstock 106–176 g/m² Lightweight Glossy Cardstock Cardstock 177–220 g/m² Glossy Cardstock Heavyweight Cardstock 221–300 g/m² Heavyweight Glossy Cardstock Labels 106–176 g/m² Postcards 106–220 g/m² Envelopes 75–90 g/m² Xerox ® VersaLink ® C8000W Color Printer User Guide...
-
Page 112: Supported Standard Paper Sizes
If Bond is not listed as an available Paper Type, ensure that the system software is up-to- date. For details, refer to the System Administrator Guide at www.xerox.com/office/ VLC8000Wdocs. S S u u p p p p o o r r t t e e d d S S t t a a n n d d a a r r d d P P a a p p e e r r S S i i z z e e s s... - Page 113 C6 envelope (114 x 162 mm, 4.5 x No. 10 envelope (241 x 105 mm, 6.38 in.) 4.1 x 9.5 in.) C4 envelope (229 x 324 mm, 9 x 12.8 in.) Xerox ® VersaLink ® C8000W Color Printer User Guide...
-
Page 114: Supported Standard Paper Sizes For Automatic 2-Sided Printing
Letterhead Plain Pre-Printed Recycled Custom Lightweight Cardstock 106–176 g/m² Lightweight Glossy Cardstock Cardstock 177–220 g/m² Glossy Cardstock Heavyweight Cardstock 221–300 g/m² Heavyweight Glossy Cardstock Tray 6 Bond 64–105 g/m² Hole-Punched Letterhead Xerox ® VersaLink ® C8000W Color Printer User Guide... -
Page 115: Supported Custom Paper Sizes
Maximum: 320 x 1320 mm (12.6 x 52 in.) Custom paper sizes are not supported Tray 6 Envelope Tray Minimum: 90 x 98 mm (3.5 x 3.9 in.) Maximum: 241 x 332 mm (9.5 x 13 in.) Xerox ® VersaLink ® C8000W Color Printer User Guide... -
Page 116: Configuring Tray Settings
Note: To configure tray settings, log in as the system administrator. For details, refer to the System Administrator Guide at www.xerox.com/office/VLC8000Wdocs. To configure the tray settings: 1. At the printer control panel, touch Device. 2. Touch Paper Trays, then select the required tray. -
Page 117: Configuring Tray 6
2. To remove the spacer plate, grasp the spacer plate and lift upward. 3. Place the tabs at the bottom of the spacer plate into the slots in the bottom of Tray 6 that correspond with the paper size. Xerox ® VersaLink ®... - Page 118 5. To secure the spacer plate, install the screw. 6. Repeat these steps for the spacer plate at the front of Tray 6. 7. On the top of the side gate, locate the pin. Xerox ® VersaLink ®...
- Page 119 Paper and Media 8. Lift the pin, then guide it to the required paper-size slot. 9. To lock the side gate into place, release the pin. Xerox ® VersaLink ® C8000W Color Printer User Guide...
-
Page 120: Loading Paper
When the paper in the tray is in short supply, or when a tray is empty, a warning message appears on the control panel. To load the paper in Trays 1–4: 1. Pull out the tray until it stops. 2. Remove any paper that is a different size or type. Xerox ® VersaLink ® C8000W Color Printer... - Page 121 The procedure separates any sheets that are stuck together and reduces the possibility of jams. Note: To avoid jams and misfeeds, do not remove paper from its packaging until you are ready to use it. Xerox ® VersaLink ® C8000W Color Printer...
- Page 122 • Insert letterhead and pre-printed paper face down with the top edge to the left. • Load hole-punched paper with the holes toward the back. Note: Use short-edge feed for custom-size paper and special media. Xerox ® VersaLink ® C8000W Color Printer...
- Page 123 • If pre-printed paper is loaded in the printer, for type, select Pre-printed. 9. To confirm the settings, touch OK. Note: To change the paper settings when the tray is set to Dedicated mode, refer to Configuring Tray Settings. Xerox ® VersaLink ® C8000W Color Printer User Guide...
-
Page 124: Loading Paper In Trays 3 And 4 Of The Tandem Tray Module
Note: To avoid paper jams and misfeeds, do not remove the packaging from the paper until you are ready to use it. Xerox ® VersaLink ®... - Page 125 5. At the control panel, select the correct paper type and color. • If letterhead paper is loaded in the printer, for type, select Letterhead. • If pre-printed paper is loaded in the printer, for type, select Pre-printed. 6. To confirm the settings, touch OK. Xerox ® VersaLink ®...
-
Page 126: Loading Paper In The Bypass Tray
1. Open the Bypass Tray. If the tray is loaded with paper, remove any paper that is a different size or type. 2. Pull out the extension tray for larger sizes. 3. Move the width guides to the edges of the tray. Xerox ® VersaLink ®... - Page 127 5. Load the paper in the tray. • For long-edge feed and 1-sided printing: • Load letterhead paper face up with the top edge toward the front. • Load hole-punched paper with the holes to the right. Xerox ® VersaLink ®...
- Page 128 • Load hole-punched paper with the holes to the right. • For short-edge feed and 1-sided printing: • Load letterhead paper face up with the top edge to the right. • Load hole-punched paper with the holes toward the back. Xerox ® VersaLink ®...
- Page 129 7. At the control panel, select the correct paper size, type, and color. • If letterhead paper is loaded in the printer, for type, select Letterhead. • If pre-printed paper is loaded in the printer, for type, select Pre-printed. 8. To confirm the settings, touch OK. Xerox ® VersaLink ®...
-
Page 130: Loading Paper In Tray 6
4. Fan the edges of the paper before loading it into the paper trays. The procedure separates any sheets of paper that are stuck together and reduces the possibility of paper jams. Note: To avoid paper jams and misfeeds, do not remove paper from the packaging until necessary. Xerox ® VersaLink ® C8000W Color Printer... - Page 131 7. At the control panel, select the correct type, and color. • If letterhead paper is loaded in the printer, for type, select Letterhead. • If pre-printed paper is loaded in the printer, for type, select Pre-printed. 8. To confirm the settings, touch OK. Xerox ® VersaLink ®...
-
Page 132: Printing On Special Paper
Paper and Media Printing on Special Paper To order special paper or other special media, contact your local reseller or visit www.xerox.com/ office/VLC8000Wsupplies. E E n n v v e e l l o o p p e e s s You can print envelopes from the Bypass Tray. - Page 133 2. Move the width guides to the edges of the tray. Note: If you do not load envelopes in the Bypass Tray right after they are removed from the packaging, they can bulge. To avoid jams, flatten the envelopes. Xerox ® VersaLink ®...
- Page 134 Rotate Image 180 Degrees. 4. At the control panel, select the correct paper size, type, and color. Ensure that the paper type is set to Envelope. 5. To confirm the settings, touch Confirm. Xerox ® VersaLink ® C8000W Color Printer...
- Page 135 You can use the optional Envelope Tray in place of Tray 1. The Envelope Tray is a dedicated tray and holds the following standard envelope sizes: • C4, C6, and DL • Monarch and No.10 To load the Envelope Tray: 1. Pull out the Envelope Tray until it stops. Xerox ® VersaLink ® C8000W Color Printer User Guide...
- Page 136 Adjust the paper guides so that they rest lightly against the edges of the envelopes. Ensure that the maximum fill line is visible or that there are no more than 50 envelopes loaded in the tray. Xerox ® VersaLink ®...
- Page 137 • Before loading labels, remove all other paper from the tray. WARNING: Do not use any sheet where labels are missing, curled, or pulled away from the backing sheet. It could damage the printer. Xerox ® VersaLink ® C8000W Color Printer...
- Page 138 2. Ensure that the paper guides are set in the correct position for the size labels you are loading. 3. Remove any paper that is a different size or type. 4. To move out the length or width paper guide, release the guide lock, then slide out the length or width paper guide. Xerox ® VersaLink ®...
- Page 139 For short-edge feed, insert labels face up with the top edge to the left. Note: Do not load paper above the maximum fill line. Overfilling can cause paper jams. 6. Adjust the length and width guides to fit the labels. Xerox ® VersaLink ®...
-
Page 140: Labels
4. At the control panel, select the correct paper type and color. Ensure that the paper type is set to Labels. 5. To confirm the settings, touch OK. 6. To return to the Home screen, press the Home button. Xerox ® VersaLink ®... - Page 141 For long-edge feed, load labels face down with the top edge toward the back of the printer. • For short-edge feed, load labels face down with the top edge to the right. Note: Do not load paper above the maximum fill line. Overfilling can cause paper jams. Xerox ® VersaLink ® C8000W Color Printer...
-
Page 142: Banner Paper
L L o o a a d d i i n n g g B B a a n n n n e e r r P P a a p p e e r r i i n n t t h h e e B B y y p p a a s s s s T T r r a a y y 1. Open the Bypass Tray, then pull out the extension tray. Remove any paper that is a different size or type. 2. Move the width guides to the edges of the tray. Xerox ® VersaLink ®... - Page 143 7. To return to the Home screen, press the Home button. Note: As the paper feeds into the printer, support the paper with your hands. To prevent paper jams, feed one sheet of paper at a time. Xerox ® VersaLink ®...
- Page 144 Paper and Media Xerox ® VersaLink ® C8000W Color Printer User Guide...
-
Page 145: Maintenance
• Cleaning the Printer ......................... 147 • Adjustments and Maintenance Procedures................153 • Supplies ........................... 162 • Routine Maintenance Items ..................... 164 • Managing the Printer ....................... 179 • Moving the Printer ........................180 Xerox ® VersaLink ® C8000W Color Printer User Guide... -
Page 146: General Precautions
• Do not touch the electrical contacts or gears. Doing so could damage the printer and cause the print quality to deteriorate. • Ensure that any parts removed during cleaning are replaced before you plug in the printer. Xerox ® VersaLink ®... -
Page 147: Cleaning The Printer
Power off the printer immediately and wait 40 minutes for the fuser to cool. Try to remove the paper jam after the printer has cooled. If the error persists, contact your Xerox representative. Xerox ®... - Page 148 Do not perform this procedure while the printer is printing. 1. Open the front door of the printer. 2. Remove the waste toner transport unit: a. To unlock the waste toner transport unit, rotate the locking lever 45 degrees counterclockwise. Xerox ® VersaLink ® C8000W Color Printer...
- Page 149 Place the removed waste toner transport unit on a level surface, with the openings facing up. Caution: To avoid toner spills, do not lay the waste toner transport unit face down, or on its side. Xerox ® VersaLink ®...
- Page 150 4. Slowly push the cleaning rod into the printer until it stops, then pull out the rod. Repeat this action two more times. 5. Return the cleaning rod to its original location. 6. To insert the waste toner transport unit: Xerox ® VersaLink ®...
- Page 151 Maintenance a. Position the waste toner transport unit as shown. b. Press the waste toner transport unit toward the printer, until both ends click into place. Xerox ® VersaLink ® C8000W Color Printer User Guide...
- Page 152 Maintenance c. To lock the waste toner transport unit, rotate the locking lever 45 degrees clockwise. 7. Close the printer front door. Xerox ® VersaLink ® C8000W Color Printer User Guide...
-
Page 153: Adjustments And Maintenance Procedures
The available settings are printed in a comb pattern, against a background that represents your target density setting. If the best match is between two combs, select a value between the two printed combs. Xerox ® VersaLink ® C8000W Color Printer... - Page 154 To begin your calibration and print the calibration pages: 1. At the printer control panel, press the Home button. 2. Log in as administrator. For details, refer to the System Administrator Guide at www.xerox.com/ office/VLC8000Wdocs. 3. Touch Device→Support→Color Calibration. 4. To select the type of lighting you use for viewing calibration pages, touch Lighting Type, then touch a selection.
- Page 155 9. When the best match for every white row is zero, touch Next. 10. To complete your calibration, follow the onscreen instructions, or refer to Evaluate and Save Your Color Density Calibration. Xerox ® VersaLink ® C8000W Color Printer User Guide...
- Page 156 Starting a Gray Balance Adjustment To begin your calibration and print the calibration pages: 1. At the printer control panel, press the Home button. 2. Log in as administrator. For details, refer to the System Administrator Guide at www.xerox.com/ office/VLC8000Wdocs. Xerox ®...
- Page 157 7. Use the updated light calibration page to repeat the process until the best choice for the light- gray balance section is zero. 8. When the best match is zero, to continue to the next color adjustment, touch Next. 9. Repeat this process for the medium and dark calibration pages. Xerox ® VersaLink ®...
-
Page 158: Color Registration
3. To perform an Automatic Color Registration adjustment, touch Start. 4. At the successfully completed prompt, touch Close. 5. To exit the menu, touch X. 6. To return to the Home screen, press the Home button. Xerox ® VersaLink ®... -
Page 159: Adjusting Paper Registration
V V e e r r i i f f y y i i n n g g P P a a p p e e r r R R e e g g i i s s t t r r a a t t i i o o n n 1. At the printer control panel, press the Home button. 2. Log in as administrator. For details, refer to the System Administrator Guide at www.xerox.com/ office/VLC8000Wdocs. 3. Touch Device→Support→Image Position. -
Page 160: Transfer Voltage Adjustment
To adjust the transfer voltage: 1. At the printer control panel, press the Home button. 2. Log in as administrator. For details, refer to the System Administrator Guide at www.xerox.com/ office/VLC8000Wdocs. 3. Load paper in the Bypass Tray. 4. Touch Device→Support→Transfer Voltage Adjustment. - Page 161 To adjust the transfer voltage, for Side 1 or Side 2, touch the Plus (+) icon or the Minus (-) icon. e. To accept the settings, touch OK. 9. To return to the Device screen, press the back arrow. 10. To return to the Home screen, press the Home button. Xerox ® VersaLink ® C8000W Color Printer...
-
Page 162: Supplies
Agreement, and Total Satisfaction Guarantee do not cover damage, malfunction, or degradation of performance caused by use of non-Xerox supplies, or the use of Xerox supplies not specified for this printer. The Total Satisfaction Guarantee is available in the United States and Canada. -
Page 163: Recycling Supplies
Electric sparks inside the vacuum cleaner can cause a fire or explosion. If you spill a large volume of toner, contact your local Xerox representative. • Never throw a toner cartridge into an open flame. Remaining toner in the cartridge can catch fire and cause burn injuries or an explosion. -
Page 164: Routine Maintenance Items
Caution: To avoid toner spills, do not lay the waste cartridge face down, or on its side. Note: Each new waste cartridge includes installation instructions. Xerox ® VersaLink ® C8000W Color Printer... -
Page 165: Replacing Staples In The Office Finisher
2. Reach into the finisher cabinet and pull the stapler toward you until it stops. 3. Push the stapler assembly to the right, as shown. 4. To remove the staple cartridge, grasp the orange handle, then pull it firmly toward you. Xerox ® VersaLink ®... - Page 166 6. Insert the front side of the new staple pack into the staple cartridge, then push the rear side into the cartridge. 7. Grasp the new staple cartridge by the orange handle, then insert the cartridge into the stapler assembly until it clicks. 8. Close the finisher front door. Xerox ® VersaLink ® C8000W Color Printer...
- Page 167 2. If the staple cartridges are not visible, grip the vertical panels at the left and right of the opening and slide the panels to the center. 3. Hold the tabs on both sides of the staple cartridge and pull the cartridge out of the finisher. Xerox ® VersaLink ®...
- Page 168 Note: The booklet maker uses two staple cartridges. Booklet stapling requires that both staple cartridges contain staples. 5. Repeat the procedure for the other staple cartridge. 6. Close the booklet maker side cover. Xerox ® VersaLink ® C8000W Color Printer...
-
Page 169: Replacing Staples In The Business Ready Finisher
1. Open the front door of the Business Ready Finisher. 2. Hold the stapler assembly by the orange lever R1 and push it to the right. 3. To remove the staple cartridge, grasp the orange handle, then firmly pull it toward you. Xerox ® VersaLink ®... - Page 170 6. Grasp the new staple cartridge by the orange handle, then insert the cartridge into the stapler assembly until you hear a click. 7. Return the staple cartridge assembly to the original position. Xerox ® VersaLink ®...
- Page 171 2. Grasp the booklet maker handle and pull the unit toward you until the staple cartridges appear on the top edge of the unit. 3. To unlock a staple cartridge from the booklet maker, push down on the orange staple cartridge handle, as shown. Xerox ® VersaLink ®...
- Page 172 4. To remove a staple cartridge from the booklet maker, pull the staple cartridge out and up. 5. Turn over the staple cartridge. 6. To permit the staple cartridge handle to open out and away from the staple pack, press in the green tabs, then pull back the handle. Xerox ® VersaLink ®...
- Page 173 8. Insert the front side of the new staple pack into the staple cartridge, then push the rear side into the cartridge. 9. To close the staple cartridge, push back the cartridge handle until it clicks. Xerox ® VersaLink ®...
-
Page 174: Emptying The Hole Punch Waste Container
E E m m p p t t y y i i n n g g t t h h e e H H o o l l e e P P u u n n c c h h W W a a s s t t e e C C o o n n t t a a i i n n e e r r A message appears on the control panel when the hole punch waste container is full. Xerox ®... - Page 175 E E m m p p t t y y i i n n g g t t h h e e H H o o l l e e P P u u n n c c h h W W a a s s t t e e C C o o n n t t a a i i n n e e r r i i n n t t h h e e O O f f f f i i c c e e F F i i n n i i s s h h e e r r Caution: Do not perform this procedure while the printer is printing. 1. Lift the finisher transport top cover. 2. Pull out the hole-punch waste container. 3. Empty the container. Xerox ® VersaLink ® C8000W Color Printer User Guide...
- Page 176 Maintenance 4. Insert the container all the way into the finisher. 5. Close the finisher transport top cover. Xerox ® VersaLink ® C8000W Color Printer User Guide...
- Page 177 The hole-punch counter resets after 10 seconds. • If you remove the hole-punch waste container before the device instructs you to, empty the container before you reinsert it into the finisher. 3. Empty the container. Xerox ® VersaLink ®...
- Page 178 Maintenance 4. Insert the container all the way into the finisher. 5. Close the front door of the Business Ready Finisher. Xerox ® VersaLink ® C8000W Color Printer User Guide...
-
Page 179: Managing The Printer
Services Upload feature to simplify the process. You can enable Remote Services to send billing meter readings to Xerox automatically so that you do not have to collect the readings manually. For more information, refer to the System Administrator Guide at www.xerox.com/... -
Page 180: Moving The Printer
Do not expose the drum cartridge to direct sunlight or strong indoor fluorescent lighting. Do not touch or scratch the surface of the drum. Caution: Failure to repackage the printer properly for shipment can result in damage not covered by the Xerox ® Warranty, Service Agreement, or Total Satisfaction Guarantee. The Xerox ®... -
Page 181: Troubleshooting
• Paper Jams ..........................187 • Clearing Finisher Jams ......................201 • Clearing Staple Jams........................ 210 • Clearing Hole Punch Jams ......................221 • Print-Quality Problems......................222 • Getting Help ..........................230 Xerox ® VersaLink ® C8000W Color Printer User Guide... -
Page 182: General Troubleshooting
Power off the printer, then power on again. For more information, refer to Printing the Error History Report. If the error persists, contact your Xerox representative. The printer is connected to an Power off the printer, then connect the power cord to a suitable uninterruptible power supply. -
Page 183: Printer Does Not Print
Power off the printer, confirm that the power cord is plugged in correctly to the printer and the outlet, then power on the printer. If the error persists, contact your Xerox representative. • If the Status LED is flashing blue, a previous print job could be The printer is busy. -
Page 184: Printing Takes Too Long
The job is complex. Wait. No action needed. The print-quality mode in the print Change the print-quality mode in the print driver to Standard. driver is set to Enhanced or Photo. Xerox ® VersaLink ® C8000W Color Printer User Guide... -
Page 185: Document Prints From Wrong Tray
If you cannot remove the obstruction, contact your Xerox representative. C C o o n n d d e e n n s s a a t t i i o o n n H H a a s s F F o o r r m m e e d d I I n n s s i i d d e e t t h h e e P P r r i i n n t t e e r r Moisture can condense in the printer when room humidity exceeds 85% or when a cold printer is located in a warm room. - Page 186 The relative humidity of the room is too • Move the printer to a location where the temperature and high. relative humidity are within the operating specifications. For more information, refer to Environmental Specifications. Xerox ® VersaLink ® C8000W Color Printer User Guide...
-
Page 187: Paper Jams
If a sheet of paper is wrapped around the heat roller, do not try to remove the paper immediately. Power off the printer immediately and wait 40 minutes for the fuser to cool. Try to remove the jam after the printer has cooled. If the error persists, contact your Xerox representative. - Page 188 • Before printing, select the correct paper type and size in the print driver. • Store paper in a dry location. • When jams occur printing on heavy coated paper, load that paper into the printer a single sheet at a time. Xerox ® VersaLink ®...
-
Page 189: Clearing Paper Jams
• To confirm the same paper size, type, or color, touch OK. • To select a new paper size, type, or color, touch the current setting, then select a new setting. When finished, touch OK. 7. To return to the Home screen, press the Home button. Xerox ® VersaLink ®... - Page 190 • To confirm the same paper size, type, or color, touch OK. • To select a new paper size, type, or color, touch the current setting, then select a new setting. When finished, touch OK. 6. To return to the Home screen, press the Home button. Xerox ® VersaLink ®...
- Page 191 The area around the Fuser can be hot. Use caution to avoid injury. Caution: Do not touch the Transfer Roller. Touching the roller can reduce image quality. 2. Remove the jammed paper. 3. If paper is jammed on the inside of Door A, remove it. Xerox ® VersaLink ® C8000W Color Printer...
- Page 192 5. If paper is jammed in the Fuser, remove the paper from areas A1 and A2. a. To open the paper guide, pull out handle A1. b. Remove any paper in area A1. Xerox ® VersaLink ® C8000W Color Printer...
- Page 193 Troubleshooting c. Lift handle A1 back into place. d. To open the paper guide, lift handle A2. e. Remove any paper in area A2. Xerox ® VersaLink ® C8000W Color Printer User Guide...
- Page 194 Note: If the paper is torn, remove all torn pieces from the printer. 6. To close Door A, push the door up firmly until it clicks into place. Xerox ® VersaLink ® C8000W Color Printer...
- Page 195 If the paper is inaccessible, refer to Clearing Paper Jams at Door 4. For paper jammed at a tray feed roller, open Trays 3 and 4, then remove the paper. Note: The optional Tandem Tray Module is shown. Xerox ® VersaLink ® C8000W Color Printer...
- Page 196 5. For printers with a Tandem Tray Module, remove any paper jammed in the Tray 4 paper guide. a. Grasp handle C, then pull the Tray 4 paper guide until it stops. b. Lift the paper guide cover, then remove any paper. c. Lower the paper guide cover. Xerox ® VersaLink ®...
- Page 197 Troubleshooting d. Push the paper guide back into position. 6. Close the paper trays. 7. Close Door B. Xerox ® VersaLink ® C8000W Color Printer User Guide...
-
Page 198: Troubleshooting Paper Jams
Remove the paper from the paper tray. Load new, dry paper into the tray. Too much static electricity is present. Load a new ream of paper. Using unsupported paper. Use only Xerox ® -approved paper. For details, refer to Supported Paper. - Page 199 The paper is moist from humidity. Remove the moist paper and replace it with new, dry paper. The paper is the wrong size, thickness, or type. Use only Xerox approved paper. For more information, refer to Supported Paper. L L a a b b e e l l a a n n d d E E n n v v e e l l o o p p e e M M i i s s f f e e e e d d s s...
- Page 200 Ensure that paper is loaded into the correct tray. For more information, refer to Supported Paper. Tray is loaded with mixed paper. Load the tray with only one type and size of paper. Xerox ® VersaLink ® C8000W Color Printer User Guide...
-
Page 201: Clearing Finisher Jams
1. Pull up the lever on the top cover, then open the top cover. 2. Remove the jammed paper. Note: If the paper is torn, remove all torn pieces of the jammed paper from the finisher. 3. Close the top cover of the finisher. Xerox ® VersaLink ® C8000W Color Printer... - Page 202 1. Open the finisher transport cover. 2. Remove the jammed paper. Note: If the paper is torn, remove all torn pieces of the jammed paper from the finisher. 3. Close the finisher transport cover. Xerox ® VersaLink ® C8000W Color Printer...
-
Page 203: Clearing Jams In The Business Ready Finisher
C C l l e e a a r r i i n n g g J J a a m m s s i i n n t t h h e e C C e e n n t t e e r r T T r r a a y y 1. If the paper is jammed at the exit to the center output tray, pull the paper in the direction shown. 2. Open, then close, the finisher transport cover. Xerox ® VersaLink ®... - Page 204 C C l l e e a a r r i i n n g g J J a a m m s s i i n n t t h h e e B B R R F F i i n n i i s s h h e e r r a a t t P P o o s s i i t t i i o o n n 3 3 a a 1. If the paper is visible at the output tray exit, remove the paper by pulling it gently in the direction shown. 2. Open the front door of the Business Ready Finisher. Xerox ® VersaLink ®...
- Page 205 • If the paper is inaccessible, or if the press User Interface (UI) prompts you to release the paper, turn green handle knob 3b in the direction shown. 5. Return green handle 3a to its original position. 6. Close the front door of the Business Ready Finisher. Xerox ® VersaLink ®...
- Page 206 • If the paper is inaccessible, or if the press User Interface (UI) prompts you to release the paper, turn green handle knob 3b in the direction shown. 4. Return green lever 3c to its original position. 5. Close the front door of the Business Ready Finisher. Xerox ® VersaLink ®...
- Page 207 3. Carefully remove the paper. Note: If the paper is torn, remove all torn pieces from the finisher. 4. Return green lever 3d to its original position. 5. Close the front door of the Business Ready Finisher. Xerox ® VersaLink ® C8000W Color Printer...
- Page 208 3. To remove the jammed paper, turn green knob 4 in either direction as shown. Note: If the paper is torn, remove all torn pieces from the finisher. 4. Return unit 4 to its original position. 5. Close the front door of the Business Ready Finisher. Xerox ® VersaLink ® C8000W Color Printer...
- Page 209 3. To remove the paper, pull it in the direction shown. Note: If the paper is torn, remove all torn pieces from the finisher. 4. Close the front door of the Business Ready Finisher. Xerox ® VersaLink ® C8000W Color Printer...
-
Page 210: Clearing Staple Jams
3. Push the stapler assembly to the right, as shown. 4. To remove the staple cartridge, grasp the orange handle, then pull the handle toward you. 5. Check inside the finisher for any loose staples, then remove the staples. Xerox ® VersaLink ®... - Page 211 The points of the jammed staples are sharp. Remove the jammed staples carefully. 8. Grasp the orange handle, then insert the cartridge into the stapler assembly until the cartridge clicks into place. 9. Close the finisher front door. Xerox ® VersaLink ® C8000W Color Printer...
-
Page 212: Clearing Booklet Staple Jams In The Office Finisher
2. If the staple cartridges are not visible, grip the vertical panels at the left and right of the opening and slide the panels to the center. 3. Hold the tabs on both sides of the staple cartridge and pull the cartridge out of the finisher. Xerox ® VersaLink ®... - Page 213 Note: The booklet maker uses two staple cartridges. Booklet stapling requires that both staple cartridges contain staples. 6. Repeat the procedure for the other staple cartridge. 7. Close the booklet maker side cover. Xerox ® VersaLink ® C8000W Color Printer...
-
Page 214: Clearing Main Staple Jams In The Business Ready Finisher
1. Open the front door of the Business Ready Finisher. 2. Locate and hold the stapler assembly by the orange lever R1, then push it to the right. 3. To remove the staple cartridge, grasp the orange handle, then pull it firmly toward you. Xerox ® VersaLink ®... - Page 215 The points of the jammed staples are sharp. Remove the jammed staples carefully. 6. To close the staple clamp, push the clamp in the direction shown until it snaps into the locked position. Xerox ® VersaLink ® C8000W Color Printer...
- Page 216 7. Grasp the new staple cartridge by the orange handle, then insert the cartridge into the stapler assembly until it clicks. 8. Return the staple cartridge assembly to its original position, then close the finisher door. Xerox ® VersaLink ®...
-
Page 217: Clearing Staple Jams In The Booklet Maker Of The Business Ready Finisher
3. To remove a staple cartridge from the booklet maker, push down on the staple cartridge handle, then pull the cartridge out and up. 4. Turn over the staple cartridge. Xerox ® VersaLink ®... - Page 218 If you do not see the staple jam, remove the staple case. 6. To remove the staple case, press the rear of the case as shown. Note: If you can see the staple jam, open the clamp on the staple cartridge. Xerox ® VersaLink ®...
- Page 219 8. Remove the jammed staples, then push the clamp in the direction shown until it snaps into the locked position. 9. To close the staple cartridge, push back the cartridge handle until it clicks. Xerox ® VersaLink ® C8000W Color Printer...
- Page 220 10. To return the staple cartridge to the booklet maker, insert the staple cartridge and push up on the cartridge handle as shown. 11. Return the booklet maker to the original position, then close the front door of the Business Ready Finisher. Xerox ® VersaLink ®...
-
Page 221: Clearing Hole Punch Jams
If the printer stops printing and reports a hole-punch jam, empty the hole-punch waste container. For details, refer to Emptying the Hole Punch Waste Container in the Office Finisher. After you empty the hole-punch waste container, locate and remove any paper jams. Xerox ® VersaLink ® C8000W Color Printer... -
Page 222: Print-Quality Problems
Total Satisfaction Guarantee is available in the United States and Canada. Coverage can vary outside these areas. Contact your local Xerox representative for details. Note: • To ensure consistent print quality, the toner, print, and drum cartridges for many devices are designed to cease functioning at a predetermined point. -
Page 223: Solving Print-Quality Problems
To determine the print-quality problem more precisely, you can print a Demonstration Print page. For details, refer to Printing Information Pages. 4. After you perform the appropriate action, if the print quality does not improve, contact your Xerox representative. Xerox ®... - Page 224 For details, refer to the page or the margins are Adjusting Paper Registration. not consistent. Faded printouts with multiple The toner cartridges are not Xerox ® Verify that the toner cartridges colors. toner cartridges. meet specifications. Replace the cartridges if necessary.
- Page 225 Essential Guide to Successful Printing at www.xerox.com/ versalinkwhite. The paper is damp. Replace the paper. The high-voltage supply is For assistance, go to the Xerox ® defective. Support website at www.xerox. com/office/VLC8000Wsupport. Only one color is faded. The toner cartridge is empty or Check the condition of the toner damaged.
- Page 226 Do not touch the Transfer Roller or the exposed end of the Transfer Belt. Fingerprints can cause print-quality issues. The toner cartridges are not Xerox ® Ensure that the toner cartridges toner cartridges. meet specifications. Replace the cartridges if necessary.
- Page 227 • Remove the paper or debris White line or lines running Paper or debris is dragging the from the printer. through all colors. bottom of the transfer belt. • For assistance, go to the Xerox ® Support website at www.xerox. com/office/VLC8000Wsupport. Xerox ®...
- Page 228 • 88 mm (3.46 in.): Fuser • 64 mm (2.52 in.): Transfer Roller • 33 mm (1.30 in.): Developer Roller; for Service only 3 If the repeating defects match one of these distances, replace that item. Xerox ® VersaLink ® C8000W Color Printer User Guide...
- Page 229 Unwanted white background on The output is not printing through feature. For details, refer to the prints. the correct Xerox print driver, or the Setting the Toner Adjustment driver settings are incorrect. • Print through the Xerox print driver, using the appropriate Adjust for Toner settings.
-
Page 230: Getting Help
O O n n l l i i n n e e S S u u p p p p o o r r t t A A s s s s i i s s t t a a n n t t The Online Support Assistant is a knowledge base that provides instructions and troubleshooting help to solve your printer problems. You can find solutions for print-quality problems, paper jams, software installation issues, and more. Xerox ® VersaLink ®... -
Page 231: More Information About Your Printer
Troubleshooting To access the Online Support Assistant, go to www.xerox.com/office/VLC8000Wsupport. M M o o r r e e I I n n f f o o r r m m a a t t i i o o n n a a b b o o u u t t Y Y o o u u r r P P r r i i n n t t e e r r... - Page 232 Troubleshooting Xerox ® VersaLink ® C8000W Color Printer User Guide...
-
Page 233: A Specifications
Specifications This appendix contains: • Printer Configurations and Options ..................234 • Physical Specifications ......................236 • Environmental Specifications ....................242 • Electrical Specifications......................243 • Performance Specifications ...................... 245 Xerox ® VersaLink ® C8000W Color Printer User Guide... -
Page 234: Printer Configurations And Options
A A v v a a i i l l a a b b l l e e C C o o n n f f i i g g u u r r a a t t i i o o n n s s The printer is available in the following configuration, as the Xerox ®... -
Page 235: Options And Upgrades
Remote Access Xerox Embedded Web Server O O p p t t i i o o n n s s a a n n d d U U p p g g r r a a d d e e s s •... -
Page 236: Physical Specifications
Width: 62 cm (24.4 in.) Depth: 72.3 cm (28.5 in.) Height: 107 cm (42.2 in.) Weight with a Two-Tray Module: 108 kg (238 lb.) Weight with Tandem Tray Module: 115 kg (254 lb.) Xerox ® VersaLink ® C8000W Color Printer... - Page 237 B B a a s s e e M M o o d d e e l l w w i i t t h h T T a a n n d d e e m m T T r r a a y y M M o o d d u u l l e e a a n n d d B B R R F F i i n n i i s s h h e e r r Width with stability foot: 143.8 cm (56.6 in.) Depth: 72.3 cm (28.5 in.) Height: 107 cm (42.2 in.) Weight: ≤ 183 kg (404 lb.) Xerox ® VersaLink ® C8000W Color Printer...
-
Page 238: Total Space Requirements
C C l l e e a a r r a a n n c c e e R R e e q q u u i i r r e e m m e e n n t t s s w w i i t t h h a a T T w w o o - - T T r r a a y y M M o o d d u u l l e e o o r r T T a a n n d d e e m m T T r r a a y y M M o o d d u u l l e e Width: 129.9 cm (51.1 in.) Depth: 167.8 cm (66.1 in.) Height: 107 cm (42.2 in.) Xerox ® VersaLink ® C8000W Color Printer... - Page 239 F F i i n n i i s s h h e e r r w w i i t t h h B B o o o o k k l l e e t t M M a a k k e e r r Width: 183.7 cm (72.3 in.) Depth: 167.8 cm (66.1 in.) Height: 108 cm (42.5 in.) Xerox ® VersaLink ®...
- Page 240 R R e e a a d d y y ( ( B B R R ) ) B B o o o o k k l l e e t t M M a a k k e e r r F F i i n n i i s s h h e e r r Width: 205.4 cm (80.8 in.) Depth: 167.8 cm (66.1 in.) Height: 107 cm (42.2 in.) Xerox ® VersaLink ®...
- Page 241 C C a a p p a a c c i i t t y y F F e e e e d d e e r r , , a a n n d d B B u u s s i i n n e e s s s s R R e e a a d d y y ( ( B B R R ) ) B B o o o o k k l l e e t t M M a a k k e e r r F F i i n n i i s s h h e e r r Width: 214.2 cm (84.3 in.) Depth: 167.8 cm (66.1 in.) Height: 107 cm (42.2 in.) Xerox ® VersaLink ®...
-
Page 242: Environmental Specifications
E E l l e e v v a a t t i i o o n n For optimum performance, use the printer at elevations below 2500 m (8200 ft.). Note: To use the printer at elevations above 2000 m (6560 ft.), the printer may need adjustment. Xerox ® VersaLink ® C8000W Color Printer... -
Page 243: Electrical Specifications
Reducing product energy consumption helps combat smog, acid rain, and long- term changes to the climate by decreasing the emissions that result from generating electricity. ENERGY STAR settings are preset on Xerox equipment at the factory to switch to Power Saver modes ®... -
Page 244: Recycling Supplies
R R e e c c y y c c l l i i n n g g S S u u p p p p l l i i e e s s For more information on the Xerox supplies recycling program, go to www.xerox.com/gwa. -
Page 245: Performance Specifications
25 ppm 25 ppm 14 ppm 8.5 ppm Heavyweight 3: 221–300 g/m 25 ppm 25 ppm 14 ppm 8.5 ppm Label: 106–176 g/m 25 ppm 14 ppm Envelope 25 ppm 14 ppm Xerox ® VersaLink ® C8000W Color Printer User Guide... - Page 246 Specifications Note: For 2-sided printing, performance is not guaranteed. Xerox ® VersaLink ® C8000W Color Printer User Guide...
-
Page 247: B Regulatory Information
Regulatory Information This appendix contains: • Basic Regulations ........................248 • Safety Certification ........................252 • Material Safety Data Sheets ....................253 Xerox ® VersaLink ® C8000W Color Printer User Guide... -
Page 248: Basic Regulations
• Connect the equipment into an outlet on a circuit different from that to which the receiver is connected. • Consult the dealer or an experienced radio/TV technician for help. Changes or modifications to this equipment not approved by Xerox can void the authority of the user to operate this equipment. WARNING: To ensure compliance with Part 15 and Part 18 of the FCC rules, use shielded interface cables. -
Page 249: Canada
• April 16, 2014: Radio Equipment Directive 2014/53/EU Hereby, Xerox declares that the radio equipment model VersaLink C8000W is in compliance with Directive 2014/53/EU. The full text of the EU declaration of conformity can found at the following internet address: www.xerox.com/environment_europe... - Page 250 The device also powers off if Fax, USB Drive, and Wired and Non-Wired Network have not been activated. To change the Power Saver settings, refer to the User Guide at www.xerox.com/office/VLC8000Wdocs. For further assistance, contact your System Administrator or refer to the System Administrator Guide.
-
Page 251: Eurasian Economic Community Certification
Administrator Guide at www.xerox.com/office/VLC8000Wdocs. Environmental Benefits of Duplex Printing Most Xerox products have duplex printing, also known as 2-sided printing, capability. This enables you to print on both sides of the paper automatically, and therefore helps to reduce the use of valuable resources by reducing your paper consumption. -
Page 252: Safety Certification
TÜV Rheinland (US/Canada) CAN/CSA C22.2 No. 60950-1-07, 2nd Edition, 2014-10 IEC 60950-1:2005 + A1:2009 + A2:2013 TÜV Rheinland (Europe) EN 60950-1:2006 + A11:2009 + A1:2010 + A12:2011 + A2:2013 IEC/EN 62368-1:2014 Xerox ® VersaLink ® C8000W Color Printer User Guide... -
Page 253: Material Safety Data Sheets
Material Safety Data Sheets For Material Safety Data information regarding your printer, go to: • North America: www.xerox.com/msds • European Union: www.xerox.com/environment_europe For the Customer Support Center phone numbers, go to www.xerox.com/office/worldcontacts. Xerox ® VersaLink ® C8000W Color Printer User Guide... - Page 254 Regulatory Information Xerox ® VersaLink ® C8000W Color Printer User Guide...
-
Page 255: C Recycling And Disposal
Recycling and Disposal This appendix contains: • All Countries..........................256 • North America ......................... 257 • European Union ........................258 • Other Countries........................260 Xerox ® VersaLink ® C8000W Color Printer User Guide... -
Page 256: All Countries
Recycling and Disposal All Countries If you are managing the disposal of your Xerox product, please note that the printer may contain lead, mercury, perchlorate, and other materials whose disposal may be regulated due to environmental considerations. The presence of these materials is fully consistent with global regulations applicable at the time that the product was placed on the market. -
Page 257: North America
Recycling and Disposal North America Xerox operates an equipment take-back and reuse/recycle program. Contact your Xerox representative (1-800-ASK-XEROX) to determine if this Xerox product is part of the program. For more information about Xerox environmental programs, visit: www.xerox.com/environment For recycling and disposal information, contact your local authorities. -
Page 258: European Union
In accordance with European legislation, end of life electrical and electronic equipment subject to disposal must be managed within agreed procedures. Prior to disposal, please contact your local reseller or Xerox representative for end of life take-back information. C C o o l l l l e e c c t t i i o o n n a a n n d d D D i i s s p p o o s s a a l l o o f f E E q q u u i i p p m m e e n n t t a a n n d d B B a a t t t t e e r r i i e e s s These symbols on the products and/or accompanying documents mean that used electrical and electronic products and batteries should not be mixed with general household waste. -
Page 259: Battery Symbol Note
B B a a t t t t e e r r y y R R e e m m o o v v a a l l Batteries should only be replaced by a manufacturer-approved service facility. Xerox ®... -
Page 260: Other Countries
Recycling and Disposal Other Countries Please contact your local waste management authority to request disposal guidance. Xerox ® VersaLink ® C8000W Color Printer User Guide...
Need help?
Do you have a question about the VersaLink C8000W and is the answer not in the manual?
Questions and answers