
Related Manuals for FlowLine EchoWave LG11 Series


Summary of Contents for FlowLine EchoWave LG11 Series
- Page 1 Guided Wave Liquid Level Transmitter LG10 & LG11 Series Manual Flowline, Inc. | 10500 Humbolt Street, Los Alamitos, CA 90720 p 562.598.3015 f 562.431.8507 w flowline.com MN300840 REV A5...
-
Page 2: Table Of Contents
Introduction / Table of Contents Step One ® EchoWave utilizes TDR (Time Domain Reflectometry) technology. It is best described as low-energy, high- frequency electromagnetic impulses, generated by the sensor’s circuitry that is propagated along the probe as it is immerged in the liquid to be measured. Impulses hit the surface of the media and part of the impulse energy is reflected back up the probe to the circuitry. -
Page 3: Specifications
Introduction Step One ELECTRICAL Analog output: 4 to 20mA < 250Ω Total load resistance: Lower range value: 4.0mA (span 0%) Upper range value: 20.0mA (span 100%) Response time: Supply voltage: 10 to 30VDC (reverse-polarity protected) Current consumption: <50mA at 24VDC Start-up time: <6s Cable terminals:... - Page 4 Introduction Step One APPLICATION SPECIFICATIONS (CONTINUED) Process temperature Rod: F: -40° to 302° C: -40° to 150° Cable: F: -40° to 302° C: -40° to 150° Coaxial: F: -40° to 266° C: -40° to 130° Ambient temperature Operation: F: -13° to 176° C: -25°...
-
Page 5: Dimensions
Introduction Step One DIMENSIONS MN300840 REV A5... -
Page 6: About This Manual
3. DO NOT open the unit cover until it is time to calibrate. Make a Fail-Safe System: Design a fail-safe system that accommodates the possibility of switch and/or power failure. Flowline® recommends the use of a redundant backup system and alarm in addition to the primary system. -
Page 7: Getting Started (Setup Overview)
Getting Started Section Two SETUP OVERVIEW Below highlights the initial steps in setting up your sensor for operation. 1. Check Part Number (Section Two) a. Confirm that the sensor’s part number matches the ordered part number and all components are provided with the model delivered. 2. -
Page 8: Part Numbers
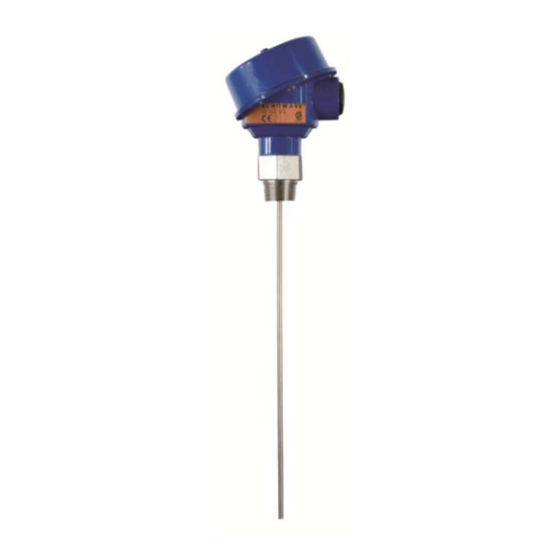
Getting Started Section Two ® Components: EchoWave is offered in 12 different models. Depending on the model purchased, you may or may not have been shipped the configuration component shown below. Mat’l of Part Maximum Probe Thread Components Number Range Style Const. -
Page 9: Probe Length
Getting Started Section 2 UNDERSTANDING SENSOR HEIGHT ® This is a critical setting for EchoWave . Sensor Height defines the height of the sensor above the bottom of the tank. The height value must take into account the shape of the tank and any risers, fittings, structures or extensions associated with the tank or the installation (see examples below). - Page 10 Getting Started Section Two UNDERSTANDING INSTALL LOCATION LENGTH Measure the space below the actual installation location for the sensor. This distance (install length) must be greater than the probe length. In many tanks, the install length corresponds to the height of the tank. With dome top, cone bottom and horizontal tanks, include the added height of the curved surface.
- Page 11 Getting Started Section Two ADDING A RISER TO AVOID CUTTING THE PROBE In some conditions, a riser may be added to avoid cutting the probe. Rod and Cable Probes With the Rod and Cable versions Least Number of Fittings Too Many Fittings of the probe, the maximum height for the riser is 12”...
-
Page 12: Measurement Range
Getting Started Section Two UNDERSTANDING MEASUREMENT RANGE ® EchoWave level transmitters have small dead band areas at both the top and bottom of the probe. It is due to the presence of unavoidable signal disturbances at both ends of the probe. In these dead band areas the measurements are non-linear or have reduced accuracy. - Page 13 Getting Started Section Two UNDERSTANDING MINIMUM FILL-HEIGHT (PUTTING IT ALL TOGETHER) ® EchoWave has a Minimum Fill-Height (Min. Fill-H), which is measured from the bottom of the tank to the top of the Bottom Dead Band. As shipped from the factory, Min. Fill-H is where the 4mA current is located and is the lowest point on the probe where the sensor can detect a liquid level.
-
Page 14: Distance (Height Of Liquid) Vs. Volume Of Liquid
Getting Started Section Two DISTANCE (HEIGHT OF LIQUID) VS. VOLUME OF LIQUID ® With WebCal , the LG10/LG11 series can be configured to operate as a device that reads the distance (height of liquid) or volume of a liquid. The location of the empty current will adjust depending on which configuration method is selected. -
Page 15: Installation (Mounting Considerations)
Installation Section Three ® EchoWave is mounted vertically into the tank via its connection thread. It is then screwed directly into a standard threaded tank connection, i.e. tank adapter, bushing, weld-in socket, or it can be screwed into a flange which is connected to a tank nozzle. LG10/LG11 series should not be welded directly into the tank. - Page 16 Installation Section Three MOUNTING CONSIDERATIONS (CONTINUED) The rod and cable probes are suitable for a very wide range of applications in liquids. However, the signal has a wider detection radius around the rod/cable. Therefore, it is more responsive for measurement signal disturbances that are overcome by a few Mounting Considerations (see below) as well as simple configuration adjustments to the sensor.
-
Page 17: Installation Tips
Installation Section Three INSTALLATION TIPS Tall and Narrow Risers Rod and Cable probes can be installed in tall and narrow risers under the following criteria: Nozzle Diameter must be >2” (50mm), Nozzle Height must be <12” (300mm), Riser must be metallic, ... - Page 18 Installation Section Three INSTALLATION TIPS (CONTINUED) Liquid Spray Rod and Cable probes must avoid any liquid that sprays or pours onto the probe. Coaxial probes are not affected by liquid straying on parts that are above the liquid surface. However, avoid installing probe where liquid will pour onto the probe.
- Page 19 Installation Section Three INSTALLATION TIPS (CONTINUED) Non-Metallic Tanks Unlike coaxial, rod and cable probes have no containment mechanism. This energy must be contained by the tank wall, requiring that all rod and cable probe sensors be installed in metallic tanks or within below grade concrete sumps. Coaxial probes can be installed in any type of tank, including non- metallic tanks.
- Page 20 Installation Section Three INSTALLATION TIPS (CONTINUED) Tall Tanks The rod and coaxial probes have a maximum insertion length of 9.8’ (3m). For metal or concrete tanks that are taller/deeper, the cable probe can be used for lengths up to 18.0’ (5.5m). ...
-
Page 21: Wiring (Analog Output)
Wiring Section Four ® Analog Output (4-20 mA): The analog output of the EchoWave is a sourced 4-20 mA control circuit. The typical way to use this feature is to connect a positive supply to the (+) input terminal, a negative supply to the (-) input terminal and to connect the current output out of the 420 (+) terminal. - Page 22 Wiring Section Four WIRE CONNECTIONS The housing has single cable entry and can be attached to screw plugs, cord grips or conduit with the ½” NPT thread. Note: the customer must confirm the suitability of those connectors for the specific application requirements and cabling;...
-
Page 23: Common Wiring To Displays, Controllers & Plcs
Wiring Section Four COMMON WIRING TO DISPLAY, CONTROLLERS & PLC’S ® to common display, controllers and PLC’s. Below is a quick review of wiring the EchoWave DataView™ LI55 Series Commander™ LI90 Series Level Controller Multi-Tank Level Controller DataLoop™ LI25 Series DataLoop™... - Page 24 Wiring Section Four COMMON WIRING TO DISPLAY, CONTROLLERS & PLC’S (CONTINUED) Generic Loop Generic PLC Powered Display DataPoint™ LC52 Series Level Controller (JWB mode) Note: LC52 shipped from factory with jumper in JWA mode. Jumper must be switched to JWB mode for ®...
-
Page 25: Configuration
Flowline’s website. You must download and install WebCal ® (version 6.5 or greater) prior to plugging in ® the USB Fob. Please go to flowline.com/webcal-software, and select your language version. ® WebCal System Requirements ® Windows... -
Page 26: Usb Fob Interface
Note: When using the Fob, do not add VDC power. The Fob, when connected to the computer, will provide ® the required power to the EchoWave ® ® For complete information on the WebCal (version 6.5 or greater) software, please refer to the WebCal manual located at flowline.com/webcal-software. MN300840 REV A5... -
Page 27: Sensor Configuration
® ® contact a Flowline application engineer at (562) 598-3015. Note: For complete information on the WebCal ® software, please refer to the WebCal manual located at flowline.com/webcal-software. ® ® CONFIGURING ECHOWAVE WITH WEBCAL 1. Sensor Configuration a. Configures Loop Fail-Safe, Output at Empty, Startup Condition & Dielectric Range for the sensor. -
Page 28: Tank Shape Selection
Configuration Section Five B. Dimensional Entry 1. Distance Mode (default): Output of sensor is based on the distance (height of liquid) in the tank. Any change in liquid level will reflect linearly to the current output. Note: Most applications will fall into this category. -
Page 29: Tank Level Configuration
Volumetric Sensor Output The Volumetric Mode button will be highlighted in Blue when a volume output is selected. ® ® * For complete information on the WebCal software, please refer to the WebCal manual located at flowline.com/webcal-software. MN300840 REV A5... -
Page 30: Empty Signal Scan
Empty Signal Scan Section Six EMPTY SIGNAL SCAN ® The empty signal Scan is a powerful disturbance signal suppression feature of EchoWave . The sensor scans its entire probe length for any disturbance/interference signals within the application that could potentially be misinterpreted as level readings by memorizing and suppressing them during operation. - Page 31 The Empty Signal Scan can be viewed with the WebCal software (version 6.5 and greater). Note: Always ® consult a Flowline representative for reviewing of the signal data. To view, follow the directions below: 1. Activate an empty signal scan (see instructions in Empty Signal Scan, Section 6).
-
Page 32: Appendix
It can be used to confirm the correct level reading by the sensor or to troubleshoot any false signals. There is a two step process involving the creating and viewing of an echo ® curve. Note: Always consult a Flowline representative for reviewing of the signal data. #1 - CREATE AN ECHO CURVE To create an echo curve, use the following instructions: 1. -
Page 33: Sensor Configuration
Appendix Section Seven A. SENSOR CONFIGURATION LOOP FAIL-SAFE This feature allows you to select the fail-safe current output if the sensor looses echo confidence (LOST). When the sensor regains echo confidence, the output current will revert back to the current level condition. - Page 34 Appendix Section Seven A. SENSOR CONFIGURATION (CONTINUED) Startup Condition This feature allows you to select the startup current when power is first applied to the sensor. The sensor will consume the selected power while it is acquiring the liquid level. When the correct level has been identified, the output will adjust to the level output.
-
Page 35: Tank Shape Selection
2 to 2.9 Note: It is very important to select the correct range for the dielectric value of the liquid. Choosing an incorrect range will affect the performance of the sensor. Reference a website such as http://flowline.com for dielectric information. -
Page 36: Dimensional Entry
Appendix Section Seven ® Shape Selection Window: This window will shows the different tank shape options available in WebCal Vertical Cylinder Vertical Cylinder with Cone Bottom Horizontal Cylinder with End caps Horizontal Cylinder with Spherical Ends ... - Page 37 Appendix Section Seven Volume – Sensor Output Units (Vertical Cylinder Example) Enter the dimensions of the tank. You must enter data in all fields shown. Sensor Height: Distance from the bottom of the tank to the top of the threads. Max.
-
Page 38: Tank Level Confirmation
Appendix Section Seven D. TANK LEVEL CONFIRMATION ® This section of WebCal is where you confirm the values set in the previous step. The values were entered under the Dimensional entry window. To edit these settings, you must go back to the Dimensional entry window via the Volumetric Mode button. -
Page 39: Write To Unit
Appendix Section Seven E. WRITE TO UNIT Write to Unit Wiring diagram After you have entered configurations, selected and configured the Tank Shape and entered the Tank Values, click “Write to Unit” and load the configuration into the memory of the sensor. -
Page 40: Cutting The Probe
Appendix Section Seven CUTTING THE PROBE If the length of the probe is too long (touches bottom of tank, prevents the sensor from being threaded into the tank or a shorter length is required for the application), the probe can be cut to length in the field. Note: The most important requirement for cutting the probe is to protect the housing from being dropped, banging into other objects or swinging freely. - Page 41 Appendix Section Seven Measure and mark the location for the cut on the exposed rod. o Use the coaxial shield as a guide to confirm both cuts are at the same length. Cutting the rod o Secure the rod to prevent it from moving during cutting. ...
- Page 42 Appendix Section Seven CABLE Place the probe on a sturdy surface. Measure the location for the cut on the cable. Wrap the cable with electrical tape along the area of the cut. o This will prevent the cable from fraying while being cut. ...
-
Page 43: Troubleshooting
Appendix Section Seven FACTORY SETTINGS From Bottom From Top (Lowest point of probe) (Bottom of Mounting Nut) Probe Style Sensor 20mA 20mA 2.0” 114.8” 116.8” 3.4” LG10-0_ _ _-_ _ (50.8mm) (2915mm) (2966mm) (85.1mm) 2.0” 114.8” 116.8” 3.4” Coaxial LG10-1_ _ _-_ _ (50.8mm) (2915mm) (2966mm) -
Page 44: Warranty
PERSON IS AUTHORIZED TO MAKE ANY OTHER WARRANTIES OR REPRESENTATIONS ON BEHALF OF FLOWLINE. This warranty will be interpreted pursuant to the laws of the State of California. If any portion of this warranty is held to be invalid or unenforceable for any reason, such finding will not invalidate any other provision of this warranty.
Need help?
Do you have a question about the EchoWave LG11 Series and is the answer not in the manual?
Questions and answers