
Related Manuals for Gorenje GI6320XA


Summary of Contents for Gorenje GI6320XA
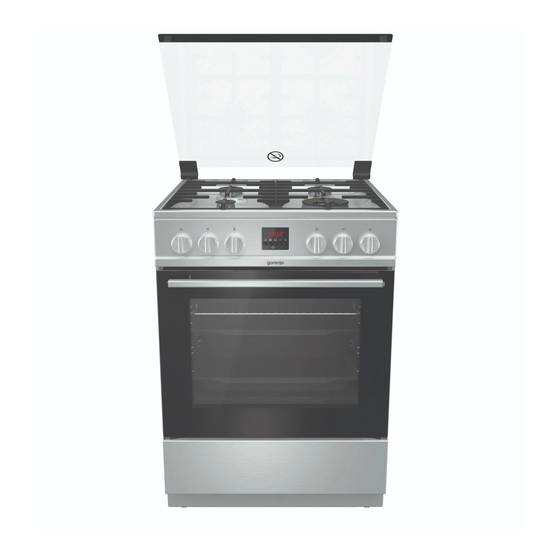
- Page 1 DETAILED INSTRUCTIONS FOR USE OF A GAS FREE STANDING COOKER FG6A... www.gorenje.com www.gorenje.com...
- Page 2 Read the instructions before connecting or using the appliance. Instructions for use are also available at our website: http://www. gorenje.com GORENJE gospodinjski aparati, d.o.o. Partizanska cesta 12 SI-3320 Velenje, SLOVENIJA info@gorenje.com Important information...
-
Page 3: Table Of Contents
CONTENTS INTRODUCTION IMPORTANT SAFETY INSTRUCTIONS Before connecting the appliance GAS FREE STANDING COOKER 13 Control unit 14 Appliance data - data plate USING THE APPLIANCE 15 USING THE APPLIANCE 15 Before using the appliance for the first time 15 Cooking hob (depending on the model) 16 Electronic program timer 21 Oven 23 Descriptions of cooking systems and cooking table... -
Page 4: Important Safety Instructions
IMPORTANT SAFETY INSTRUCTIONS CAREFULLY READ THE INSTRUCTIONS AND SAVE THEM FOR FUTURE REFERENCE This appliance can be used by children aged from 8 years and above and persons with reduced physical, sensory or mental capabilities or lack of experience and knowledge if they have been given supervision or instruction concerning use of the appliance in a safe way and understand the hazards involved. - Page 5 CAUTION: The cooking process has to be supervised. A short term cooking process has to be supervised continuously. WARNING: Before replacing the light bulb, make sure the appliance has been disconnected from the mains power, in order to prevent the hazard of an electric shock. CAUTION: This appliance is for cooking purposes only.
- Page 6 Do not use harsh abrasive cleaners or sharp metal scrapers to clean the oven door glass or the glass of hinged lids of the hob (where appropriate), since they can scratch the surface, which may result in shattering of the glass. The appliance must not be installed behind a decorative door in order to avoid overheating.
- Page 7 glass. It may only be closed when the cooking zones have completely cooled down. Appliance must be connected to fixed wiring which is in accordance with the witing rules. Appliance must be connected to fixed wiring which has incorporated means of disconnection. Fixed wiring must be made in accordance with the wiring rules.
-
Page 8: Before Connecting The Appliance
If you observe any faults on the gas Never stand on the open oven door and do installation or smell gas in the room: not let children sit on it. • immediately shut off the gas supply or close the gas cylinder; Make sure the vents are never covered or •... -
Page 9: Gas Free Standing Cooker
GAS FREE STANDING COOKER DESCRIPTION OF THE APPLIANCE AND EQUIPMENT (depending on the model) Since the appliances for which these instructions were drawn up may have different equipment, some functions or equipment may be described in the manual that may not be present in your appliances. - Page 10 The symbol on the product or its packaging indicates that glass lids may shatter when heated. Turn off all the burners before shutting the lid. APPLIANCE DRAWER Do not store combustible, explosive, volatile or temperature- sensitive items (such as paper, dish cloths, plastic bags, cleaners or detergents and spray cans) in the oven's storage drawer, as they can ignite during excessive operation and cause a fire.
- Page 11 OVEN EQUIPMENT AND ACCESSORIES (depending on the model) GLASS BAKING DISH is used for cooking with all oven systems. It can also be used as a serving tray. The GRID is used for grilling or as support for a pan, baking tray or baking dish with the food.
- Page 12 The grid or the tray should always be inserted into the groove between the two wire profiles. With telescopic extendible guides, first pull out the guides of one level and place the grid or the baking tray onto them. Then, push them in with your hand as far as they will go.
-
Page 13: Control Unit
CONTROL UNIT (depending on the model) COOKING ZONE KNOB, FRONT LEFT COOKING ZONE KNOB, REAR LEFT CONTROL LIGHT TIMER COOKING SYSTEM SELECTOR KNOB COOKING ZONE KNOB, REAR RIGHT COOKING ZONE KNOB, FRONT RIGHT NOTE: Symbols of cooking systems may be located on the knob or on the front panel (depending on the appliance model). -
Page 14: Appliance Data - Data Plate
APPLIANCE DATA - DATA PLATE (depending on the model) A Serial number B Model C Type D Trademark E Code F Technical information G Compliance indications / symbols H Factory settings for gas type The rating plate, indicating the basic information about the appliance, is located on the edge of the oven and it is visible when the oven door is opened. -
Page 15: Using The Appliance
USING THE APPLIANCE BEFORE USING THE APPLIANCE FOR THE FIRST TIME Upon receiving the appliance, remove all parts, including any transport equipment, from the oven. Clean all accessories and utensils with warm water and regular detergent. Do not use any abrasive cleaners. -
Page 16: Electronic Program Timer
ELECTRONIC PROGRAM TIMER Minute minder Selecting the right cooking zone gas burner Selecting the oven gas burner Minus Plus dot symbol for settings delay symbol oven burner cooking zone burner symbol minute minder symbol SWITCHING ON AND SETTINGS After connecting your appliance to the mains power or after an extended power outage, "0.00"... - Page 17 Touch the key again to set the time for the next burner, change the already active timer setting, or check the remaining time. When the time expires, the burner is switched off and gas supply to the burner is shut down. A short beep will be heard. Cancelling a timer setting Use the key to select the burner.
- Page 18 Setting the minute minder The minute minder can be used independently from the oven operation. Press the key. "0.00" appears on the display and the symbol flashes. Use the key to set the time. After a few seconds the symbol will stop flashing and the timer countdown will start. During the last minute, the minute minder is displayed in seconds.
- Page 19 GAS BURNERS - To sear the food, set the burner to maximum power fi rst, and then continue to cook at minimum power. - Always place the burner cap accurately on the burner crown. Make sure the slots in the burner crown are never blocked.
- Page 20 BURNER IGNITION AND OPERATION Always press the knob before rotating it. Cooking power levels are indicated on the knobs with a large and a small flame symbol. Rotate the knob over the large flame position to the small flame position and back.
-
Page 21: Oven
OVEN CHOOSING THE COOKING SYSTEM (depending on the model) Rotate the knob (left and right) to select the cooking system (see program table). Settings can also be changed during operation. CONVENTIONAL OVEN HEATING WITH GAS Press the knob and rotate it to the left to position . - Page 22 HEATING THE OVEN WITH THE INFRARED HEATER The heat is radiated by the infrared (grill) heater installed in the oven ceiling. It is used for grilling. - Gas oven Press the knob and rotate it to the right to position .
-
Page 23: Descriptions Of Cooking Systems And Cooking Table
DESCRIPTIONS OF COOKING SYSTEMS AND COOKING TABLE If your desired food cannot be found in the cooking table, find information for similar food. The information displayed applies to cooking on a single level. An interval of suggested temperature is indicated. Start with a lower temperature setting and increase it if you find the food is not browned sufficiently. - Page 24 Standard doneness levels and recommended final core temperature for different types of meat Food core temperature Meat colour on cross- Type of food (°C) section, and colour of juices BEEF meaty red, like raw meat, Rare 40-45 little juice light red, a lot of light red Medium rare 55-60 juice...
- Page 25 BOTTOM HEATER Only the bottom heater will operate. Baking pastry: Only use one level and light-coloured baking sheets or trays. Dark baking sheets or trays absorb too much of the heat from the oven burner. Always place the baking trays on the grid. If you are using the supplied baking sheet, remove the grid.
- Page 26 Type of food Guide Temperature Cooking time (from the (°C) (min) bottom) BREAD Bread * 190-200 40-50 Bread rolls (Semmel)* 190-200 30-40 Pizza * 200-220 30-45 The symbol * means that the oven should be preheated using the selected cooking system. Roasting meat: Use enamel coated, tempered glass, clay, or cast iron pan or tray.
- Page 27 Soufflés, gratins, and vegetable dishes Type of food Guide Temperature Cooking time (from the (°C) (min) bottom) Baked potatoes, chunks 200-210 50-70 Vegetables au gratin 200-210 50-60 Lasagne 200-210 60-70 Moussaka 190-200 50-60 Sweet soufflé 200-210 40-50 Fish soufflé 180-200 46-65 Frozen food Type of food...
- Page 28 GRILL (INFRARED) HEATER Grill (infrared) heater located at the top of the oven cavity will operate. Grilling Type of food Weight Guide Cooking time (from the (min) bottom) MEAT AND FISH Beet steak 180 g/piece 25-35 Pork fillets 150 g/piece 25-35 Grill sausages 70 g/piece...
- Page 29 Cooking with the turnspit (depending on the model) Maximum temperature when using the rotisserie is 230°C. Insert the skewer support into the 3rd guide from the bottom and place the deep tray into the bottom (1st) guide to serve as a drip tray. Impale the meat on the skewer and tighten the screws.
-
Page 30: Maintenance & Cleaning
MAINTENANCE & CLEANING Be sure to unplug the appliance from the power supply and wait for the appliance to cool down. Children should not clean the appliance or perform maintenance tasks without proper supervision. Aluminium finish Clean the aluminium finish with non-abrasive liquid cleaners intended for such surfaces. Apply the cleaner onto a wet cloth and clean the surface. -
Page 31: Conventional Oven Cleaning
CONVENTIONAL OVEN CLEANING You may use the standard cleaning procedure to clean stubborn dirt in the oven (using cleaners or an oven spray). After such cleaning, rinse the cleaner residues thoroughly. Clean the oven and the accessories after each use to prevent the dirt from burning into the surface. -
Page 32: Gas Burner
GAS BURNER The grid, cooking surface, and burner parts may be cleaned in hot water with some washing up detergent. Do not clean them in a dishwasher. Clean the thermocouple and the spark plug with a soft brush. These parts have to be spotlessly clean to function correctly. Clean the burner crown and cap. -
Page 33: Using The Aqua Clean Function To Clean The Oven
USING THE AQUA CLEAN FUNCTION TO CLEAN THE OVEN Ignite the gas in the oven and rotate the system selector knob to the AQUA CLEAN position Pour 0.6 l water into a baking tray and place it in the lower guide. After 30 minutes, food residues on the oven enamel walls will have softened and they will be easy to clean with a damp... -
Page 34: Cleaning The Insert Bottom Panel
CLEANING THE INSERT BOTTOM PANEL Allow the bottom insert to cool down completely. Slightly lift the bottom insert in the middle of the front edge and pull it out of the oven. Clean it with non-abrasive cleaners and degreasers. However, make sure it is rinsed well under running water so that there are no residues of detergent on the surface. -
Page 35: Removing And Cleaning Wire And Telescopic Extendible Guides
REMOVING AND CLEANING WIRE AND TELESCOPIC EXTENDIBLE GUIDES Only use conventional cleaners to clean the guides. A Hold the guides at the bottom side and pull them towards the center of the oven cavity. B Remove them from the openings at the top. -
Page 36: Removing And Inserting The Oven Oor
REMOVING AND INSERTING THE OVEN OOR (depending on the model) First, fully open the door (as far as it will go). A Rotate the stoppers all the way back (in case of conventional closing). B With soft closing system, rotate the stoppers back by 90°. - Page 37 DOOR LOCK (depending on the model) To open it, gently push it to the right with your thumb and pull the door outwards at the same time. When the oven door is closed, the door lock automatically returns to the initial position.
- Page 38 SOFT DOOR CLOSING (depending on the model) Oven door is fitted with a system that dampens the door closing force, starting at the 75-degree angle. It allows simple, quiet, and smooth closing of the door. A gentle push (to a 15-degree angle relative to the closed door position) is enough for the door to close automatically and softly.
-
Page 39: Removing And Inserting The Oven Inner Door Glass
REMOVING AND INSERTING THE OVEN INNER DOOR GLASS (depending on the model) Oven door glass pane can be cleaned from the inside, but it has to be removed first. Remove the oven door (see chapter "Removing and replacing the oven door"). Depending on appliance model, the glass in the door is removed either as described in METHOD 1 or METHOD 2. - Page 40 METHOD 2 (depending on the model) Undo the holder screws on both sides of the door. Remove the holder. Slightly lift the door glass and remove it from the clips on the bottom side of the door. To replace the door glass, observe the reverse order.
-
Page 41: Replacing The Bulb
REPLACING THE BULB The bulb is a consumable and therefore not covered by warranty. Before changing the bulb, remove the trays, the grid, and the guides. (Halogen lamp: G9, 230 V, 25 W; regular bulb E14, 25 W, 230 V) Use a flat screwdriver to release the bulb cover and remove it. -
Page 42: Special Warnings And Fault Reporting
SPECIAL WARNINGS AND FAULT REPORTING During the warranty period, any repairs may only be carried out by a service technician authorized by the manufacturer. Before starting any repairs, disconnect the appliance from the power mains by removing or tripping the fuse or by disconnecting the plug from the wall outlet. Any unauthorized repairs of the cooker may result in electric shock and short circuit hazard;... - Page 43 Problem/error Cause Electric burner ignition no Carefully clean the opening between the spark plug and longer works. the burner. Clean the burner caps with a metal cleaner. Place the burner cover correctly. If the problems persist despite observing the advice above, call an authorized service technician.
-
Page 44: Installation And Connection Instructions
INSTALLATION AND CONNECTION INSTRUCTIONS APPLIANCE PLACEMENT The walls or furniture adjacent to the appliance (floor, rear kitchen wall, side walls) have to be temperature-resistant to at least 90 °C. - Page 45 LEVELLING THE APPLIANCE AND ADDITIONAL SUPPORT...
- Page 46 PREVENTION FROM TIPPING OVER Dimensions in the parenthesis represent built-in measures of the support bracket without the additional support. If the supplied element protecting the appliance from tipping over cannot be firmly secured to your wall with the screws and the wall plugs supplied, use other fittings to secure the bracket in such way that it cannot be pulled out from the wall.
- Page 47 GAS CONNECTIONS FACTORY DEFAULT SETTINGS - Gas appliances are tested and fi tted with the CE sign. - Gas appliances are supplied sealed with burners adjusted to natural gas type H or E (20 mbar), or to liquefi ed natural gas (50 or 30 mbar). The information is provided on the appliance rating plate found on the interior of the oven.
- Page 48 Gas connection plug A Connection EN ISO 228-1 B Non-metal gasket, thickness 2 mm C Hose plug for gas (depending on the connection regulations in the specifi c country) D Hose plug EN ISO 10226-1/-2 (depending on the connection regulations in the specifi c country) (supplied, depending on the model) After connection, check the operation of the burners.
- Page 49 Cooking burner 1. Burner crown cap 2. Burner crown with burner cap support 3. Thermo element (only with some models) 4. Spark plug 5. Nozzle Triple (three-ring) burner A Nozzle Gas valve with a safety device B Minimum heat load regulation screw Oven burner controls To access the parts required to adjust the oven burner to another type of gas,...
-
Page 50: Nozzle Table
NOZZLE TABLE Gas type, pressure Auxiliary burner Normal burner Natural gas H Nominal heat load 0,48 0,48 Wo=45,7÷54,7 MJ/ m (kW) Natural gas E, Consumption Natural gas E+ (l/h) Wo=40,9÷54,7 MJ/m Nozzle type G20, 72 X 103 Z (1/100 mm) p=20mbar Nozzle ID 690771... - Page 51 Gas type, pressure Oven burner Infra burner Natural gas H Nominal heat load Wo=45,7÷54,7 MJ/ m (kW) Natural gas E, Consumption (l/h) Natural gas E+ Nozzle type (1/100 Wo=40,9÷54,7 MJ/m G20, p=20mbar Nozzle ID 568171 568173 Liquefied gas Nominal heat load 3+, B/P (kW) Wo=72,9÷87,3MJ/m...
-
Page 52: Disposal
DISPOSAL Packaging is made of environmentally friendly materials that can be recycled, disposed of, or destroyed without any hazard to the environment. To this end, packaging materials are labelled appropriately. The symbol on the product or its packaging indicates that the product should not be treated as normal household waste. - Page 56 FG6A EGT en (09-21)
Need help?
Do you have a question about the GI6320XA and is the answer not in the manual?
Questions and answers