Table of Contents
Advertisement
Quick Links
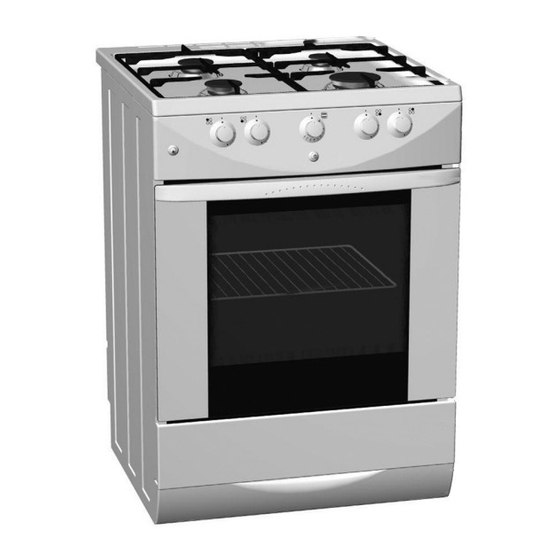
Freestanding gas cooker
Dear Customer!
Congratulations on your purchase. See for yourself: our
products read reliability.
These ample instructions have been compiled in order to help
you learn how to handle the appliance. They will show you step
by step what your appliance is capable of, so please read them
carefully before you attempt to use your cooker for the first
time.
Contents
Instructions for use......................................................... 3
Safety precautions
If you notice any malfunction in the gas installation, or if you
smell gas in the room:
Description of the appliance .......................................... 4
Gas burner control ......................................................... 5
Oven................................................................................. 6
Ignition and operation of oven gas burner
Instructions for use
Safety precautions
• To avoid any possible hazard, the appliance may be
installed by qualified personnel only, authorized by the
gas distributing company and by the authorized service.
Installation should be carried out in accordance with the
legal regulations and technical requirements of the local
gas supplier. Important instructions in this regard may
be found in the Section "Instructions for installation".
• Any repairs by unqualified persons may result in explosion,
electric shock or short circuit. In order to avoid possible
injuries to your body or to the appliance, do not attempt any
repairs by yourself. Such work should be carried out by
qualified service personnel.
• Before installing and connecting the appliance check
whether the specifications of the local gas supplier (type of
gas and pressure) correspond to the specifications of the
appliance.
• Technical specifications of the appliance are indicated on
the rating plate.
• This appliance is not connected to a chimney or vent
opening. The appliance must be installed and connected in
accordance with the standing regulations. Special attention
should be taken in regard to adequate ventilation.
Safety warnings are listed on page 3.
The first thing to do is to check if your appliance has arrived
undamaged. In case you find any transport damages, please
report it immediately to your local dealer, or to the regional
warehouse which supplied the appliance. You will find their
phone numbers on the invoice or on the delivery note.
We hope your cooker will successfully serve its purpose for
many years.
Grilling with infrared electric heater (position
Cleaning and maintenance ...........................................11
Troubleshooting guide ..................................................12
Note!
Replacement of parts ....................................................13
Instructions for installation and connection ...............14
Gas connections .............................................................14
Electrical connections ...................................................17
Technical specifications ................................................17
• During the operation of gas burners the room may be filled
with extra heat and humidity, so it is necessary to assure
adequate ventilation. Occasional opening of the window or
door should provide enough exchange of air. During the
prolonged use of the appliance, or during a very intense use,
more ventilation will be required, and it will probably be
necessary to engage the extractor hood.
• Hot grease is highly inflammable, so pay extra attention
when preparing food with grease or oil. Frying may be
carried out only under constant surveillance.
• Never clean the oven or the cooktop with hot steam devices
or high-pressure jet cleaning device, as they may provoke
short circuit.
• Before opening the control panel and before any attempted
repairs disconnect the appliance from the mains.
• Do not keep any flammable material in the drawer under the
oven (paper, wiping cloth, plastic bags, cleaning agents or
sprays, etc.), as they might cause fire. Use the drawer to
keep only the oven utensils (flat baking pan, oil collector, oil
filter, etc.).
• Mains lead of adjacent appliances may be damaged by
cooking zones or if stuck between the oven doors, and
produce short circuit, therefore keep them at safe distance
from the appliance.
Instructions for use and installation
GB IE MT
)
3
Advertisement
Table of Contents

Subscribe to Our Youtube Channel
Related Manuals for Gorenje GIN 4703 W


Summary of Contents for Gorenje GIN 4703 W
-
Page 1: Table Of Contents
Freestanding gas cooker GB IE MT Dear Customer! Safety warnings are listed on page 3. The first thing to do is to check if your appliance has arrived Congratulations on your purchase. See for yourself: our undamaged. In case you find any transport damages, please products read reliability. -
Page 2: Intended Use
• Never use the burners or the oven for heating of the room. Dismantling and replacement as well as the new inner door section may be ordered at your nearest service center. The list Never place empty dishes upon the cooking zones. •... -
Page 3: Electric Ignition
1 Gas ignition device button (certain models only) 5 Oven function mode selection and temperature selection button 2 Cooking zone, rear left, normal burner 3 Cooking zone, front left, normal burner 6 Cooking zone, front right, large burner 4 Oven illumination switch (certain models only) 7 Cooking zone, rear right, auxiliary burner Electric ignition will operate only if the mains lead is plugged Electric ignition... -
Page 4: Cookware
• After that you can set the burning power between high and Cookware low position to suit your cooking requirements. Selection of the adequate dish size ensures optimized cooking • Button positions between are not recommended. time and consumption of gas. Diameter of the dish is of utmost In these positions the flame is not stabilized and may be importance. -
Page 5: Oven Guide Levels
Pastry has fallen • To shut the oven burner off turn the button to the position Check the recipe. Use less fluids next time. Follow the mixing (OFF). times, especially when using powered kitchen mixers. Setting Temperature(in°C) Pastry is too light below gas faucet is shut Use dark baking pan next time, or place the pan one level lower, or switch on the lower heater a while before the... -
Page 6: Roasting
Pastry baking table Type of pastry Guide level Temperature Baking time (from down (°C) (in min.) upwards) Sweet pastry Raisin cake 180-190 50-70 Square cake 180-190 60-75 Tree cake (tart form) 180-190 45-60 Cheese cake (tart form) 180-190 60-90 Fruit cake 190-200 50-70 Fruit cake with icing... -
Page 7: Heating With Infrared Gas Burner (Position - Symbol)
Roasting table Type of meat Weight Guide level Temperature Roasting time (in grams) (from bottom up) (°C) (in min.) Beef Beef loin 1000 200-220 90-120 Beef loin 1500 190-210 120-150 Roast beef, rare 1000 210-230 30-40 Roast beef, well done 1000 210-230 40-50... -
Page 8: Broaching With Infrared Gas Burner
• During grilling the oven thermostat is off, and the grill burner operates at full power. • Grilling tables indicate the recommended temperature, guide levels and grilling times, which may vary according to the weight and quality of meat. • Oil the grill grid before placing the food, otherwise food might stick to the grid. -
Page 9: Broaching With Infrared Electric Heater
• Pierce the chicken with the broach spike and secure it from Broaching with infrared electric heater both sides with tightening forks. To ensure uniform and even (certain models only) roast,fasten chicken legs and wings to the chicken body. • This mode of roasting meat actually uses grill heater •... -
Page 10: Oven Drawer
• Never use aggressive cleaners, like polishing agents, dish door completely, remove the hinge clamps from the upper hinge latches and return them into the horizontal position. cleaning accessories, corrosion inhibitors, or any other devices that might cause scratches. • Coated, stainless steel or zinc-coated surfaces or aluminum parts must not come into contact with oven sprays, since they might cause damage or discoloration. -
Page 11: Important
Important! Keep the present instructions for use always at hand, and in case you sell the appliance, hand them over to the new If the malfunction of the appliance was caused by the owner. improper use, the service visit during the warranty period is Following are some simple advice how to repair minor faults: not free of charge. -
Page 12: Instructions For Installation And Connection
Instructions for installation and connection potential danger. Children may swallow small parts, or Safety precautions for the technician suffocate with foils. Installation may be carried out in accordance with the standing regulations.It is extremely important to ensure adequate air circulation. Safety precautions •... -
Page 13: Beginning Of Operation
Beginning of operation Start using the appliance in accordance with the instructions for use. Lit up all burners and check the stability of the flame with high and low setting. Adjust air intake if necessary. After that, take time and explain the operation and control of the appliance to the user and read with him the instructions for use. - Page 14 Safety gas faucet (fig. 3) Non-safety gas faucet (fig. 3a) 13 Setting screw for 13 Setting screw for minimum heat input minimum heat input rate rate Elements to be replaced or reset when altering the type of gas Cooking zone burner Fig.
-
Page 15: Electrical Connections
Electrical connections • Before attempting the connection, check whether the voltage Electric connection may be carried out by qualified service personnel only! indicated on the rating plate corresponds to the actual mains Wrong connection may permanently damage parts voltage. • Mains lead behind the cooker must be placed in such of the appliance and render your warranty void! Mains voltage of the user (230 V) must be verified with the manner to avoid touching the back panel of the cooker...
Need help?
Do you have a question about the GIN 4703 W and is the answer not in the manual?
Questions and answers