Table of Contents
Advertisement
Quick Links
Advertisement
Table of Contents

Related Manuals for Gorenje GIK63B


Summary of Contents for Gorenje GIK63B
- Page 1 GIK32B User manual GIK63B...
- Page 2 Manual GB 3 - GB 30 Pictograms used Important information...
-
Page 3: Table Of Contents
CONTENTS Your induction hob Introduction Description Safety instructions What you should pay attention to Connection and repair During use Temperature safety Cooking-time limiter Using the touch controls Induction cooking How does induction work Pans Operation Switching on the hob and setting the power Easy Cook function Setting 9 Residual heat indicator... -
Page 4: Your Induction Hob
YOUR INDUCTION HOB Introduction This hob has been designed for the real lover of cooking. Cooking on an induction hob has a number of advantages. It is easy, because the hob reacts quickly and can also be set to a very low power level. Because, moreover, it can also be set to a high power level, it can bring things to the boil very quickly. -
Page 5: Description
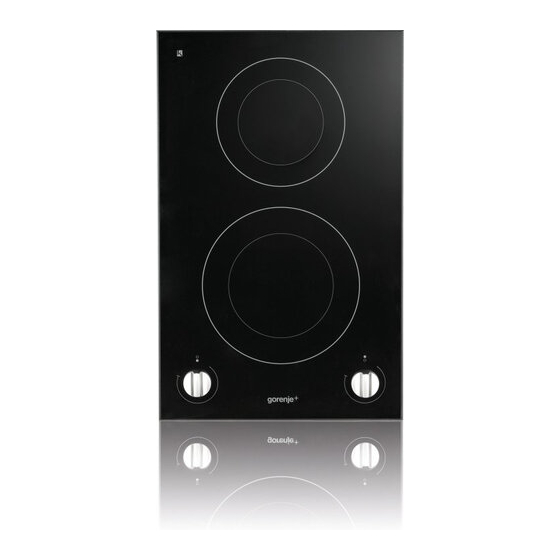
YOUR INDUCTION HOB Description GIK63B GIK32B Cooking zone front left 70 - 2300 Watt, diameter 20 cm Cooking zone rear left 40 -1400 Watt, diameter 16 cm Cooking zone rear right 70 - 2300 Watt, diameter 20 cm Cooking zone front right 40 - 1400 Watt, diameter 16 cm... -
Page 6: What You Should Pay Attention To
SAFETY What you should pay attention to • Induction cooking is extremely safe. Various safety devices have been incorporated in the hob such as a residual heat indicator and a cooking time limiter. There are nevertheless a number of precautions you should take. - Page 7 SAFETY • The zones heat up during use and stay hot for a while afterwards. Keep young children away from the hob during and immediately after cooking. • Grease and oil are inflammable when overheated. Do not stand too close to the pan. Should oil catch fire, never try to extinguish the fire with water.
-
Page 8: Temperature Safety
SAFETY • The appliance is not intended to be operated by means of an external timer or separate remote-control system. Temperature safety • A sensor continuously measures the temperature of certain parts of the hob. Every cooking zone is equipped with a sensor that measures the temperature of the bottom of the pan to avoid any risk of overheating when a pan boils dry. - Page 9 SAFETY In the event of overheating the result will be that the cooking zone in question or all the cooking zones will display one of the following reactions: • the appliance will reduce the power a little; • in case this will not help the appliance will switch off and E2 will appear in the displays.
-
Page 10: Use
Induction cooking Induction cooking is fast • To start you will be surprised by the speed of induction cooking. Especially at higher settings, foods and liquids will boil very rapidly. It is best not to leave pans unattended to avoid them boiling over or boiling dry. -
Page 11: How Does Induction Work
How does induction work A magnetic field is generated in the appliance. By placing a pan with an iron base on a cooking zone, a current is induced in the pan base. This induced current generates heat in the base of the pan. Easy The electronic controls are accurate and easy to set. - Page 12 You can check for yourself whether your pans are suitable using a magnet. A pan is suitable if the base of the pan is attracted by the magnet. Suitable Unsuitable Special stainless steel pans Earthenware Class Induction Stainless steel Hard-wearing enamelled pans Porcelain Enamelled cast-iron pans Copper...
-
Page 13: Operation
OPERATION Switching on the hob and setting the power The induction hob is fitted with a residual heat indicator, automatic cooking-time limiter, Easy Cook function and a childproof lock. On this page and the following ones, you can read how to use these facilities. Switching on and power setting •... -
Page 14: Setting 9
OPERATION Setting 9 Only switch the hob on at setting 9 if you want to boil water. This setting is too high for heating butter or milk and much too high for defrosting. Consult the cooking tables in the section “Comfortable cooking” to help you learn the techniques. -
Page 15: Cooking
Healthy cooking Burning point of different types of oil To ensure your food is fried as healthily as possible, Gorenje+ recommends choosing the type of oil according to the frying temperature. Each oil has a different burning point at which toxic gasses are released. - Page 16 COOKING • fry thick pancakes; • fry thick slices of breaded meat; • fry bacon (fat); • fry raw potatoes; • make French toast; • fry breaded fish. Use setting 6 and 5 to: • complete the cooking of large quantities; •...
-
Page 17: Maintenance
MAINTENANCE Cleaning Set the child lock before you start cleaning the hob. Daily cleaning • Although food spills cannot burn into the glass, we nevertheless recommend you to clean the hob immediately after use. • Best for daily cleaning is a damp cloth with a mild cleaning agent. •... -
Page 18: General
TROUBLESHOOTING General If you notice a crack in the glass top (however small), switch the hob off immediately, unplug the hob, turn off the (automatic) fuse switch(es) in the meter cupboard or, in the event of a permanent connection, set the switch in the power supply lead to zero.) Contact the service department. - Page 19 TROUBLESHOOTING Symptom Possible cause Solution A fuse blows as soon as the The hob has been wrongly Check the electrical hob is switched on. connected. connections. Fault code E2. The hob has overheated. Let the hob cool down and then use a lower setting. Fault code E3 The pan is not suitable for Use a suitable pan, see page...
-
Page 20: Installation
Damage caused by incorrect connection, installation or use, will not be covered by the guarantee. Clearance Sufficient all-round clearance is essential to the safe use of the hob. Check that there is enough clearance. cooker hood * GIK63B: min. 60 cm cabinet side wall GB 20... - Page 21 INSTALLATION Installation dimensions The dimensions and recesses are shown in the illustrations beneath. GIK63B front GIK32B front GB 21...
- Page 22 INSTALLATION Building in dimensions opening worktop for GIK32B Coupling profile Use the coupling profiles provided when the units are fitted tightly together. Keep an edge of minimum 60 cm between the holes if the coupler is not used. GB 22...
- Page 23 INSTALLATION Ventilation The electronics in the appliance need cooling. The appliance will automatically switch off if there is insuffi cient air circulation. There are ventilation openings on the underside of the appliance. It must be possible for cool air to be drawn in through these openings.
- Page 24 INSTALLATION Lower kitchen cabinet with an oven • Installing the oven under an induction hob is possible with oven types EVP4.., EVP2.., which are fi tted with a cooling fan. Before installing the oven, the rear wall of the kitchen cabinet should be removed.
-
Page 25: Electrical Connection
INSTALLATION Electrical connection Common connections: • 2 lives with 2 neutrals connection (2 2N a.c. 230 V / 50 Hz): The voltage between live and neutral is 230 V a.c. There may be a voltage of 0 V between the phases if they are connected to the same phase in the meter cupboard but also 400 V if they are connected to 2 different phases. - Page 26 INSTALLATION • 2 lives with 1 neutral connection (2 1N a.c. 400 V / 50 Hz) The voltage between the phases and the neutral is 230 V a.c. Between the lives there is a voltage of 400 V. If there is not a voltage of 400 V between the lives, two wires have been taken from the same live in the meter cupboard and the hob must be connected with two neutral wires, as indicated...
- Page 27 INSTALLATION • 3-phase connection (3 a.c. 230 V / 50 Hz): The voltage between the phases and the neutral is 230 V a.c. Install connecting bridges between the connection points 3-4. Your groups must be fused with at least 16 A (3x). The connecting power cable must have a minimum core cross section of 2,5 mm GB 27...
-
Page 28: Building In
INSTALLATION Building in Check that the cabinet and the cut-out meet the dimension and ventilation requirement Threat the sawn ends of wooden or synthetic worktops with sealing varnish if necessary, to prevent moisture causing the worktop to swell. Lay the hob upside down on the worktop. Fit the connecting cable to the appliance in compliance with requirements (see page 24, 25 and 26). -
Page 29: Technical Details
INSTALLATION Technical details This appliance complies with all relevant CE directives. Hob type GIK32B GIK63B Induction Connection 230V - 50Hz 230V - 50Hz Max. capacity cooking zones Front left 2,3 kW (Ø200) Rear left 1,4 kW (Ø160) Rear right 2,3 kW (Ø200) Front right 1,4 kW (Ø160) -
Page 30: Environmental Aspects
ENVIRONMENTAL ASPECTS Disposal of packaging and appliance In the manufacturing of this appliance durable materials were used. Make sure to dispose of this equipment responsibly at the end of its lifecycle. Ask the authorities for more information regarding this. The appliance packaging is recyclable. The following may have been used: •... - Page 32 GIK_G+ 319758/en (03-11)
Need help?
Do you have a question about the GIK63B and is the answer not in the manual?
Questions and answers