Table of Contents
Advertisement
Quick Links
Advertisement
Table of Contents

Subscribe to Our Youtube Channel
Related Manuals for Gorenje GI5121WJ


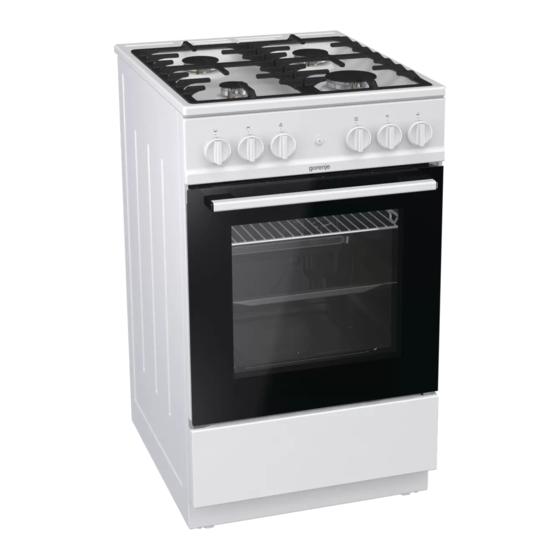
Summary of Contents for Gorenje GI5121WJ
- Page 2 Read the instructions before connecting or using the appliance. Instructions for use are also available at our website: http://www.gorenje.com GORENJE gospodinjski aparati, d.d. Partizanska cesta 12, SI-3320 Velenje, SLOVENIA info@gorenje.com Important information Tip, note...
-
Page 3: Important Safety Instructions
IMPORTANT SAFETY INSTRUCTIONS CAREFULLY READ THE INSTRUCTIONS AND SAVE THEM FOR FUTURE REFERENCE. This appliance may only be used by children aged 8 years and above and persons with reduced physical, sensory or mental capabilities or lack of experience and knowledge if supervision or instructions are provided to them concerning use of the appliance in a safe way and if they understand the hazards involved. - Page 4 Do not use harsh abrasive cleaners or sharp metal scrapers to clean the oven door glass/ the glass of hinged lids of the hob (as appropriate), since they can scratch the surface, which may result in shattering of the glass. Do not use steam cleaners or high-pressure cleaners to clean the appliance, as this may result in an electric shock.
- Page 5 Unauthorized service and repair can result in risk of explosion, electric shock, or short circuit and consequently personal injury and damage to the appliance.Such tasks may only be carried out by an authorized expert. Prior to installation, ensure that the local distribution conditions (nature of the gas and gas pressure) and the adjustment of the appliance are compatible.
- Page 6 Prolonged intensive use of the appliance may call for additional ventilation, for example opening of a window, or more effective ventilation, for example increasing the level of mechanical ventilation where present. This is a class 1 and 2/1 appliance. The appliance may touch the adjacent cabinets on both sides when placed in a row.
-
Page 7: Before Connecting The Appliance
Oven door become very hot during operation. A third glass is installed for extra protection, reducing the temperature of the outside surface (only with some models). Oven door hinges may be damaged when under excessive load. Do not place heavy pans on open oven door and do not lean against open oven door when cleaning the oven cavity. -
Page 8: Control Unit
APPLIANCE LID Make sure the lid is clean and that there is no liquid spilt on it before raising it. The lid may be lacquer- coated or glass. It may only be closed when the cooking zones have completely cooled down. Do not close the lid when the burner is lit! The symbol on the product or its packaging indicates that glass lids... -
Page 9: Energy Saving Tips
Always place the burner cap accurately on the BURNER IGNITION AND OPERATION burner crown. Make sure the slots in the burner crown are never blocked. Always press the knob before rotating it. Cooking power levels are indicated on the knobs with a large and a small flame symbol. - Page 10 Two-handed ignition OVEN To ignite a gas burner, press the corresponding knob and rotate it to the maximum power position. Press CHOOSING THE COOKING SYSTEM the spark plug button. depending on the model) Electric spark from the spark plug will be activated Rotate the knob (left and right) to select the cooking and the gas will ignite.
-
Page 11: Baking Pastry
pizzas successively will save a lot of energy as the Provide enough liquid during the cooking process to oven will already have been preheated. prevent the meat from burning. Turn the meat during cooking. The roast will remain juicier if you cover it. Use dark, black silicon-layered or enamel-coated baking sheets and trays as they conduct the heat GRILLING WITH THE GAS-FIRED OR... -
Page 12: Maintenance And Cleaning
Undo the skewer handle and close the oven door. Glass surfaces Do not use rough abrasive cleaning agents or sharp Switch on the oven, selecting the system of electric metal scrapes for cleaning of oven door glass, as they could crack the surface and causing the grill heater and spit roast. -
Page 13: Removing And Replacing The Oven Door
water until there are no residues of detergent on the REMOVING AND REPLACING THE OVEN surface left. Then, wipe it dry. DOOR (depending on the model) 1. Open the oven door (up to end position). Upon reassembly, slide the tabs in the rear part of 2. -
Page 14: Removing And Inserting The Oven Door Glass Pane
Hold the door glass pane by the lower edge; slightly lift it so that it is no longer attached to the support; and remove it. To remove the third glass pane (only with some models), lift and remove it. Also remove the rubber seals on the glass pane. - Page 15 ADJUSTING THE HEIGHT OF THE INSTALLATION AND COOKER CONNECTION INSTRUCTIONS (depending on the model) The height of the cooker is 900 mm. You can adjust APPLIANCE PLACEMENT (mm) the height of the appliance from 850 to 940 mm. 1. Put the cooker on the floor with back side. 2.
-
Page 16: Connecting To The Power Mains
PREVENTION FROM TIPPING OVER CONNECTING TO THE POWER MAINS (mm) (depending on the model) Make sure the power cord is not located near hot parts and sharp edges. If the power cord is damaged, it should be replaced by the manufacturer or an authorized service technician, in order to avoid hazard. -
Page 17: Connecting To Gas Supply
nozzle for large flame and adjustable regulation A Connection EN ISO 228-1 screw for small flame. B Non-metal gasket, thickness 2 mm C Hose plug for liquefied natural gas (depending on CONNECTING TO GAS SUPPLY the connection regulations in the respective ... - Page 18 Cooking burner Temperature-controlled gas tap B Minimum heat input regulation screw Grill burner Gas valve with a safety device B Minimum heat input regulation screw 1 Nozzle 2 Injector holder 3 Grill burner Oven burner To access the parts required to adjust the grill burner to another type of gas, the grill burner has to be disassembled (undo the screw on the front part of the burner and pull it slightly forward).
- Page 19 DISPOSAL Packaging is made of environmentally friendly materials that can be recycled, disposed of, or destroyed without any hazard to the environment. To this end, packaging materials labelled appropriately. The symbol on the product or its packaging indicates that the product should not be treated as normal household waste.
-
Page 20: Nozzle Table
NOZZLE TABLE Gas type, pressure Auxiliary burner Normal burner Wobbe number Standard Natural gas H Nominal heat load (kW) 0,48 0,48 Wo=45,7÷54,7 MJ/ m Consumption (l/h) 95,3 45,7 181,0 45,7 Natural gas E, Nozzle type (1/100 mm) 103Z Natural gas E+ Nozzle ID Wo=40,9÷54,7 MJ/m 690771... - Page 21 Regulation screws for liquefied gas are installed and set in factory to the gas type for which the factory default settings apply. When modifying the appliance for use with a different type of gas, the regulation screw has to be tightened or undone to set the required gas flow (do not undo the regulation screw by more than 1.5 turns).
Need help?
Do you have a question about the GI5121WJ and is the answer not in the manual?
Questions and answers