
Related Manuals for Uniden BCD325P2-AU


Summary of Contents for Uniden BCD325P2-AU
- Page 1 BCD325P2 Owner’s Manual ©2015 Uniden America Corporation Printed in Vietnam U01UB379ZZZ(0)
-
Page 2: Waterproof Warning
WATERPROOF WARNING! Uniden does not represent this unit to be waterproof. To reduce the risk of fire or electrical shock, do not expose this unit to rain or moisture. -
Page 3: Table Of Contents
CONTENTS PRECAUTIONS ..............2 EARPHONE WARNING! ............2 WATERPROOF WARNING! ..........2 IMPORTANT INFORMATION ..........9 THE FCC WANTS YOU TO KNOW ........9 MODIFICATION NOTICE ...........9 PART 15 INFORMATION ............9 SCANNING LEGALLY ............10 AVIS D’INDUSTRIE CANADA ...........10 MAIN FEATURES ..............11 UNDERSTANDING DYNAMIC MEMORY ......14 CONVENTIONAL SIMPLEX AND REPEATER SYSTEMS................14 UNDERSTANDING CTCSS/DCS/NAC ......14... - Page 4 Band Defaults ............38 P25 LP Filter ...............39 P25 Threshold ............39 Disp. Unit ID ..............39 See Scanner Info............39 % Memory Used ............39 Firmware Version and Serial Number ......39 Locking/Unlocking the Keyboard ......40 Viewing the Battery Level ........40 Cloning ................40 Scanner Reset ............40 PLANNING SYSTEMS, SITES, AND GROUPS ....41 ENTERING TEXT ..............41 PROGRAMMING SYSTEMS ..........42...
- Page 5 Set Audio AGC ............50 P25 NAC Option ............50 CREATING SITES ...............51 Edit Name (no EDACS SCAT) ........51 Set Quick Key..............52 Set Start-up Key ............52 Edit Band Plan (Motorola Custom/P25/VHF/UHF only) ...52 Set Frequencies ............54 Set Modulation ............54 Set Attenuator..............54 Set Hold Time .............55 P25 Waiting Time (Motorola only) ......56 CREATING GROUPS ............56 Edit Name..............57...
- Page 6 Volume Offset ..............65 Copy/Paste Channel ..........65 USING THE BCD325P2 WITH A GPS .........65 LOCATION-BASED SCANNING ........65 NON RADIO LOCATION-BASED GPS FEATURES ..66 CONNECTING YOUR SCANNER ........66 Edit Name ..............68 Set Type ..............68 Set Alert (POI only)............68 Set Alert Volume (Dangerous Road/Xing only) ...69 Set Alert Light (Dangerous Road/Xing only)....69 GPS DISPLAY MODE (POI ONLY) ........72 GPS REVIEW LOCATION MODE ........74...
- Page 7 CLOSE CALL AUTO STORE .........104 USING CLOSE CALL MODES ........105 MANAGING CLOSE CALL HITS ........105 In Close Call Only Mode ...........105 In Close Call Hold Mode..........106 HITS WITH SCAN ............106 WEATHER OPERATION MENU .........107 Using Fire Tone-Out ..........110 Setting up Tone-Out ..........110 In Tone-Out Standby Mode ........113 Key-Safe Mode............113 APPENDIX ................116...
-
Page 9: Important Information
MODIFICATION NOTICE Changes or modifications to this product not expressly approved by Uniden, or operation of this product in any way other than as detailed by this Users Guide, could void your authority to operate this product. -
Page 10: Scanning Legally
Une version française de ce guide d’utilisation est disponible sur le site Web d’Uniden au : www.uniden.com. Sur le site d’Uniden, sélectionnez “ Support”, puis “ Owner’s Manuals”. Au menu déroulant de sélection des produits, choisissez “Scanners”. Sélectionnez le modèle et cliquez sur le drapeau canadien. -
Page 11: Main Features
MAIN FEATURES Trunk Tracker V Operation – follows conversations on analog Motorola, Motorola Astro 25 (APCO 25), P25 One-Frequency Trunk, EDACS, EDACS SCAT, and LTR trunked radio systems, including systems in VHF, UHF, 700 MHz, 800 MHz, and 900 MHz bands. APCO 25 Phase I and Phase II Support –... - Page 12 Individual Channel Volume Offset – allows you to adjust the volume offset for each channel. Control Channel Data Output – allows the analysis of control channel data without the need to perform invasive modifications to the scanner. Private Systems – lets you flag a system so that it cannot be read out of the scanner or modified (only with optional software).
- Page 13 Close Call Temporary Store - temporarily stores and scans the last 10 Close Call hits in the ‘Hits with Scan’ system. Fire Tone-Out Standby/Tone Search - lets you set the scanner to alert you if a two-tone sequential page is transmitted. You can set up to 10 settings (transmit frequency, tone frequencies) then select one for standby monitoring.
-
Page 14: Understanding Dynamic Memory
Quick Search - lets you search from the currently-tuned frequency or channel or enter a frequency and start searching. Automatic Channel Setup - accepts frequencies on any valid channel step, even if it does not fall within the band plan’s default steps. Configurable Band Defaults - allows you to set the step (5, 6.25, 7.5, 8.33, 10, 12.5,15, 20, 25, 50 or 100 kHz) and modulation (AM, FM, NFM, WFM, or FMB) for 31 different bands. -
Page 15: Understanding Trunking
CTCSS and DCS systems all use some form of coded squelch. Coded squelch techniques involve the transmission of a special ‘code’ signal along with the audio of a radio transmission. A receiver with coded squelch only activates when the received signal has the correct ‘code’. This lets many users share a single frequency, and decreases interference caused by distant transmitters on the same channel. - Page 16 • Motorola Type I • Project 25 Standard • Motorola Type II • Motorola X2-TDMA • Motorola Type IIi Hybrid • P25 Phase I and Phase II • Motorola Type II Smartnet • EDACS Standard (Wide) • Motorola Type II Smartzone •...
-
Page 17: Understanding Multi-Site Trunking
like a short blip of static like someone keyed up and unkeyed a radio within about 500 msec. LTR systems are limited to 20 frequencies per system. UNDERSTANDING MULTI-SITE TRUNKING Some Motorola and EDACS systems covering a very large geographic area use multiple antenna sites that each operate on different frequencies and use the same talkgroup IDs for traffic. -
Page 18: Included With Your Scanner
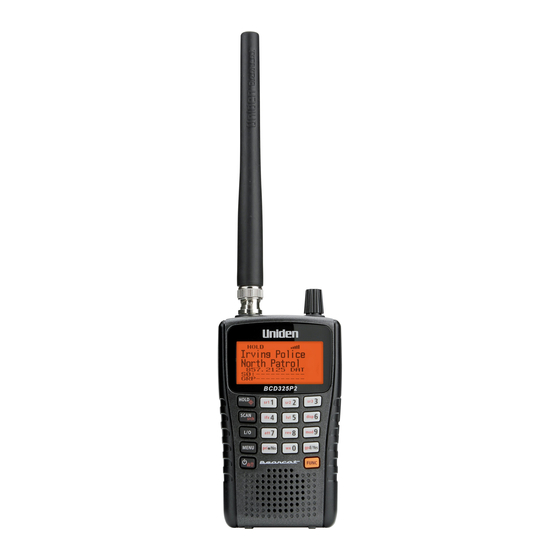
INCLUDED WITH YOUR SCANNER Accessories included in the box are: Not Shown: • USB Cable • Hand Strap • Rechargeable AA Ni-Mh batteries (2) • Belt Clip (attached) BCD325P2 Scanner Antenna Printed Materials: • Owner’s Manual (English, French) • APP Form •... -
Page 19: Connecting The Usb Cable
When battery icon flashes and the scanner beeps every 15 seconds, replace or recharge the batteries. The scanner has a built-in circuit that lets you recharge rechargeable batteries while they are in the scanner. When the scanner is turned on, the scanner will not charge the batteries. When the scanner is turned off, the scanner will charge the batteries. -
Page 20: Navigating The Menu
The only things you will be able to scan right out of the box are the service search, custom search, weather scan, auto search and store, close call search, or close call auto store. NAVIGATING THE MENU The scanner’s menu lets you select options that let you set up and use the scanner using the Menu key. - Page 21 KEYPAD AND KNOB CONTROLS Select - Volume - Squelch knob Hold-Close Call button Scan-Search button Lockout button Menu Function button button Power-Lock-Backlight button Each of the keys and the knob on the BCD325P2 produce several different results depending upon how you activate them. You can, for example, rotate the knob as well as press it.
- Page 22 Function • Press to select a menu item or save an entry in Menu Scroll Control, Mode. SQL, Vol • Press then turn to adjust volume level in Scan Mode. • Press to view battery info in Scan Mode. • Turn to select scan/search direction and to continue scan/ search in Scan/Search Modes.
- Page 23 Function • Press to enter Function Mode for 3 seconds. Func • Press and hold to lock Function Mode. Press again to unlock. • Press to hold on a channel, frequency, search, Close Call Hold/ hit, or Tone-Out search. Press again to resume. •...
- Page 24 Function • Press to toggle the lockout status of a channel in Scan Mode. • Press to toggle the lockout status of a frequency in Search Mode. • Press to toggle the lockout status of a location in GPS Review Location Mode. •...
- Page 25 Function • Enter any 3-digit channel number tag then Menu to access Number Keys a channel in the current system in Scan Hold Mode. • Enter any 3-digit system number tag then (.)no then any 3-digit channel number tag then Menu to access a channel in another system in Scan Hold Mode.
- Page 26 Function • Press Func then 9(mod) to toggle the modulation for a conventional channel in Scan Hold Mode. • Press Func then 9(mod) to toggle the modulation for a trunked site in Scan Hold Mode. • Press Func then 9(mod) to toggle the modulation for a search/Close Call/Tone-Out in Search Mode.
- Page 27 Function • Press to select a menu item or save a name in Menu yes(gps) Mode. • Press to enter the Menu mode for a displayed channel in Scan Mode. • Press to enter the Menu mode for the current Tone-Out in Tone-Out Standby/Search.
-
Page 28: A Look At The Display
A LOOK AT THE DISPLAY Conventional Display Mode 1 (Function Mode) Conventional Display Mode 2... - Page 29 Trunking Display Mode 1 Trunking Display Mode 2...
- Page 30 Trunking Display Mode 3 (Hold Mode) The first line shows the system, site, or range name while scanning. This shows the scanning direction. These show the one’s place of Quick Key for system or site. These show Quick Key for channel groups.
- Page 31 Top Line Displays when you press the Func key to select Function Mode in Any Mode. Displays and blinks when you press and hold the Func key to lock Function Mode in Any Mode. HOLD HOLD appears in Hold Mode. Appears if the system/site/group/channel/frequency/search/location is locked out in Hold Mode.
- Page 32 3rd Line • will scroll ‘SCAN’ (for a conventional system), ‘ID SCAN’, or ‘ID SEARCH’ (for a trunked system) and show an up or down arrow to indicate the scan direction in Scan Mode. • will display the search frequency range/channels and an up or down arrow to show the scan direction in Search Mode.
- Page 33 appears if the channel is receiving digitalized voice in Scan Receive/Hold Modes. appears if the channel is receiving data in Scan Receive/Hold Modes. appears if the control channel is being received in Scan Receive/ Hold Modes. appears if the channel is receiving encrypted voice in Scan Receive/Hold Modes.
- Page 34 S0-9: S0-9: shows the first digit of (systems/sites/search assigned to) the currently scanned quick key on the left with the blinking second digit (1-0) on the right in Scan/Receiving Modes. S0-9: shows the first digit of the system/site/search quick key assigned to the displayed channel on the left with the second digit (1-0) on the right in Hold Mode a non-blinking number on the right indicates the quick key is enabled...
- Page 35 BAND DEFAULTS Frequency Step Mode Band Frequency Step Mode Band Range (kHz) Range (kHz) 25-26.96 Petroleum 174-215.95 VHF TV 26.965-27.405 CB Class D Channel 27.41-27.995 Business/ 216-224.98 1.25 Meter Forest 28-29.68 10 Meter 225-379.975 UHF Air 29.7-49.99 VHF Low 380-399.9875 12.5 Military Trunked...
-
Page 36: Settings Menus
When you select ‘AUTO’ for a channel or mode’s modulation or step, the above values are used unless you’ve edited the Band Defaults. Although TV bands are listed, the scanner cannot decode digital TV audio. SETTINGS MENUS To Edit Settings press Menu. Scroll to ‘Settings’... -
Page 37: Adjust Key Beep
Adjust Key Beep This setting turns the key beep on or off and adjusts the volume level. Scroll to ‘Adjust Key Beep’ and press E/yes. At ‘Set Level’ scroll to ‘Level 1-15 or Auto’ (the scanner sets the alert beep to the master volume level) and press E/yes to save and exit. -
Page 38: Set Gps Format
Set GPS Format Allows you to set the GPS format to DD,MM,SS or decimal degrees (DD.000000), time format, time zone, and units. Scroll to ‘Set GPS Format’ and press E/yes. Scroll to ‘Pos Format’ and press E/yes. Scroll to ‘DMS:DDD MM”SS.ss’ or ‘DEG:DDD.dddddd’ and press E/yes to save and exit. -
Page 39: P25 Lp Filter
Press Menu to return P25 LP Filter This setting lets you set the scanner to apply a software filter that removes the 4kHz tone you can hear on some P25 systems. Note that turning on this setting increases the CPU load and could slightly degrade P25 decode performance on some systems. -
Page 40: Locking/Unlocking The Keyboard
Press Menu twice to exit. Locking/Unlocking the Keypad Hold on any channel. Press Func then to lock or unlock the keypad. The only keys/knobs that work are Func, Hold, and the scroll control for volume. Viewing the Battery Level To view the battery level (in volts) press the scroll control and look at the small numbers in the upper right of the display. -
Page 41: Entering Text
Startup Keys You can program each of your conventional systems, trunked sites, service searches, or custom searches with a ‘Startup Key’ (0-9) so that when you power up the scanner and press the key number, just those systems/sites/searches assigned to the key will be enabled for scan (groups are not effected). See also Using Startup Keys. -
Page 42: Programming Conventional Systems
At ‘Edit Name’ press E/yes. See Entering Text. To Copy a System, press Menu. At ‘Program System’ press E/yes. At ‘Select System’ scroll to the system you want to copy and press E/yes. Scroll to ‘Copy System’ and press E/yes. At ‘New Sys Name?’... -
Page 43: Set Quick Key
Set Quick Key Set Lockout Set Audio AGC Set Start-up Key Set Hold Time P25 Waiting Time Set Number Tag Set Selay Time Set Quick Key Assigns a quick key to a system. The system will be scanned when its quick key is enabled. -
Page 44: Set Hold Time (In Seconds)
Set Hold Time (in seconds) Sets (in seconds) the amount of time the scanner will scan the system before moving on to the next system. All (unlocked) channels will be scanned at least once regardless of this setting. The scanner moves to the next system after the hold time expires, any current transmission ends, and the channel delay time expires. -
Page 45: Programming Trunked Systems
Note: Any analog transmissions on channels with Audio Type set to All lose the first part of the transmission, up to the wait time you set here. PROGRAMMING TRUNKED SYSTEMS Note for Motorola/P25 systems: If you are not sure if the system is Motorola or P25, look at the system type in the RadioReference.com database for your system. -
Page 46: Set Number Tag
Note: EDACS Wide is the same as EDACS Standard and uses a 9600 baud control channel. EDACS Narrow-band systems use a 4800 baud control channel. At ‘Edit Name’ press E/yes. See Entering Text. Scroll to ‘Edit Sys Options’ and press E/yes. Continue at ‘Set Number Tag’... -
Page 47: Id Scan/Search (No Edacs Scat)
Scroll to ‘Set Number Tag’ and press E/yes. Enter the number tag (0-999) and press E/yes to save and exit. ID Scan/Search (no EDACS SCAT) Sets whether the scanner scans the programmed ID groups (ID Scan) or searches for all IDs (ID Search) in a trunking system. The default setting is ID search. Scroll to ‘ID Scan/Search’... -
Page 48: Priority Id Scan (No Edacs Scat/P25-1Tr)
• 14 can only be assigned to Block 0. Since these size codes require multiple blocks, you will be prompted for the next available block. For example, if you assign Block 0 as 12, the scanner prompts you for block 2, the next block available, instead of block 1. If you assign Block 0 as 14, you would not see another prompt because 14 uses all available blocks. -
Page 49: Set Id Format
At ‘Set Tone’ scroll to the alert (Alert 1-9 or Off) and press E/yes. At ‘Set Level’ scroll to ‘Level 1-15 or Auto’ (the scanner sets the alert beep to the master volume level) and press E/yes. Scroll to ‘Set Alert Light’ and press E/yes. Scroll to Off, On, Slow Blink, or Fast Blink and press E/yes. -
Page 50: P25 Nac Option
P25 NAC Option (P25-1Tr only) allows you to have the scanner search for NAC codes or you can program a specific code for the system. Scroll to ‘P25 NAC Option’ and press E/yes. Scroll to one of two settings and press E/yes. Search - The scanner opens squelch for any digital signal and displays the NAC used. -
Page 51: Edit Name (No Edacs Scat)
Edit Name Set Attenuator Set Quick Key Set Lockout Set Start-up Key Set Hold Time Edit Band Plan Set Location Info Set Site Type P25 Waiting Time Set Frequencies Delete Site Set Modulation New Site Edit Name (no EDACS SCAT) Assigns a name to the site. - Page 52 (or base) is always the base frequency as provided in the Radio Reference Database. Use this Excel spreadsheet to calculate the upper base frequency value. Follow the instructions and use the spreadsheet at http://info.uniden.com/ UnidenMan4/CalculatingUpperBaseFrequencies to determine the upper base frequency value.
-
Page 53: Set Frequencies
For Standard Motorola 800 MHz rebanded systems set Band Plan 1 and Band Plan 2 as follows: Band Plan Lower Base Freq Upper Base Freq Offset Polarity Spacing 851.025 854.0000 25 kHz 851.0125 868.9875 25 kHz Set Site Type (EDACS only) This is where you select a Wideband or Narrowband EDACS site. -
Page 54: Set Modulation
Set Modulation This setting selects the modulation used for the site. The default setting is auto (NFM for FM frequencies). See also Band Defaults. Scroll to ‘Set Modulation’ and press E/yes. Scroll to Auto, NFM, or FM and press E/yes. Note: You can also toggle modulation for a site in hold mode by pressing Func then 9(mod). -
Page 55: P25 Waiting Time (Motorola Only)
Set Location Info Allows you program a location for the site so the scanner will enable/disable it for scanning with a GPS unit attached. See Set GPS Format first to set your position format. Scroll to ‘Set LocationInfo’ and press E/yes. At ‘Set Latitude’... -
Page 56: Edit Name
At ‘Select System’ scroll to the system where you want to create a group and press E/yes. Scroll to ‘Edit Group’ and press E/yes. At ‘Select Group’ scroll to ‘New Group’ and press E/yes. Continue at ‘Set Number Tag’ below. To Edit Group Options, pess Menu. -
Page 57: Set Lockout
At ‘Set Latitude’ press E/yes. Enter the latitude and press E/yes. At ‘Set Longitude’ press E/yes. Enter the longitude and press E/yes. At ‘Set Range’ press E/yes. Enter the range (0.5 to 125 in 0.5 steps) and press E/yes. At ‘Set GPS Enable’ press E/yes. When this option is set to “On”, the scanner will control L/O status of this group by position information received from a GPS. -
Page 58: To Program A Frequency Into An Existing Group
want to edit the channel settings or are done editing the channel, press L/O to return to ‘Hold’ to enter another frequency or Scan to exit. Then see Edit Channel Options, Edit Group Options, and Edit Conventional Systems Options to customize the channel(s), group, and system. To Program a Frequency into an Existing Group In Scan Mode press Hold to hold on any channel. -
Page 59: To Program An Id Into An Existing Group
To Program an ID into an Existing Group In Scan Mode Hold on any channel. Enter the ID (see Entering IDs) and press E/yes. At ‘Quick TGID Save?’ press .no. At ‘Select System’ scroll to the system where you want to store the ID and press E/yes. -
Page 60: Edit Channel Options Menu
To enter a Motorola Wildcard (receive any) I-Call ID, press .no once then enter 0 and press E/yes. Note: You can also lock out this wildcard ID so you will not receive I-Calls. To enter an EDACS ID in AFS (default) format, enter the agency number, press .no once for a hyphen, then the fleet and subfleet and press E/yes. -
Page 61: Edit Name
At ‘Select System’ scroll to the system where the channel is and press E/yes. Scroll to ‘Edit Group’ and press E/yes. Scroll to the Group that has the channel you want to edit and press E/yes. Scroll to ‘Edit Channel’ press E/yes. At ‘Select Channel’... -
Page 62: Set Number Tag
Scroll to ‘Set Audio Type’ and press E/yes. Scroll to one of three options and press E/yes. All - The scanner automatically determines whether the audio is analog or digital. Digital Only - The scanner receives the channel only if it has APCO 25 digital audio. -
Page 63: Set Modulation (Conventional Only)
Set Modulation (conventional only) This setting selects the modulation used for the channel. The default setting is Auto (NFM for FM channels). Scroll to ‘Set Modulation’ and press E/yes. Scroll to Auto, AM, NFM, FM, WFM, or WFM Broadcast and press E/yes to save and exit. -
Page 64: Set Lockout
Press Menu to return. Set Lockout Determines whether a channel is scanned or not. ‘Temporary L/O’ means until you cycle power. The default setting is unlocked. Scroll to ‘Set Lockout’ and press E/yes. Scroll to ‘Unlocked’, ‘Temporary L/O’, or ‘Lockout’ and press E/yes. Press Scan/Srch or L/O to exit. -
Page 65: Using The Bcd325P2 With A Gps
USING THE BCD325P2 WITH A GPS LOCATION-BASED SCANNING You can connect the scanner to an optional GPS device (BC-GPSK using the BC- UTGC cable) and set the scanner to automatically lock and unlock trunked sites and channel groups based on the location information and range settings you program for those sites/groups. - Page 66 The scanner displays ‘Searching for Satellite’ in GPS Display Mode until it receives the signal from the satellite if you have your connections and baud rate set correctly. The first time the scanner starts receiving a signal from the GPS, it beeps and briefly displays ‘GPS Connected’...
-
Page 67: Edit Name
To Edit an Existing Location press Menu. Scroll to ‘Program Location’ and press E/yes. At ‘Select Type’ scroll to ‘POI’, ‘Dangerous Xing’, or ‘Dangerous Road’ and press E/yes. Scroll to the location you want to edit and press E/yes. Scroll to the options below and press E/yes. Press Scan/Srch when editing is finished. -
Page 68: Set Alert (Poi Only)
Set Alert (POI only) Lets you configure the alert tone and/or light when you are in range of a POI. The default tone is ‘Alert 1’, the default level is ‘Auto’, and default alert light is ‘Fast Blink’. Scroll to ‘Edit Name’ and press E/yes. See Entering Text. Scroll to ‘Set Alert’... - Page 69 Alert in GPS Display Mode...
- Page 70 There are three ranges for each Dangerous Xing or Dangerous Road alert: 1 mile/ km, .5 mile/km and .1 mile/km. The scanner alerts once for each range when it meets both of the following two conditions: The first condition is heading for the Location. A valid heading is within ±45˚ of the value set in Set Heading.
-
Page 71: Gps Display Mode (Poi Only)
Enter a range from (.05 to 4 mi/km in .05 mi/km steps) and press E/yes to save and exit. Set Heading (Dangerous Road/Xing only) sets how the scanner alerts you to the location based on how you approach it. To make the alert direction-dependent, select a direction of approach. - Page 72 The left side of the 1st line displays the current direction of travel. The right side of the 1st line displays the present time. The left side of the 2nd line displays the current speed. The right side of the 2nd line displays the elevation of the current location. The 3rd line is always “OFF”...
- Page 73 The 1st line displays the latitude of the current location. The 2nd line displays the longitude of the current location. The 3rd line displays “OFF” (when a POI is not selected) or the name of the selected POI. The large arrow shows the direction to the selected POI. The left side of the 1st line displays the current direction of travel.
-
Page 74: Gps Review Location Mode
To Toggle ‘Hold’ mode on a background Scan/Srch press Hold. To Return to Scan mode press Scan/Srch. Press GPS again to view GPS Display Mode. To View ‘Review Location’ Mode press E/yes. Notes: All sites/groups (with quick keys enabled and gps enabled for the site/ group) not within range of your current location will be temporarily locked out. - Page 75 1. POI - Indicates a Point of Interest location. 2. DXG - Indicates a Dangerous Crossing location. 3. DRD - Indicates a Dangerous Road location. 4. Range - Indicates the programmed distance to your POI. 5. Head - Indicates the selected heading to the designated Dangerous Crossing from any direction.
-
Page 76: Priority/Priority Id/Priority Plus Scan
PRIORITY/PRIORITY ID/PRIORITY PLUS SCAN Priority Scan When scanning a conventional system, scanning is interrupted (based on the priority check interval setting) to check priority channels for activity. The more channels you have set to priority, the longer the interruption is. The scanner cannot scan over 100 priority channels at once. -
Page 77: Using Startup Keys
Off - the priority feature is off. On - the scanner checks conventional priority channels, and priority IDs within systems that have priority ID enabled. PRI - appears in the display when you select this mode. Plus On - the scanner only scans the conventional priority channels. PRI - flashes in the display when you select this mode. -
Page 78: Scanning Systems
Caution: If you press the wrong key when you press the power key to set your startup configuration, and that wrong key doesn’t have any systems assigned to that key, the scanner will lock out all systems that have startup keys. SCANNING SYSTEMS With earlier scanners, you selected banks to scan that had channels stored in them. - Page 79 Notes: If no systems are programmed, or all systems (or groups in a system) are locked out or turned off, ‘Nothing to Scan’ appears. Turn on a system/site quick key or unlock a system/site to scan. If you turn off all groups in a system you will not be able to turn any back on and also see ‘Nothing to Scan’.
- Page 80 To lock out a channel or frequency quickly press L/O once while the channel or frequency is in the display to temporary lock out. Quickly press L/O twice to lock out. To lock out a conventional system/trunked site/search while receiving the system/ site/search quickly press E/yes then L/O once to temporary lock out.
- Page 81 To toggle Priority Modes Hold on any channel and press Func then .no(pri). Press Hold to resume. To toggle Weather Alert Priority on or off Hold on any channel and press Func then 0(wx). Press Hold to resume. To toggle Close Call Modes Hold on any channel and press Func then Hold/ Press Hold to resume.
-
Page 82: Using Number Tags
Storing a Displayed ID in ID Search Mode To store a displayed ID into an existing group during ID Search, press E/yes. You will see ‘Quick TGID Save?’ in the display then press .no. At the ‘Select Group’ prompt, scroll to the group where you want to store the ID and press E/yes. -
Page 83: P25 Adjustment Mode
Press Func (or press and hold Func to view longer) to view the current system and channel number shown in the top left corner of the display as “T000. 000”. For example “T002. 043” would indicate the current system is 2 and the current channel is 43. -
Page 84: Locking/Unlocking Systems/Sites/Searches
Current Threshold Setting Van Cort Patrol 935. 0125MHz Threshold Voltage Level E R R : 1 4 A U T O T 1.38 1.60 1.82 The first line on the display will show the digital error rate and the decode threshold setting (0-20) when receiving. -
Page 85: Locking/Unlocking Groups
Rotate the scroll control until the system/site/search you want to unlock appears. Press L/O (each time) to toggle ‘Unlocked’, ‘Temporary L/O’, or ‘Lockout’. (You have to be quick to get ‘Lockout’). Press Scan/Srch to return. Note: You will see ‘Nothing to Scan’ if the quick key is not turned on for the system/site/search (if one is assigned). - Page 86 Or, quickly press Hold to hold on the channel. Press L/O to toggle ‘Unlocked’, ‘Temporary L/O’, or ‘Lockout’. Or, quickly press E/yes to go to the menu for that channel. (Press .no to cancel storing a tone code if asked). Scroll to ‘Set Lockout’...
-
Page 87: Band Scope Mode
BAND SCOPE MODE... -
Page 88: Using Band Scope Mode
The Band Scope feature lets you have the scanner provide a visual representation of radio activity in a frequency band. The screen is arranged with the frequencies increasing in value from left-to-right, and a signal strength meter for signals. Band Scope Mode searches a frequency range and displays the signal level in real time. - Page 89 Hold Mode ‘HOLD’ shows in the display and allows you hold the sweep then scroll to and listen to a frequency. To toggle between ‘Search’ mode and ‘Max Hold Search’ mode press Func then Scan/Srch. To listen to any frequency under the marker Hold (in either mode) and scroll to the frequency.
-
Page 90: Search/Close Call Options Menu
To toggle Intermediate Frequency Exchange on or off Hold and press Func then 4(ifx). Press Hold to resume. To toggle the attenuator on or off pressFunc then 7(att). (Press and hold 7(att) for global attenuation). Notes: The search time changes depending on the search step size. The step defaults to the default band step for the channel. - Page 91 Scroll to the frequency (or press .no to go to the next) and press E/yes to unlock. Press Menu twice to return. Note: You can also do this in search mode by pressing Func then L/O. Broadcast Screen these settings determine whether the scanner automatically ignores transmissions that are on common broadcasts, paging systems, and other annoyance radio sources during Custom Search, Quick Search, or Close Call Search.
- Page 92 Scroll to ‘Tone/Code Search’ and press E/yes. Scroll to 1 of 3 options and press E/yes. Off - the scanner does not search and display any tones. CTCSS/DCS Search - the scanner searches and displays only CTCSS/ DCS tones. P25 NAC Search - the scanner searches and displays only NAC tones. Repeater Find this feature sets whether the scanner tries to tune to a repeater output frequency when it detects a transmission on a repeater input frequency in Search and Close Call modes.
-
Page 93: Search For
Set Audio AGC allows you to turn the AGC feature on or off for Quick Search and Close Call modes. See also Adjust Audio AGC. Scroll to ‘Set Audio AGC’ and press E/yes. Scroll to ‘Analog’ and press E/yes to toggle on or off. Scroll to ‘Digital’... - Page 94 Scroll to Set Delay Time and press E/yes. Scroll to the desired delay time (-10, -5, -2, 0, 1, 2, 5, 10, or 30 secs.) and press E/yes to save and exit. A negative delay will force a resume after that number of seconds. Scroll to Set Attenuator and press E/yes.
- Page 95 Service Search allows you quickly select and search the scanner’s preprogrammed frequencies. See Edit Service Search first. To start a Service Search, press Menu. Scroll to ‘Search for...’ and press E/yes. At ‘Service Search’ press E/yes. Scroll to: ‘Public Safety’, ‘News’, ‘Ham Radio’, ‘Marine’, ‘Railroad’, ‘Air’, ‘CB Radio’, ‘FRS/GMRS’, ‘Racing’, ‘FM Broadcast’, ‘Military Air, or ‘Special’...
- Page 96 Scroll to ‘C-Ch Only Mode’ and press E/yes. Scroll to On or Off then press E/yes to save and exit. Scroll to ‘Set MOT BandPlan’ and press E/yes. See also Edit Band Plan. Scroll to 1 of 3 options and press E/yes. 800/900 Standard - The scanner will use the regular old Motorola band plan and return to the menu.
-
Page 97: Custom Search
Scroll to Set Startup key and press E/yes. Scroll to 0-9 or .no for no startup key and press E/yes to save and exit. Scroll to Set Number Tag and press E/yes. Enter 0-999 and press E/yes. Scroll to Set Lockout and press E/yes. (Used for ‘Search with Scan’... -
Page 98: Auto Search And Store
Repeat for any other search keys you want to program. Press L/O to exit. The default settings are: SRCH 1: Custom 1 SRCH 2: Public Safety SRCH 3: Band Scope Mode Auto Search and Store Auto Search and Store allows you search and store frequencies from enabled custom search ranges or a service search range into a conventional system, or new talkgroup IDs into a trunked system. -
Page 99: Quick Search
At ‘Select Store Sys’ scroll to the conventional system you want to store the frequencies in and press E/yes. At ‘Select Range’ scroll to the ‘service search’ or to ‘custom search’ to select where to search from and press E/yes. Note: The quick key for the system must be turned on (if one is assigned to the system) and not locked out to select the system to store frequencies in otherwise you will see ‘Nothing to Scan’. -
Page 100: Searching
Note: As there is no ‘Step’ setting in ‘Search and Close Call Options’, you will have to set the step in ‘Band Defaults’. To start searching at the current frequency in scan mode quickly press Hold to hold on the frequency. Press Func then Scan/Srch. -
Page 101: Storing A Displayed Frequency (While Searching)
Press Func then press and hold 8(rev). Press Hold to resume. To toggle modulation for a search press Hold to hold on each search. Press 7(att) then 9(mod). Press Hold to resume. To toggle Close Call modes press Hold/ To review and unlock search frequencies press Func then L/O. To unlock all frequencies of all search/close call ranges Hold on any search and press and hold L/O. -
Page 102: Close Call Menu
CLOSE CALL MENU Your scanner’s Close Call feature lets you set the scanner so it detects, alerts you to, and displays the frequency of a nearby strong radio transmission. You can set the scanner so the Close Call feature checks for a Close Call hit every 2 seconds in the background while you are scanning or searching or use Close Call only mode. - Page 103 Set CC Bands allows you select the Close Call bands to be searched or auto stored. Scroll to ‘Set CC Bands’ and press E/yes. Scroll to each band and press E/yes to toggle on or off. Press Menu to return. VHF Low 1 - Band 1 - 25-54MHz VHF Low 2 - Band 2 - 54-108 MHz Air Band-Band 3 - 108-137 MHz...
-
Page 104: Close Call Auto Store
With this feature Off, when the scanner detects a Close Call signal while scanning, the scanner does not override the current audio. ‘Close Call’ appears for the length of time set in Close Call Pause. (only if it’s still there). Set Close Call Mode selects the Close Call mode when scanning or searching. -
Page 105: Using Close Call Modes
USING CLOSE CALL MODES To Start Close Call Only Mode, press and hold Hold/ To Use Close Call while Scanning or Searching, press Hold/ to toggle Close Call Priority, Close Call DND, or Off. MANAGING CLOSE CALL HITS In Close Call Only Mode When the scanner detects a Close Call signal, ‘Close Call’... -
Page 106: In Close Call Hold Mode
‘CC Found!’ and ‘Press Func Key’ appear for the length of time set in Close Call Pause. If you do not press ‘Func’, the scanner will return to scanning after ‘pause’ times out. Press E/yes to listen to and display the frequency for the (+) delay time set in Search/Close Call Options (only if it’s still there). -
Page 107: Weather Operation Menu
Scroll to ‘Set Lockout’ and press E/yes. Scroll to ‘Unlocked’, ‘Temporary L/O’, or ‘Lockout’ and press E/yes to save and exit. Scroll to ‘Set Hold Time’ and press E/yes. Enter the hold time (0-255 seconds) you desire and press E/yes to save and exit. - Page 108 To turn Intermediate Frequency Exchange on or off press Func then 4(ifx). To turn the attenuation on or off press Func then 7(att). To store a frequency press E/yes then see Storing a Displayed Frequency. To go to the Weather Menu in any weather mode press Func then Menu. Weather Alert Priority turning the weather alert priority feature on allows the scanner to check the weather channels every 5 seconds for a 1050 Hz weather alert signal and still scan or search.
- Page 109 FIPS codes are in the format nSSCCC: n: A special subcounty designator. For an entire county, use 0. SS: The state code. CCC: The county code. Scroll to ‘Program SAME’ and press E/yes. At ‘Select SAME’ scroll to the SAME group (1-5) and press E/yes. At ‘Edit Name’...
-
Page 110: Using Fire Tone-Out
Note: You can also turn on weather alert in scan or search modes by pressing and holding the WX button. Press WX again, then scroll to ‘Alert Only’, ‘SAME 1-5’, or ‘All FIP’ and press E/yes. Scroll to ‘Weather Alert’ and press E/yes. Scroll to 1 of 7 options and press E/yes. - Page 111 Notes: For two-tone pages, enter the tones (in Hz) for tone A and tone B. For one-tone pages using short tones between 1.25 and 3.75 seconds, enter tone for tone A and 0 for B. For long-tone pages, such as group pages of more than 3.75 seconds, enter 0 for A and the tone for B.
- Page 112 Press Menu to return. Using Tone-Out Standby/Search See Setting up Tone-Out first. Press Menu. Scroll to ‘Tone-Out for...’ and press E/yes. Scroll to ‘Tone-Out Standby’ and press E/yes. You can also assign Tone-Out to a Search Key. The display will show the Tone-Out name, channel number (1-10), and tone settings. Any transmission received on the frequency will not be heard but you will still see the signal strength bars.
-
Page 113: In Tone-Out Standby Mode
In Tone-Out Standby Mode To select another Tone-Out turn the scroll control. To save found tones in Tone-Out Search mode, press E/yes at ‘Save Found Tones?’. To turn Intermediate Frequency Exchange on or off press Func then 4(ifx). To turn the attenuation on or off press Func then 7(att). To toggle the modulation press Func then 9(mod). - Page 114 NORMAL PRESS MODE 3, 4 3, 4 3, 4 3, 4 3, 4 (Srch 1 - Srch 3) <4(ifx) 5(lvl) 6(disp) 7(att) 8(rev) 9(mod) 0/wx .no/pri E/yes/ 1: Key-Safe only applies for press and hold for this key. 2: Key-safe only allows toggle of ‘Temporary Lockout” and “Unlock.” 3: Key-Safe only allows MENU for selecting system/channel number tags.
-
Page 115: Appendix
FUNCTION + PRESS MODE 1, 2 (Srch 1 - Srch 3) <4(ifx) 5(lvl) 6>(disp) 7(att) 8(rev) 9(mod) 0/wx .no/pri E/yes/ Menu 1: Key-Safe only applies for press and hold for this key. 2: Key-safe only allows toggle of ‘Temporary Lockout” and “Unlock.” 3: Key-Safe only applies in HOLD mode. - Page 116 Preset Map 1 Preset Map 2 Preset Map 3 Preset Map 4 Preset Map 5 Block Size Block Size Block Size Block Size Block Size Code Code Code Code Code S-11 S-11 S-12 S-11 (S-12) Preset Map 6 Preset Map 7 Preset Map 8 Preset Map 9 Preset Map 10...
- Page 117 Preset Map 11 Preset Map 12 Preset Map 13 Block Size Block Size Block Size Code Code Code Preset Map 14 Preset Map 15 Preset Map 16 Block Size Block Size Block Size Code Code Code S-10 S-10 S-10 S-11 S-11 S-11 S-12...
-
Page 118: Entering Ids
Number of Number of Max IDs per Size Code Fleets Sub-Fleets Talkgroups per Radios Blocks Talkgroup Block per Block 1024 2048 4096 You can tell which block a Motorola ID is in by its number. Block Lower ID# Upper ID # 0000 8191 8192... - Page 119 Direct entry (Quick Save) not allowed for I-Call IDs. System Type TGID Format Motorola Type I Systems BFF-SS Normal ID B=Block (0-7) BFFF-S Normal ID (Fleet is 100-127) FF(F)=Fleet BFF- Fleet ID S(S)=Sub-Fleet BFFF- Fleet ID (Fleet is 100-127) B- Block ID N=Decimal Number NNNNN i=I-Call ID...
-
Page 120: Weather Channels
TT ID + # Usage TT ID + # Usage ID+0 Normal Talkgroup ID+8 DES/DVP Encryption Talkgroup ID+1 All Talk troup ID+9 DES All Talkgroup ID+2 Emergency ID+10 DES Emergency ID+3 Talkgroup patch to another ID+11 DES Talkgroup patch ID+4 Emergency Patch ID+12 DES Emergency Patch... -
Page 121: Same Event Codes
SAME EVENT CODES Standard Event Code Warning Watch Advisory Description Administrative Message Admin Message Avalanche Watch Avalanche Avalanche Warning Avalanche Biological Hazard Biological Warning Boil Water Warning Boil Water Blizzard Warning Blizzard Child Abduction Child Emergency Emergency Civil Danger Warning Civil Danger Civil Emergency Civil EMG... - Page 122 Standard Event Code Warning Watch Advisory Description Immediate Evacuation Evacuate Note Food Contamination Food Warning Flash Flood Watch Flash Flood Flash Flood Statement Flash Flood Flash Flood Warning Flash Flood Flood Watch Flood Flood Statement Flood Flood Warning Flood Fire Warning Fire Flash Freeze Warning Flash Freeze...
- Page 123 Standard Event Code Warning Watch Advisory Description National Silent Test Nation Silent Nuclear Power Plant Nuclear Plant Warning Power Outage Advisory Power Outage Radiological Hazard Radiological Warning Required Monthly Test Monthly Required Weekly Test Weekly Special Marine Warning Special Marine Special Weather Special WX Statement...
-
Page 124: Ctcss Tones
Standard Event Code Warning Watch Advisory Description Wild Fire Watch Wild Fire Wild Fire Warning Wild Fire Winter Storm Watch Winter Storm Winter Storm Warning Winter Storm Unrecognized Watch Unrecognized Unrecognized Unrecognized Emergency Unrecognized Unrecognized Statement Unrecognized Warning Unrecognized Continuous Tone Coded Squelch System (CTCSS) and Digital Coded Squelch (DCS) are two methods used to prevent interference by other radio communications. -
Page 125: Dcs Codes
88.5Hz 123.0Hz 165.5Hz 196.6Hz 250.3Hz 91.5Hz 127.3Hz 167.9Hz 199.5Hz 254.1Hz DCS CODES The scanner can detect the following 112 hexadecimal DCS codes. REVERSE LIST Range (MHz) Offset (MHz) Range (MHz) Offset (MHz) 29.5200 - 29.5800 + 0.1 450.0000 - 454.9875 29.6200 - 29.6800 - 0.1 455.0000 - 459.9875... -
Page 126: Repeater Frequency List
143.9000 + 4.25 473.0000 - 475.9875 144.5100 - 144.8900 + 0.6 476.0000 - 478.9875 145.1100 - 145.4900 - 0.6 479.0000 - 481.9875 146.0100 - 146.3850 + 0.6 482.0000 - 484.9875 146.4150 - 146.5050 485.0000 - 487.9875 146.5950 488.0000 - 490.9875 146.6100 - 146.9850 - 0.6 491.0000 - 493.9875... -
Page 127: Technical Specifications
TECHNICAL SPECIFICATIONS Band Coverage: 30 Bands Size: 2.64 in (W) x 1.29 in (D) x 4.532 in (H) (without antenna, knob, clip, and other projections) 67 mm (W) x 32.7 mm (D) x 115 mm (H) (without antenna, knob, clip, and other projections) Weight: 9.6 oz. - Page 128 Sensitivity (12dB SINAD) Nominal VHF Low Band 1 0.3 μV (AM) 25.005 MHz 0.2 μV (NFM) 40.840 MHz 0.2 μV (NFM) 53.980 MHz VHF Low Band 2 0.6 μV (WFM) 54.050 MHz 0.2 μV (FM) 72.515 MHz 0.5 μV (FMB) 107.100 MHz Aircraft Band 0.3 μV...
- Page 129 Public Service Band 0.3 μV (NFM) 758.0125 MHz 0.4 μV (NFM) 806.000 MHz 0.3 μV (NFM) 857.150 MHz 0.3 μV (NFM) 954.9125 MHz Hum & Noise (Nominal) VHF Low Band 1 (AM) 25.005 MHz 53 dB (NFM) 40.840 MHz 44 dB VHF Low Band 2 (WFM) 54.050 MHz...
-
Page 130: Rbrc Information
WARRANTY INFORMATION WARRANTOR: UNIDEN AMERICA CORPORATION (Uniden) ELEMENTS OF WARRANTY: Uniden warrants, for one year, to the original retail owner, this Uniden Product to be free from defects in materials and craftsmanship with only the limitations or exclusions set out below. - Page 131 Uniden, (C) improperly installed, (D) serviced or repaired by someone other than an authorized Uniden service center for a defect or malfunction covered by this warranty, (E) used in any conjunction with equipment or parts or as part of any system not manufactured by Uniden, or (F) installed or programmed by anyone other than as detailed by the Operating Guide for this product.
Need help?
Do you have a question about the BCD325P2-AU and is the answer not in the manual?
Questions and answers