Table of Contents
Advertisement
Quick Links
®
HMPRO50 OPERATOR'S MANUAL
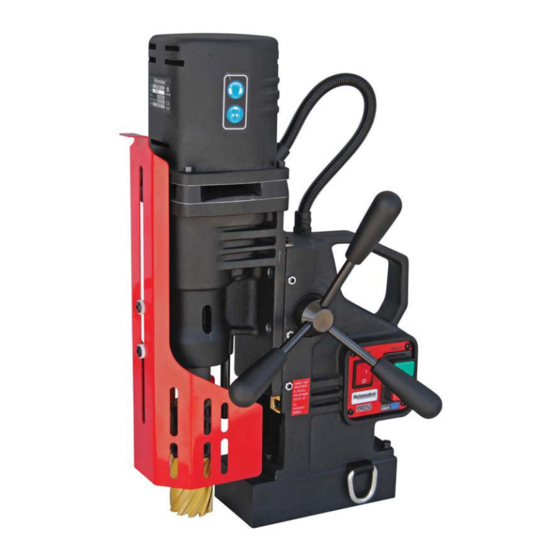
HOLEMAKER PRO 50
Holemaker Portable Magnetic Drilling Machine
OPERATOR'S MANUAL
OPERATOR'S MANUAL
WARNING!
,
BEFORE USE
ENSURE EVERYONE USING THIS MACHINE READS AND UNDERSTANDS
.
ALL SAFETY AND OPERATING INSTRUCTIONS IN THIS MANUAL
EYE PROTECTION
HEARING PROTECTION
NEVER PLACE
LINE VOLTAGE
BEWARE OF
REQUIRED
REQUIRED
FINGERS NEAR
PRESENT
ROTATING
CUTTING AREA OR
MACHINE PARTS
MACHINE ARBOR
S
r e
a i
# l
D
a
e t
f o
P
r u
h c
a
e s
www.holemaker.com
1
Advertisement
Table of Contents

Subscribe to Our Youtube Channel
Related Manuals for HOLEMAKER PRO 50


Summary of Contents for HOLEMAKER PRO 50
- Page 1 ® HMPRO50 OPERATOR’S MANUAL HOLEMAKER PRO 50 Holemaker Portable Magnetic Drilling Machine OPERATOR’S MANUAL OPERATOR’S MANUAL WARNING! BEFORE USE ENSURE EVERYONE USING THIS MACHINE READS AND UNDERSTANDS ALL SAFETY AND OPERATING INSTRUCTIONS IN THIS MANUAL EYE PROTECTION HEARING PROTECTION NEVER PLACE...
-
Page 2: Table Of Contents
HMPRO50 OPERATOR’S MANUAL Congratulations on the purchase of your Holemaker Pro 50 portable magnetic drilling machine. Holemaker drilling machines are designed to deliver fast, efficient hole drilling performance in portable applications. TABLE OF CONTENTS Important Safety Instructions ........3 - 4 Power Supply Requirement . -
Page 3: Important Safety Instructions
10. Secure Work • Use clamps or a vise to hold work. It’s safer than using your hand and it frees both hands to operate tool. 11. Do Not Overreach • Keep proper footing and balance at all times. www.holemaker.com... - Page 4 • Do not use this tool if switches do not turn it on and off. Have defective switches replaced by authorized service center. 19. Use Cutter Guard Always use cutter guard supplied with machine to reduce the risk of injury. (refer fig. 1) • Fig. 1 www.holemaker.com...
-
Page 5: Power Supply Requirement
If the cord or plug is damaged, have it repaired before using. If the plug will not fit the outlet, have a proper outlet installed by a qualified electrician. The Holemaker must be plugged into an appropriate outlet, properly installed and grounded in accordance with all codes and ordinances. -
Page 6: Technical Data
MT 2 Tool holder …………………………………. " Weldon) 19.05 mm Capacities: max. Holemaker cutter diameter ………....52mm max. drilling depth with standard arbor ………..52mm max. drilling depth with optional arbor ….……..75mm Magnet Dead Lift (on 25 mm plate) ………....... -
Page 7: Special Instructions
2. Remove any excessive mill scale or rust from surface to be drilled. 3. When drilling thin materials, it is recommend ed that you plac e a steel plate under the work piece and Holemaker magnet area to increase magnetic holding force. -
Page 8: Machine Operation
To move machine into next drilling spot, stop the motor as described above and push the magnet switch (1) to the position “O”. NOTE: As a power saving function, Switching the Magnet Switch(1) to “I” will supply the electromagnet with 50% power. Switching the Start-Stop Switch(2) to “I” will increase the electromagnet to 100% power. www.holemaker.com... - Page 9 Place the machine so that the tool is over the centre of the hole you intend to make and turn the magnetic base ON. Always make sure prior to use that the machine is secured from falling down with a chain/strap. An example of a safety chain/strap use. www.holemaker.com...
- Page 10 OFF. - When work with the machine is finished the power cord should be disconnected from the power source, the machine should be cleaned up from swarf, coolant etc and the cutter should be removed and cleaned. www.holemaker.com...
-
Page 11: Maintenance And Service
Then, tighten screws (3) until any noticeable resistance is felt. When the screw in this position and blocked with a hexagonal key, tighten counter nut (4). The screws (3) counteract the machining force and protect the pressure strip from shifting during operation. www.holemaker.com... -
Page 12: Basic Troubleshooting
• Dull cutters; dull or chipped cutting edges require excessive feed pressure, resulting in breakage. • Movement of machine on material - See “1. Magnetic base not holding securely” • Inconsistent hardness in material can cause cutter breakage 7. Oversized or rough holes • Insufficient coolant. • Excessive feed pressure. • Dull cutter. www.holemaker.com... -
Page 13: Machine Parts Breakdown
® HMPRO50 OPERATOR’S MANUAL HMPRO50 MAGNETIC DRILLING MACHINE HOLEMAKER PRO 50 ITEM PART NUMBER SPPRO5001 FRAME ASSEMBLY, SPPRO5002 MOTOR COMPLETE 230V, SPPRO5003 CONTROL PANEL 230V SPPRO5004 GUARD ASSY, SPPRO5005 STOP ROD SPPRO5006 LOWER SLEEVE, SPPRO5007 UPPER SLEEVE, SPPRO5008 SAFTY PIPE,... - Page 14 ® HMPRO50 OPERATOR’S MANUAL SPPRO5001 FRAME ASSEMBLY ITEM PART NUMBER SPPRO500101 MAIN BODY ASSY SPPRO500102 D-RING STRAP SPPRO500103 ELECTROMAGNETIC BASE, SPPRO500104 SPRING WASHER 6,1 SPPRO500105 HEX. SOCKET BOLT M6x25 www.holemaker.com...
- Page 15 SLIDE INSERT - LEFT 1.1.3 SPPRO50010104 SELF LUBRICATING SLEEVE 28,05H7x32x16, 1.1.4 SPPRO50010105 SPRING WASHER 1.1.5 SPPRO50010106 DISC SPRING 4,2x10x0,5 1.1.6 SPPRO50010107 HEX SOCKET BOLT-M5X20 1.1.7 ROUND WASHER 5,3 SPPRO50010108 1.1.8 SPPRO50010109 HEX SET SCREW M5X10 1.1.9 SPPRO50010110 NUT M5 1.1.10 www.holemaker.com...
- Page 16 SPPRO500224 HEX. SOCKET BOLT M5x35 2.24 HEX. SOCKET BOLT M5x40 2.25 SPPRO500225 SPPRO500226 SCREW M3x5 PHCRMS 2.26 SPPRO500227 CROSS RECESSED RAISED COUNTERSUNK HEAD SCREW M5x10 2.27 SCREW M4X12 PHCRMS 2.28 SPPRO500228 SPPRO500229 SPRING WASHER-4.3 2.29 SPPRO500230 SPRING WASHER-4.1 2.30 www.holemaker.com...
- Page 17 ARMATURE TOOTH END z12 2.1.4 SPPRO50020105 FIELD 230V 2.1.5 SPPRO50020106 UPPER HOUSING 2.1.6 SPPRO50020107 CROSS RECESSED PAN HEAD TAPPING SCREW 4x16 2.1.7 SPPRO50020108 SPRING WASHER 2.1.8 SPPRO50020109 BRUSH 230V 2.1.9 SPPRO50020110 SPRING BRUSH 2.1.10 SPPRO50020111 HEXAGON BOLT M4x73 2.1.11 www.holemaker.com...
- Page 18 2.2.6 SPPRO50020207 BEARING, NEEDLE RHNA 081210 2.2.7 SPPRO50020208 EXTERNAL RETAINING RING 30z 2.2.8 SPPRO50020209 EXTERNALE RETAINING RING 25z 2.2.9 SPPRO50020211 INTERNAL RETAINING RING 62W 2.2.11 SPPRO50020213 PIN 6x14 2.2.13 SPPRO50020214 SPRING WASHER 5.1 2.2.14 SPPRO50020215 HEX SOCKET BOLT-M5X20 2.2.15 www.holemaker.com...
- Page 19 HELICAL INPUT GEAR z46 2.17.3 SPPRO50021703 WOODRUFF KEY 3x3.7 2.17.4 SPPRO50021704 BEARING, BALL- 8X22X7 SPPRO500218 PINION SHAFT Z=12 ASSY, ITEM PART NUMBER DESCRIPTION 2.18.1 SPPRO50021801 GEARSHAFT, 12T (2x2) 2.18.2 SPPRO50021802 CLUSTER GEAR z52/z44, m=1mm 2.18.3 SPPRO50021803 SQUARE KEY 3x3x36 www.holemaker.com...
- Page 20 ® HMPRO50 OPERATOR’S MANUAL SPPRO5003 CONTROL PANEL ASSEMBLY ITEM PART NUMBER DESCRIPTION SPPRO500301 PANEL PLATE ASSY SPPRO500302 ELECTRONIC CONTROLLER SW-30M SPPRO500303 SWITCH START-STOP /230V SPPRO500304 SWITCH MAGNET SPPRO500305 METAL LOCK, SPPRO500306 INTERFERENCE ELIMINATOR, www.holemaker.com...
-
Page 21: Electrical Diagram
® HMPRO50 OPERATOR’S MANUAL www.holemaker.com... - Page 22 ® HMPRO50 OPERATOR’S MANUAL HOLEMAKER ANNULAR CUTTER GUIDE Cutter Type Features Diameter Available Cut Depth Available Applications Silver Series Metric Silver Series Imperial Gold Series Metric Super-Cut Super-Cut TICN Super-Cut M42 Cobalt Super-Cut M42 Chassis Pro-Cut Maxi-Cut Maxi-Rail www.holemaker.com...
Need help?
Do you have a question about the PRO 50 and is the answer not in the manual?
Questions and answers