Advertisement
Quick Links
Advertisement

Summary of Contents for Cecilware 2000
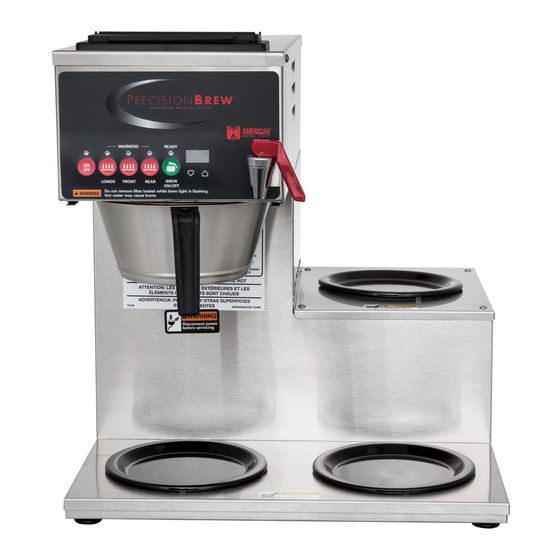
- Page 1 Century 2000 Low Profile Coffee Brewers...
- Page 2 CENTURY 2000 COFFEE BREWERS Manual Pourover Group - 120V MODEL WARMERS C-2001P 1 BOTTOM C-2002P 1 TOP, 1 BOTTOM C-2003P 2 TOP, 1 BOTTOM C-2003PR 2 BOTTOM, 1 RIGHT C-2003PL 2 BOTTOM, 1 LEFT Automatic with Backup Group - 120V...
-
Page 8: Parts List
PARTS LIST COVER, POUROVER SCREW, TRUSS HEAD SL #8x3/8 NYLON RECEPTACLE #8 LABEL, SWITCH PANEL READY LIGHT - GREEN POWER SWITCH - RED WARMER SWITCH, AMBER BREW BASKET - BLACK LEGS 3/4" ADJUSTABLE U588Q TOWER COVER P489A BODY WELDMENT ASSEMBLY M408A HEATER SWITCH SPST TOGGLE SWITCH BRACKET... - Page 9 PARTS LIST ITEM DESCRIPTION TROUGH SUB-ASSY SPRAY TUBE ASSY WASHER WASHER, RED SILICON SPRAY HEAD ADAPTER SPRAY HEAD BRACKET, COMPONENT TERMINAL BLOCK, 3 POSITION ELBOW 90° SILICON TUBE 1/2" ID, 14" LG PLUG TANK BODY PART NO RP97Q HEATER, 120V 1500W H297Q HEATER, 220V 2400W P155A...
- Page 10 PARTS LIST ITEM DESCRIPTION TUBING 1/4" COLD WATER INLET TUBING 1/4", NEEDLE VALVE EXT. NEEDLE VALVE (80242) MT. BKT, WATER INLET VALVE HOSE NUT FITTING VALVE, WATER INLET (.75GPM) 120V VALVE, WATER INLET (.75GPM) 220V UNION "TEE" 1/4" WATER COIL SUB-ASSY GASKET, SILICONE RUBBER FLAT WASHER FAUCET ASSEMBLY...
- Page 11 SILICONE GASKET SCREW 1/4-20 x 5/8 S.S. TANK TOP ASSEMBLY WATER TANK SUB-ASSEMBLY HEATER 120V - 1500W HI-LIMIT ELBOW 90° CECILWARE PART NO SILICONE TUBING 1/2" I.D. x 14" LONG K642Q TUBING 1/4" COLD WATER INLET L592A L532L MT. BKT, WATER INLET VALVE...
-
Page 12: Water Inlet Connection
WARNING: MACHINE WARRANTY IS VOID IF MACHINE IS CONNECTED TO ANY VOLTAGE OTHER THAN 120 VOLTS. (EXPORT UNITS SHOULD BE CONNECTED TO 220 VOLTS) ** INSTALLATION INSTRUCTIONS ** NOTE: A SEPARATE CIRCUIT SHOULD BE SUPPLIED FOR EACH OF THESE BREWERS WITH A 15 AMP CIRCUIT BREAKER OR FUSE. CHECK LOCAL CODES FOR COMPLIANCE IN INSTALLATION. -
Page 13: Brewing Instructions
MANUAL POUROVER UNITS THESE INSTRUCTIONS ARE FOR INITIAL PRIMING ONLY AND DO NOT HAVE TO BE REPEATED FOR NORMAL OPERATION. 1. Remove sample filter pack from brew funnel and insert brew funnel back into machine. 2. Place an empty decanter on warmer plate directly under brew funnel. 3. - Page 14 1. Wash brew funnel and decanter by hand as needed. Do not use dishwasher, which may cause decanter breakage. 2. For cleaning all metal surfaces, use any reputable stainless steel cleaning compound. Spray head should be checked and cleaned regularly. (At least once a week.) Spray head holes must be kept open.
- Page 15 CAUTION: DISCONNECT POWER BEFORE ATTEMPTING ANY ELECTRICAL REPAIRS THERMOSTAT ADJUSTMENTS: NOTE: The thermostat is behind the lower front panel. If water temperature is less than 197 degrees F (92 degrees C) slowly turn thermostat knob clockwise until ready light goes out. When temperature of water approaches 197 degrees to 203 degrees F (92 degrees to 95 degrees C) slowly turn thermostat knob counter- clockwise until the green ready light comes on.


Need help?
Do you have a question about the 2000 and is the answer not in the manual?
Questions and answers