Table of Contents
Advertisement
Available languages
Available languages
Quick Links
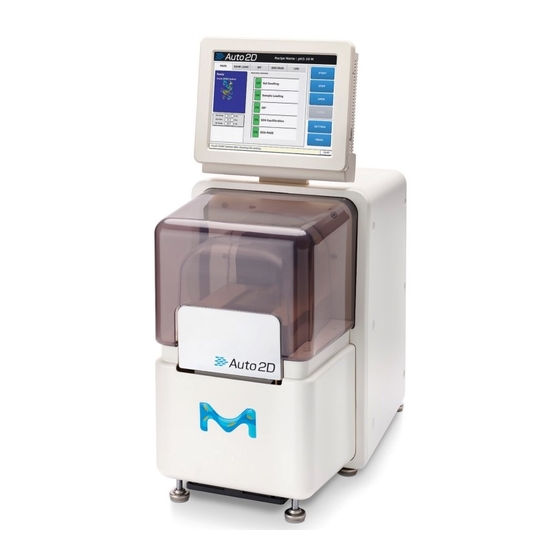
Quick Start Guide
Auto2D
(original)
BM-100
English . . . . . . . . . . . . . . . . . . . . . . . 2
Français (French) . . . . . . . . . . . . . . . . 7
Español (Spanish) . . . . . . . . . . . . . . 13
Nederlands (Dutch) . . . . . . . . . . . . . 19
Deutsch (German) . . . . . . . . . . . . . . 25
20424817
Rev 06/21
Mode
®
Italiano (Italian) . . . . . . . . . . . . . . . 30
日本語 (Japanese) . . . . . . . . . . . . . . . 36
中文 (Chinese) . . . . . . . . . . . . . . . . . 41
한국어 (Korean) . . . . . . . . . . . . . . . . . 46
Product Ordering . . . . . . . . . . . . . . . 51
1
SigmaAldrich.com
Advertisement
Table of Contents

Related Manuals for Merck Millipore Auto2D


Summary of Contents for Merck Millipore Auto2D
-
Page 1: Table Of Contents
SigmaAldrich.com Quick Start Guide Auto2D Mode ® (original) BM-100 English ..... . . 2 Italiano (Italian) ....30 日本語... -
Page 2: English
Preparation Sample Preparation English Intended Use Precautions Dissolve the protein sample in the Reagents Working Rehydration Solution, prepared The Auto2D Electrophoresis Device fully For research use only. ® according to step 3. Sample may be Prepare and store Reagent Kits as automates the process of 2D electrophoresis, diluted 2-fold or more with Working Please read the Safety Sheet (enclosed) and... - Page 3 Load a Recipe Insert the Chips Into the Tray Place the Electrode Chip Choose SETTING > RECIPE. Touch the Recipe Cathode Side Information screen. Recipe select dialog box will appear. Anode Side On the Auto2D Device touch screen, choose ® Insert the IEF Chip into the slot in the OPEN >...
-
Page 4: Français (French)
After Electrophoresis Power Off Français (French) Utilisation prévue Précautions Choose MENU > EXIT APPLICATION > OK > Remove the Gel SYSTEM/OS SHUT DOWN > OK L’appareil d’électrophorèse Auto2D permet ® Pour une utilisation en Choose OK > OPEN > OK. d’automatiser intégralement la procédure Turn off switch on the back of the recherche uniquement. - Page 5 Préparation Préparation de l’échantillon Mise en marche de Mise en place des Puces l’appareil Auto2D ® Dissoudre l’échantillon protéique dans la Réactifs Puce PAGE solution de réhydratation de travail préparée Sélectionner le cordon d’alimentation suivant l’étape 3. L’échantillon peut être Préparer et conserver les kits de réactifs (fourni avec le dispositif) compatible avec Côté...
- Page 6 Chargement des solutions Mise en place de la Puce Électrodes Après l’électrophorèse Retirer le gel Sélectionner OK > OPEN (Ouvrir) > OK. Retirer et éliminer la Puce IEF et les solutions restantes dans la Puce Solutions. Voir la section Élimination. Retirer la Puce PAGE et la rincer avec de l’eau distillée.
-
Page 7: Español (Spanish)
Mise hors tension Avis Español (Spanish) Indicaciones de uso Precauciones Sélectionner MENU > EXIT APPLICATION Nous fournissons à nos clients des informations (Quitter l’application) > OK > SYSTEM/OS et des conseils relatifs aux technologies et aux La unidad de electroforesis Auto2D ®... - Page 8 Preparación Preparación de las muestras Encendido del dispositivo Auto2D Montaje de los chips ® Disuelva la muestra de proteínas en la Seleccione el cable de alimentación apropiado Reactivos Chip de PAGE disolución de rehidratación de trabajo (suministrado con el dispositivo) que sea preparada según el paso 3.
- Page 9 Aplicación de las disoluciones Colocación del Chip electrodo Después de la electroforesis Retirada del gel Elija OK > OPEN > OK (OK > ABRIR > OK). Retire y deseche el chip de IEF y las disoluciones que queden en el chip de disolución.
-
Page 10: Nederlands (Dutch)
Apagado Eliminación Nederlands (Dutch) Bedoeld gebruik Voorzorgsmaatregelen Elija MENU > EXIT APPLICATION > OK > Los componentes expuestos a las muestras SYSTEM/OS SHUT DOWN > OK (MENÚ > deben desecharse como residuos biológicos. Het Auto2D Electrophoresis Device Uitsluitend voor onderzoeksdoeleinden. ®... - Page 11 Preparatie Monsterpreparatie Laad een procedure Plaats de Chips in de bak Los het eiwitmonster op in de Working Kies SETTING (instelling) > RECIPE (recept). Reagentia Raak het Recipe Information scherm aan. Rehydration Solution, geprepareerd volgens Selectie dialoogvak voor procedure verschijnt. stap 3.
- Page 12 Plaats de Electrode Chip Na Elektroforese Uitschakelen Kies MENU > EXIT APPLICATION (toepassing Verwijder de gel sluiten) > OK > SYSTEM/OS SHUT DOWN (systeem/os afsluiten) > OK Kies OK > OPEN > OK. Zet de schakelaar achterop het Verwijder de IEF Chip en gooi deze samen Auto2D Device uit.
-
Page 13: Deutsch (German)
Kennisgeving Deutsch (German) Verwendungszweck Lagerung und Haltbarkeit Wij bieden naar ons beste weten en vermogen informatie en advies aan onze klanten over Das Auto2D Elektrophoresegerät Das Auto2D Gerät sollte nur in Innenräumen ® ® applicatietechnologieën en bepalingen, echter vollautomatisiert den Prozess der verwendet/aufbewahrt werden. - Page 14 Vorbereitung Probenvorbereitung Schalten Sie das Auto2D Gerät ein Chip-Vorbereitung ® Lösen Sie die Proteinprobe in der gemäß Wählen Sie das Netzkabel (im Lieferumfang Reagenzien PAGE-Chip Schritt 3 zubereiteten Rehydrier-Arbeitslösung. enthalten), das mit den Steckdosen in Die Probe kann 2-fach oder stärker mit Ihrem Land kompatibel ist.
- Page 15 Geben Sie die Lösungen zu IEF-Chip Nach der Elektrophorese Schalten Sie das Gerät ab Wählen Sie MENU > EXIT APPLICATION > Entfernen Sie das Gel OK > SYSTEM/OS SHUT DOWN > OK [MENÜ > ANWENDUNG VERLASSEN > OK > Wählen Sie OK > OPEN > OK SYSTEM/OS HERUNTERFAHREN >...
- Page 16 Preparazione Preparazione dei campioni Italiano (Italian) Uso previsto Conservazione e stabilità Aggiungere il campione di proteine alla Reagenti soluzione di reidratazione alla concentrazione Il dispositivo per elettroforesi Auto2D Il dispositivo Auto2D deve essere ® ® di lavoro preparata come descritto al punto Preparare e conservare i kit di reagenti automatizza completamente il processo di utilizzato/conservato solo in ambienti chiusi.
- Page 17 Alimentazione del Assemblaggio del chip Aggiungere le soluzioni Posizionare il chip Elettrodo dispositivo Auto2D ® Chip PAGE Scegliere il cavo di alimentazione (fornito con il dispositivo) compatibile con le prese Lato del catodo di corrente del proprio paese. Inserire nella parte posteriore del dispositivo Auto2D ®...
- Page 18 Chip IEF Avviare l’elettroforesi Spegnimento Avvertenza Selezionare CLOSE > OK > START > OK. Selezionare MENU > EXIT APPLICATION > Ai nostri Clienti forniamo informazioni e OK > SYSTEM/OS SHUT DOWN > OK consigli su tecnologie applicative e questioni L’elettroforesi avrà inizio. legislative al meglio delle nostre conoscenze e Spegnere l’interruttore sul retro del capacità, senza che ciò...
-
Page 19: 日本語 (Japanese)
準備 試料の調製 日本語 (Japanese) 用途 注意事項 タンパク質試料を、 ステップ3に従って調製したワーキン 試薬 グRehydration solutionに溶解させます。 液体の試料は Auto2D 電気泳動デバイスは2D電気泳動のプロセスを 本製品は研究用です。 ® ワーキングRehydration solutionで2倍以上に希釈して、 試薬キッ トの調製を、 キッ ト同梱の文書または完 完全に自動化し、 タンパク質分離をまず等電点で、 次い 本製品使用前にはSafety Sheet ( 同梱) と 目的のタンパク質濃度にし、 塩濃度を出来るだけ減少さ 全版のユーザーガイド (オンライン) に従って行い で分子量で分離します。 わずか2時間でタンパク質の分離 せるようにして ください。 ます。 が完了します。... - Page 20 レシピの読み込み チップをトレイにセットする Electrode Chipをセットする SETTING → RECIPE を選択します。 Recipe Information (レシピ情報) 画面をタッチします。 Recipe Selectionダ イアログボックスが表示されます。 Auto2D 装置のタッチスクリーンで OPEN → OK ® Electrode Chipのスロッ トにIEF Chipを挿入します。 を選択します。 トレイが開いたら、 PAGE Chip (水色の 「電気泳動の開始」 前に次を確認します。 Electrode ChipのIEF電極部分とSolution Chipの ”RECIPE NAME” → LOAD → OK → EXIT を選択します。 ライン)...
-
Page 21: 中文 (Chinese)
電気泳動の後 電源オフ 中文 (Chinese) 预期用途 储存和稳定性 MENU → EXIT APPLICATION → OK → SYSTEM/ ゲルの取り出し OS SHUT DOWN → OK を選択します。 Auto2D 电泳设备使2D电泳过程完全自动化, 基于等电点 Auto2D 设备应仅在室内使用/存放。 有关存放要求, ® ® OK → OPEN → OK を選択します。 和分子量来分离蛋白质。 它只需两个小时即可完成蛋 请参见每个部件的产品标签。 装置背面のスイッチをオフにします。 白质的完全分离。 Solution ChipとIEF Chipを外し、... - Page 22 制备 制备样品 加载配方 将芯片插入托盘 将蛋白质样品溶解于按照步骤3制备的工作复水溶液中。 选择 “ SETTING (设置) > RECIPE (配方) ” 。 试剂 按 “配方信息” 屏幕。 这时将出现配方选择对话框。 可以用工作复水溶液将样品稀释2倍或更多倍, 以达到想 按照试剂盒随附的文件或完整版 《用户指南》 要的蛋白质浓度, 并降低盐浓度。 (网上) 中的说明制备和存放试剂盒。 盐浓度过高会影响等电聚焦过程中的蛋白质分离, 并造 让以下低温储存的产品平衡至室温 成电流超过100 µA。 高盐浓度的样品应通过以下方法 (20–25°C约10分钟) 。 之一脱盐: IEF芯片 TCA/丙酮沉淀, 然后将蛋白质在工作复水溶液 • 中重悬...
- Page 23 声明 放置电极芯片 关闭电源 在开始电泳步骤之前, 请检查并确认以下内容: 选择 “菜单 > 退出应用 > 确定 > 关闭系统/操作系统 我们尽我们的所知与所能, 向客户提供关于应用技术与 > 确定” 。 法规问题的信息和建议, 但恕不承担任何责任和义务。 除了阳极腔和阴极腔外, 电极芯片不是湿的。 我们的客户在任何情况下都须遵守现行法律和法规。 • 关闭Auto2D设备背面的开关。 这也同样适用于任何第三方权利。 我们的信息和咨询意 已经取掉PAGE芯片阴极侧的透明盖。 • 见并不能减少我们客户对于检查我们的产品是否符合 说明: 如果在设备内部观察到冷凝水, 请在关闭电源 已在需要的地方添加了溶液。 他们自己需求的责任。 • 之前, 先将托盘打开一段时间, 以使内部干燥。 开始电泳 本文件中的信息可能会有所变更,...
-
Page 24: 한국어 (Korean)
준비 시료 준비 한국어 (Korean) 사용 용도 주의사항 단계 3에 따라서, 작업용 재수화 용액에 단백질 시료를 시약 용해하십시오. 작업용 재수화 용액으로 시료를 2배 이상 Auto2D 전기영동 기기는 2D 전기영동 과정을 완전히 연구용으로만 사용. ® 해당 키트와 함께 제공된 문헌 또는 완전한 사용자 희석하여... - Page 25 제조법 불러오기 칩을 트레이에 삽입 전극 칩 배치 SETTING > RECIPE를 선택합니다. 제조법 정보 스크린을 터치하십시오. 제조법 선택 대화 상자가 나타납니다. Auto2D 기기 터치스크린에서, OPEN > OK를 전극 칩 슬롯에 IEF 칩을 삽입하십시오. ® 선택합니다. 트레이가 열린 후, PAGE 칩(연청색 선) ”RECIPE NAME”...
-
Page 26: Product Ordering
전기영동법 이후 전원 끄기 Product Ordering MENU > EXIT APPLICATION > OK > 젤 제거 Purchase online at SigmaAldrich.com/products. SYSTEM/OS SHUT DOWN > OK를 선택합니다. OK > OPEN > OK를 선택합니다. Catalogue Catalogue Auto2D 기기 후면의 스위치를 끄십시오. Description Number Description Number IEF 칩... - Page 27 Merck, Millipore, Auto2D and Sigma-Aldrich are trademarks of Merck KGaA, Darmstadt, Germany or its affiliates. All other trademarks are the property of their respective owners. Detailed information on trademarks is available via publicly accessible resources. © 2021 Merck KGaA, Darmstadt, Germany and/or its affiliates. All Rights Reserved.
Need help?
Do you have a question about the Millipore Auto2D and is the answer not in the manual?
Questions and answers