Table of Contents
Advertisement
Quick Links
04/13 Rev. 1.12-03
Mounting / Setup
Product description ....................................... 2
Product name ............................................ 2
Intended Use of System ............................ 2
Configurations ........................................... 2
System requirements ................................ 2
Functionality .............................................. 3
Technical data ........................................... 4
Component overviews ............................... 5
For your safety .............................................. 7
General safety notes ................................. 7
Connecting an interlocking guard .............. 8
Warning notes on the device ................... 10
Assembly .................................................... 11
lock circuit ............................................... 11
Mounting to ALX 92x ............................... 12
Mounting to ALX 73x ............................... 13
Mounting to ALS 20x ............................... 14
Mounting to ALS 30x ............................... 15
USER MANUAL / SERVICE MANUAL
LA-TO / LA-TO XL
Installing the pressure regulator ..............16
Connecting the compressed air ...............17
Exchanging the vacuum plate ..................18
Settings .......................................................19
Parameter settings ...................................19
Position of the pressure plate ..................20
Sensor adjustment ...................................22
Valves ......................................................24
Appendix .....................................................27
Pneumatic plan ........................................28
Advertisement
Table of Contents

Related Manuals for Novexx Solutions LA-TO


Summary of Contents for Novexx Solutions LA-TO
-
Page 1: Table Of Contents
04/13 Rev. 1.12-03 USER MANUAL / SERVICE MANUAL LA-TO / LA-TO XL Mounting / Setup Product description ........2 Installing the pressure regulator ....16 Product name ..........2 Connecting the compressed air ....17 Intended Use of System ......2 Exchanging the vacuum plate ....18 Configurations ........... -
Page 2: Product Description
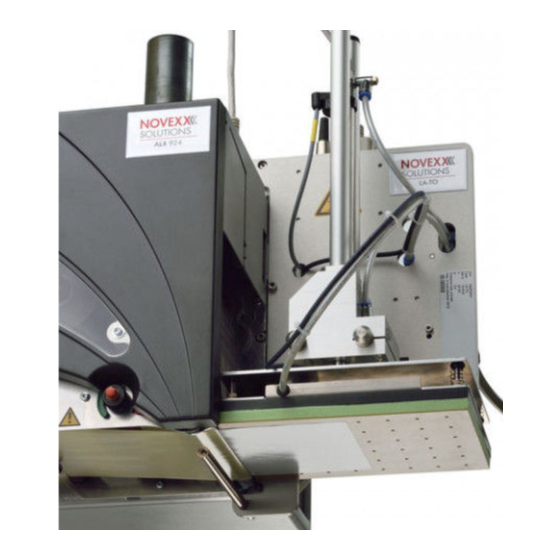
The LA -TO is firmly attached to the respective machine. In contrast to direct dispens- ing from the dispensing edge of the machine onto the product, the LA-TO can bridge distances of up to 18 cm (LA -TO XL: 38 cm) between dispensing edge and product. -
Page 3: Functionality
04/13 Rev. 1.12-03 USER / SERVICE MANUAL Mounting/Setup LA-TO / LA-TO XL Product description SERVICE DATA > MODULE Displaying firmware version of applicator interface: FW VERS. > Applicator Int. • ALX 73x ALX 734, ALX 735 or ALX 736 with fixed L-shape dispensing edge and firmware version 1.33 or higher. -
Page 4: Technical Data
As a result of static charge and friction effects, plastic materials may tend to crease during the dispen- sation step. Therefore, plastic materials must be tested under application conditions before being used in production. Capacity LA-TO / LA-TO XL to ALS 20x/256/30x max. 100 labels/min LA-TO / LA-TO XL to ALX 92x max. 80 labels/min... - Page 5 04/13 Rev. 1.12-03 USER / SERVICE MANUAL Mounting/Setup LA-TO / LA-TO XL Product description • LA -TO: 0,3 l/stroke • LA -TO XL: 0,6 l/stroke Air consumption Max. 40 l/min for vacuum (depending on du- ration of vacuum) Option Max. admissible input pressure at the pressure regulator: 10 bar Dimensions •...
-
Page 6: Component Overviews
04/13 Rev. 1.12-03 USER / SERVICE MANUAL Mounting/Setup LA-TO / LA-TO XL Product description Component overviews LA-TO front side [1] LA-TO front side Name Mounting plate (type-specific) Pneumatic cylinder Home position sensor End position sensor Support air nozzle Pressure line for downwards movement... - Page 7 04/13 Rev. 1.12-03 USER / SERVICE MANUAL Mounting/Setup LA-TO / LA-TO XL Product description LA-TO rear side [2] Rear side (LA-TO for ALX 92x) Name Compressed air connector (10 mm tube-Ø) Pressure reducer Connector box Support air valve Vacuum valve...
-
Page 8: For Your Safety
04/13 Rev. 1.12-03 USER / SERVICE MANUAL Mounting/Setup LA-TO / LA-TO XL For your safety For your safety General safety notes WARNING! Danger of cuts and crush injuries especially at the following points: • Between moveable vacuum plate and dispensing edge. -
Page 9: Connecting An Interlocking Guard
04/13 Rev. 1.12-03 USER / SERVICE MANUAL Mounting/Setup LA-TO / LA-TO XL For your safety Connecting an interlocking guard The illustrations in this chapter show exemplary a LA -TO at an ALS 20x RH labeller (pictured without cables and hoses). The following instructions apply equally to all other LA -TO versions. - Page 10 04/13 Rev. 1.12-03 USER / SERVICE MANUAL Mounting/Setup LA-TO / LA-TO XL For your safety [5] Diagram of a movable interlocking guard: A Protective guard closed. Interlock switch connected (C). Applicator is working. B Protective guard open. Interlock switch not connected (D). Applicator stopped.
-
Page 11: Warning Notes On The Device
04/13 Rev. 1.12-03 USER / SERVICE MANUAL Mounting/Setup LA-TO / LA-TO XL For your safety Warning notes on the device CAUTION! Warning notes on the machine provide important information for the operating per- sonnel. Do not remove warning notes. -
Page 12: Assembly
04/13 Rev. 1.12-02 USER / SERVICE MANUAL Mounting/Setup LA-TO / LA-TO XL Assembly Assembly WARNING Risk of tripping! Lay cables and compressed air hoses in a way that nobody can stumble over it. WARNING! Risk of injuries caused by lashing pneumatic hoses. -
Page 13: Mounting To Alx 92X
04/13 Rev. 1.12-02 USER / SERVICE MANUAL Mounting/Setup LA-TO / LA-TO XL Assembly Mounting to ALX 92x Tool 4 mm hex socket screwdriver Assembly 1. Switch-off the ALX 92x. 2. Fasten the LA -TO to the ALX 92x using 3 bolts [8A]. -
Page 14: Mounting To Alx 73X
04/13 Rev. 1.12-02 USER / SERVICE MANUAL Mounting/Setup LA-TO / LA-TO XL Assembly Mounting to ALX 73x Tools 2.5/4 mm hex socket screwdriver Assembly 1. Switch-off the ALX 73x. 2. Unscrew 2 screws [10A] and take off the dispensing edge together with the holding rods [10C]. -
Page 15: Mounting To Als 20X
04/13 Rev. 1.12-02 USER / SERVICE MANUAL Mounting/Setup LA-TO / LA-TO XL Assembly Mounting to ALS 20x Tools 4/6 mm hex socket screwdrivers Assembly 1. Switch-off the ALS 20x. Mark the lateral position of the dispensing edge (material zero-line), before disassembling it. -
Page 16: Mounting To Als 30X
04/13 Rev. 1.12-02 USER / SERVICE MANUAL Mounting/Setup LA-TO / LA-TO XL Assembly Mounting to ALS 30x Tools 2.5/4 mm hex socket screwdriver Assembly 1. Switch-off the ALS 30x. 2. Remove the four set screws [16A] and take off the dispensing edge with holding rods [16C]. -
Page 17: Installing The Pressure Regulator
04/13 Rev. 1.12-02 USER / SERVICE MANUAL Mounting/Setup LA-TO / LA-TO XL Assembly Installing the pressure regulator Tools: • Screwdriver • 5 mm hex screwdriver The pressure reducer can be fastened directly onto the enclosure [19C] or using a mounting bracket [19A]. -
Page 18: Connecting The Compressed Air
04/13 Rev. 1.12-02 USER / SERVICE MANUAL Mounting/Setup LA-TO / LA-TO XL Assembly Connecting the compressed air Connect the compressed air hose as pictured opposite [21]. • Hose diameter: 10 mm • Maximum admissible compressed air pressure at the pressure reducer: 10 bar •... -
Page 19: Exchanging The Vacuum Plate
04/13 Rev. 1.12-02 USER / SERVICE MANUAL Mounting/Setup LA-TO / LA-TO XL Assembly Exchanging the vacuum plate The LA -TO can be equipped with vacuum plates in 4 sizes. The size of the vacuum plate limits the size of the max. -
Page 20: Settings
Depends on application SIGNAL SCHNITTST >AI BOARD SIGNAL > Apply mode SIGNAL SCHNITTST >APPLIK. SIGNALE > Dwell time Applies only to time controlled LA-TO SIGNAL SCHNITTST >AI BOARD SIGNAL > Dwell time Depends on application [Tab. 4] Settings for firmware version 1.34 (ALS) respectively 1.36 (ALX) (AI: 1.23). -
Page 21: Position Of The Pressure Plate
04/13 Rev. 1.12-02 USER / SERVICE MANUAL Mounting/Setup LA-TO / LA-TO XL Settings Position of the pressure plate WARNING! Injury hazard by unintentionally triggered applicator. Unplug the compressed air line before starting the adjustment. The following sections only apply to units where a LA -TO is mounted onto an ALX 92x. - Page 22 04/13 Rev. 1.12-02 USER / SERVICE MANUAL Mounting/Setup LA-TO / LA-TO XL Settings Adjust the distance to the dispensing edge The vacuum plate should be positioned approximately 3 mm behind the label dispensing edge. If this is not the case, it can be adjusted as follows: 1.
-
Page 23: Sensor Adjustment
04/13 Rev. 1.12-02 USER / SERVICE MANUAL Mounting/Setup LA-TO / LA-TO XL Settings Sensor adjustment WARNING! Injury hazard by unintentionally triggered applicator. Unplug the compressed air line before starting the adjustment. Adjust the home position The upper limit stop of the piston rod in the pneumatic cylinder is referred to as the “home position”. - Page 24 This setting is only required, if the applicator is driv- Applicator type en sensor controlled, what means that „LA-TO Sensor“. With the alternative setting „LA-TO Timed“, this sensor signal is not interpreted. As soon as a label is transferred from the vacuum plate, the vacuum plate moves downwards to the final posi- tion.
-
Page 25: Valves
04/13 Rev. 1.12-02 USER / SERVICE MANUAL Mounting/Setup LA-TO / LA-TO XL Settings Valves WARNING! Danger of cuts and crush injuries especially at the following points: • Between moveable vacuum plate and dispensing edge. • Between the guiding rods of the applica- tor. - Page 26 04/13 Rev. 1.12-02 USER / SERVICE MANUAL Mounting/Setup LA-TO / LA-TO XL Settings Checking the transfer process The schematics to the right display the typical transfer process: from dispensing the label to transferring the label to the product. 1. Once a print or dispensing command is received, the label is transferred across the dispensing edge [32a] and separated from the release paper [32b].
- Page 27 04/13 Rev. 1.12-02 USER / SERVICE MANUAL Mounting/Setup LA-TO / LA-TO XL Settings Setting the on-off valve WARNING High risk of getting fingers or hands crushed due to abruptly backwards moving vacuum plate. Set the on-off valve as described below.
-
Page 28: Appendix
04/13 Rev. 1.12-00 USER / SERVICE MANUAL Installation / Setup LA-TO / LA-TO XL Appendix Appendix... -
Page 29: Pneumatic Plan
04/13 Rev. 1.12-00 USER / SERVICE MANUAL Installation / Setup LA-TO / LA-TO XL Appendix Pneumatic plan [34] LA -TO pneumatic diagram. - Page 30 04/13 Rev. 1.12-00 USER / SERVICE MANUAL Installation / Setup LA-TO / LA-TO XL Appendix Pos. no. Article no. Amount Designation A4075 Norm cylinder A5886 Solenoid valve A5887 Solenoid valve A4476 Push-in fitting A4468 Push-in L-fitting A4466 Silencer A5895 Plug socket with cable...
Need help?
Do you have a question about the LA-TO and is the answer not in the manual?
Questions and answers