Table of Contents
Advertisement
Quick Links
Installation instructions and
Operating instructions
wAppLoxx Pro Control Plus (WLX-PRO-CTRL-PLUS)
These operating instructions apply to the following items:
ACCO16000
ACCO16500
[1] wAppLoxx Pro Control Plus Complete
Instructions
Item no
wAppLoxx Pro Control Plus incl. wireless
Product description
wAppLoxx Pro Control Plus
module for wAppLoxx cylinder
V5
Advertisement
Table of Contents

Related Manuals for Abus wAppLoxx Pro Control Plus


Summary of Contents for Abus wAppLoxx Pro Control Plus
- Page 1 Pro Control Plus (WLX-PRO-CTRL-PLUS) These operating instructions apply to the following items: Item no Product description ACCO16000 wAppLoxx Pro Control Plus ACCO16500 wAppLoxx Pro Control Plus incl. wireless module for wAppLoxx cylinder [1] wAppLoxx Pro Control Plus Complete Instructions...
-
Page 2: Table Of Contents
1.6. Special features compared to the wAppLoxx Pro Control Installing the wAppLoxx Pro Control Plus wAppLoxx Pro Control Plus connections LED signalling Starting up the wAppLoxx Pro Control Plus using the Manager System settings 6.1. Date and time 6.2. System access 6.3. - Page 3 12. wAppLoxx Pro Plus App 12.1. Configuration of the wAppLoxx Pro Plus App 12.2. Functions of the wAppLoxx Pro Plus App 13. Terms of use for wAppLoxx Pro Plus 14. Open Source Licence information 15. Disposal instructions [3] wAppLoxx Pro Control Plus Complete Instructions...
-
Page 4: General
Finger contact with the electronics should also be avoided. ABUS Security Center GmbH & Co. KG shall not be held liable for loss or damage caused – or alleged to have been caused – either directly or indirectly by this manual. We reserve the right to make changes to the content of this manual without prior notice. - Page 5 Battery instructions The wAppLoxx Pro Control Plus is powered for time buffering via a 3 V CR2 lithium battery that is included in the scope of delivery. In order to ensure a long lifespan and to prevent fire and injury, comply with the following instructions: •...
- Page 6 (To ensure reliable buffering of the system time, we recommend changing the CR1220 installed in the wAppLoxx Pro Control Plus at regular, two-year intervals.) After replacing the batteries, you must always check that the device is functioning correctly. Batteries must not be disposed of along with household waste in accordance with the battery directive;...
-
Page 7: Wapploxx Pro Control Plus Technical Data
The wAppLoxx Pro Control Plus has been optimised for use in conjunction with alarm systems. Some functions are therefore only available if an interface to an alarm system has been set up for the wAppLoxx Pro Control Plus (Chapter 10.1). [7] wAppLoxx Pro Control Plus Complete... -
Page 8: Structure And Scope Of Functions Of A Wapploxx Pro Plus Slave Control
What functions does a wAppLoxx Pro Plus slave control offer? The cascading function allows you to connect up to five wAppLoxx Pro Control Plus in master-slave mode in a local network. The master-slave function is used to increase the range of the wireless coverage. wAppLoxx door products are thereby directly programmed at the master control into the master or slave control or into an associated repeater. -
Page 9: Wapploxx Pro Repeater Technical Data
Wireless extension of the wAppLoxx Pro system Up to 32 door components (wAppLoxx Pro Cylinder and wall reader) per repeater Managing door components via wAppLoxx Pro Control Plus Emergency power supply via battery (optional) [9] wAppLoxx Pro Control Plus Complete... -
Page 10: Operation Of Wapploxx Components
1.5. Operation of wAppLoxx components The wAppLoxx Pro Control Plus is offered in two variants. In the variant with additional wireless module (ACCO16500), old cylinder generations can also be integrated. The compatibility of locking media depends on the cylinder generations used and the security mode desired. -
Page 11: Special Features Compared To The Wapploxx Pro Control
With the wAppLoxx Pro Control, the first connection could only be established in the first 5 minutes. For other devices, a security key had to be passed on. This condition does not apply to the new wAppLoxx Pro Control Plus. It can be registered at any time and with multiple devices. - Page 12 General events (see chapter 10.3) The creation of events has a new structure. First an event is selected, then the desired reaction can be configured as desired. [12] wAppLoxx Pro Control Plus Complete Instructions...
-
Page 13: Installing The Wapploxx Pro Control Plus
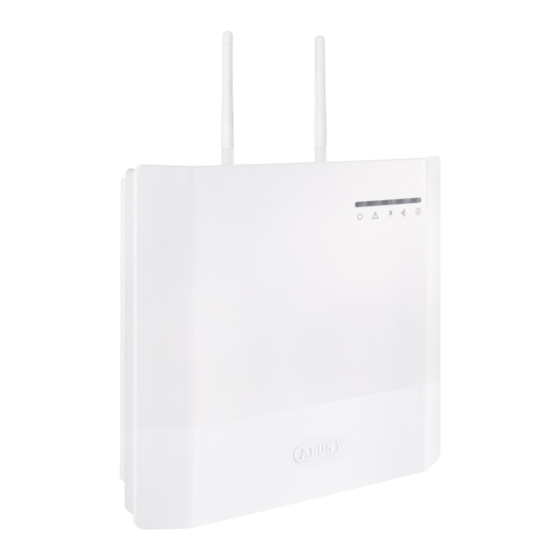
2. Installing the wAppLoxx Pro Control Plus Screw the enclosed external Attach the housing cover antennas onto the connections Make sure that there is sufficient provided for this purpose and distance of approx. 1m to walls and mount the housing using three ceiling. -
Page 14: Wapploxx Pro Control Plus Connections
ABUS power supply unit. (Item no.: 505366). We recommend switching to a new original ABUS power supply unit particularly in the event of problems with the power supply or if the existing power supply unit is defective. -
Page 15: Led Signalling
Master Control active (continuously green) Slave control active (continuously yellow) System in update mode (continuously blue) Wireless communication between the wAppLoxx Pro Control Plus and wAppLoxx Pro Cylinder (blue during wireless communication) Network connection active (consistent blue) [15] wAppLoxx Pro Control Plus Complete... -
Page 16: Starting Up The Wapploxx Pro Control Plus Using The Manager
1. Connect the wAppLoxx Pro Control Plus to the router/switch. 2. Connect the wAppLoxx Pro Control Plus to the power supply. If your router is set to DHCP mode, it now assigns a new IP address to the wAppLoxx Pro Control Plus automatically. - Page 17 The wAppLoxx Pro Control Plus must be configured using the wAppLoxx Pro Plus Manager. This takes you to the wAppLoxx Pro Control Plus configuration view, where you are requested to enter your user name and password. The following access data is set by default on delivery:...
- Page 18 Keep the password for administrator access safe. Should you no longer have the password, the wAppLoxx Pro Control Plus will need to be reset using reset button “B” on the PCB. Attention: All settings and configurations are lost when a factory reset is carried out.
- Page 19 To use the cloud functions of your wAppLoxx Pro Control Plus, you must allow cloud access. This is required for event notifications via e-mail and for automatic updates via the cloud. You can change your selection at any time in the system settings under System Access (see Chapter 6.2).
- Page 20 This may be necessary if an automatic discovery of available controls via mDNS cannot be guaranteed on the network side. To do this, select "Add WLX-CTRL via IP address" under the "Edit" tab and enter the IP address of the corresponding control manually. [20] wAppLoxx Pro Control Plus Complete Instructions...
-
Page 21: System Settings
It is essential to configure the date and time to ensure the device functions correctly. The date and time must always be correct to ensure smooth operation. Check that the date and time are correct during every operation. [21] wAppLoxx Pro Control Plus Complete Instructions... - Page 22 Time zone Select the time zone in which the wAppLoxx Pro Control Plus is located. The wAppLoxx Pro Control Plus must have access to the internet for this to be possible. 3. Manual Select this setting to adjust the system time manually.
-
Page 23: System Access
Be sure to take security guidelines into consideration. Please ensure the administrator access is changed after initial commissioning. Administrator 2 Settings If you want to create another user with administrator rights, activate "Second Administrator Access". [23] wAppLoxx Pro Control Plus Complete Instructions... - Page 24 Pro Control Plus and the PC configuration software. Cloud access: To use the cloud functions of your wAppLoxx Pro Control Plus, you must allow cloud access. This is required for event notifications via e-mail and for automatic updates via the cloud.
- Page 25 42 days will be automatically deleted. Device name Select the device name used to identify your wAppLoxx Pro Control Plus on the network/in the app. The device name can only be changed after adding a reset card. [25] wAppLoxx Pro Control Plus Complete...
-
Page 26: Notifications
Enter your e-mail address under Recipient e-mail address 1 and then click "Save". Further e- mail addresses can be added using the “Add item” selection field. You can then select your e-mail address as the event response (see Chapter 10.3). [26] wAppLoxx Pro Control Plus Complete Instructions... -
Page 27: Network Settings
6.4. Network settings Use DHCP settings Check this box if the wAppLoxx Pro Control Plus is connected to a router with DHCP function. All connection data is now automatically assigned by the router. If no DHCP function is available, you can remove the tick and enter the connection data manually. -
Page 28: Upgrade And Restore
Click on the notification to automatically download and install the updates. Manual firmware update The latest firmware for wAppLoxx Pro Control Plus is available for download from www.abus.com. We recommend always using the latest firmware. You can find them under the following link in the "Downloads"... -
Page 29: External Access To The Wapploxx Pro Plus System
To do so, a user with web access must have been created as described in Chapter 8.2. Any number of devices can be used to access the wAppLoxx Pro Control Plus. If a desktop computer or Notebook is to be used to access the WLX PRO CTRL PLUS, we recommend the wAppLoxx Pro Plus Manager for this. - Page 30 (see chapter 12). If a mobile device has already been used to access the wAppLoxx Pro Control Plus via the app, then a QR code can be generated and scanned by other devices on this device or in the app via “SHARE DEVICE”.
-
Page 31: Configuration Of The Components
7.1. wAppLoxx Pro Plus Slave Control wAppLoxx Pro Control Plus cascading The cascading function allows you to connect up to five wAppLoxx Pro Control Plus in master-slave mode in a local network. The master-slave function is used to increase the range of wireless coverage. - Page 32 4. If the control is not automatically found in the network, the IP address or the host name of the slave control can be provided manually. After entering the data, the control appears in the list. 5. Repeat the procedure to register further slave controls. [32] wAppLoxx Pro Control Plus Complete Instructions...
- Page 33 This includes your system’s reset card which was stored in the master control and is valid for the slave controls. In the event of a failure, the master control can continue operating the slave controls independently. [33] wAppLoxx Pro Control Plus Complete Instructions...
-
Page 34: Wapploxx Pro Repeater
5. The power supply unit can be removed for the walk test - LED 1 lights up red You can find further information about the walk test in this chapter under the step Walk Test. [34] wAppLoxx Pro Control Plus Complete Instructions... - Page 35 1. Click on the green plus sign in the repeater menu to create a new wAppLoxx Pro Repeater. 2. Assign a name and select the control to which the repeater is to be registered. 3. Click "Register device" [35] wAppLoxx Pro Control Plus Complete Instructions...
- Page 36 Press the walk test button “B” on the repeater to start a walk test. good or better (2 bars), you can then install the wAppLoxx Pro Repeater in the desired position. We recommend performing the walk test with the battery. [36] wAppLoxx Pro Control Plus Complete Instructions...
- Page 37 Via wAppLoxx Pro Control Plus: The wAppLoxx Pro Repeater will automatically be removed from the wAppLoxx Pro Control Plus by pressing the “Delete” button. There must be a wireless connection in place to do this. Otherwise the wAppLoxx Pro Repeater must be manually unpaired by pressing pairing button "A".
-
Page 38: Wapploxx Pro Cylinder
All wAppLoxx Pro door components that have been created are displayed under the menu item wAppLoxx with their signal strength and battery status. This also includes Edit, Lock and Delete symbols. Lock+ Battery status Battery change Delete Edit Unlock [38] wAppLoxx Pro Control Plus Complete Instructions... - Page 39 Every time communication takes place between the wAppLoxx Pro Cylinder and wAppLoxx Pro Control Plus, the most recent battery status measurement is displayed graphically. Battery full: Battery status OK Battery empty: Battery must be replaced soon [39] wAppLoxx Pro Control Plus Complete Instructions...
- Page 40 Your wAppLoxx Pro Control Plus includes a system card and a reset card on delivery. These cards have the following functions: System card Since the wAppLoxx Pro Cylinder does not have a mechanical reset button, the cylinder is set to The system card can be used for programming or unpairing mode by presenting the system card.
- Page 41 Reader To use the wAppLoxx Pro to read in new tags, activate this function in the selection field. Only one wAppLoxx Pro can be defined as a reader for each wAppLoxx Pro Control Plus. Control Select the wAppLoxx Pro Control Plus or the previously registered slave control into which the wAppLoxx Pro cylinder is to be programmed.
- Page 42 Cylinders that have Office mode activated allow the door to be opened without a tag by turning the cylinder knob. To restrict Office mode to a certain time frame, you can assign the relevant wAppLoxx Pro Cylinder to a self-defined schedule. [42] wAppLoxx Pro Control Plus Complete Instructions...
- Page 43 3. Successful programming of the reset card is indicated when the cylinder flashes green and the ID card is entered in the field. 4. Click on “Save”. 5. The ID of the reset card is now transmitted to the programmed and all subsequently programmed cylinders. [43] wAppLoxx Pro Control Plus Complete Instructions...
-
Page 44: Wapploxx Pro Wall Reader Or Bridge Box
3. Enter the name of the Wall Reader/door. 4. Select the control or repeater with which the Bridge Box is to be paired. 5. Click on "Register device", a pop-up will appear and the wAppLoxx Pro Control Plus is in pairing mode. - Page 45 3. Now present the reset card or a fallback medium to the Wall Reader. 4. The Bridge Box is now unpaired from the wAppLoxx Pro Control Plus. 5. If the unpairing process was successful, only the status LED will be lit up green.
-
Page 46: Setting Up A Master Key System
This chapter describes the step-by-step approach to programming a Master key system in the wAppLoxx Pro Control Plus with various permissions and time profiles. The configuration process can also be performed in any order and changed at any time. At the first start-up,... - Page 47 “root”, then the door group has no other superordinate group and is the highest within the hierarchy. Assigned wAppLoxx Here, you can click on the selection boxes to assign the respective doors/wAppLoxx Pro [47] wAppLoxx Pro Control Plus Complete Instructions...
-
Page 48: Users And Tags
This is achieved by clicking on “Enable event log”. Users must log into their own user interface (see Chapter 11) to execute these functions. Users must enter a user name and password to gain access. [48] wAppLoxx Pro Control Plus Complete Instructions... - Page 49 To do this, an interface to the alarm system will need to have been configured (see Chapter 10.1) Arming/disarming Users are authorised to “arm” and “disarm” one or both alarm systems on the doors of the selected door groups. [49] wAppLoxx Pro Control Plus Complete Instructions...
- Page 50 If a user without a tag is selected for fallback access, this user will still occupy one of the 9 possible slots for fallback tags. A tag can be subsequently assigned to the user. [50] wAppLoxx Pro Control Plus Complete Instructions...
- Page 51 You can export a key issue log to document the issue of tags. In the user overview, click on the key to the left of the Delete icon. You can note down individual agreements and export an output protocol as a PDF file by clicking "Save and print". [51] wAppLoxx Pro Control Plus Complete Instructions...
- Page 52 3. Select the exported CSV file and then click "Load". To guarantee the protection of personal data, user data for web access is not included in exports. It will need to be reassigned after importing the user list. [52] wAppLoxx Pro Control Plus Complete Instructions...
- Page 53 Pro Control Plus system. For a successful user import, the data and column names must be created as a .csv file as shown in the example.
-
Page 54: User Groups
Enter a name for the user group. (e.g. Management team.) Schedule Here you have the option to select a schedule for the user group. Assigned Users Here you can select the users to be assigned to this user group. [54] wAppLoxx Pro Control Plus Complete Instructions... -
Page 55: Schedules
Create schedules To create a schedule, select "Schedules" in the main menu. The list contains all saved schedules that can either be edited directly or deleted. To create a new schedule, click on “Create”. [55] wAppLoxx Pro Control Plus Complete Instructions... -
Page 56: Holiday Schedules
The “Holiday” menu is where you can assign various holiday schedules to the respective general schedules. The holiday access times that have been set in the schedules are applicable on the selected holiday days. [56] wAppLoxx Pro Control Plus Complete Instructions... -
Page 57: Key Lock Plan
A single tick by the “IT department” user group and “IT department” door group. This means that the users of the door group only have access authorisation for the “Server room” door. [57] wAppLoxx Pro Control Plus Complete Instructions... -
Page 58: Cameras
Login data Enter the user name and password of your IP camera. Connection data Enter the IP address and ports of your ABUS IP camera. You can access this information in the ABUS IP Installer. Assign wAppLoxx camera You can then assign the camera to the desired wAppLoxx cylinder. -
Page 59: Events
▪ Normally open (Open Latched NO) contact: Relay closed when “armed” ▪ Normally closed (Closed Latched NC) contact: Relay open when “armed” ▪ Normally open (Open Timed NO) impulse: Relay closes for one second when “armed” [59] wAppLoxx Pro Control Plus Complete Instructions... - Page 60 It is displayed whether this input is active. Arm input You can use the Arm input to “arm” and “disarm” the WAppLoxx Pro Control Plus from a connected alarm panel. Each time the connected alarm panel switches between its “armed”...
- Page 61 The current status of the input is displayed. Connection to the alarm panel There are four options for connecting the wAppLoxx Pro Control Plus to an alarm panel: 1. Alarm system fully wired The Arm Input, Arm Output and Ready for Arm options are connected to the alarm panel.
- Page 62 Pro Control Plus in its “armed” position until the alarm panel unlocks it again. It is not possible to use the wAppLoxx Pro Control Plus to “disarm” the system here. You can only actuate the connected wAppLoxx Pro Cylinders when the alarm system is unarmed.
- Page 63 Only the Arm Output of the wAppLoxx Pro Control Plus is configured, although it is not connected. This makes it possible to lock the cylinders with an Arm command until a valid Arm/Disarm medium is presented. [63] wAppLoxx Pro Control Plus Complete...
-
Page 64: Example - Secvest
Module is connected. 10.2.1. One alarm area On the wAppLoxx Pro Control Plus, Input 1 is used for arming preparation and Input 2 for arming acknowledgement. Thus, output 1 of the wAppLoxx Pro Control Plus controls the zone input 1 on the Secvest for arming. - Page 65 Configuration of the wAppLoxx Pro Control Plus to the Secvest alarm panel interface [65] wAppLoxx Pro Control Plus Complete Instructions...
- Page 66 Configuration of wired zone 301 as key switch duration on the Secvest [66] wAppLoxx Pro Control Plus Complete Instructions...
- Page 67 Configuration of the wired output 301 (relay 01) for the ready signal on the Secvest Configuration of the wired output 302 (relay 02) for the activation on the Secvest Configuration of the output mode for each partition on the Secvest (not pre-configured) [67] wAppLoxx Pro Control Plus Complete Instructions...
- Page 68 10.2.2. Two alarm areas In addition to wiring with an alarm area, the wAppLoxx Pro Control Plus uses input 4 for arming preparation and input 5 for arming acknowledgement. In addition, output 2 of the wAppLoxx Pro Control Plus controls zone input 2 on the Secvest for arming.
- Page 69 Configuration of the wAppLoxx Pro Control Plus to the Secvest alarm panel interface [69] wAppLoxx Pro Control Plus Complete Instructions...
- Page 70 Configuration of HyMo Zone 401 as key switch duration on the Secvest [70] wAppLoxx Pro Control Plus Complete Instructions...
- Page 71 Configuration of HyMo Zone 402 as key switch duration on the Secvest Configuration of HyMo output 401 (relay 01) for the ready signal on the Secvest [71] wAppLoxx Pro Control Plus Complete Instructions...
- Page 72 Configuration of HyMo output 402 (relay 02) for activation on the Secvest Configuration of HyMo output 403 (relay 03) for the ready signal on the Secvest [72] wAppLoxx Pro Control Plus Complete Instructions...
- Page 73 Configuration of HyMo output 404 (relay 04) for activation on the Secvest Configuration of the output mode for partition 1 on the Secvest (not pre-configured) [73] wAppLoxx Pro Control Plus Complete Instructions...
- Page 74 Configuration of the output mode for partition 2 on the Secvest (not pre-configured) [74] wAppLoxx Pro Control Plus Complete Instructions...
-
Page 75: General Events
Only the tags that function with the set mode are recorded. Tamper Action starts as soon as the tamper contact has been interrupted. Repeater tamper Action starts as soon as the cover tamper contact for the repeater is triggered. [75] wAppLoxx Pro Control Plus Complete Instructions... - Page 76 If, after an action, a relay is to be triggered as a reaction, select the relay (for relay connections, see Chapter 3). You can then select the activity signal and the delay in seconds. wAppLoxx Select a cylinder to be coupled as an event response. [76] wAppLoxx Pro Control Plus Complete Instructions...
-
Page 77: User Login
Later, it is possible to change the password in the menu item System settings by selecting the user name ("Logged in as ..."). Show the QR code to connect to the wAppLoxx Pro Plus app Change the user password Unpair or delete the tag [77] wAppLoxx Pro Control Plus Complete Instructions... -
Page 78: Remote Functions
For Access cylinders, the remote control function can also be used when the alarm system is armed. [78] wAppLoxx Pro Control Plus Complete Instructions... -
Page 79: Protocol/Event Log
11.2. Protocol/Event Log To protect sensitive personal data, the wAppLoxx Pro Control Plus can be configured so that the event log is only displayed after a second authorised user logs in. The two men role mode can be established in the system settings under System access. - Page 80 [80] wAppLoxx Pro Control Plus Complete Instructions...
-
Page 81: Wapploxx Pro Plus App
1. Installing the wAppLoxx Pro Plus App Scan the QR code with your smartphone and open the link displayed. Alternatively, you can also find the ABUS wAppLoxx Pro Plus app in your App Store (iOS) or Play Store (Android). Install the app on your smartphone. - Page 82 Pro Plus Manager In the wAppLoxx Pro Plus Manager, the icon for generating a QR code is displayed above the wAppLoxx Pro Control Plus. Click on the icon and scan the QR code in the app with your smartphone.
- Page 83 Pro Plus app of another user Users who have already added the wAppLoxx Pro Control Plus to their app can share it with other users. This can be done in the control’s settings. By clicking on the "Share Device"...
- Page 84 Enter your individual user name here. Auto-login You can select whether you want to log into your wAppLoxx Pro Control Plus automatically after starting the app. If you are operating several controls, you can specify the control into which you should be automatically logged in.
-
Page 85: Functions Of The Wapploxx Pro Plus App
Pro Control Plus Settings After adding, your control will appear on the overview page of the wAppLoxx Pro Plus app. Use the stylus at the top right of the tile to access the wAppLoxx Pro Control Plus settings. Figure You can set an image of the installation location of your wAppLoxx Pro Control Plus. - Page 86 If you have lost your tag, you can delete it in the app. A password confirmation is required to delete a tag. The administrator can reprogram and reassign the tag to a user. Remove from App Use this button to delete the wAppLoxx Pro Control Plus from your app. Remote door opening Navigation aids Search function: All cylinders, hotkeys and wall readers are displayed on the overview page.
- Page 87 Export logbook entries By clicking on the button "Export logbook" you can export the logbook entries as a PDF file. The logbook type (accesses, arming/disarming, recordings, system messages) and the [87] wAppLoxx Pro Control Plus Complete Instructions...
- Page 88 On the overview page you can see all installed cameras. By clicking on one of the installed cameras, you can open the live stream. In the live stream, you can zoom in or out with your fingers. [88] wAppLoxx Pro Control Plus Complete Instructions...
- Page 89 Switch between low and high resolution of the live stream. Create a snapshot of the currently open camera. View snapshots created in the past, in the app and via events. Explanations of other camera functions. [89] wAppLoxx Pro Control Plus Complete Instructions...
-
Page 90: Terms Of Use For Wapploxx Pro Plus
Linker Kreuthweg 5 86444 Affing The use of the application is exclusively based on these terms of use. ABUS Security Center is free to provide services in connection with this use by third parties. 13.1 Scope of application By installing and subsequently using the application offered by the ABUS Security Center, the user accepts the following terms of use as amended from time to time. - Page 91 The user shall also immediately change the login data assigned to them and the login data created by them or have it reset by ABUS Security Center after showing proof of their identity if they suspect that unauthorised third parties may have knowledge of this login data.
- Page 92 ABUS Security Center reserves the right to amend these Terms of Use if necessary for factual reasons. In this case, ABUS Security Center will inform the user of the change in good time and request the user's consent. Further use of the application may be made dependent on consent.
-
Page 93: Open Source Licence Information
Retrieving the open source licence information from your wAppLoxx Pro Control Plus 1. Remove the power supply from your wAppLoxx Pro Control Plus and insert a USB stick into the USB interface. 2. Then restore the power supply. -
Page 94: Disposal Instructions
Please contact your dealer or dispose of the products at the local collection point for electronic waste. If you have any technical questions, please contact your specialist dealer. ABUS Security Center GmbH & Co. KG Linker Kreuthweg 5 86444 Affing • Germany...
Need help?
Do you have a question about the wAppLoxx Pro Control Plus and is the answer not in the manual?
Questions and answers