Abus wAppLoxx Pro Control Installation And Operating Instructions Manual
Hide thumbs
Also See for wAppLoxx Pro Control:
- Installation instructions and user manual (28 pages) ,
- Fitting instructions manual (39 pages)

Related Manuals for Abus wAppLoxx Pro Control


Summary of Contents for Abus wAppLoxx Pro Control
- Page 1 Installation and operating instructions wAppLoxx Pro Control (WLX-Pro CTRL) wAppLoxx Pro Control Complete Instructions...
-
Page 2: Table Of Contents
5.1 Setting the date and time ....................... 18 5.2 Programming a wAppLoxx Pro Cylinder in the wAppLoxx Pro Control .......... 18 5.3 Programming a wall reader or a Bridge Box in the wAppLoxx Pro Control ........20 5.4 Creating users ..........................21 5.5 Creating user groups ........................ - Page 3 10.5 Remote event ..........................70 11. User interface ..........................72 11.1 Remote functions ......................... 73 11.2 Protocol/event log ........................74 12. Conditions of use for wAppLoxx ...................... 76 wAppLoxx Pro Control Complete Instructions...
-
Page 4: General
No part of the product may be changed or modified in any way. Finger contact with the electronics should also be avoided. ABUS Security-Center GmbH & Co. KG shall not be held liable for loss or damage caused – or alleged to have been caused –... - Page 5 Safety information: Please observe the following instructions for the wAppLoxx Pro Control to avoid fire and injury: • Mount the device securely in a dry area of the building. • Ensure there is sufficient ventilation for the device. • The device is designed for indoor use only.
- Page 6 If batteries are replaced, take note of temperature details specified by the manufacturer. If after the initial commissioning of the wAppLoxx Pro Control, the signal lights do not light up properly, please restart the wAppLoxx Pro Control. After the cylinder is initialised for the second time, the notification should no longer appear.
-
Page 7: Wapploxx Pro Control Technical Data
The wAppLoxx Pro Control has been optimised for use in conjunction with alarm systems. Some functions are therefore only available if an interface to an alarm system has been set up for the wAppLoxx Pro Control (Chapter 9.1). wAppLoxx Pro Control Complete Instructions... -
Page 8: Installing The Wapploxx Pro Control
2. Installing the wAppLoxx Pro Control Screw the enclosed external antennas onto Mount the housing cover the connections provided for this purpose and mount the housing using four screws. Make sure there is sufficient spacing (approx. 1 m) to Make sure not to damage the PCB during this the ceiling and walls. -
Page 9: Wapploxx Pro Control Connections & Led Displays
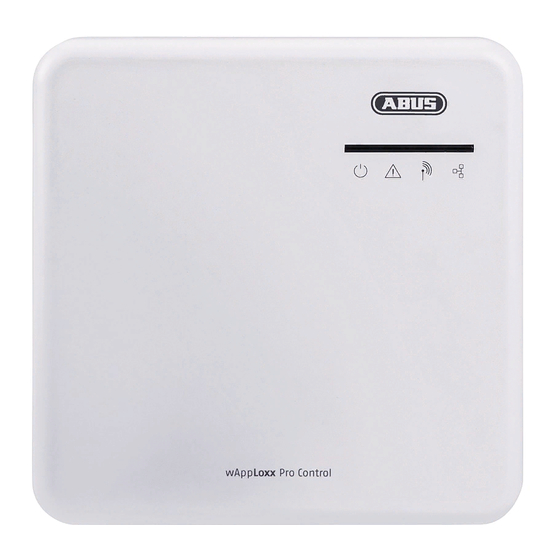
ABUS power supply unit. (Item no.: AZZU10010/AZZU10011). We recommend switching to a new original ABUS power supply unit particularly in the event of problems with the power supply or if the existing power supply unit is defective. - Page 10 LED signalling System power (consistent green) System in update mode or restarting (flashing blue) Wireless communication between the wAppLoxx Pro Control and wAppLoxx Pro Cylinder (blue during wireless communication) Network connection active (consistent blue) wAppLoxx Pro Control Complete Instructions [10]...
-
Page 11: Commissioning The Wapploxx Pro Control
Option 1: Connecting the wAppLoxx Pro Control directly to a PC/laptop. 1. Connect the wAppLoxx Pro Control to your PC/laptop via a network cable. 2. Connect the wAppLoxx Pro Control to the power supply. The wAppLoxx Pro Control automatically detects whether a direct connection between the PC/laptop and the wAppLoxx Pro Control should be established. - Page 12 5. Now open the wAppLoxx Pro Control Finder software. The current software version is available for download at abus.com. Your wAppLoxx Pro Control will now appear under “local devices”. Recommended configuration: We recommend configuring the wAppLoxx Pro Control using the wAppLoxx Pro Control Finder.
- Page 13 6. This takes you to the wAppLoxx Pro Control website where you are requested to enter your user name and password. The following access data is set by default on delivery: User name: administrator Password: 12345678 Important: Please ensure you change the administrator access after initial commissioning.
- Page 14 1. Connect the wAppLoxx Pro Control to the router/switch. 2. Connect the wAppLoxx Pro Control to the power supply. If your router is set to DHCP mode, it now assigns a new IP address to the wAppLoxx Pro Control automatically. If your router is not set to DHCP mode, the default IP Address for the wAppLoxx Pro Control is 192.168.0.50.
- Page 15 Use the latest version of Mozilla Firefox or Google Chrome to carry out programming. Alternatively, Internet Explorer, version 11.306 or above, or Edge can be used. 4. This takes you to the wAppLoxx Pro Control website where you are requested to enter your user name and password. wAppLoxx Pro Control Complete Instructions...
- Page 16 Please ensure the administrator access is changed after initial commissioning. Keep the password for administrator access safe. Should you no longer have the password, the wAppLoxx Pro Control will need to be reset using reset button “B” on the PCB.
-
Page 17: Quick Configuration
On the overview page of the main menu, you can find an overview of all the important information about your wAppLoxx Pro Control. Make sure you have the latest firmware on your wAppLoxx Control. You can find information about the firmware update under Section 6.6 “Upgrade and restore”. -
Page 18: Setting The Date And Time
A detailed description of all setting options can be found under Section 6.1 5.2 Programming a wAppLoxx Pro Cylinder in the wAppLoxx Pro Control Your wAppLoxx Pro Control includes a system card and a reset card on delivery. These cards have the following functions:... - Page 19 To do this, enable the function in the selection field. Alternatively, tags can also be programmed directly on the computer via the wAppLoxx Card Reader. wAppLoxx Pro Control Complete Instructions [19]...
-
Page 20: Programming A Wall Reader Or A Bridge Box In The Wapploxx Pro Control
2. Present the “system card” at the cylinder. Green flashing will indicate successful programming. 3. The cylinder will now connect to the wAppLoxx Pro Control. This process can take several seconds. 4. Successful programming is confirmed by the following display, and you will be prompted to turn the cylinder knob or to present a tag. -
Page 21: Creating Users
To create a new user group, click on the green plus sign in the “User groups” menu item. You can specify the following items in the “Create user group” menu: Name: Defines the name of the respective user group (e.g. “Management team” or “Production employee”). Allocated users: wAppLoxx Pro Control Complete Instructions [21]... - Page 22 If you do not use schedules, select the field “Not used”. Holiday schedule: If you have defined holiday schedules, you can enable these by clicking on the selection field. Save the settings by clicking on the “Save” button. wAppLoxx Pro Control Complete Instructions [22]...
-
Page 23: Creating Door Groups
Save the settings by clicking on the “Save” button: In the Door groups menu item, you can see the hierarchical structure as well as the assignment of individual wAppLoxx Pro Cylinders to the respective door groups. wAppLoxx Pro Control Complete Instructions [23]... -
Page 24: Locking Plan
Access authorisation is granted for the selected door group and its subordinate groups. Grant single permission: Access authorisation is granted for the selected door group. Remove permission: Access authorisation is removed from the selected door group and its subordinate groups. Example (see above) wAppLoxx Pro Control Complete Instructions [24]... -
Page 25: Activating The Web Connection
Activating the web connection for the wAppLoxx Pro app: The wAppLoxx Pro Control must be connected to the internet (router). 1. To access your wAppLoxx Pro Control using the app via the internet, you first have to enable the web connection using the secure code. - Page 26 The symbol on the dashboard then displays the successful activation. 6. You can now connect to your wAppLoxx Pro Control via the wAppLoxx app. Use the QR code scan function on your app under menu item “Add manually”. The QR code can be scanned via the user menu (setup is explained under the “Create user”...
-
Page 27: Advanced Configuration
6. Advanced configuration It is essential to configure the date and time to ensure the device functions correctly! Please ensure you change the administrator access after initial commissioning. 6.1 Date and Time wAppLoxx Pro Control Complete Instructions [27]... - Page 28 Device name Select the device name used to identify your wAppLoxx Pro Control on the network/app. The date and time must always be correct to ensure smooth operation. Check that the date and time are correct during every commissioning.
-
Page 29: System Access
System mode settings: All existing tags are deleted if Secure Mode is activated. If this is the case, then only the MIFARE DESfire tags from ABUS function. Mixed operation is not possible. wAppLoxx Pro Control Complete Instructions [29]... -
Page 30: Notifications
You can use an existing account or create an new one for your Control. You can obtain the necessary server addresses and ports from your email provider. Sender: Sender name for the wAppLoxx Pro Control Sender email address: The email address associated with the sender SMTP server:... -
Page 31: Network
6.4 Network Receive network settings from DHCP: Check this box if the wAppLoxx Pro Control is connected to a router with a DHCP function. All connection data is now automatically assigned by the router. If no DHCP function is available, you can enter the connection data manually. Contact your network administrator for assistance if necessary. -
Page 32: Language
This ensures that only secured connections can be established and the data is transmitted with encryption. 6.5 Language Here you can select the desired language for the user interface of the wAppLoxx Pro Control. 6.6 Upgrade and Restore wAppLoxx Pro Control Complete Instructions... - Page 33 If the update process was interrupted or not performed correctly, the firmware can be loaded via the MicroSD card restore process. To do this, disconnect the wAppLoxx Pro Control from the power. Insert the MicroSD card supplied with the latest firmware and reconnect the normal voltage.
- Page 34 Restore settings If you would like to save your settings or transfer them to another wAppLoxx Pro Control, you can export them to a configuration file (*.conf). This file contains all settings with the exception of the wAppLoxx Cylinder. These must be registered again from scratch. To import a configuration file, select this using the “Browse”...
-
Page 35: Cascading Wapploxx Pro Controls
Pro Controls and copy/make a note of the IP address of the desired slave control. You can view it on the dashboard: 5. Program a cylinder/wall reader in the future master control now and program it as a reader to scan locking media. wAppLoxx Pro Control Complete Instructions [35]... - Page 36 6. Establish the system mode as safe/unsafe and program a reset card. Do not forget to subsequently update the cylinder. 7. To declare a wAppLoxx Pro Control as a master and add a slave control, tick the → “Activate Master Only” checkbox in the System settings System access menu item.
- Page 37 If you then log in to a slave control as an administrator, you will be able to see the slave status of the wAppLoxx Pro Control in the dashboard. Cylinder and user management in a master-slave system...
- Page 38 Regular synchronisation of data therefore also takes place once per minute. In a wAppLoxx Pro Control declared as a slave control, the wAppLoxx Pro Cylinders operated via this slave control are programmed and managed. The rights and user management is carried out via the master control.
-
Page 39: Setting Up A Master Key System
This chapter describes the step-by-step approach to programming a Master key system in the wAppLoxx Pro Control with various permissions and time profiles. The configuration process can also be performed in any order and changed at any time. We recommend the following approach for the initial commissioning process: 1. - Page 40 All wAppLoxx Pro Cylinders that have been created are displayed in the door overview with their signal strength and battery status. This also includes Edit, Lock and Delete symbols. wAppLoxx Pro Control Complete Instructions [40]...
- Page 41 Control, the most recent signal strength measurement is displayed as a bar chart. No bar: No wireless connection to the wAppLoxx Cylinder Unsatisfactory – operation not 1 bar: recommended 2 bars: Satisfactory 3 bars: Good wAppLoxx Pro Control Complete Instructions [41]...
- Page 42 Battery status OK Battery empty: Battery must be replaced soon Your wAppLoxx Pro Control includes a system card and a reset card on delivery. These cards have the following functions: System card: Since the wAppLoxx Pro Cylinder does not have a mechanical reset button, the cylinder is set to programming or unpairing mode by presenting the system card.
- Page 43 Pro Control. Programming: To program a wAppLoxx in the wAppLoxx Pro Control, click on the “Program” button. The system card must then be presented to the wAppLoxx Pro Cylinder. You can find additional information on using the wAppLoxx Pro Cylinder in the separate “wAppLoxx Pro installation instructions”.
-
Page 44: Schedules
Holiday schedules can be set up to establish different access times regardless of the day of the week (for holidays, for example). Create schedules To create a schedule, select “General Schedules” in the main menu and then click on “Create”. wAppLoxx Pro Control Complete Instructions [44]... - Page 45 The early shift has access from Monday to Thursday between 06:00 and 14:00. On Fridays and Saturdays, access is restricted to between 06:00 and 13:00. On the associated holidays, access is available between 07:00 and 10:00. wAppLoxx Pro Control Complete Instructions [45]...
-
Page 46: Holiday Schedules
The holiday access times that have been set in the schedules are applicable on the selected holiday days. 8.4 User groups Individual users are grouped into user groups. To create a new user group, select “User groups” in the main menu and click on the green plus sign. wAppLoxx Pro Control Complete Instructions [46]... -
Page 47: Users And Tags
Enter the user’s surname and given name. If the user is to be allocated a tag, click on “Register” to receive a previously unallocated tag for the wAppLoxx Cylinder defined as a tag reader. wAppLoxx Pro Control Complete Instructions [47]... - Page 48 If users forget their new password, the entire user must be deleted and recreated. Permissions: The Permissions area allows you to assign various rights to the user as required for the selected access groups. wAppLoxx Pro Control Complete Instructions [48]...
- Page 49 Without an access group, users cannot be granted any access permissions. For this reason, each user should be assigned at least one access group. wAppLoxx Pro Control Complete Instructions [49]...
- Page 50 Fallback authorisation is registered directly in the wAppLoxx Cylinder and enables access when there is no wireless connection to the wAppLoxx Pro Control. This requires the tag to be presented to the wAppLoxx Cylinder three times if the wireless connection is interrupted. It is possible to register ten fallback tags with each wAppLoxx Cylinder.
- Page 51 1. Open an empty workbook in MS Excel. 2. In the “Data” tab click on “From Other Sources”. Then select the item “From XML Data Import”. 3. When opening the required file, make sure that the “All Files” format is selected. wAppLoxx Pro Control Complete Instructions [51]...
- Page 52 In the text import wizard, select file origin “Unicode (UTF-8)” and make sure that “Delimited” is selected. Then click “Next”. 4. Select “Tab” and “Comma” as delimiters and click on “Next”. wAppLoxx Pro Control Complete Instructions [52]...
- Page 53 Now select the data format “General” and click on “Finish”. wAppLoxx Pro Control Complete Instructions [53]...
-
Page 54: Locking Plan Matrix
We recommend regularly backing up the system. You can do so via the “Export” function in the “Restore” menu. In the same menu, you can upload the saved data on your wAppLoxx Pro Control at any time. 8.6 Locking plan matrix... - Page 55 Sample company and has access authorisation for all sub-groups. A single tick by the “Production” user group and “Production” door group. This means that the users of the door group only have access authorisation for the “Office 1” door. wAppLoxx Pro Control Complete Instructions [55]...
-
Page 56: Cameras
ABUS server to have external access to the camera. You can find out how to connect an IP camera to the ABUS server in the instructions for your ABUS IP camera. After you have registered your desired camera on the ABUS server, enter the data assigned by the ABUS server into the configuration menu. -
Page 57: Events
10. Events wAppLoxx Pro Control Complete Instructions [57]... -
Page 58: Interface To Alarm System
Pro Control. If the alarm panel is not ready and the “Ready for arm” input is not active, the wAppLoxx Pro Control prevents the system from “arming” and signals this via the wAppLoxx Cylinder. Input 1 is used by default (see Chapter 3). - Page 59 “armed” and “disarmed” status, the wAppLoxx Pro Control is also switched between “armed” and “disarmed” accordingly. This ensures that the connected alarm panel and the wAppLoxx Pro Control have the same status. Input 2 is used by default (see Chapter 3). Delay: Select a delay time of between 10 and 20 seconds.
- Page 60 “arm” and “disarm” the system using the wAppLoxx Pro Control. Furthermore, the Arm command is only sent when forced action is required via the Ready for Arm input. The Arm Input has the highest priority and also operates the wAppLoxx Pro Control at the same time.
- Page 61 The Arm Input and Arm Output options are connected to the alarm panel. This makes it possible to “arm” and “disarm” the system using the wAppLoxx Pro Control; however, there is no forced action requested via the alarm panel. 3. Dominant alarm system (locking function via alarm panel)
-
Page 62: Example - Secvest
Pro Control in its “armed” position until the alarm panel unlocks it again. It is not possible to use the wAppLoxx Pro Control to “disarm” the system here. You can only actuate the connected wAppLoxx Cylinders when the alarm system is unarmed. - Page 63 Configuration of the wAppLoxx Pro Control to the Secvest alarm panel interface wAppLoxx Pro Control Complete Instructions [63]...
- Page 64 Configuration of the wAppLoxx Pro Control to the Secvest alarm panel interface tamper contact Configuration of the wAppLoxx Control for monitoring cover/back tampering wAppLoxx Pro Control Complete Instructions [64]...
- Page 65 Configuration of the zone type on the Secvest Configuration of wired zone 301 as key switch duration on the Secvest wAppLoxx Pro Control Complete Instructions [65]...
- Page 66 Configuration of wired zone 302 as a tamper zone on the Secvest Configuration of the wired output 301 (relay 01) for the ready signal on the Secvest Configuration of the wired output 302 (relay 02) for the activation on the Secvest wAppLoxx Pro Control Complete Instructions [66]...
-
Page 67: Creating Events
To create an event, select “Events” in the main menu, then click on “Create Event”. An event always comprises an action and a reaction. Enter a name for the event and select an event type. wAppLoxx Pro Control Complete Instructions [67]... - Page 68 Control. Hot key: The hot keys can be used to control a relay in the wAppLoxx Pro Control. wAppLoxx: Select the door at which the event must take place to trigger an action. wAppLoxx Pro Control Complete Instructions [68]...
- Page 69 Select the email recipient you would like to inform about a defined event. Camera: Select the camera you would like to control for a defined event. Reaction (camera): Here you can select the desired reaction (either video recording or snapshot) when arming a camera. wAppLoxx Pro Control Complete Instructions [69]...
-
Page 70: Tamper Settings
13.2. 10.5 Remote event Remote Event (cylinder release controlled via external activation) The “Remote Event” function enables the release of one or several cylinders by using one of the wAppLoxx Pro Control’s three inputs. wAppLoxx Pro Control Complete Instructions [70]... - Page 71 There is the choice of selecting all cylinders, individual cylinders or access groups, for which the Remote Event should be triggered. Status: Indicates whether the condition for locking the cylinder has been met. wAppLoxx Pro Control Complete Instructions [71]...
-
Page 72: User Interface
To access the user level, please enter the user data. User data is created in the administrator user menu (Chapter 11. Users) We recommend that users change their password after starting up for the first time. When selecting the user name (“Logged in as...”) the change password menu will open. wAppLoxx Pro Control Complete Instructions [72]... -
Page 73: Remote Functions
For Access cylinders, the remote control function can also be used when the alarm system is armed. wAppLoxx Pro Control Complete Instructions [73]... -
Page 74: Protocol/Event Log
11.2 Protocol/event log To protect sensitive personal data, the wAppLoxx Pro Control can be configured so that the event log is only displayed after a second authorised user logs in. The four-eyes principle can be established in the system settings under System access. - Page 75 • Reset to factory default • Battery warning • External input • Supervision loss • Tamper • Enable secure mode • Internet connected • Disable secure mode • Internet disconnected • Administrator logged in wAppLoxx Pro Control Complete Instructions [75]...
-
Page 76: Conditions Of Use For Wapploxx
Office for the Protection of the Constitution or the Military Counter-intelligence Service, or for enforcing rights to intellectual property. Right of access and withdrawal wAppLoxx Pro Control Complete Instructions [76]... - Page 77 ABUS. The wAppLoxx online service is provided “as is” and ABUS Security-Center assumes no liability or guarantee in relation to it. This condition of use is valid from 23/05/2018...
- Page 78 Please contact your dealer or dispose of the products at the local collection point for electronic waste. If you have any technical questions, please contact your specialist dealer. wAppLoxx Pro Control Complete Instructions [78]...
- Page 79 ABUS Security Center GmbH & Co. KG Linker Kreuthweg 5 86444 Affing • Germany wAppLoxx Pro Control Complete Instructions [79]...
Need help?
Do you have a question about the wAppLoxx Pro Control and is the answer not in the manual?
Questions and answers