Table of Contents
Advertisement
Quick Links
Advertisement
Table of Contents

Summary of Contents for ApexDesk REV-1507C
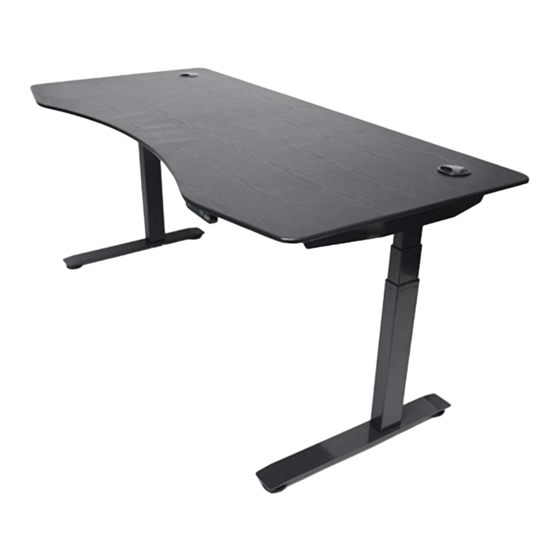
- Page 1 ELECTRIC HEIGHT-ADJUSTED SIT TO STAND DESK ApexDesk Assembly Guide REV-1507C...
-
Page 2: Table Of Contents
PARTS / COMPONENT DIAGRAMS ..........................5 ASSEMBLY INSTRUCTIONS ............................6 MOTOR INITIALIZATION INSTRUCTIONS ......................... 12 TROUBLESHOOTING ..............................13 CARE INSTRUCTIONS ............................... 13 TECHNICAL SPECIFICATIONS ........................... 13 WARRANTY INFORMATION............................. 14 CONTACT INFORMATION ............................14 ApexDesk Assembly Guide P a g e... -
Page 3: Caution, Use & Liability
The desk height is adjustable so that it can be positioned at the most suitable height. Any other use is at user’s risk. Under no circumstances does the manufacturer accept warranty claims or liability claims for damages caused from improper use or handling of the desk. ApexDesk Assembly Guide P a g e... -
Page 4: Parts & Hardware List
PARTS & HARDWARE LIST TOOLS REQUIRED Phillips Head Screwdriver (not included) Allen Wrench (included) HARDWARE INCLUDED HARDWARE LIST M6x35mm Screws L-Shaped Lever M4x12mm Nuts/Bolts 3 Sets M3x14mm Screws M6x15 Screws M6x20 Screws ApexDesk Assembly Guide P a g e... -
Page 5: Parts / Component Diagrams
PARTS / COMPONENT DIAGRAMS PARTS / COMPONENT LIST Desktop (1800x840x25mm) Base Supports Lifting Columns Upper Supports Beam Control Box Controller ApexDesk Assembly Guide P a g e... -
Page 6: Assembly Instructions
Controller to be on the left, turn the Beam (only) 180° so the two holes would fall on the right instead. Continue with rest of the Tips and Instructions in each Step. ApexDesk Assembly Guide P a g e... - Page 7 On the opposite side, insert the end of lever marked with a GREEN arrow into the holes that is also marked with a GREEN arrow. Slide the green-arrowed end all the way inside the hole until it touches the inner beam. STEP 4 – CONT’D ApexDesk Assembly Guide P a g e...
- Page 8 WIGGLE or DO NOT FEEL LOOSE. If they do, please repeat STEP 4 again. STEP 5 Repeat STEP 4 on the other side of the Beam (#5). Green Arrow Red Arrow STEP 6 ApexDesk Assembly Guide P a g e...
- Page 9 Control Box. If you prefer the Up/Down Controller to be on the left side, make sure you place Beam according to the Tips in Step 2. The 4 connection ports on the Control Box (#6) should face left instead to allow easier access. RIGHT LEFT BOTTOM VIEW ApexDesk Assembly Guide P a g e...
- Page 10 This step is a two-person job. Lay top down with the underside facing up and flip the assembled frame onto the Desktop. Watch out for hanging cables and power cords. Secure with M6x15 Screws (E) x 3 pieces on each side. STEP 9 ApexDesk Assembly Guide 10 | P a g e...
- Page 11 Adjust leveling studs on the feet as needed. Wire 3 BOTTOM VIEW STEP 10 Plug the Power Cord into a 120V outlet and follow the motor initialization instructions in the next chapter. ApexDesk Assembly Guide 11 | P a g e...
-
Page 12: Motor Initialization Instructions
During memorization process the system will make adjustments automatically. If initialization sequence is interrupted then whole process must start over again. We recommend reinitializing motor whenever the power is interrupted (ie: power cord unplugged, power outage, etc). ApexDesk Assembly Guide 12 | P a g e... -
Page 13: Troubleshooting
Control Box and a power outlet. Make sure the motor has been initialized properly. Please follow and complete the “Motor Initialization Instructions.” If symptom persists, contact ApexDesk Support. Desk wobbles a lot. Check if the floor is even and adjust leveling feet as needed. -
Page 14: Warranty Information
ApexDesk’s obligation under this warranty is limited to the repair or replacement, at ApexDesk’s sole option, of the parts or products the defect of which are reported to ApexDesk within the applicable warranty period and which, upon examination by ApexDesk, prove to be defective.


Need help?
Do you have a question about the REV-1507C and is the answer not in the manual?
Questions and answers