Table of Contents
Advertisement
Quick Links
Advertisement
Table of Contents

Related Manuals for Tews Technologies TPMC810

Summary of Contents for Tews Technologies TPMC810
- Page 1 The Embedded I/O Company TPMC810 Isolated 2x CAN Bus Version 2.0 User Manual Issue 2.0.0 April 2022 TEWS TECHNOLOGIES GmbH Am Bahnhof 7 25469 Halstenbek / Germany Phone: +49-(0)4101-4058-0 Fax: +49-(0)4101-4058-19 E-mail: info@tews.com www.tews.com...
- Page 2 P14 Back I/O with same pin in this document at any time without notice. assignment as TPMC816-10R TEWS TECHNOLOGIES GmbH is not liable for any damage arising out of the application or use of the device described herein. Style Conventions Hexadecimal characters are specified with prefix 0x, i.e.
- Page 3 Settings subchapter (generic ground symbol instead of earth ground symbol) - Added a note to the Pin Assignment chapter regarding isolated ground connection. 2.0.0 User Manual Update for TPMC810 V2.0. April 2022 TPMC810 User Manual Issue 2.0.0 Page 3 of 22...
-
Page 4: Table Of Contents
6.2 DIP Switch Settings ........................18 PIN ASSIGNMENT – I/O CONNECTOR ..............20 7.1 Front Panel I/O ..........................20 7.2 Back I/O P14 – TPMC810-10R ...................... 21 7.3 Back I/O P14 – TPMC810-20R ...................... 22 TPMC810 User Manual Issue 2.0.0... - Page 5 TABLE 7-1 : DB9 MALE CONNECTOR X1 CHANNEL 1 ................20 TABLE 7-2 : DB9 MALE CONNECTOR X2 CHANNEL 2 ................20 TABLE 7-3 : PIN ASSIGNMENT P14 BACK I/O CONNECTOR – TPMC810-10R ........21 TABLE 7-4: PIN ASSIGNMENT P14 BACK I/O CONNECTOR – TPMC810-20R ......... 22 TPMC810 User Manual Issue 2.0.0...
-
Page 6: Product Description
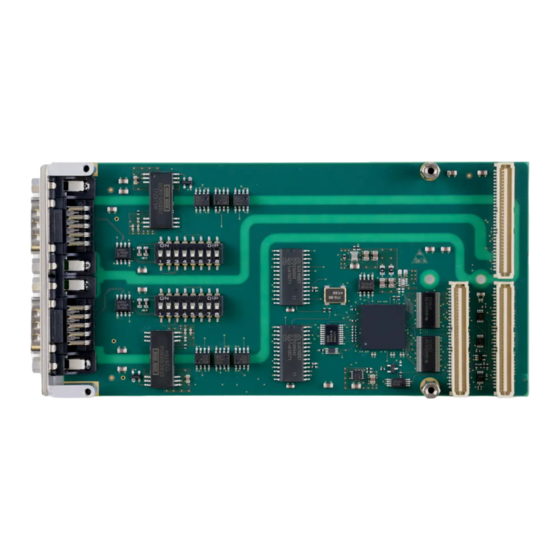
Each channel can generate an interrupt on INTA. The TPMC810 provides front panel I/O via two DB9 male connectors and rear panel I/O via P14. A special order option providing the same rear I/O pin assignment as TPMC816 is available. -
Page 7: Technical Specification
If FIT rates are not available, MIL-HDBK-217F and MIL-HDBK-217F Notice 2 formulas are used for FIT rate calculation. Humidity 5 – 95 % non-condensing Weight 73.3g Table 2-1 : Technical Specification TPMC810 User Manual Issue 2.0.0 Page 7 of 22... -
Page 8: Handling And Operation Instructions
This PMC module is sensitive to static electricity. Packing, unpacking and all other module handling has to be done with appropriate care. 3.2 Ground for Isolated I/O I/O Connector's isolated ground signals must be connected to external ground. TPMC810 User Manual Issue 2.0.0 Page 8 of 22... -
Page 9: Addressing
Mode Configuration (Byte) Mapping (Bit) Space) CAN Controller 2 (0x18) Address Space 3 (0x1C) Not Used 4 (0x20) Not Used 5 (0x24) Not Used Table 4-2 : PCI Address Space Overview TPMC810 User Manual Issue 2.0.0 Page 9 of 22... -
Page 10: Serial Eeprom Memory
0xE0 0xFFFF 0xFFFF 0xFFFF 0xFFFF 0xFFFF 0xFFFF 0xFFFF 0xFFFF 0xF0 0xFFFF 0xFFFF 0xFFFF 0xFFFF 0xFFFF 0xFFFF 0xFFFF 0xFFFF Table 4-3 : Configuration EEPROM Subsystem-ID Value (Offset 0x0C): TPMC810-10 0x000A TPMC810-20 0x0014 TPMC810 User Manual Issue 2.0.0 Page 10 of 22... -
Page 11: Local Configuration Register (Lcr)
Miscellaneous Control Register 0x0078_0040 0x54 General Purpose I/O Control 0x0224_96D0 0x70 Hidden1 Power Management data select 0x0000_0000 0x74 Hidden 2 Power Management data scale 0x0000_0000 Table 4-4 : PCI Controller Configuration Register Map TPMC810 User Manual Issue 2.0.0 Page 11 of 22... -
Page 12: Can Controller Register Address Space
4.5 CAN Controller Register Address Space 4.5.1 Local Register Map All local registers of the TPMC810 are accessible in the memory space of the PMC module. The PCI base address for the Local Registers is PCI Base Address 2 (PCI Memory Space, Offset 0x18 in the PCI Configuration Space). -
Page 13: Table 4-6 : Registers Of Sja1000
(IR) CAN Interrupt flags Enable/disable of interrupt Interrupt Enable (IER) — events in PeliCAN Mode Enable/disable of interrupt Control (CR) — events in BasicCAN Mode Table 4-6 : Registers of SJA1000 TPMC810 User Manual Issue 2.0.0 Page 13 of 22... -
Page 14: Local Software Reset
Value of 1 issues a reset to the local logic. The local logic remains in this reset condition until the PCI Host clears the bit. The contents of the PCI Controller Configuration Registers are not reset. TPMC810 User Manual Issue 2.0.0 Page 14 of 22... -
Page 15: Programming Hints
11 : Push-Pull output stage OCTN0 OCPOL0 Normal polarity OCMODE1 01 : Test output mode (bit reflection) 10 : Normal output mode OCMODE0 Table 5-1 : Output Control Register (OCR; 0x08) TPMC810 User Manual Issue 2.0.0 Page 15 of 22... -
Page 16: Integrated Data Buffer
4 bits for the Data Length Code, indicating the amount of data bytes Tx-buffer: 0x0C-0x13 Data Byte 1 - 8 Up to 8 data bytes as indicated by the Data Length Code Rx-buffer: 0x16-0x1D Table 5-3 : Rx- and Tx-buffer in BasicCAN Mode TPMC810 User Manual Issue 2.0.0 Page 16 of 22... -
Page 17: Table 5-4 : Rx- And Tx-Buffer In Pelican Mode
A read access of the Tx-buffer can be done using CAN addresses 96 to 108. For more information about the registers with respect to read and/or write access, bit definition and reset values, please consult the SJA1000 CAN Controller data sheet. TPMC810 User Manual Issue 2.0.0 Page 17 of 22... -
Page 18: Configuration Hints
P14 I/O connector. Whereas in the bus end mode the I/O lines are NOT passed through and the node input pins must be used to connect the CAN bus lines. Note that on TPMC810- 20R the pass through option is not applicable and only the bus end mode is available (see P14 Back I/O pin assignment). -
Page 19: Figure 6-1 : Can Channel Interface
Front I/O Transceiver Rear I/O CAN_H_IN CAN_H CAN_L CAN_L_IN CAN GND CAN_H_OUT CAN_L_OUT CAN GND Figure 6-1 : CAN Channel Interface TPMC810 User Manual Issue 2.0.0 Page 19 of 22... -
Page 20: Pin Assignment - I/O Connector
In either case the CAN I/O ground signals are isolated from system ground and require a proper connection to the common ground of the CAN network they are connected too. TPMC810 User Manual Issue 2.0.0 Page 20 of 22... -
Page 21: Back I/O P14 - Tpmc810-10R
CAN Channel 2 Ground CAN Channel 2 Low Level Out CAN Channel 2 High Level Out CAN Channel 2 Ground Table 7-3 : Pin Assignment P14 Back I/O Connector – TPMC810-10R TPMC810 User Manual Issue 2.0.0 Page 21 of 22... -
Page 22: Back I/O P14 - Tpmc810-20R
CAN Channel 2 High Level (input/output) CAN Channel 2 Ground Table 7-4: Pin Assignment P14 Back I/O Connector – TPMC810-20R Note that the I/O circuits of both CAN ports are electrically isolated from the main system and also from each other.
Need help?
Do you have a question about the TPMC810 and is the answer not in the manual?
Questions and answers