Bellman & Symfon Visit BE1411 Installer's Manual
Hide thumbs
Also See for Visit BE1411:
- User manual (96 pages) ,
- Medical device information (40 pages) ,
- Manual (20 pages)
Table of Contents
Advertisement
Quick Links
Advertisement
Table of Contents

Related Manuals for Bellman & Symfon Visit BE1411


Summary of Contents for Bellman & Symfon Visit BE1411
- Page 1 Visit installer’s guide...
-
Page 2: Table Of Contents
All you need to know about Visit. Transmitters Door transmitter Push button transmitter Telephone transmitters Mobile phone transceiver Baby monitor Smoke alarms CO alarm Receivers Flash receiver Portable receiver Pager receiver Wrist receiver Alarm clock receiver Accessories Magnetic mounting kit Pager charger Mobile phone sensor Bed shaker... -
Page 3: Door Transmitter
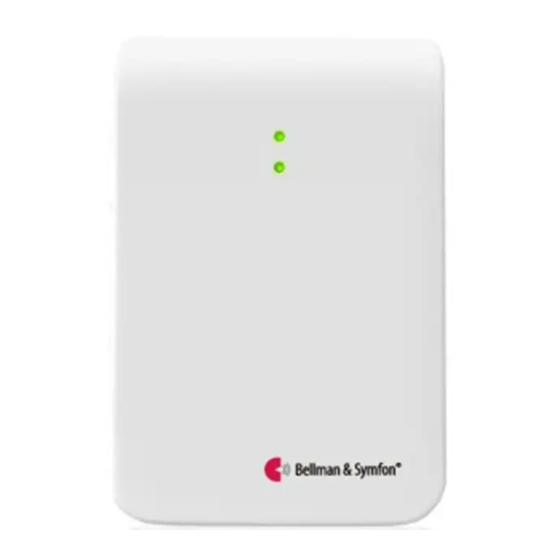
VISIT SYSTEM System overview Reliable and flexible The Visit system is highly flexible and can easily be configured to cater for your client’s specific home environment and lifestyle. It offers doorbell and phone detection, baby monitoring Door transmitter Smoke alarm Baby monitor Mobile phone transceiver and fire protection that meets the highest standards. - Page 4 VISIT TRANSMITTERS Visit door transmitter BE1411 Buttons and connections Installation – single sound source Test / program buttons LED lights 3.5 mm ext. mic. input Internal microphone BE9199 / BE9200 Using the transmitter’s internal microphone External microphone Pull the battery tab to start the transmitter. Clean the wall with the wet wipe and remove the protective film from the Velcro.
- Page 5 VISIT TRANSMITTERS Visit door transmitter BE1411 Installation – intercom and electronic doorbell Installation – hardwiring your doorbell Remove the protective film from the external microphone (sold separately) and attach it to the intercom’s speaker. Pull the battery tab to start the transmitter. Connect it to the door transmitter.
- Page 6 VISIT TRANSMITTERS Visit door transmitter BE1411 Optimizing the doorbell detection Default signal pattern The next step is to teach the transmitter to recognize your doorbell. When the door transmitter is activated, the following happens: The LED on the transmitter lights up in green to show that it’s signalling the receiver. Press and hold button 1 until the top LED starts to blink.
- Page 7 VISIT TRANSMITTERS Visit door transmitter BE1411 Changing the radio key If your Visit system is activated for no reason, there is probably a nearby system that triggers yours. In order to avoid radio interference, you need to change the radio key on all units. The radio key switches are located under the transmitter cover. Here is how you change the radio key: Open the transmitter front cover and move any radio key switch to the up (on position) to change the radio key.
-
Page 8: Push Button Transmitter
VISIT TRANSMITTERS Visit push button transmitter BE1420 Buttons and connections Using it as a caller button Status LED Front button Radio key switches Signal switches Hole for lanyard The transmitter can be worn around your neck and be used as a wireless caller button. Here is how you use it: Attach the lanyard to the transmitter. - Page 9 VISIT TRANSMITTERS Visit push button transmitter BE1420 Testing the connection Changing the radio key If your Visit system is activated for no reason, there is probably a nearby system that triggers yours. In order to avoid radio Using the front button interference you need to change the radio key on all units.
- Page 10 VISIT TRANSMITTERS Visit telephone transmitter BE1431 Buttons and connections Setting up the transmitter Remove the battery pull tab to start the unit. Test / program buttons LED lights 3.5 mm ext. trig. BE9026 Contact mat BE9023 Magnetic switch Clean the wall with the wet wipe and remove the protective film from the Velcro. Mount the transmitter on the wall.
- Page 11 VISIT TRANSMITTERS Visit telephone transmitter BE1431 Default signal pattern Changing the radio key When the telephone transmitter is activated by an incoming call or a triggered accessory, the following happens: If your Visit system is activated for no reason, there is probably a nearby system that triggers yours. In order to avoid radio interference you need to change the radio key on all units.
-
Page 12: Mobile Phone Transceiver
VISIT TRANSMITTERS Visit Mobile phone transceiver BE1433 Buttons and connections Installing the app Installing the transmitter Test / program buttons LED lights 3.5 mm ext. trig. Contact mat Magnetic switch Turn on Bluetooth® Mount it Swipe down from the top of the screen and tap Remove the cover from the Velcro on the back of the the Bluetooth icon. - Page 13 VISIT TRANSMITTERS Visit Mobile phone transceiver BE1433 Using the app Troubleshooting Once you have installed the Visit app, you will start to Most problems with the Mobile phone transceiver can be solved quickly by following the advice below. receive Visit notifications on your mobile phone. In Try this addition, your Visit receiver will alert for mobile calls and messages.
- Page 14 VISIT TRANSMITTERS Visit Mobile phone transceiver BE1433 Try this Try this If the Visit receiver responds and the notification doesn’t appear on your If the LED doesn’t light up check the transmitter user manual for further assistance. If the mobile still doesn’t receive notifications, try the following: mobile device: Check the Bluetooth connection ...
- Page 15 VISIT TRANSMITTERS Visit baby monitor BE1491 Buttons and connections Setting up the baby monitor Remove the battery pull tab to start the unit. Test / settings LED lights 3.5 mm ext. trig. Microphone (You can press and hold both test buttons for 3 seconds to turn it on/off.) Place the baby monitor on the bedside table or mount it on the wall using the supplied screw and plug.
-
Page 16: Baby Monitor
VISIT TRANSMITTERS Visit baby monitor BE1491 Adjusting the settings Changing the radio key The buttons for sensitivity and delay are located on the left side of the baby monitor. When you press the button, the If your Visit system is activated for no reason, there is probably a nearby system that triggers yours. In order to avoid radio corresponding LED color shows the current setting. - Page 17 VISIT TRANSMITTERS Visit smoke alarm – optothermal BE1481 Buttons and controls Installing the smoke alarm Remove the mounting bracket from the smoke alarm by turning it counter-clockwise and insert the supplied Horn Test button Mounting plate batteries to start the unit. Fix the mounting bracket to the ceiling using the supplied screws and plugs.
-
Page 18: Smoke Alarms
VISIT TRANSMITTERS Visit smoke alarm – optothermal BE1481 Signal pattern Changing the radio key The smoke alarm status indicator blinks in red once every 50 s to show that it is working correctly. If your Visit system is activated for no reason, there is probably a nearby system that triggers yours. In order to avoid radio Depending on the cause of the alarm, the signal patterns are as follows: interference, you need to change the radio key on all units. - Page 19 VISIT TRANSMITTERS VISIT ACCESSORIES Visit smoke alarm – optothermal Visit accessory BE9175 Changing the radio key Magnetic mounting kit Systems with only BE1481 Smoke alarm For easy installation of smoke alarms Note: The mounting kit is not suitable for vinyl wallpapers, anti-adhesive coatings, silicone- Step 1: Change the radio key on the BE1481 Smoke alarm The magnetic mount kit offers a quick and easy alterna-...
- Page 20 VISIT TRANSMITTERS Visit smoke alarm – ionization BE1551 Overview Setting up the smoke alarm Remove the front cover by rotating it fully backwards and connect the battery to the battery snaps to start the unit. Signal horn Test button Radio LED The alarm will chirp during startup.
- Page 21 VISIT TRANSMITTERS Visit smoke alarm – ionization BE1551 Signal pattern Changing the radio key The smoke alarm LED blinks in red once per minute to show that it is working correctly. If your Visit system is activated for no reason, there is probably a nearby system that triggers yours. In order to avoid radio Depending on the alarm, the signal patterns are as follows: interference, you need to change the radio key on all units.
-
Page 22: Co Alarm
VISIT TRANSMITTERS Visit CO alarm – electrochemical BE1555 Buttons and controls Installing the CO alarm Remove the mounting bracket from the CO alarm by turning it counter-clockwise. Alarm/radio LEDs CO Sensor Radio button Taking care to avoid any electrical wiring, fix the mounting bracket to the ceiling or wall using the supplied screws and plugs, see Location and positioning below. - Page 23 VISIT TRANSMITTERS Visit CO alarm – electrochemical BE1555 Signal pattern Changing the radio key When the alarm detects over 43 ppm CO, the red LED blinks in accordance with the table. This helps locate CO leaks as the If your Visit system is activated for no reason, there is probably a nearby system that triggers yours. In order to avoid radio alarm gives an indication straight away.
-
Page 24: Flash Receiver
VISIT RECEIVERS Visit flash receiver BE1441 | BE1442 Buttons and controls Getting started Connect the power supply to the receiver and the mains outlet. Pull the battery tab on the bottom (BE1442 only). Visit LEDs Flash Mute / test button Place the receiver on a level surface or mount it on the wall using the wall bracket accessory (see separate instructions). - Page 25 VISIT RECEIVERS Visit flash receiver BE1441 | BE1442 Changing the radio key Advanced programming If your Visit system is activated for no reason, there is probably a nearby system that triggers yours. In order to avoid radio By using advanced programming, you can customize the signal pattern from a specific transmitter and event, displaying interference, you need to change the radio key on all units.
-
Page 26: Portable Receiver
VISIT RECEIVERS Visit portable receiver BE1450 Buttons and controls Getting started Slide open the battery cover, fit the batteries and close the cover again. Power LED Volume Flash LEDs Visit LEDs Flash signal switch BE1270 Bed shaker Place the receiver on a level surface or mount it on the wall using the wall bracket. To test the radio link you need a Visit transmitter. - Page 27 VISIT RECEIVERS Visit portable receiver BE1450 Changing the radio key Advanced programming If your Visit system is activated for no reason, there is probably a nearby system that triggers yours. In order to avoid radio By using advanced programming, you can customize the signal pattern from a specific transmitter and event, displaying interference, you need to change the radio key on all units.
-
Page 28: Pager Receiver
VISIT RECEIVERS Visit pager receiver BE1470 Buttons and controls Getting started Open the battery cover, fit the battery and close the cover again. Visit LEDs Front label Belt clip Battery cover Battery eject Battery compartment Attach the pager to your belt using the belt clip. For extra security, use the supplied safety cord. To test the radio link you need a Visit transmitter. - Page 29 VISIT RECEIVERS Visit pager receiver BE1470 Changing the radio key Advanced programming If your Visit system is activated for no reason, there is probably a nearby system that triggers yours. In order to avoid radio By using advanced programming, you can customize the signal pattern from a specific transmitter and event, displaying interference, you need to change the radio key on all units.
-
Page 30: Wrist Receiver
VISIT RECEIVERS Visit wrist receiver BE8102 Buttons and controls Getting started Pull the battery tab on the charger and connect the power supply to the mains outlet. The mains LED lights up in green. Silicone wrist band Visit LEDs Battery LED 3.5 mm bed shaker input BE1270 bed shaker Place the wrist receiver in the charger and charge it for at least 2 hours. - Page 31 VISIT RECEIVERS Visit wrist receiver BE8102 Changing the radio key Advanced programming If your Visit system is activated for no reason, there is probably a nearby system that triggers yours. In order to avoid radio By using advanced programming, you can customize the signal pattern from a specific transmitter and event, displaying interference, you need to change the radio key on all units.
-
Page 32: Alarm Clock Receiver
VISIT RECEIVERS Visit alarm clock receiver BE1580 Buttons and controls Getting started Pull the battery tab and connect the power supply to the alarm clock and the mains outlet. Time dial Visit LEDs Snooze Alarm dial Alarm on/off Flash and sound Alarm indicator on/off Connect the bed shaker, tuck it under the pillow or mattress, and place the alarm clock on the bedside table. - Page 33 RECEIVERS Visit alarm clock receiver BE1580 Setting the time Setting the alarm Changing the radio key Press the left dial and turn it to set hours. Press the right dial and turn it to set hours. If your Visit system is activated for no reason, there is probably a nearby system that triggers yours. In order to avoid radio To set minutes, press and turn the dial again.
-
Page 34: Pager Charger
VISIT ACCESSORIES Pager charger BE1260 Buttons and controls Getting started Important! Replace the old alkaline battery with the supplied 1.2 V NiMH rechargeable battery. Charger brackets BE1270 bed shaker Fit the supporting legs to the back of the charger and place it on a level surface. You can also mount it on the wall using the supplied screws and plugs. -
Page 35: Mobile Phone Sensor
Mobile phone sensor Mobile phone sensor BE9250 Note: Not available on all markets. Buttons and connections Using BE9250 with the alarm clock Open the battery compartment, fit the supplied battery and connect the mobile phone sensor to the 2.5 mm input. Ergonomic grip 2.5 mm connector 3.5 mm connector... -
Page 36: Bed Shaker
VISIT ACCESSORIES Bed shaker Flash receiver wall bracket BE1270 BE9075 Connections Using a flash receiver Anti-slip surface Portable receiver Flash receiver BE1441 Use the drilling template to mark and drill holes for the screws and plugs. Remove the flash receiver table stand using the Allen key. Fit the wall bracket on the wall. -
Page 37: Magnetic Switch
VISIT ACCESSORIES Magnetic switch Contact mat BE9023 BE9026 Monitors the door and window Signals when someone steps on it Mount the magnetic switch on the door or window frame and Place the contact mat by the front door or by the bed and connect it to the telephone transmitter. -
Page 38: External Microphone
External microphone External trigger cable BE9199 | BE9200 BE9253 Extends the door transmitter reach Connects an external trigger source to Visit The external microphone can be used with the door The external trigger cable is used to connect an external transmitter when the sound source is located too far trigger source to a Visit product. - Page 39 We are driven to make a difference for hard- of-hearing and deaf people. We realize this by offering solutions that empower people to stay safe, independent, and socially active. Our global headquarter is in Gothenburg, Sweden and we are represented by regional offices and a qualified partner network in Europe, Asia Pacific, and North America.
Need help?
Do you have a question about the Visit BE1411 and is the answer not in the manual?
Questions and answers