Table of Contents
Advertisement
Quick Links
LPRT 517931
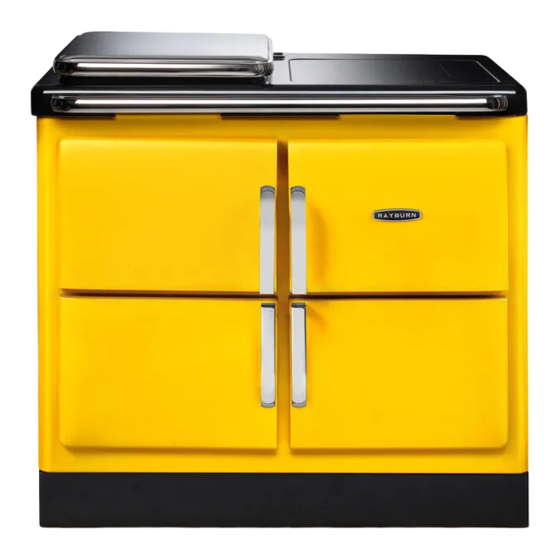
Rayburn Ranger®
User Guide &
Installation Instructions
CAUTION: THIS UNIT IS HEAVY, PROPER EQUIPMENT AND ADEQUATE MANPOWER MUST BE USED IN MOVING THE
RANGE TO AVOID DAMAGE TO THE UNIT OR THE FLOOR.
REMEMBER, when replacing a part on this appliance, use only spare parts that you can be assured conform to the safety and
performance specification that we require.
DO NOT use reconditioned or copy parts that have not been clearly authorised by Rayburn.
PLEASE READ THESE INSTRUCTIONS BEFORE USING THIS APPLIANCE
AND KEEP IN A SAFE PLACE FOR FUTURE REFERENCE.
For use in GB and IE
03/22 EINS 517932
Advertisement
Table of Contents

Related Manuals for Rayburn Ranger


Summary of Contents for Rayburn Ranger
- Page 1 REMEMBER, when replacing a part on this appliance, use only spare parts that you can be assured conform to the safety and performance specification that we require. DO NOT use reconditioned or copy parts that have not been clearly authorised by Rayburn. PLEASE READ THESE INSTRUCTIONS BEFORE USING THIS APPLIANCE AND KEEP IN A SAFE PLACE FOR FUTURE REFERENCE.
- Page 2 Useful Information It maybe useful to make a note of your Rayburn appliance Serial Number when it is being installed. The serial number can be found on the rear of the appliance. My Rayburn Details: Serial No: Rayburn Service No:...
-
Page 3: Table Of Contents
Contents Health and Safety Introduction Rayburn Ranger® Overview Operating the Rayburn Ranger® The Hotplate The Ovens Cooking On Your Rayburn Ranger® Induction Hob Fitting the Oven Shelves 10. Rayburn accessories 11. Cleaning Table 12. Maintenance 13. Installation instructions 14. Installation introduction 15. -
Page 5: Health And Safety
Rayburn or a separate remote-control been given supervision or instruction concerning use of the system. - Page 6 HOLE SIZES ± ANGULAR ± 30 ' DATE SCALE THIS DRAWING IS THE PROPERTY OF AGA-RAYBURN REPRODUCTION IN WHOLE OR PART,MAY NOT BE MADE WITHOUT THEIR WRITTEN CONSENT Copyright 1999 1:5 @ A0 DO NOT SCALE (THIS IS A COMPUTER GENERATED DRAWING DO NOT MODIFY MANUALLY) PART No.
-
Page 7: Introduction
Your Rayburn is a radiant heat store cooker which combines the design values and cooking principles of the traditional Rayburn with the flexibility to turn each cooking area off and on as you require, thereby fitting into your lifestyle beautifully. -
Page 8: Rayburn Ranger® Overview
® Rayburn Ranger Overview Fig. 3.1 DESN 517958 Cooker overview Fig. 3.1 Fig. 3.2 Control Panel Upper Oven (Roast, Bake & Grill) Lower Oven (Bake & Simmer) Warming Oven 2-Zone Induction Hob Hotplate (Boil & Simmer) Refer to page 5 to page 13 for operation of the main cooker. -
Page 9: Operating The Rayburn Ranger
The Rayburn will emit an odour for a short while, this is simply due to the protective oil we put on the hotplate burning off. Due to the newness in the first couple of hours, it is advisable to open the kitchen window while this takes place. - Page 10 Controls Warm up times Hotplate As the Rayburn works on the principle of stored radiant heat within the castings and ovens, time is required to gather heat from the electric elements and to fully saturate each heating zone. Simmering Setting ON...
-
Page 11: The Hotplate
Keep the hotplate clear of any burnt on food or crumbs by brushing with the wire brush, supplied with your Rayburn. Cleaning details can be found “Cleaning & Caring” on page Hotplate Controls The boiling plate setting Fig. -
Page 12: The Ovens
The Ovens Cooker overview Fig. 6.1 Your Rayburn Ranger® features 3 ovens, giving you flexibility to cook a range of foods and dishes. Control Panel The upper oven can be used as either a Roasting oven or Upper Oven (Roast & Grill) Baking oven with the use of the ‘e’... - Page 13 Upper Oven Fig. 6.2 The Rayburn Ranger® UPPER oven is indirectly heated by two elements, one concealed in the base of the oven and the other is visible in the roof (Fig. 6.2). These elements heat the twin walled cavity to provide cooking results consistent with traditional heat storage ovens, but with the flexibility to turn the ovens off when not in use.
- Page 14 Operate the warming oven via the separate push switch in the centre of the control panel, a red neon indicates that the warming oven is on The Rayburn Ranger® has an ‘e’ setting which will reduce running costs and the useful heat into the room will be reduced.
-
Page 15: Cooking On Your Rayburn Ranger
Cooking On Your Rayburn Ranger® Quick Cooking Guide for your Rayburn UPPER OVEN ON ROAST 1st runner Oven grilling 2nd runner Grilling, browning, gratins 3rd runner Small pastries, scones, bread rolls, Yorkshire puddings. 4th runner Roast meat and poultry, roast vegetables, Blind baking pastry. - Page 16 Cooking Tips • UPPER OVEN ON ROAST Suitable for roasting and high temperature cooking • Food might need to be shielded during longer cooking and ensure perfect browning e.g. apple pie • Cooking times might be slightly longer when both ovens are in use •...
-
Page 17: Induction Hob
Most types of pans will generate a faint audible sound during the cooking process and this is perfectly normal. The level of sound will vary depending on the type and style of pan used. Accessories can be viewed at your local Rayburn specialist or online at www.agacookshop.co.uk. - Page 18 Residual Heat Indicator Using the Induction Hob The hob surface will get hot when in use, this is due to heat Step 1. To switch on touch the Power ON pad. being conducted from the cooking pan. The hob surface will also remain hot for a while after use.
- Page 19 Pause Warming Function The warming function will keep cooked food warm for a set Step 1. To interrupt the cooking period, touch the pause period of time. button. Level Temperature 40°C 104°F Melting 70°C 158°F Warming 94° C Simmer Step 1. To select the Warming function, first touch the Power ON pad.
- Page 20 Auto Cook Timer Function The Auto Cook feature allows the pan contents to be brought The timer functions do not start or stop a cooking process. up to a high temperature rapidly, before reverting back to the The hob has two individual timers: set power level.
- Page 21 1. Kitchen Timer Modify Kitchen Timer Step 1. To switch on touch the Power ON pad. Step 1. To switch on touch the Power ON pad. Step 2. Press the “-” and “+” button together. Step 2. Press the “-” and “+” button together. Step 3.
- Page 22 2. Minute Minder Step 6. If an instant countdown is required touch the Step 1. To switch on touch the Power ON pad. power pad. Step 2. Touch the induction on. If power level is not set Step 7. After the time has elasped the alarm will sound. within 10 seconds the unit will automatically switch off.
- Page 23 3. Temporary Lock Step 1. To switch on touch the Power ON pad. Temporary Lock, this feature will lock the controls for the duration of a cooking process to prevent accidental adjustment of the controls. Step 2. Touch the induction on. If power level is not set within 10 seconds the unit will automatically switch off.
- Page 24 Bridge Function The bridge function allows both cooking zones to be switched on at the same time and controlled as one cooking zone only. This is ideal for an induction compatible griddle or fish kettle for example. Step 1. Touch the power button. Step 2.
-
Page 25: Fitting The Oven Shelves
Fitting the Oven Shelves General The shelves are designed to be non-tilt. To remove a shelf, lift clear of the side notches and slide forward. To replace a shelf insert into the oven with the short prongs at the rear, facing upwards. Slide into position above the side notches then allow to drop down on the runner. -
Page 26: Rayburn Accessories
10. Rayburn accessories Accessories in your Ranger Fig. 10.1 1 x Large Size Roasting Tin / Grill Pan (Fig. 10.1) This tin can be used as a grill pan for the grill. This is designed to slide onto the oven runners without the need for it to sit on an oven grid shelf. -
Page 27: Cleaning Table
DO NOT put oven doors in a dishwasher. IMPORTANT: Rayburn recommend Viterous Enamel DO NOT use steel wool, oven cleaning pads, or any Association approved cleaners for cleaning the other materials that will scratch the surface. -
Page 28: Maintenance
12. Maintenance • Your Rayburn does not need to be regularly serviced. • In the event of requiring maintenance please call the AGA Rayburn service centre. • Your appliance MUST only be maintained and installed by a qualified engineer, Rayburn engineer or an authorised distributor. -
Page 29: Installation Instructions
REMEMBER, when replacing a part on this appliance, use only spare parts that you can be assured conform to the safety and performance specification that we require. DO NOT use reconditioned or copy parts that have not been clearly authorised by Rayburn. PLEASE READ THESE INSTRUCTIONS BEFORE USING THIS APPLIANCE... -
Page 30: Installation Introduction
14. Installation introduction Consumer protection As a responsible manufacturer, we take care to make sure that our products are designed and constructed to meet the required safety standards when properly installed and used. WARNING - ELECTRIC SHOCK HAZARD It is the customers responsibility to contact a qualified electrical installer to make sure the electrical installation is adequate and in conformance with the regulations. -
Page 31: Product Dimensions Rayburn Ranger
15. Product Dimensions Rayburn Ranger® Fig. 15.1 DESN 517955 NOTE: When surveying for a appliance installation the actual clearance required for the ‘body’ of the appliance should be increased overall by 10 mm beyond the figures quoted above. This allows safe margin to take into account the natural dimensional variations found in major castings in particular the width across an appliance recess could be critical. - Page 32 Side and Overhead Clearances Fig. 15.2 If you are installing the appliance in a new kitchen or have the opportunity to set the width between kitchen units, it is advisable to include an additional small gap each side of 3mm to assist with installation and prevent damage when moving the product.
- Page 33 Rear Clearances (including Combustible Rear Walls) Fig. 15.4 SPECIAL NOTE: Ensure that unprotected electric cabling 10 mm or plastic services do not pass within or on the outside of the wall behind or directly above the appliance. This type of material can age prematurely when exposed to continuous higher temperature.
-
Page 34: Electrical Connection
16. Electrical connection WARNING: This appliance must be earthed. The method of connection to the mains electricity supply must facilitate complete electrical isolation of the appliance, This appliance is designed for the voltage stated on by a multi-pole switch, having a contact separation of at least the rating plate, which is situated behind the plinth 3 mm on all poles. -
Page 35: Installation And Levelling
17. Installation and Levelling NOTE: Care must be taken not to trap mains cables (Fig. Fig. 17.1 17.1). When removing appliance from the pallet, the front stability feet can be raised with a spanner to allow appliance to be slid from transit pallet (Fig. 17.2). Slide cooker off transit pallet. -
Page 36: Circuit Diagrams
18. Circuit diagrams The Ranger NEON Neon Roast oven ROAST OVEN 600W 300W Elements ELEMENTS Baking oven HOTPLATE ELEMENT GRILL FAN Grill Fan Hotplate element 900W elements 300W 300W BAKING OVEN 1000W ELEMENT CONNECTOR BLOCK Plug and socket PLUG AND SOCKET... - Page 37 The Induction Hob Colour Code Black Blue Brown Green Violet Orange White Yellow Grey DESN 517960...
-
Page 38: Rayburn Warranty
19. Rayburn Warranty The fault occurred due to misuse, accidental damage or Thank you for choosing a RAYBURN cooker. We are sure that modification from manufacturer’s specification. you will be impressed with the performance of your new RAYBURN cooker and with the ongoing service you Please note that invoices for call out repair work carried will receive. - Page 40 For further advice or information contact your local Rayburn Specialist. With AGA Rangemaster’s policy of continuous product improvement, the Company reserves the right to change specifications and make modifications to the appliances described and illustrated at any time. Manufactured By...
Need help?
Do you have a question about the Ranger and is the answer not in the manual?
Questions and answers