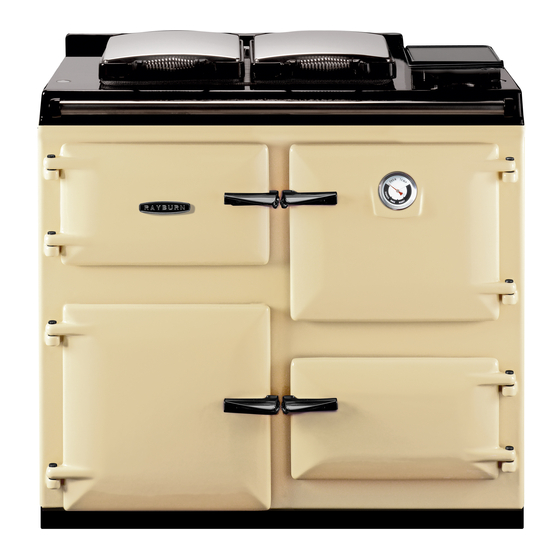
Summary of Contents for Rayburn 400K (P/F)
- Page 1 Users Instructions 400K (P/F) For use in GB and IE DESN 512548 A PLEASE READ THESE INSTRUCTIONS BEFORE USING THIS APPLIANCE raywarranty@aga-web.co.uk 06/15 EOPI 512465...
-
Page 2: Table Of Contents
CONTENTS SECTION PAGE INTRODUCTION FEATURES AND ACCESSORIES 4 - 5 INTRODUCTION TO TIMER USING THE AUTOMATIC COOKING FACILITY 7 - 10 USING THE MINUTE MINDER MAIN OVEN OPERATION COOKING WITH YOUR APPLIANCE COOKING CHART CLEANING AND CARE OF YOUR APPLIANCE SERVICING OR FAULT NOTE: SMOKE/SMELL EMITTED DURING INITIAL USAGE. -
Page 3: Introduction
Introduction Thank you for buying a Rayburn Appliance. To get the best from it, please read this leaflet and carefully follow the instructions before using your Rayburn for the first time. Consumer Protection As responsible manufacturers we take care to make sure that our products are designed and constructed to meet the required safety standards when properly installed and used. -
Page 4: Features And Accessories
Features/Accessories Doors Fig. 1 To open the doors. Twist the handle slightly to disengage the door catch from the locking spindle and pull the door open. Thermodial See Fig. 2 Fig. 1 The thermodial positioned on the main oven door is an approximate guide to the internal oven temperature. - Page 5 Mid-day or evening timing to suit meal times. Alternative third programme setting if needed. Note: When using the external programmer, the internal clock within the Rayburn should be in the manual mode. The minute timer can still be used.
-
Page 6: Introduction To Timer
Introduction to the Timer • Press and hold the button. Now press the [+] or [-] buttons to increase or decrease the time (Fig. 5). Holding the [+] or [-] buttons for more than 2 seconds will advance/decrease the set time quickly. Release the buttons to set the time of day. -
Page 7: Using The Automatic Cooking Facility
Using the Automatic Cooking Facility AUTOMATIC COOKING CONTROL This can be used to set an automatic cooking programme. It switches the oven on and off at the pre-set times. The maximum length of cooking programme which can be set is 23 hours and 59 minutes e.g. a delay time + cooking time = maximum 23 hours and 59 minutes. - Page 8 Using the Automatic Cooking Facility Fig. 11 DESN 517074 Fig. 14 DESN 517077 Now press and hold the button (Fig. 12) and then Set the oven to the required temperature. When cooking press the [+] button (or [-] button) until the required 'stop is finished [AUTO] will flash and the beeper will sound.
- Page 9 Using the Automatic Cooking Facility For an overview of the functions refer to table below. Symbol Function Notes Used with the [+] and [-] Sets the Minute Minder buttons Sets the duration/ Used with the [+] and [-] cook period buttons Sets the end/ Used with the [+] and [-]...
- Page 10 Using the Automatic Cooking Facility Using this facility on the Rayburn timer allows the user to select the amount of time the appliance is on and the finish/off time. HINTS ON THE USE OF THIS FACILITY The Rayburn should be COLD before starting any automatic cooking where there is a delay in the start time.
-
Page 11: Using The Minute Minder
Using the Minute Minder Minute Minder Press and hold the button (Fig. 16), and then press the [+] button (or {-] button) until the length of time you want is shown (Fig. 17). Fig. 16 DESN 517068 Fig. 17 DESN 517069 You can check the time remaining by pressing When the beeper sounds cancel it by pressing any button. -
Page 12: Main Oven Operation
When left on L setting the main oven will maintain a low idling temperature suitable for slow cooking . As the Rayburn is made of cast iron, the time for the appliance to heat up and cool down is longer than with a conventional oven. -
Page 13: Cooking With Your Appliance
The Rayburn Cookbook The cookbook supplied with your Rayburn is general to all Rayburns. When following the recipes consult these operating instructions to ascertain details relevant to your Rayburn. -
Page 14: Cooking Chart
30-35 mins YORKSHIRE PUDDING 2 or 3 25-35 mins SLOW/FAST ROASTING SEE RAYBURN Depending on Joint COOKBOOK FOR TIMES Shelf Positions are counted downwards ie top shelf is No. 1 position (See Fig. 3A) The positions are a guide only and can of course be altered... -
Page 15: Cleaning And Care Of Your Appliance
Look for cleaners carrying the VEA (Vitreous Enamel Association) approval logo as this indicates they can be used on the Rayburn. For stubborn deposits, gentle localised soaking, not flooding, is easier than rubbing and hot water and detergent will soften most burnt on stains in about 10 minutes. -
Page 16: Servicing Or Fault
Servicing or Fault BURNER RESET SEE FIG. 18 If a fault occurs on the burner then it automatically shuts down and the red button on the front plinth will be illuminated. This can be reset, after 1 minute by depressing the button. - Page 20 With AGA Rangemaster’s policy of continuous product improvement, the Company reserves the right to change specifications and make modifications to the appliance described at any time. Manufactured by AGA Rangemaster Station Road Ketley Telford Shropshire TF1 5AQ England www.rayburn-web.co.uk www.agacookshop.co.uk...


Need help?
Do you have a question about the 400K (P/F) and is the answer not in the manual?
Questions and answers