Table of Contents
Advertisement
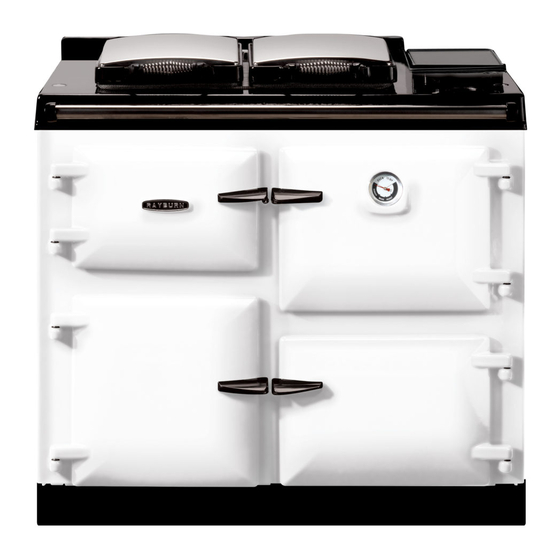
600K/700K
DESN 515618
DESN 516825
Servicing
nstructions
REMEMBER, when replacing a part on this appliance, use only spare parts that you can be assured conform to the
safety and performance specification that we require. Do not use reconditioned or copy parts that have not been clearly
authorised by AGA.
PLEASE READ THESE INSTRUCTIONS BEFORE SERVICING THIS APPLIANCE
For use in GB & IE
05/14A EINS 515877
Advertisement
Table of Contents

Subscribe to Our Youtube Channel
Related Manuals for Rayburn 600K


Summary of Contents for Rayburn 600K
- Page 1 600K/700K DESN 515618 DESN 516825 Servicing nstructions REMEMBER, when replacing a part on this appliance, use only spare parts that you can be assured conform to the safety and performance specification that we require. Do not use reconditioned or copy parts that have not been clearly authorised by AGA.
-
Page 2: Table Of Contents
REPLACEMENT OF PARTS ELECTRICAL COMPONENT ACCESS (ELECTRICAL CONTROLS) RE-ASSEMBLE CONTROL CIRCUIT - EXTERNAL FAULT FINDING RAYBURN 600 WIRING - SELF CONTAINED CONTROL RAYBURN 600 WIRING - SATRONIC BOXES BURNER DOES NOT START ERROR TABLE INFORMATION SYSTEM - COOKER BURNER 23-24... -
Page 3: Consumer Protection
Consumer Protection As responsible manufacturers we take care to make sure that our products are designed and constructed to meet the required safety standards when properly installed and used. IMPORTANT NOTICE: PLEASE READ THE ACCOMPANYING WARRANTY Any alteration that is not approved by AGA could invalidate the approval of the appliance, operation of the warranty and could affect your statutory rights. -
Page 4: Introduction
BURNER SERVICING OIL PUMP SERVICING - Cleaning of fuel line strainer. The Rayburn cannot be serviced whilst hot, so the oven RE-COMMISSIONING thermostat should be turned off on the evening before the REPLACEMENT PARTS service visit. -
Page 5: Burner Removal
BURNER ACCESS SEE FIG. 1 1. Open up the bottom burner access door. Remove door and put in a safe place. (Rayburn 600K only). 2. Remove 4 inner panel securing screws and remove panel. 3. Remove the 3 plinth securing screws and remove plinth. -
Page 6: Burner Removal
Burner Removal BURNER REMOVAL IMPORTANT: DURING BURNER REMOVAL CARE MUST BE TAKEN NOT TO DAMAGE THE CERAMIC FIBRE INSULATION. SEE FIGS 2 & 3 FLEXIHEAD 1. Using a 13mm spanner, unscrew top securing bolt and remove the horseshoe clamp. 2. Withdraw the burner head. BODY 1. -
Page 7: Cleaning
CLEANING SEE FIG. 4 & 4A 1. Remove the top oven door and place in a safe position. (Rayburn 600K only). 2. Remove side and base access doors (complete with gaskets) using hex. driver. 3. Thoroughly clean top, side and base flueways through access apertures with brush. -
Page 8: Burner Servicing
Burner Servicing COOKER BURNER INTRODUCTION SEE FIG. 5 To remove blast tube, slacken two grub screws, pull forward. Fig. 5 DESN 515765 BURNER NOZZLE REMOVAL SEE FIG. 6 1. Remove two socket head screws. 2. Remove head assembly complete. 3. Disconnect ignition leads. 4. -
Page 9: Photo Electric Cell (Pec) Cleaning
Burner Servicing PHOTO ELECTRIC CELL (PEC) CLEANING SEE FIG. 8 Withdraw Photo Electric Cell from the burner head. Clean PEC sensing end with a soft brush taking care not to scratch the light sensitive body. Re-insert PEC taking care to insert the correct way round. Should the cell show signs of distortion or cracking, replacement will be necessary. -
Page 10: Oil Pump Servicing
Oil Pump Servicing INTRODUCTION To carry out servicing on the oil pump. Turn off the oil line isolating valve near to the appliance. SEAL STRAINER COVER OIL PUMP STRAINER CLEANING SEE FIG. 10 1. A container must be put under the pump to catch any oil when starting to clean the oil pump strainer. -
Page 11: Re-Commissioning
Re-commissioning BLEED AIR FROM OIL SUPPLY SEE FIG. 15 Disconnect the flexible oil pipe line at the pump inlet, open the stop valve slowly and run off some of the oil into a receptacle to establish an air free supply to the pump. Re- make the connection oil tight and leave valve open. -
Page 12: Set Combustion Air And Check Smoke
Re-commissioning SET COMBUSTION AIR AND CHECK SMOKE SEE FIG. 13 & 13A Switch on cooker burner. After 15 minutes of the cooker burner running, lift up the RH insulating cover and remove the countersunk headed screw in the hotplate. Insert the sensing end of a portable indicator to check the CO (Carbon Dioxide) level. -
Page 13: Replacement Of Parts
Replacement of parts (Burner) FAN MOTOR SEE FIG. 14 Follow instructions in sections BURNER ACCESS, Steps 1-3 and BURNER REMOVAL. 1. Isolate electric supply. 2. Remove 3-pin plug. 3. Remove solenoid plug. 4. Disconnect oil pipe. 5. Undo 2 screws and remove snorkel. 6. -
Page 14: Ignitor
Replacement of parts (Burner) IGNITOR SEE FIG. 16 Follow instructions in sections BURNER ACCESS, Steps 1 to 3 and BURNER REMOVAL. 1. Remove both HT leads from ignitor. 2. Remove mains plug from ignitor. 3. Remove earth screw. 4. Remove 2 ignitor securing screws. 5. -
Page 15: Control Box
Replacement of parts (Burner) CONTROL BOX SEE FIG. 18 Follow instructions in section BURNER ACCESS, Steps 1 to 3. 1. Undo centre fixing screw. 2. Gently pull control box away from base. 3. Fit new control box, re-assemble in reverse order. Fig. -
Page 16: Pump Access
Replacement of parts (Burner) PUMP ACCESS SEE FIG. 20 Follow instructions in section BURNER ACCESS, Steps 1 to 3 and BURNER REMOVAL. 1. Isolate fuel supply. 2. Disconnect flexible hose (This must be replaced annually). 3. Remove solenoid plug. 4. Remove feed pipe. 5. -
Page 17: Replacement Of Parts (Electrical Controls)
2. Close facia controls chassis and secure with the 2 screws. 3. Refit the outer panel in position and secure with the 2 screws. 4. Replace the thermostat knob. 5. Replace the controls door, (Rayburn 600K only). CONTROL CIRCUIT-EXTERNAL SEE FIG. 22 Fig. 22 DESN 515893... - Page 18 Replacement of parts (Electrical controls) Fig. 23 DESN 515891...
-
Page 19: Fault Finding
Fault Finding Rayburn 600/700K Wiring Diagram 111MB self contained control Fig. 24... - Page 20 Fault Finding RAYBURN 600/700K COOKER ONLY WIRING DIAGRAM 111MB FOR INDIVIDUAL SATRONIC BOXES Fig. 25...
-
Page 21: Burner Does Not Start
1. Isolate the electrical power supply. 2. Open up the bottom burner access door. Remove door and put in a safe place, (Rayburn 600K only). 3. Unscrew the 4 screws holding the inner panel in place and remove panel. -
Page 22: Error Table
Fault Finding Error Table In the next tables a description of the different errors is given. Errors can be divided into two groups. Blocking errors will disappear when error is gone, and non-volatile locking errors can only be reset by the reset button. A blocking error is indicated with an ‘E’... - Page 23 Fault Finding Cooker Burner (Control Box Type - DKO 970) Information system The information system communicates with the outside world using a LED (the used Flash-Code is similar to the Morse Code). The messages are optically transmitted by flashing appropriately a LED. Using an (optional) additional terminal the messages can be recorded and displayed in easily readable form.
- Page 24 Fault Finding Cooker Burner (Control Box Type - DKO 970) In case of failure the LED is permanently illuminated. Every 10 seconds the illumination is interrupted by a flash code which indicates the cause of the error. Therefore the following sequence is performed which is repeated as long as the unit is not reset.
-
Page 25: Control Box Type Dko
Fault Finding Cooker Burner (Control Box Type DKO 970N) - Information system The information system is microprocessor based and reports on all aspects of burner control box operation and flame supervision. It informs continuously about the actual programming sequence the unit is just performing. Besides monitoring of the programming sequence it also allows to identify errors during start-up of operation without any additional testing devices. - Page 26 Fault Finding Fig. 27A DESN 516838...
- Page 27 Fault Finding...
- Page 28 Fault Finding HIGH SMOKE NUMBERS INCORRECT INCORRECT INTERNAL COMPONENTS NOZZLE FAULT AIR INTAKE OIL PRESSURE COMBUSTION INSULATION USED ON BLOCKED SETTINGS INCORRECT PANELS COMBUSTION REPLACE INCORRECTLY RE-ADJUST ADJUST TO HEAD CHECK AIR POSITIONED NOZZLE RECOMMENDED SEE SERVICING INLET TO INSTALLATION SETTINGS INSTRUCTIONS FAULTY...
- Page 32 With AGA Rangemaster’s policy of continuous product improvement, the Company reserves the right to change specifications and make modifications to the appliance described at any time. Manufactured by AGA Rangemaster Station Road Ketley Telford Shropshire TF1 5AQ England Tel.: 0845 815 2020 www.rayburn-web.co.uk www.agacookshop.co.uk www.agaliving.com...
Need help?
Do you have a question about the 600K and is the answer not in the manual?
Questions and answers