Advertisement
Quick Links
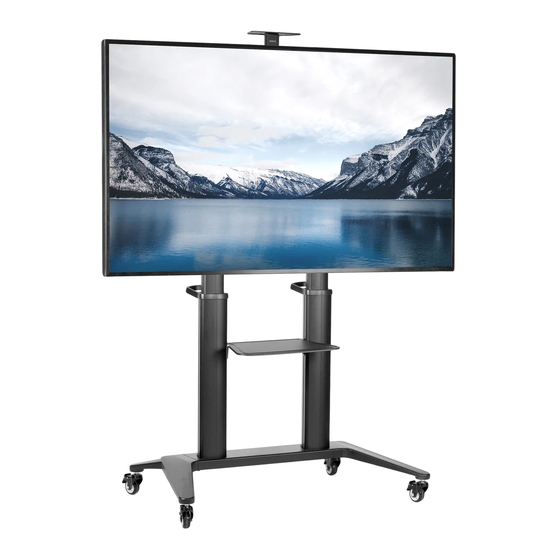
Aluminum Mobile Large Screen TV Cart
Instruction Manual
SKU: STAND-TV120B
Scan the QR code with your mobile device or follow the link
for helpful videos and specifications related to this product.
https://vivo-us.com/products/stand-tv120b
GET IN TOUCH | Monday-Friday from 7:00am-7:00pm CST
help@vivo-us.com
www.vivo-us.com
Chat live with an agent!
309-278-5303
Advertisement

Subscribe to Our Youtube Channel
Related Manuals for Vivo STAND-TV120B


Summary of Contents for Vivo STAND-TV120B
- Page 1 Aluminum Mobile Large Screen TV Cart Instruction Manual SKU: STAND-TV120B Scan the QR code with your mobile device or follow the link for helpful videos and specifications related to this product. https://vivo-us.com/products/stand-tv120b GET IN TOUCH | Monday-Friday from 7:00am-7:00pm CST help@vivo-us.com...
-
Page 2: Package Contents
WARNING! If you do not understand these directions, or if you have any doubts about the safety of the installation, please call a qualified technician. Check carefully to make sure there are no missing or defective parts. Improper installation may cause damage or serious injury. -
Page 3: Tools Needed
DO NOT EXCEED WEIGHT CAPACITY. TOOLS NEEDED Failure to do so may result in serious injury. 308lbs 11lbs 11lbs (140kg) (5kg) Phillips (5kg) Screwdriver CAMERA SHELF MEDIA SHELF ASSEMBLY STEPS STEP 1 Attach Left Legs (A) and Right Leg (B) to Base (C) using M8x20mm Screws (S-C) and 6mm Allen Wrench (T-B) as shown in the figure below. - Page 4 STEP 2 Attach Lower Columns (E) to the assembled base using M8x80mm Screws (S-B) with Washers (S-A) and 6mm Allen Wrench (T-B). Assemble Upper Columns (F) to Lower Columns (E) using M8x20mm Screws (S-C) and 6mm Allen Wrench (T-B) . Then slide the Handles (G) over Upper Columns (F) as shown below.
- Page 5 STEP 3 Loosen the 8 screws shown below on Mounting Plate (H) using 5mm Allen Wrench (T-A). Then slide Mounting Plate (H) down onto Upper Columns (F) and retighten the 8 Screws. Note: There is a gap between the brackets on Mounting Plate (H) and the top of the plate. This gap should be on top when installed.
- Page 6 STEP 4 Press on Top Covers (O) into Upper Columns (F) and End Caps (N) onto Mounting Plate (H) as shown below. STEP 5 Loosen the two screws on both of the upright brackets on Media Shelf (I) using 5mm Allen Wrench (T-A).
- Page 7 STEP 6 Assemble Left TV Bracket (J) and Right TV Bracket (K) to the back of the television using Screws (M-A through M-E) with Square Washers (M-F) and Spacer (M-G, M-H).
- Page 8 STEP 7 Hang the TV with Left TV Bracket (J) and Right TV Bracket (K) onto Mounting Plate (H). Secure it by tightening the security screw on the bottom of the TV brackets using a Phillips screwdriver.
- Page 9 STEP 8 Attach Camera Shelf (L) to Camera Shelf Support (M) using M5x8mm Screws (S-D) and a Phillips screwdriver. Then mount Shelf Support (M) at the desired height on Mounting Plate (H) using M8x12mm Screws (S-E) with Spacer (S-F) and 5mm Allen Wrench (T-A), making sure the spacer goes between Camera Shelf Support (M) and Mounting Plate (H) in the bottom hole as shown below.
- Page 10 STEP 9 Route cables through the provided slots in the columns and attach the Cable Covers (P) to hold them in place. Store the Allen Wrenches (T-A, T-B) in the holes in Handles (G).
- Page 11 STEP 10 NOTE: Height marking represents the distance from the floor to the center of the brackets (this includes the casters).
- Page 12 : 1HR 8M (within office hrs) - 23% within < 15m - 38% within < 30m - 61% within < 1hr - 83% within < 2hr - 92% within < 3hr FOR MORE VIVO PRODUCTS, CHECK OUT OUR WEBSITE AT: www.vivo-us.com...
Need help?
Do you have a question about the STAND-TV120B and is the answer not in the manual?
Questions and answers