Table of Contents
Advertisement
Quick Links
INSTRUCTIONS
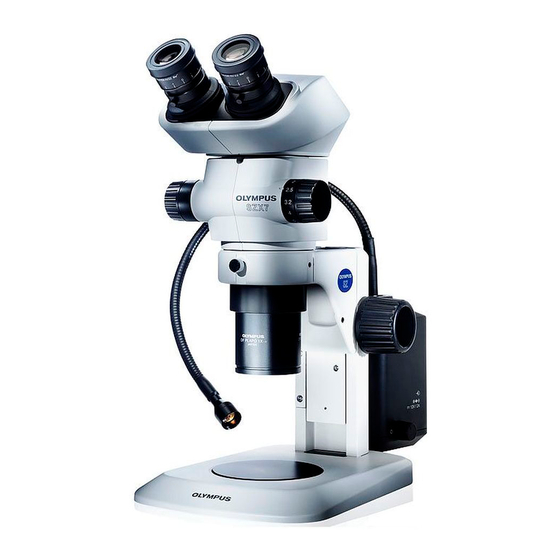
SZX7
Stereomicroscope system
This instruction manual is for the Olympus stereomicroscope system. To ensure the safety,
Optical Microscope and Accessory
obtain optimum performance and to familiarize yourself fully with the use of this microscope, we
recommend that you study this manual thoroughly before operating the microscope.
Retain this instruction manual in an easily accessible place near the work desk for future reference.
For details of products included in the configuration of this system, see "1 Nomenclature" (P. 3)
and "9 Optional modules" (P. 19).
Downloaded from
ManualsNet.com
search engine
Advertisement
Table of Contents

Related Manuals for Olympus SZX7


Summary of Contents for Olympus SZX7
- Page 1 INSTRUCTIONS SZX7 Stereomicroscope system This instruction manual is for the Olympus stereomicroscope system. To ensure the safety, Optical Microscope and Accessory obtain optimum performance and to familiarize yourself fully with the use of this microscope, we recommend that you study this manual thoroughly before operating the microscope.
- Page 2 Downloaded from ManualsNet.com search engine...
-
Page 3: Table Of Contents
SZX7 Contents Correct assembly and adjustments are critical for the microscope to manifest its full performance. If you are going to assemble the microscope by yourself, please read “8 Assembly” (P. 16). For the assemblies of the modules for which instruction manuals are available, refer to their instruction manuals. - Page 4 5 Troubleshooting ............................13 6 Specifications ............................14 7 Optical performance ........................15 8 Assembly ..............................16 8-1 Assembly diagram ............................16 8-2 Detailed assembly procedures ......................17 9 Optional modules ..........................19 9-1 Eye point adjuster SZX-EPA ........................19 9-2 AS unit SZX-AS ..............................19 9-3 BX stage adapter type 1 SZX-STAD1.................... 20 9-4 Stage adapter type 1 SZH-STAD1 ....................
-
Page 5: Important
SZX7 Important The SZX7 stereomicroscope is provided with the ESD (Electro-Static Discharge) protection specifications. It is provided with electroconductive coating in the external finish to reduce the surface resistance and grounding lead wires in their standard stand or system to eliminate static electricity from them. - Page 6 Maintenance and storage 1. To clean the lenses and other glass components, simply blow dirty away using a commercially available blower and wipe gently using a piece of cleaning paper (or clean gauze). If a lens is stained with fingerprints or oil smudges, wipe it gauze slightly moistened with commercially available absolute alcohol.
-
Page 7: Nomenclature
The microscope can also be mounted on the SZ2-STU1/STU2/STU3 large stand as well as on the SZX2-ST SZX standard stand by using the SZ2-STB1/SZ2-STS focusing arm. Olympus classifies SZX-ZB7 as an optical microscope and other units as optical microscope accessories. Downloaded from ManualsNet.com... -
Page 8: Controls
Controls Eye shades (P.8) Zoom magnification indication (P.10) Indicates 0.8, 1, 1.25, 1.6, 2, 2.5, 3.2, 4, 5 and 5.6 Click stop ON-OFF screw (P.10) Zoom adjustment knobs (P.7) Zoom adjustment knobs (P.7) 0.8X to 5.6X 0.8X to 5.6X Eyepiece clamping knobs Focus adjustment knob (P.6) Focus adjustment knob (P.6) Stroke: 120mm... -
Page 9: Observation Procedure
SZX7 Observation procedure If you have not assembled the microscope yet, please read “8 Assembly” (P. 16) (page 16 to 18). 3-1 Reparation Ref. Page 1. Confirm the mounting, particularly that of the observation tube............................Page 16 to 18 2. -
Page 10: Operation
Operation 4-1 Stand Using the stage When reflected light illumination is used, the stage plate can be placed either the white or black surface facing up depending on the specimen. However, when the ESD performance is required, always use the black surface of the stage plate. When transmitted light illumination is used, use the transparent glass stage plate (SP-C). -
Page 11: Adjusting The Diopter (Zoom Confocality Adjustment)
SZX7 Adjusting the diopter (zoom confocality adjustment) Confirm that the eyepiece clamping knobs a are NOTE tightened firmly before proceeding to the adjustment. Eyepieces without eyepiece micrometer disk Turn the diopter adjustment rings b of the left and right eyepieces to positions “0”. -
Page 12: Using The Eye Shades
Diopter scale of the 10X eyepieces The valid range of the diopter scale is between -8 and +5 but a slight margin is added to it. Therefore, the diopter value may exceed +5 or -8 when it is adjusted to the maximum. In this case, whether the diopter value is over +8 or under -5 can be identified by the length of the eyepiece. -
Page 13: Selecting The Light Path (Szx2-Tr30)
SZX7 WHSZ30X-H Rotate the disk-mounting ring c of the eyepiece counterclockwise Indication to remove. engraved surface Rotate the push ring d of the eyepiece micrometer disk counterclockwise to remove. Prepare an eyepiece micrometer disk e (24 mm dia. x 1.5 mm thick), remove dust and dirt from its surface, place it on the disk-mounting ring c with the engraving facing downward, and fix it with the push ring d . -
Page 14: Microscope Body
An objective other than the 1X model is provided with a magnification indication ring. Use the ring having indication “SZX7” with the SZX7 microscope. Widen the magnification indication ring b and fit into the deep part of the left zoom adjustment knob c so that the indicated figures can be read from the front of the microscope. -
Page 15: Using Auxiliary Sleeve Sz2-Et (Option)
SZX7 Using auxiliary sleeve SZ2-ET (option) As the 0.5X objective has a long working distance, it cannot be used in combination with the standard stand unless the auxiliary sleeve is used. When the auxiliary sleeve is used, the microscope NOTE becomes tall and unstable. -
Page 16: Camera Observation And Photomicrography
4-4 Camera observation and photomicrography When camera observation or photomicrography is required, use the SZX2-TR30/SZX2-TTR trinocular tube. A digital camera unit can be mounted on the trinocular tubes by means of the camera adapter and/or camera mount adapter *. * The camera mount adapter is not necessary if a camera adapter equipped with a camera mount is used. For details, please also read the instruction manuals for the camera adapter and digital camera. -
Page 17: Troubleshooting
Under certain conditions, performance of the microscope may be adversely affected by factors other than defects. If problems occur, please review the following list and take remedial action as needed. If you cannot solve the problem after checking the entire list, please contact Olympus. Problem... -
Page 18: Specifications
Specifications Item Item specifications 1. Zoom microscope body Zoom magnification variation: Left/right optical axis parallel method. · SZX-ZB7 Zoom drive: Horizontal knob system. Click stop for each zoom magnification: ON-OFF switching possible. Zoom ratio values: 7 values (0.8X to 5.6X). Zoom magnification indication: 0.8, 1, 1.25, 1.6, 2, 2.5, 3.2, 4, 5, 5.6 Objective mounting: Screw mounting into thread. -
Page 19: Optical Performance
SZX7 Optical performance Eyepieces WHSZ10X/10X-H WHSZ15X-H WHSZ20X/20X-H WHSZ30X-H Objective Total Actual field Total Actual field Total Actual field Total Actual field magnification (mm) magnification (mm) magnification (mm) magnification (mm) 4X – 28X 55 – 7.8 6X – 42X 40 – 5.7 8X –... -
Page 20: Assembly
Assembly 8-1 Assembly diagram The diagram below shows the sequence of assembly of the various modules. The numbers indicate the order of assembly. Assembly steps enclosed in will be detailed on the subsequent pages. When assembling the microscope, make sure that all parts are free of dust and dirt, and avoid NOTE scratching any parts or touching glass surfaces. -
Page 21: Detailed Assembly Procedures
SZX7 8-2 Detailed assembly procedures Installing the microscope body Loosen the body clamping knob a and insert the microscope body b gently into the mounting hole of the standard stand. The body clamping knob a can be attached to any of the accessory mounting screw holes c around the mounting hole. - Page 22 Mounting the stage plate Mounting While applying the stage plate a to the stage plate holder spring b , fit the stage plate into the stage plate mounting hole c . The stage plate has the milky white and black surfaces. Select the side facing up according to the specimen.
-
Page 23: Optional Modules
SZX7 Optional modules 9-1 Eye point adjuster SZX-EPA External view and nomenclature Observation tube mount Observation tube clamping screw Installation Remove the observation tube a using the Allen screwdriver provided with the SZX microscope body. Attach the eye point adjuster b to the position where the observation tube has been attached. -
Page 24: Bx Stage Adapter Type 1 Szx-Stad1
Using the aperture iris diaphragm Adjusting the aperture iris diaphragm makes it possible to improve the contrast of the observation image and increase the focal depth. However, the resolution is degraded when the aperture iris diaphragm is stopped down. Slide the aperture iris diaphragm lever. Slide toward the left to open the aperture iris diaphragm and toward the right to close it. - Page 25 SZX7 Assembly Use the tools shown in the table below. Tool Description Allen wrench (for M4 screw) Provided with SZX-STAD1 Hexagon socket screw (M4) Provided with SZX-STAD1 Placing the notch b on the back side of the base, and secure the screws (2 pcs.) using the Allen wrench to attach SZH-STAD1 a to...
-
Page 26: Stage Adapter Type 1 Szh-Stad1
9-4 Stage adapter type 1 SZH-STAD1 The SZH-STAD1 is an adapter providing the similar function to the BX stage adapter type 1 (SZX-STAD1). The difference is that the stage usable for the SZH-STAD1 is the BH2-SH horizontal knob stage. Assembly STAD mount for ILLT SZX2-STADM is necessary for using the SZX2-ILLTQ/ILLTS LED transmitted light illumination base. -
Page 27: Gliding Stage Szh-Sg
SZX7 9-5 Gliding stage SZH-SG External view and nomenclature Stage plate Finger hook Seat Gliding stage Gliding stage Illumination field diameter: 40 mm Moving range diameter: 40 mm Installation · Be sure to clean the sliding surface if dirt or metallic power is attached on them. -
Page 28: Cup Stage Szh-Sc
9-6 Cup stage SZH-SC External view and nomenclature The SZH-SC can be used only with reflected light illumination. It cannot be used with transmitted light NOTE illumination. Tube Cup stage Finger hook Tilting limit angle: 30° Stage plate* Specimen holder Seat Specimen holder mount holes Same size as the stage plate. - Page 29 SZX7 Operation Place a specimen on the stage plate, hold the cup stage by the edge, and tilt the cup stage slowly. If the specimen slips on the stage plate, hold the specimen with the provided specimen holder. To fix a container such as a petri dish, insert the provided tube into the specimen holder to fix the container by pinching.
- Page 30 Memo Downloaded from ManualsNet.com search engine...
- Page 31 Downloaded from ManualsNet.com search engine...
- Page 32 Manufactured by Shinjuku Monolith, 2-3-1 Nishi-Shinjuku, Shinjuku-ku, Tokyo 163-0914, Japan Distributed by AX6631 09 Issued in March, 2019 Downloaded from ManualsNet.com search engine...
Need help?
Do you have a question about the SZX7 and is the answer not in the manual?
Questions and answers