Olympus SZX16 Instructions Manual
Reflected fluorescence system
Hide thumbs
Also See for SZX16:
- Overview (24 pages) ,
- Instructions manual (36 pages) ,
- Instructions manual (40 pages)
Table of Contents
Advertisement
Main modules described in this manual
SZX2-RFA16
Fluorescence filter units
SZX2-CCV
U-LH100HG
U-RFL-T
This instruction manual is for the Olympus SZX2 Reflected Fluorescence System. To ensure safety, obtain
optimum performance, familiarize yourself fully with the use of this equipment, we recommend that you
study this manual thoroughly before operating the microscope.
Retain this instruction manual in an easily accessible place near the work desk for future reference.
INSTRUCTIONS
SZX16 REFLECTED
FLUORESCENCE SYSTEM
A X 7 4 7 6
Advertisement
Table of Contents

Related Manuals for Olympus SZX16


Summary of Contents for Olympus SZX16
- Page 1 SZX16 REFLECTED FLUORESCENCE SYSTEM This instruction manual is for the Olympus SZX2 Reflected Fluorescence System. To ensure safety, obtain optimum performance, familiarize yourself fully with the use of this equipment, we recommend that you study this manual thoroughly before operating the microscope.
- Page 2 Compliance This device complies with the requirements of both directive 2004/108/EC concerning electromagnetic compatibility and directive 2006/95/EC concerning low voltage. The CE marking indicates compliance with the above directives.
-
Page 3: Table Of Contents
SZX16 REFLECTED FLUORESCENCE SYSTEM CONTENTS Correct assembly and adjustments are indispensable for the microscope to manifest its full performance. If you want to assemble the microscope by yourself, see Chapter 5, “ASSEMBLY” (pages 8 to 12) first. IMPORTANT — Be sure to read this section for safe use of the equipment. —... - Page 4 This equipment can provide the highest level of brightness required in macro fluorescence observation using fluorescence filter units (up to 5 units can be mounted) when it is combined with the SZX2-ZB16 zoom microscope body, an objective for the SZX16 and the lamp housing for 100 W mercury burner. SAFETY PRECAUTIONS 1.
- Page 5 SZX16 REFLECTED FLUORESCENCE SYSTEM Getting Ready 1. This manual pertains only to the reflected fluorescence system. Before using this system together with the SZX16 microscope and associated options, make sure that you have carefully read and understood their manuals, and understand how the microscopic system should be used together.
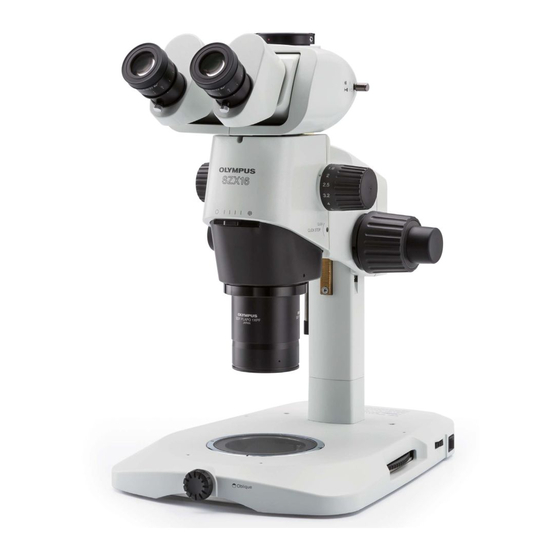
- Page 6 NOMENCLATURE }If you have not yet completed the assembly of the microscope, go to Chapter 5, “ASSEMBLY” (pages 8 to 12) first. Lamp Housing U-LH100HG U-LH100HGAPO Reflected Fluorescence Illuminator SZX2-RFA16 ² ³ Zoom Microscope Body SZX2-ZB16 Antiglare Plate SZX2-CCV Objective SDFPLFL0.3X SDFPLAPO0.5XPF SDFPLAPO0.8X...
- Page 7 SZX16 REFLECTED FLUORESCENCE SYSTEM CONTROLS Exciter balancer insertion slot (P. 17) Collector lens focusing knob (P. 14) Excitation filter slider (P. 6 & 16) Mirror focusing knob (P. 15) (Rear panel) Burner centering knobs (P. 14) Shutter slider (P. 5) Filter turret (P.
-
Page 8: Observation
Always use a zoom magnification of 1X or more. The peripheral part of the illumination field will be CAUTION shaded under lower magnifications. For the operating methods of the controls on the zoom microscope body, refer to the instruction manual for the SZX16. Fluorescence Observation ³ (Figs. 1 to 3) 1. -
Page 9: Specifications
SZX16 REFLECTED FLUORESCENCE SYSTEM SPECIFICATIONS Reflected Light Fluorescence Illuminator SZX2-RFA16 Illumination system Zoom-interlocked, near-vertical fluorescence illumination. Independent zooming of the illumination system is possible by releasing the interlock. Filter turret 5-position turret. Up to 5 sets of excitation/barrier filter sliders can be mounted. - Page 10 3. SZX2-FCFPHQ 4. SZX2-FGFP 5. SZX2-FGFPA 6. SZX2-FGFPHQ 7. SZX2-FYFPHQ 8. SZX2-FRFP1 BA515-560 BP490-500 9. SZX2-FRFP2...
-
Page 11: Assembly
SZX16 REFLECTED FLUORESCENCE SYSTEM ASSEMBLY }Have your Olympus dealer or representative assembly the system. During assembly take special care not to hit the illuminator head of the reflected fluorescence illuminator against anything because the prism is exposed in this part. - Page 12 5-2 Detailed Assembly Procedure Attaching the Reflected (Fig. 5) Fluorescence Illuminator 1. Fully loosen the focusing assembly clamping knob @ of the vertical fluorescence illuminator and, holding the illuminator with both hands, insert it gently and straight into the pillar support sleeve ² by aligning the clamping knob with the mounting hole on the pillar support sleeve.
- Page 13 SZX16 REFLECTED FLUORESCENCE SYSTEM Mounting the Zoom Microscope Body (Figs. 8 & 9) ² 1. Using the Allen screwdriver, loosen the clamping screws ² of the microscope mount adapter @ and pull out the adapter in the direction of the arrow. (Fig. 8) 2.
- Page 14 Attaching the Antiglare Plate ² (Fig. 10) ³ }Before starting fluorescence observation, be sure to attach the optional SZX2-CCV antiglare plate. This is particularly important when using the U-excitation (SZX2-FUV) in order to protect your eyes from UV-rays. 1. Loosen the antiglare plate clamping knob @ and fit the pin ³ of the antiglare plate into the positioning hole on the left side of the microscope body ².
- Page 15 ³ lower side. # Be sure to use the USH-103OL (OLYMPUS) or HBO103W/2 (OSRAM). To prevent burner cracking due to glass distortion caused by stain, be careful not to stain the burner with fingerprints or dirt. If it is contaminated, clean by wiping gently with a piece of gauze moistened with absolute alcohol.
-
Page 16: Adjustments, General
ADJUSTMENTS, GENERAL Centering the Mercury Burner Turning On the Power Supply Unit Set the main switch to “ I ” (ON). Between 5 and 10 minutes are required for the arc to stabilize after the burner is ignited. }Discharge-type mercury burners may not ignite the first time the power is turned on due to its characteristics. If the burner does not ignite, set the main switch to “... - Page 17 SZX16 REFLECTED FLUORESCENCE SYSTEM 4. Rotate the collector lens focusing knob 6 to project the arc image on the stage plate. (A) If the arc image is not projected, adjust the burner centering knobs 7. 5. Rotate the burner centering knobs 7 to move the arc images on the 45°...
-
Page 18: Mounting An Nd Filter
Precise Centering of the Mirror }The position of the mirror has been adjusted and locked before shipment. Only if you want more precise adjustment of the mirror position, proceed to the following steps immediately after the procedure in the previous paragraphs. -
Page 19: Using The Dummy Filters
SZX16 REFLECTED FLUORESCENCE SYSTEM Using the Dummy Filters }Mounting a dummy filter in a dummy filter slider allows it to be used in fluorescence observation. When using UV rays as the excitation light, select a combination that makes it possible to cut the UV rays on the barrier side. -
Page 20: Using The Exciter Balancer
Using the Exciter Balancer U-EXBABG/EXBAUB/EXBAUG }When observing fluorescence generated with U/B/G multiple excitation using double-dye fluorescence excitation and a barrier filter, the exciter balancer can be used to adjust the balance between the intensities of the excitation light of the fluorescent dyes. - Page 21 SZX16 REFLECTED FLUORESCENCE SYSTEM 3. Push in the engagement adjustment lever of the exciter balancer to engage the filter in the light path. }The angle of the engagement adjustment lever can be adjusted in the following range, only when the lever is pushed in.
-
Page 22: Proper Selection Of The Power Supply Cord
If no power supply cord is provided, please select the proper power supply cord for the equipment by referring to “ Specifications ” and “ Certified Cord ” below: CAUTION: In case you use a non-approved power supply cord for Olympus products, Olympus can no longer warrant the electrical safety of the equipment. - Page 23 SZX16 REFLECTED FLUORESCENCE SYSTEM Table 2 HAR Flexible Cord APPROVAL ORGANIZATIONS AND CORDAGE HARMONIZATION MARKING METHODS Alternative Marking Utilizing Printed or Embossed Harmoniza- Black-Red-Yellow Thread (Length tion Marking (May be located on Approval Organization of color section in mm) jacket or insulation of internal wir-...
-
Page 24: Lamp Housing Inspection Sheet
{If there is any ( ) mark noted, immediately stop use of the product, and contact Olympus for detailed inspections or replace the lamp housing. {If you detect an abnormality other than that listed below or with other Olympus product, also stop the use of the product and contact Olympus for detailed inspections. - Page 25 MEMO...
- Page 26 MEMO...
- Page 28 Manufactured by Shinjuku Monolith, 2-3-1 Nishi-Shinjuku, Shinjuku-ku, Tokyo 163-0914, Japan Distributed by 48 Woerd Avenue Waltham, MA 02453, U.S.A. 8F Olympus Tower, 446 Bongeunsa-ro, Gangnam-gu, Seoul, Korea 135-509 AX7476 08...
Need help?
Do you have a question about the SZX16 and is the answer not in the manual?
Questions and answers