
Related Manuals for 2N C-CURE 9000


Summary of Contents for 2N C-CURE 9000
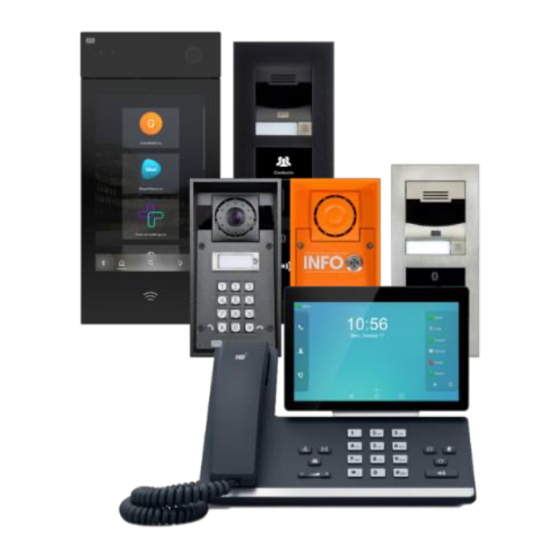
- Page 1 Configuration & User Guide 2N Intercoms Integration for C•CURE 9000 Security Classification: Protected Version: Revision: Rev1 Uncontrolled Control: when printed Date 07/03/2022...
-
Page 2: Table Of Contents
Configuration & User Manual: 2N IP Intercoms and CCURE 9000 Table of Contents PART 1 PREFACE INDING NFORMATION 1.1.1 C•CURE 9000 M ANUALS 1.1.2 O NLINE 1.1.3 C ONVENTIONS PART 2 INTRODUCTION 2.1 2N I NTERCOMS NTEGRATION VERVIEW 2.2 2N I... - Page 3 Configuration & User Manual: 2N IP Intercoms and CCURE 9000 6.5.1 T 2N I ELETE A NTERCOM BJECT 6.6 G ENERAL 6.6.1 G ENERAL 6.6.2 T RIGGERS 6.6.3 T REATE A USTOM VENT 6.6.4 C 2N E ONFIGURING VENT RIGGERS 6.7 S...
-
Page 4: Part 1 Preface
Configuration & User Manual: 2N IP Intercoms and CCURE 9000 Part 1 Preface The 2N Intercoms Integration user manual is for new and experienced security system users who want to learn to use this product for the C•CURE 9000 Security Management System. 1.1 Finding More Information You can access C•CURE 9000 manuals and online Help for more information about C•CURE 9000 on the... -
Page 5: Conventions
Configuration & User Manual: 2N IP Intercoms and CCURE 9000 1.1.3 Conventions This manual uses the following text formats and symbols. Convention Meaning Bold This font indicates screen elements, and also indicates when you should take direct action in a procedure. Bold font describes one of the following items: A command or character to type, or •... -
Page 6: Part 2 Introduction
The integration driver acts as an interface between 2N Intercoms and the C•CURE access control system. The solution has one main data flow component: Outbound JSON data (driver): The driver monitors 2N intercoms through the use of their JSON REST API. This allows the driver to retrieve the status of the devices and issue commands. -
Page 7: Intercoms Integration Components
2N Intercoms – This represents the interface from C•CURE to 2N Intercoms where all • connection parameters are set. 2.3 2N Intercoms Integration Utilization 2.3.1 Terminology The table below lists some terms and definitions related to the C•CURE 9000 2N Intercoms Integration Product. Term Definition 2N Intercom The configuration server object in C•CURE that represents the driver... -
Page 8: Licensing The 2N Intercoms Integration Product
This integration has two licensing requirements: 2.6.1 C•CURE License The 2N Intercoms Integration product is a licensed option for a C•CURE 9000 Server. You must purchase this license from Software House support to use the software. In an Enterprise architecture, the MAS and any SAS you wish to run the integration on must be licensed. -
Page 9: Part 3 Installation
This chapter explains how to install and uninstall the 2N Intercoms Integration. 3.1 2N Intercoms Integration driver installation Copy 2N-Intercoms-x.x.x.x.exe file to the local disk on the target C•CURE machine. The same installation file may be run on standalone, MAS and SAS C•CURE servers and C•CURE clients. - Page 10 Configuration & User Manual: 2N IP Intercoms and CCURE 9000 Copy the Hardware Identifier using the Copy button and contact 2N Distributor to receive your license. Once you have received your license file, copy it onto the server and click Browse to the file path.
- Page 11 Configuration & User Manual: 2N IP Intercoms and CCURE 9000 The Ready to Install screen appears. 10. Click Install to start the installation. 11. The Installation Wizard Completed dialog box appears when the installation is complete. Click Finish and then Close to complete the installation.
-
Page 12: Erver Services
"Running", start the 2N Intercoms Driver service. When the CrossFire Framework Service, CrossFire Server and Component Framework Service and 2N Driver service display a Status of "Running", you can configure 2N Driver Service objects in the C•CURE 9000. You only have to enable these services once. -
Page 13: Uninstalling The 2N Intercoms Integration
Configuration & User Manual: 2N IP Intercoms and CCURE 9000 3.3 Uninstalling the 2N Intercoms Integration This section describes how to uninstall the 2N Intercoms integration from the Server computer and Client computers in your security system. The Uninstall process removes all software components that were installed on the computer by the 2N Intercoms Integration installation. -
Page 14: Part 4 C•Cure 9000 Enterprise Architecture Consideration
You cannot create a 2N Intercom object on the MAS server partition. • You cannot create a 2N Intercom object on the Global partition of a MAS or a SAS. • An Intercom may only be created locally on a SAS which has the integration installed. This will •... -
Page 15: Mas And Sas Actions
SAS with the full integration installed. 4.5 MAS and SAS Actions Once the 2N Intercoms are configured on the SAS and map objects configured as required, the integration operates in a similar way to a standalone server in an Enterprise Architecture in C•CURE. -
Page 16: Part 5 C•Cure Hardware Tree
5.1 Hardware Tree Pane The Hardware Tree displays a tree structure that shows how you have configured the integration objects on the C•CURE 9000 system. For the 2N Intercoms integration, the 2N Intercoms group, and the servers appear in the tree. -
Page 17: Part 6 2N Intercoms Configuration
2N Integration. Auto-discovery will occur each time the driver is restarted. Any 2N intercoms discovered on the network will appear in the first folder of the C•CURE Hardware tree (this is typically Company Name, but may be edited to re- name). -
Page 18: Creating A 2N Intercom Object
If the installation is carried out in an Enterprise environment, please refer to the Post- Installation in an Enterprise Environment section using General tab definitions table for reference. In the Hardware Tree of the Administration Workstation, right click the 2N Intercoms folder and then right click on 2N Intercoms icon. Select New. -
Page 19: Deleting A 2N Intercom Object
6.5 Deleting a 2N Intercom Object This section describes how to delete a 2N Intercom Object. Please be advised that deleting a 2N Intercom object won’t affect linked objects such as C•CURE events and C•CURE journal messages. Even though a 2N Intercom object is not present, C•CURE objects remain in place allowing historical data and events to be... -
Page 20: General Tab
Configuration & User Manual: 2N IP Intercoms and CCURE 9000 6.6 General Tab The General Tab enables the user to view and edit basic information about the 2N Intercom server object. COPYRIGHT © 2022 2N Telekomunikace a.s. All rights reserved... -
Page 21: General Tab
Configuration & User Manual: 2N IP Intercoms and CCURE 9000 6.6.1 General Tab The following table provides the fields and button definitions on the General Tab: Field Details Use SIP Proxy Check this checkbox if you wish to use SIP protocol for the intercom –... -
Page 22: Triggers Tab
Configuration & User Manual: 2N IP Intercoms and CCURE 9000 6.6.2 Triggers Tab The Triggers tab is used to configure actions generated in 2N Intercoms to trigger events in C•CURE. Events may be configured in C•CURE for 2N intercoms, which may then be subsequently be triggered by the appropriate state change for a given intercom. - Page 23 Configuration & User Manual: 2N IP Intercoms and CCURE 9000 The New Event window appears: 4. Assign a name for the Event you wish to create, e.g., “2N Intercom – Offline”. Check the Enabled and Armed checkboxes: COPYRIGHT © 2022 2N Telekomunikace a.s. All rights reserved...
- Page 24 Inactive, e.g., when the 2N Intercom comes back online. Click Save and Close. The Event is saved. Repeat the above steps for any additional 2N Events required on the system. NOTE The example described above shows how to create a self-clearing C•CURE Event, meaning the Event will close automatically once the Event state becomes Inactive.
-
Page 25: Configuring 2N Event Triggers
Value – Offline Action – Activate Event d. Details – 2N Intercom – Offline (this is configured by pressing the ‘…’ button next to the Event field) Repeat the process for all events you wish to configure for the device. -
Page 26: State Images Tab
Similar to the event’s activation, the journal will now also log the event’s deactivation: 6.7 State Images Tab The State Images tab shows the default images for different hardware states for 2N Intercoms. These images can be customized with any .JPG file. -
Page 27: Part 7 Call Management
Part 7 Call Management This chapter explains how to manage calls for 2N Intercoms in C•CURE 9000. Commands may be issued for intercoms from the Hardware tree, Dynamic view, or from a map. Right-click the device or icon to see a list of commands for intercoms. - Page 28 Configuration & User Manual: 2N IP Intercoms and CCURE 9000 To customise columns in this view, right-click the top of the table and select the columns you wish to display: COPYRIGHT © 2022 2N Telekomunikace a.s. All rights reserved...
-
Page 29: Maps
Configuration & User Manual: 2N IP Intercoms and CCURE 9000 7.3 Maps Calls for 2N intercoms may be managed from a C•CURE map. Please see the Map Configuration section in this document for details on configuring intercoms on a map. -
Page 30: Part 8 Unlocking A C•Cure Door On Dtmf Activation
Configuration & User Manual: 2N IP Intercoms and CCURE 9000 Part 8 Unlocking a C•CURE door on DTMF Activation The integration may be configured to trigger a C•CURE door to open when a DTMF code is sent to the device. To configure such an action, carry out the following steps: Open a 2N intercom to edit in C•CURE. -
Page 31: Part 9 Map Configuration
Part 9 Map Configuration 2N intercoms may be added to a map in C•CURE, where calls can be initiated, held and terminated and call states may be monitored. To add a map to C•CURE, carry out the following steps: 9.1 Configuring a map In the Administration Workstation, select Data Views, and Maps from the list: Click New. - Page 32 In the main map editor window, click the button to add objects to the map. The Icon Selector section appears: Select 2N Intercom. An intercom icon is dropped on the map: COPYRIGHT © 2022 2N Telekomunikace a.s. All rights reserved...
- Page 33 Configuration & User Manual: 2N IP Intercoms and CCURE 9000 Drag the icon to the desired position on the map, then right-click the icon and select Drop on map. The Icon Editor section appears: Click Select object. A list of configured intercoms appears:...
- Page 34 Configuration & User Manual: 2N IP Intercoms and CCURE 9000 Select the intercom and click OK. The intercom is added to the map. 10. Repeat the process for every intercom you wish to add to the map. COPYRIGHT © 2022 2N Telekomunikace a.s. All rights reserved...
-
Page 35: Map Annunciations
Configuration & User Manual: 2N IP Intercoms and CCURE 9000 9.2 Map annunciations C•CURE supports annunciations for objects placed on a map. For example, an intercom may be configured to turn red on a map if it goes offline: 9.2.1 Configuring map annunciations To configure annunciations for intercom icons, follow steps 1-8 of the previous section. - Page 36 Configuration & User Manual: 2N IP Intercoms and CCURE 9000 The following intercom states may be represented by annunciations on a map: Unknown • Offline • Online • Locked • Idle • Calling • On Call • On Hold •...
-
Page 37: Part 10 C•Cure 9000 Alerts And Journaling System
C•CURE 9000 Journal messages may be monitored and respectively handled by the operator in the Activity Monitor window of the Monitoring Station. Depending on requirements users are also enabled to setup respective triggers/actions to be taken once a 2N Intercoms alert is triggered. This means C•CURE alerts may be raised accordingly. -
Page 38: Journal Messages Supported
Configuration & User Manual: 2N IP Intercoms and CCURE 9000 10.2.3 Journal messages supported Status message (Online, Offline, Locked) • Call State messages (Idle, On Call, Calling, On Hold) • Device Events (Input Changed, Output Changed, Motion Detected, Noise Detected, Audio •... -
Page 39: Part 11 Troubleshooting The 2N Integration
Configuration & User Manual: 2N IP Intercoms and CCURE 9000 Part 11 Troubleshooting the 2N Integration This chapter explains how to troubleshoot any issues with the 2N Intercoms Integration. Issue Troubleshooting steps 2N Intercoms • Ensure the intercoms are online and accessible on the network. -
Page 40: Appendix 1 - Configuration Of 2N Devices
Master Station. 3.1. LAN Connection Setting - 2N IP Intercom 2N IP Intercoms must use static IP addresses to communicate in direct mode – without the central SIP exchange. Automatic IP address retrieval from the DHCP server is set by default in the 2N IP intercoms. - Page 41 If there is no DHCP server in the network or if you need to find out the IP address of your 2N IP Intercoms you could use free software 2N® IP Network Scanner which can be downloaded from 2N web.
-
Page 42: Lan Connection Setting - 2N Master Station
Uncheck the “Use DHCP Server” and in “Manual Settings” fill in the desired values according to your network setup, e.g.: 3.2. LAN Connection Setting - 2N Master Station 2N Master station is also by default using DHCP for automated network settings. The easiest way to change it is from the device touch screen. Network Settings: Swipe down from the top of the screen to enter the control centre. -
Page 43: Setting Calling Between 2N Ip Intercom And 2N Master Station
If you configure everything according to the following instructions you’ll be able to automatically see video preview from intercoms when a call is received on the 2N Master Station as well as activate switches on 2N IP Intercoms which is necessary to rule C•CURE 9000 to open the Door. - Page 44 Configuration & User Manual: 2N IP Intercoms and CCURE 9000 Name the user and enter a new phone number in this format: sip:Master Station IP. In this case, it’s sip:10.27.5.211. Assign the User(s) to the quick dial buttons COPYRIGHT © 2022 2N Telekomunikace a.s. All rights reserved...
- Page 45 Stations’ call log or get a video preview and door unlock button. If you’d like the intercom to pick up calls (from the 2N Master Station) automatically, change Call receiving mode (SIP1) to Automatic.
- Page 46 Configuration & User Manual: 2N IP Intercoms and CCURE 9000 The Master Station offers an “Open Door” button function. To use this, you should enter the intercom’s Switch Code into the Master Station’s configuration to open doors without having to enter this switch code manually. Firstly, this code must be defined in the intercom’s configuration: Hardware>Switches>Switch#>Switch Codes or in Directory>Users>User#>User...
-
Page 47: Master Station Setup
Configuration & User Manual: 2N IP Intercoms and CCURE 9000 4.2. 2N Master Station setup Configuration of the 2N Master Station is very straightforward. Pick one of the Door Phones from the Door Phone List and set it as follows:... -
Page 48: Ip Intercom Http Api Activation
Configuration & User Manual: 2N IP Intercoms and CCURE 9000 4.3. 2N IP Intercom HTTP API Activation Configuration is required on the 2N IP Intercom devices to allow the connection from C•CURE 9000. The procedure to set up the 2N devices is as follows: Under Services →... - Page 49 Configuration & User Manual: 2N IP Intercoms and CCURE 9000 COPYRIGHT © 2022 2N Telekomunikace a.s. All rights reserved...
Need help?
Do you have a question about the C-CURE 9000 and is the answer not in the manual?
Questions and answers