
Related Manuals for 2N Helios Uni


Summary of Contents for 2N Helios Uni
- Page 1 2N Helios Uni Door Access Intercom Installation Manual Version: CIE-Group Ltd, www.cie-group.com...
- Page 2 2N TELEKOMUNIKACE a.s. administers the FAQ database to help you quickly find information and to answer your questions about 2N products and services. On www. faq.2n.cz you can find information regarding products adjustment and instructions for optimum use and procedures „What to do if...".
- Page 3 Content: 1. Product Overview 1.1 Components and Associated Products 1.2 Terms and Symbols 2. Description and Installation 2.1 Before You Start 2.2 Mechanical Installation 2.3 Electric Installation 2.4 Button Tags 3. Function and Use 3.1 Programming 3.2 Full Parameter Chart 3.3 Function Description 3.4 Section for Advanced Users 3.5 Maintenance...
-
Page 4: Product Overview
1. Product Overview ® In this section, we introduce the Helios Uni product, outline its application options and highlight the advantages following from its use. Here is what you can find in this section: 1.1 Components and Associated Products 1.2 Terms and Symbols Basic Features ®... - Page 5 Advantages of Use Additional amplifier for higher volume Water resistant (without any additional roof) High-quality "marine grade" stainless steel front panel Variable mounting options (brick/plasterboard flush mounting, wall mounting) No special brick/plasterboard flush mounting accessories needed Sensitive microphone and powerful loudspeaker Bidirectional communication –...
-
Page 6: Components And Associated Products
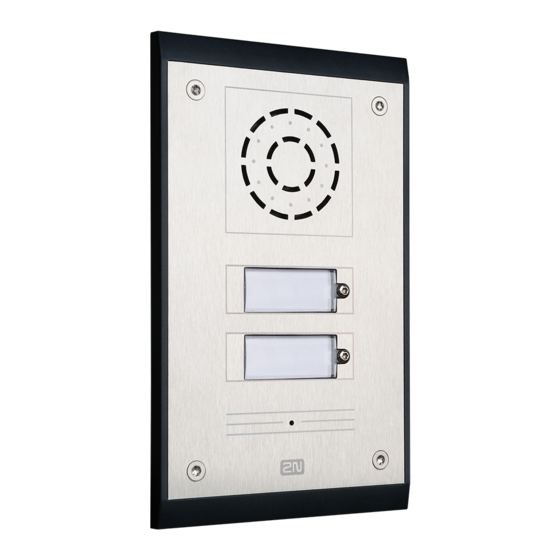
1.1 Components and Associated Products Basic Units Part No. 9153201-E ® Helios Uni 1 button, analogue Part No. 9153202-E ® Helios Uni 2 buttons, analogue ® Helios Uni is designed for outdoor applications and requires no additional roof. ® Helios Uni units can be flush mounted without requiring any additional accessories. -
Page 7: Mounting Accessories
Mounting Accessories Part No. 9153003 Wall mounting box (Al casting) Brick flush mounting box (included in the delivery) CIE-Group Ltd, www.cie-group.com 07 / 63... -
Page 8: Gsm/Umts Connection Accessories
GSM/UMTS Connection Accessories Part No. 501303E ® GSM gateway 2N EasyGate Part No. 511333E ® GSM gateway EasyGate Pro with battery backup CIE-Group Ltd, www.cie-group.com 08 / 63... -
Page 9: Electric Locks
Electric Locks Part No. 932070 BEFO 1211 12 V / 600 mA Part No. 932080 BEFO 1221 with momentary pin Part No. 932090 BEFO 1211MB with mechanical blocking CIE-Group Ltd, www.cie-group.com 09 / 63... -
Page 10: Other Accessories
Other Accessories Part No. 91341481E 12 V / 2 A adapter 100–240 V / 12 V / 2 A Part No. 932928E 12 V transformer 230 V / 12 V Part No. 9134148E ® SIEMENS Adapter This is required when connecting to a Siemens HiPath Telephone system CIE-Group Ltd, www.cie-group.com 10 / 63... -
Page 11: Terms And Symbols
1.2 Terms and Symbols The following symbols and pictograms are used in the manual: Safety Always abide by this information to prevent persons from injury. Warning Always abide by this information to prevent damage to the device. Caution Important information for system functionality. Useful information for quick and efficient functionality. -
Page 12: Description And Installation
2. Description and Installation ® In this section we describe the Helios Uni product and its installation. Here is what you can find in this section: 2.1 Before You Start 2.2 Mechanical Installation 2.3 Electric Installation 2.4 Button Tags CIE-Group Ltd, www.cie-group.com... -
Page 13: Product Completeness Check
Product Completeness Check ® Please check the contents of your Helios Uni delivery: ® 1× Helios Uni (selected model) 1× Torx 10 / Torx 20 double-ended wrench ® 1× Helios Uni Installation Manual 1× mounting template 1× CD 1× A5 transparent name plate foil 1×... -
Page 14: Mechanical Installation
Caution ® Stainless steel screws are used for the Helios Uni assembly. Other screws than stainless steel ones corrode soon and may aesthetically deteriorate the surrounding environment! Having removed the front panel, make sure that no dirt gets inside the product (especially onto the sealing surface). -
Page 15: Flush Mounting - Classic Bricks
Caution The warranty does not apply to the product defects and failures arisen as a result of improper mounting (in contradiction herewith). The manufacturer is neither liable for damage caused by theft within an area that is accessible after the attached electric lock is switched. The product is not designed as a burglar protection device except when used in combination with a standard lock, which has the security function. - Page 16 You can use the cable tie for connection as shown: Mounting completion – after electric installation! Insert the intercom in the mounting box in the wall. Tighten the intercom with the stainless steel screws included in the delivery. As the screw holes are oval, you can perfect the vertical position before tightening. We do not recommend you to insert the button tags now.
-
Page 17: Flush Mounting - Plasterboard
Hole dimensions for flush mounting Flush Mounting – Plasterboard What you need: Just a properly cut hole If this is your first plasterboard installation, check the function of the intercom side clamps. Loosen and then re-tighten the clamp screw to see how it turns automatically and starts moving forwards in its slot. -
Page 18: Wall Mounting
Cut a hole 100 (W) × 180 (H) mm. Unscrew the front panel from the door intercom. Connect the cables in the hole to the terminals or RJ connector as described in Electric Connection subsection Mounting completion – after electric installation! Insert the intercom in the hole keeping it in the vertical position. - Page 19 Wall Mounting Use the wall (surface) mounting box, part No. 9153003 , and follow the instructions enclosed. (concrete and steel structures, entry barrier columns, etc.) What you need: Wall mounting box Part No. 9153003 Mounting instructions: a) If the cable wall outlets are located directly under the intercom to be installed, move the cap from the middle hole to the bottom one to make way for the cables.
- Page 20 Dimension for wall (surface) mounting CIE-Group Ltd, www.cie-group.com 20 / 63...
-
Page 21: Electric Installation
2.3 Electric Installation ® This subsection describes how to connect Helios Uni into your Local Area Network (LAN) and how to connect supply voltage and the electric lock. PCB Connectors Description of Connectors: LINE – An analogue telephone line with any polarity, or an RJ connector or terminals 12V AC, DC –... -
Page 22: Connection To Telephone Line
– ® except for the button backlight and electric lock, if connected. Nevertheless, 2N Helios Uni can work without these circuits too and sends an acoustic signal on having been connected to a line (or after having been disconnected from the line for a defined period of time). -
Page 23: Separate Backlight And Electric Lock Supply
Caution If the lock power supply fails and the telephone system carries on working, the intercom is unaware of the failure the switch will be password-activated and the activation is acoustically signalled, but the electric lock will not work because of the lack of power. Ground connection is mandatory. -
Page 24: Button Tags
Tag Printing ® Every Helios Uni delivery includes a sheet of translucent foil, which can be laser-printed. Cut the printed foil and insert the tags in the name plates. Every name plate includes a piece of foil, which can be written over manually, using a waterproof permanent marker, if necessary. - Page 25 CIE-Group Ltd, www.cie-group.com 25 / 63...
-
Page 26: Function And Use
3. Function and Use ® In this section we describe the basic and extending functions of the 2N Helios Uni product. Here is what you can find in this section: 3.1 Programming 3.2 Full Parameter Chart 3.3 Function Description 3.4 Section for Advanced Users 3.5 Maintenance... -
Page 27: Entering Programming Mode
3.1 Programming ll the intercom parameters, including the keypad ones, are set remotely using any tone- dialling telephone set (or a mobile phone). First call the intercom and enter the programming mode. The access to this mode is service password protected. A voice menu is available in the programming mode and so you need not use this manual to program standard parameters. -
Page 28: Switch Password Programming
contents (excluding passwords). Now you can enter new data – of variable meaning and length depending on the parameter selected (refer to the Full Parameter Chart). Finally, press again for confirmation. The intercom confirms the data saving. Repeat this procedure for each parameter. Switch Password Programming Each switch can be controlled with up to 10 different passwords that are listed in the intercom memory. -
Page 29: Deleting All Passwords, All Memories, Complete Initialisation
If you do not press any button within a predefined timeout, the intercom sends a hang-up signal and hangs up. The timeout is 5 seconds; every character is followed by 30 seconds for you to think over your setting. The 5-second limit starts when the intercom has read all that relates to the current user position in the programming menu. -
Page 30: If You Forget The Service Password
If You Forget the Service Password If you forget the service password, contact the manufacturer. The manufacturer can change your service password to 12345 remotely without altering any other parameter. Keyboard letters facilitate password remembering. For example, it is easier to remember a 9-letter word (e.g. crocodile) than a 9-digit number (276263453) CIE-Group Ltd, www.cie-group.com 30 / 63... -
Page 31: Full Parameter Chart
3.2 Full Parameter Chart Parameter Parameter Range Default Note (function) Name 011 to 016 Button 01 blank memories to16 digits 021 to 026 Button 02 blank memories to16 digits Digits 0–9 can only be entered directly into the memories. Special characters are entered additionally using function XX7: 7 or Enter special... - Page 32 Parameter Parameter Range Default Note (function) Name Enter up to up to Password 00 cannot be entered from 10 switch the keypad! passwords digits Up to 10 switch passwords Delete passwords using function 812 Delete valid Valid ...
- Page 33 Parameter Parameter Range Default Note (function) Name Max. call 1–99 12 = 120 Range of 10 s – 990 s duration Log-in 1–99 3 = 30 seconds timeout Hang-up 5–99 15 = 1,5 time between calls Microphone ...
- Page 34 Parameter Parameter Range Default Note (function) Name Minimum 10– 20 = 2s If the tone is longer, the intercom continuous hangs up. tone time Minimum 0– 8 = 0.08 These parameters control the busy busy tone or tone detection.
- Page 35 Parameter Parameter Range Default Note (function) Name Minimum 1– 50 = 0,5 The longest ringing period pause ringing tone s 2) must be in the interval between time parameters 952 and 953. Warning! As these parameters also detect incoming calls, an incorrect setting may result in the intercom not answering the call! Minimum...
- Page 36 Parameter Parameter Range Default Note (function) Name Possibility to 0 = no dial the next 1 = yes number by pressing 2nd button Count of 0–9 There is a 3-second pause between message every two messages. repetitions Intercom 16 digits...
- Page 37 Parameter Parameter Range Default Note (function) Name language 0–8 selection for 1 = English a message 2–3 = 4 = German 5–7 = 8 = Portuguese 9 = Dutch10 ... 99 = silence Note: Survey of messages in Subs. 4.2 Caution! Czech version has language order: 1 = Czech, 2 = English language...
-
Page 38: Explanation Of Some Parameters
Notes Terminology: For the purpose hereof, parameter means a value that is stored in the intercom memory and can be re-programmed. Function a means of execution of another service such as initialisation, software version identification and so on. 1) Types 3 and 4 of Automatic Dialling without Confirmation differ from each other in how they process very short calls (a few seconds). - Page 39 Example: The busy tone in the figure above is considerably longer than the pause time. Therefore, set parameter according to the pause, to 200 ms, e.g., and parameter according to the tone, to 600 ms, for example. In this case, however, the default values can be maintained for both the parameters.
-
Page 40: Function Description
3.3 Function Description From External User's View (Visitor) Like normal doorbells, intercom buttons are provided with labels. The visitor finds the appropriate button (e.g. Mr. Smith) and presses it. This activates the intercom, which then dials the number pre-programmed for that button, The visitor can then hear the ringing tone from the loudspeaker and the required (Mr. -
Page 41: Door Opening
From Internal User's View (Survey of Functions) Calling to 2N ® Helios Uni You call the appropriate extension and the intercom makes the call and gives a confirmation tone after two rings (or as pre-programmed). Now you can speak and control the switch, program the intercom (see later), and listen to what is going on outside and speak to the calling party if desired. -
Page 42: Signals Overview
Programming The access to this mode is password-protected. For details refer to the Programming section. The voice menu helps you considerably with programming the intercom. Having entered the programming mode, you can also alter any parameter and memory settings. Caution The above mentioned functions (except for calls to the intercom) require a tone-dialling... -
Page 43: Call Termination Options - Summary
Signal Name Meaning "Attention, your call Signals that the preset maximum call time will is being terminated" elapse within 10 seconds. "Wait, please" Optional message during call establishing. "Communicator Optional message for intercom identification number ... is calling" Voice menu ... - Page 44 2N ® Helios Uni Statuses and Available Operations Operation Hang- Outgoing Incoming Programming call call Button pressing – new call × — — — — Call extension – DTMF — Call termination – DTMF Hang-up upon continuous, busy or ringing —...
-
Page 45: Section For Advanced Users
3.4 Section for Advanced Users Automatic Multiple Number Dialling When you press an intercom button, you may find out that the called line is busy or the called party is absent. The intercom is able to identify these situations and solve them by Automatic Multiple Number Dialling if one of three automatic dialling modes is enabled. -
Page 46: Automatic Multiple Number Dialling With Confirmation
Situation Intercom Action Ringing tone, which is terminated Regarded as a successful call, continues for the before 10 rings are made (the count maximum timeout (maximum call duration). For details of rings is variable) refer to the text under the table. Ringing tone, 10 rings are made (the Hangs up and dials the next number. -
Page 47: Evaluation Of Situations In Audible Automatic Dialling With Confirmation
Evaluation of Situations in Audible Automatic Dialling with Confirmation Situation Intercom Action Busy tone Hangs up in approximately 2 seconds and dials the next number. Call or silence Waits for the preset timeout (log-in time), then hangs up and dials the next number. -
Page 48: Silent Automatic Multiple Number Dialling
Otherwise, the function is the same as with Automatic Multiple Number Dialling with Confirmation. 2N ® Helios Uni Identification There are situations in which the calling person does not want to or cannot speak for security reasons in the automatic dialling mode. In these cases, the intercom can play back a message stored in its memory. - Page 49 DTMF FUNCTION Character Call termination These digits are interpreted as a password beginning – for switch control. Notes These commands do not work in the Automatic Multiple Number Dialling mode without Confirmation! The above-mentioned commands may not be accepted due to poor connection if sent during a message.
-
Page 50: Survey Of Messages
Survey of Messages The table below includes a survey of language versions for standard announcements. English is selected by default. To select another language, use parameters 976 and 977. Value of Language End of call Outgoing call message parameter selection – message English version... -
Page 51: Arrival/Departure, Day/Night Modes
..... Dutch ..... Arrival/Departure, Day/Night Modes ® Helios Uni can identify easily where to 'route' (switch) a call after a button is pressed. All you have to do is call the intercom and enter the following: I'm leaving: password I'm back:... -
Page 52: How Does Switching Work
How does switching work? Every button has memories for 6 numbers (intended primarily for Automatic Multiple Number Dialling). If the Automatic Multiple Number Dialling mode is , memory is used for the Day mode and memory for the Night mode. This is a simple two-number switching. -
Page 53: Maintenance
3.5 Maintenance Cleaning If used frequently, the intercom gets dirty. To clean it, use a piece of soft cloth moistened with clean water. We recommend you to obey the following principles while cleaning: Never use aggressive detergents (such as abrasives or strong disinfectants). Alcohol-based cleaners may be applied. - Page 54 Templates Nametags CIE-Group Ltd, www.cie-group.com 54 / 63...
-
Page 55: Technical Parameters
4. Technical Parameters Telephone Parameters Parameters Value Conditions Minimum required off-hook line current 15 mA Off-hook Minimum required on-hook line voltage 20 V Hang-up DC voltage drop (off-hook) < 8 V < 16 V I = 25 mA I = 50 mA Lead current while hang-up <... - Page 56 Parameters Value Conditions 350 to 500 Busy tone detection speed Variable 350 to 500 Continuous tone detection speed Variable 350 to 500 Ringing tone detection speed Variable 350 to 500 Overvoltage protection – common mode 1000 V 8 / 20 μs Overvoltage protection –...
- Page 57 Physical Properties Cover: ABS plastic, high-quality stainless steel Working temperature: −25°C to +55°C Working relative humidity: 10% to 95% (non-condensing) Storing temperature: −40°C to 70°C Dimensions: (193 × 115 × 39) mm (197 × 119 × 47) mm flush box (193 ×...
-
Page 58: Supplementary Information
5. Supplementary Information ® This section provides supplementary information on the Helios Uni product. Here is what you can find in this section: 5.1 Troubleshooting 5.2 Directives, Laws and Regulations 5.3 General Instructions and Cautions CIE-Group Ltd, www.cie-group.com 58 / 63... -
Page 59: Troubleshooting
5.1 Troubleshooting For the most frequently asked questions refer to faq.2n.cz CIE-Group Ltd, www.cie-group.com 59 / 63... - Page 60 Europe ® Helios Uni conforms to the following directives and regulations: Directive 1999/5/EC of the European Parliament and of the Council, of 9 March 1999 - on radio equipment and telecommunications terminal equipment and the mutual recognition of their conformity...
-
Page 61: General Instructions And Cautions
5.3 General Instructions and Cautions Please read this User Manual carefully before using the product. Follow all instructions and recommendations included herein. Any use of the product that is in contradiction with the instructions provided herein may result in malfunction, damage or destruction of the product. The manufacturer shall not be liable and responsible for any damage incurred as a result of a use of the product other than that included herein, namely undue application and disobedience of the recommendations and warnings in contradiction... -
Page 62: Electric Waste And Used Battery Pack Handling
The consumer shall, without delay, change the access password for the product after installation. The manufacturer shall not be held liable or responsible for any damage incurred by the consumer in connection with the use of the original password. The manufacturer also assumes no responsibility for additional costs incurred by the consumer as a result of making calls using a line with an increased tariff. - Page 63 CIE-Group Ltd, www.cie-group.com 63 / 63...
Need help?
Do you have a question about the Helios Uni and is the answer not in the manual?
Questions and answers