Advertisement
Quick Links
Discontinue
I N S T R U C T I ON MA N U A L
P A R E C T
E L E C T R O −P N E U MA T I C
R E G U L A T OR
E R 3 0 0
Please read this instruction manual
●
carefully before using this product,
particularly the section describing
safety.
Retain this instruction manual with
●
the product for further consultation
whenever necessary.
S M − 2 7 6 6 7 7 −A
Advertisement

Related Manuals for CKD ER300


Summary of Contents for CKD ER300
- Page 1 Discontinue S M − 2 7 6 6 7 7 −A I N S T R U C T I ON MA N U A L P A R E C T E L E C T R O −P N E U MA T I C R...
- Page 2 Discontinue F o r S a f e t y U s e To use this product safety, basic knowledge of pneumatic equipment, including materials, piping, electrical system and mechanism, is re- quired (to the level pursuant to JIS B 8370 Pneumatic System Rules). We do not bear any responsibility for accidents caused by any person without such knowledge or arising from improper operation. Our customers use this product for a very wide range of applications, and we cannot keep track of all of them. Depending on operating condi- tions, the product may fail to operate to maximum performance, or cause an accident. Thus, before placing an order, examine whether the product meets your application, requirements, and how to use it. This product incorporates many functions and mechanisms to ensure safety. However, improper operation could result in an accident. To pre- vent such accidents, read this operation manual carefully for proper operation. Observe the cautions on handling described in this manual, as well as the following instructions: DANGER: ! Failure to pay attention to DANGER notices may cause a situation that results in a fatality or serious injury and that ...
-
Page 3: Design And Selection
Discontinue DESIGN AND SELECTION 1) Inferior quality air will deteriorate the product characteristics and affect its ! durability badly. Use an air dryer, filter and sub micron filter t o eliminate solid CAUTION material, moisture and tar and thus provide clean air from the pressure source. Regulator Air filter 5 μm Pneumatic equipment Pressure switch Air dryer Oil mist filter E R 3 0 0 Fig1 Recommended air circuit In the case where the secondary side air pressure is reduced, the secondary side air flows through the model ER3 00 and will be discharged from the exhaust port. The inside of the secondary piping and that of the load side should be kept clean. ... -
Page 4: Usage And Maintenance
1 ) Be sure to follow the instructions provided below. Failure to follow these ! CAUTION instructions may hamper normal pressure control. * Never adjust the primary pressure to less than that of the secondary pressure +0.049MPa while the input signal is on. * Never send an input signal (this includes the power supply with the voltage input type) when the primary pressure is at atmospheric level. * Install a pressure switch capable of detecting the ER300 primary pressure and turning off input signals (this includes the power supply with the voltage input type) to the ER300 when pressure is reduced. Reference: The pressure switch setting must be the maximum set pressure +0.049MPa or more, at the ER300. * Never connect the power supply and input signal groundingline to the ER300 body. 2 ) The best measures against noise such as of solenoid valve etc. is through surge protection with CR, Diode (DC) etc. The following measures are also acceptable: * Separate the power line from the ER300 signal cable. * Connect the ER300 signal cable with the shield cable. *1 * Install a line filter in the ER300 source power supply (for example, when using the DC power supply pack, install in the DC power supply pack AC side). Warning: When the above precautions are not provided, normal pressure control cannot be guaranteed. Important: * Connect the shield to the GND. * For the connection between the V, S, and M terminals, divide the shield cable. ... - Page 5 Discontinue INDEX ER300 Series PARECT Electronic Regulator INSTRUCTION MANUAL No.SM‑276677‑A 1 . PRODUCTS 1 . 1 Specifications ・・・・・・・・・・・・・・・・・・・・・・・・・・・・・・・・・・・・・・・・・・ 5 1 . 2 Dimensions ・・・・・・・・・・・・・・・・・・・・・・・・・・・・・・・・・・・・・・・・・・・・ 6 2 . WIRING 2 . 1 Terminal Box・・・・・・・・・・・・・・・・・・・・・・・・・・・・・・・・・・・・・・・・・・・ 7 2...
-
Page 6: Specifications
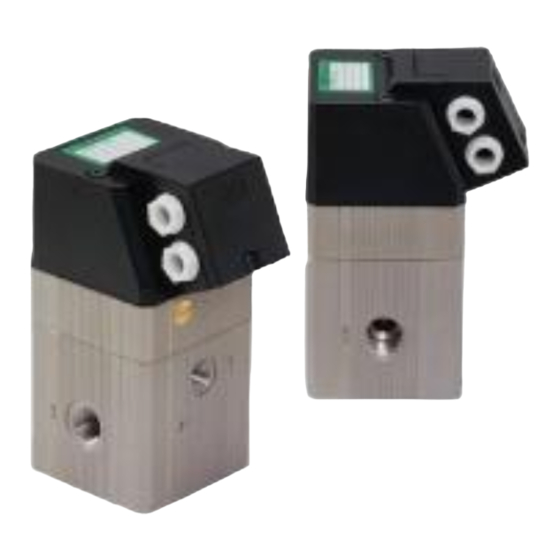
Discontinue 1 PRODUCTS 1.PRODUCTS 1.1 Specifications Model ER310 ER350 ER380 Item Media (Refer to CAUTION) Cleaned air Working pressure range 150kPa ‑ 200kPa 0.54Mpa ‑ 0.59MPa 0.83Mpa ‑ 0.88MPa Pressure control range 0kPa ‑ 98kPa 0Mpa ‑ 0.49MPa 0Mpa ‑ 0.78MPa Voltage Input Voltage rate 0VDC ‑ 10VDC .0VDC ‑ 5VDC 3‑wire type Input Input impedance 10kΩ Signal Current Input current rate 4mA ‑ 20mA(No power supply required) 2‑wire type Input impedance 500Ω or less DC11V ‑ DC16V Power supply voltage ... - Page 7 Discontinue 1 PRODUCTS 1.2 Dimensions Port size(D) Rc3/8 Rc1/4 Fig2 Dimensions [SM‑276677‑A] −6−...
- Page 8 Discontinue 2 WIRING 2 . WIRING 2 .1 Terminal Box To open the terminal box cap, ① remove the M3 pan head screw, ② pull the cap lower part until the lower claw disengages, and ③ push the entire cap diagonally upward (refer to Fig3 ) F i g 3 . Terminal Box 2 . 2 Connection The connections are for power supply, for the input signal line, and for the pressure monitor line output. The input connection differs in the voltage input type (3 line system) or the current input type (2 line system). 1 ) . Voltage Input Type (3 line system) Connection. Use the 6mm external diameter, 3-core shield cable 0.5 ...
- Page 9 Discontinue 2 WIRING F i g 5 . Voltage Input(3-Line System)Connection Diagram Current Input Type (2-Line System) Connection Use the 6mm external diameter, 2-core shield cable 0.5-1 5mm for a device controlled with input signal of 4mA -20mA current. To avoid connected to a malfunction caused by noise, the shield cable must be connected to Ground at the operation side as same as at the Voltage Input Type. As Figure4 indicates, connect to the respective terminals as indicated in Fig7. Fig6 . 2-line Input Cable [SM‑276677‑A] −8−...
- Page 10 Discontinue 2 WIRING 3) Pressure Monitor Output Connection * The pressure monitoring function which the output pressure status is output as an electric signal can be used only for the Voltage Input Type (3-Line System) device. It cannot be used for the Current lnput Type (2-Line System). * Connect to the terminals as indicated in Figure5, with the 6mm external diameter, 0.5-1.5mm 2-core shield cable as indicated in Fig8 Fig7 . Current Input (2-line System) Connection Diagram Fig8 . Monitor Output Cable −9− [SM‑276677‑A] ...
-
Page 11: Product Operation
Discontinue 3 PRODUCT OPERATION 3 . PRODUCT OPERATION 3 .1 Adjustment The Parect Electronic regulator’s zero point and span point are factory adjusted at the time of shipment. Zero and Span adjustment at factory Model Zero(MPa) Span(MPa) ER310 0 0.098 ER350 0 0.49 ER380 0 0.78 If necessary, in accordance with the following procedures after mounting a pressure gage of accuracy commensurating with the accuracy expected on the secondary side. Procedure−1 Adjust operational pressure.(primary side). Procedure−2 Zero point adjustment First, turn on the power and set the signal to 0 V (4mA for the current input type). Then, set the pressure to 0MPa by turning the zero point adjustment trimmer either clockwise or counterclockwise. ... - Page 12 Discontinue 4 MODEL 4 . HOW TO ORDER E R 3 A 0 − B C − D Symbol Optional blacket No symbol Nothing Blacket attached B Symbol Port size 08 Rc1 /4 10 Rc3 /8 Symbol Input signal 0 0VDC ‑ 10VDC ...
Need help?
Do you have a question about the ER300 and is the answer not in the manual?
Questions and answers