
Related Manuals for Reed Instruments R2310


Summary of Contents for Reed Instruments R2310
- Page 1 R2 3 1 0 In r ar d Th r mom t r In t r ct ion M an al www.REEDIN STRUM EN TS.com REED Inst r ument s 1 -8 7 7 -8 4 9 -2 1 2 7 | info@r eedinst r ument s.com | www.r eedinst r ument s.com...
-
Page 2: Table Of Contents
Table of Cont ent s Introduction ....................3 Product Quality ....................3 Safety ......................3 Features ......................4 Included ......................4 Speci cations .....................4-5 Instrument Description .................. 6 Display Description ..................7 Distance & Spot Size ..................8 Operating Instructions ................9-13 Power ON and OFF .................. -
Page 3: Introduction
Int r oduct ion Thank you for purchasing your REED R2310 Infrared Thermometer. Please read the following instructions carefully before using your instrument. By following the steps outlined in this manual your meter will provide years of reliable service. Pr oduct Qualit y... -
Page 4: Features
Feat ur es • Built-in laser pointer identi es target area • User selectable °F or °C • 12:1 distance to spot size ratio • Digitally adjustable emissivity • Max, Min, Average and Differential readings • Backlit display • High and low alarms •... - Page 5 Max/Min: Average and Differential: F/C Switchable: Trigger Lock: Tripod Mountable: Drop Tested: Yes, 9.8' (3M) Laser Type: Class II Low Battery Indicator: Power Supply: 9V battery Battery Life: Approx. 10 hours (with continuous use, backlight on) Product Certi cations: CE, RoHS, IP65, Drop Tested Operating Temperature: 32 to 122°F (0 to 50°C) Storage Temperature:...
-
Page 6: Instrument Description
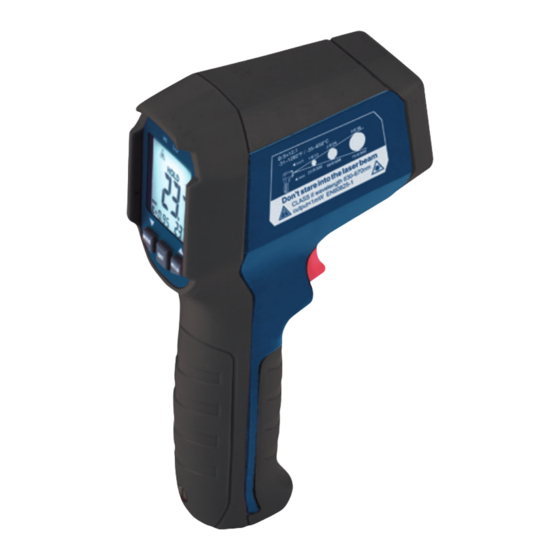
Inst r ument Descr ipt ion 1. Laser Pointer Beam 7. Set Button 2. IR Sensor 8. High/Low Alarm Button/ Up Arrow 3. Trigger 9. Handle Grip 4. High/Low Alarm Indicators 10. Battery Cover 5. LCD Display 11. Battery Compartment Screw 6. -
Page 7: Display Description
Display Descr ipt ion Temperature Measurement Trigger Lock Laser ON High and Low Limit Alarm Low Battery Temperature Measurement Active Measurement Data Hold Unit of Measurement Temperature Measurement Value Mode Emissivity Temperature Measurement Value from Selected Mode REED Inst r ument s www.REEDIN STRUM EN TS.com 1 -8 7 7 -8 4 9 -2 1 2 7 | info@r eedinst r ument s.com | www.r eedinst r ument s.com... -
Page 8: Distance & Spot Size
Dist ance & Spot Size REED Inst r ument s www.REEDIN STRUM EN TS.com 1 -8 7 7 -8 4 9 -2 1 2 7 | info@r eedinst r ument s.com | www.r eedinst r ument s.com... -
Page 9: Operating Instructions
Oper at ing Inst r uct ions Power ON and OFF Gently pull the trigger to turn the thermometer on. The LCD display and white backlight will turn on. The thermometer will automatically shut off after 8 seconds of inactivity. M anual M easur ement Pull and hold the trigger after aiming at the target. -
Page 10: Maximum, Minimum, Average And Differential Functions
M aximum, M inimum, Aver age and Differ ent ial Funct ions Press the MODE button to toggle between MAX/MIN/AVG/DIF modes. The temperature value of corresponding modes are shown in the secondary display area. Set t ing t he High Temper at ur e Alar m Press the SET button once to enter the high alarm limit setup. -
Page 11: Setting The Low Temperature Alarm
Set t ing t he Low Temper at ur e Alar m Press the SET button twice to enter the low alarm limit setup. Use the UP and DOWN buttons to set values. Press the UP and DOWN buttons to add or subtract 1 temperature value. -
Page 12: Switching The Unit Of Measure (°F/°C)
Swit ching t he Unit of M easur e (°F/ °C) Press the SET button four times to enter unit of measure setup. Use the UP and DOWN buttons to switch between °F and °C units. The thermometer will exit the setup after 5 seconds of inactivity. Tur ning Laser ON/ OFF To turn the laser on or off, press the SET button ve times to enter laser setup. -
Page 13: Turning High And Low Alarms On/Off
Tur ning High and Low Alar ms ON/ OFF Press the button to enter alarm setup screen. Press the button again to toggle through the alarm functions. High/Low alarms on. High alarm on. Low alarm on. No alarm set. REED Inst r ument s www.REEDIN STRUM EN TS.com 1 -8 7 7 -8 4 9 -2 1 2 7 | info@r eedinst r ument s.com | www.r eedinst r ument s.com... -
Page 14: Battery Replacement
Bat t er y Replacement The battery should be replaced when is displayed. Remove the screw with a áat screwdriver and open the battery cover. Replace the 9V battery. Place the battery cover back and tighten the screw. Applicat ions •... -
Page 15: Appendix: Emissivity Chart
Appendix: Emissivit y Char t Emissivity is a term used to describe the energy-emitting characteristics of materials. Most (90% of typical applications) organic materials and painted or oxidized surfaces have an emissivity of 0.95. Inaccurate readings will result from measuring shiny or polished metal surfaces. - Page 16 Measured Surfaces Emissivity Steel: Cold Rolling, Steel PlateBur- 0.7-0.9, 0.4-0.6, 0.1 nishing, Steel Plate Rubbing Zinc: Oxidization Non-Metal Asbestos 0.95 Asphalt 0.95 Basalt Carbon: Non-Oxidization, 0.8-0.9, 0.7-0.8, 0.9 Graphite, Silicone Carbide Ceramics 0.95 Clay 0.95 Concrete 0.95 Cloth Glass: Convex, Smooth, 0.76-0.8, 0.92-0.94, 0.78-0.82 Lead-Boron Plates...
-
Page 17: Product Care
REED Instruments guarantees this instrument to be free of defects in material or workmanship for a period of one (1) year from date of shipment. During the warranty period, REED Instruments will repair or replace, at no charge, products or parts of a product that proves to be defective because of improper material or workmanship, under normal use and maintenance. -
Page 18: Product Support
Pr oduct Suppor t If you have any questions on your product, please contact your authorized REED distributor or REED Instruments Customer Service by phone at 1-877-849-2127 or by email at info@ reedinstruments.com. Please visit www.REEDIN STRUM EN TS.com for the most up-to-date manuals, datasheets, pr oduct guides and softwar e. - Page 19 Te s T & M e a s u r e w i Th Co n f i d e n Ce Ch e Ck o u T o u r l a Te s T Pr o d u CTs ! www.REEDIN STRUM EN TS.com REED Inst r ument s 1 -8 7 7 -8 4 9 -2 1 2 7 | info@r eedinst r ument s.com | www.r eedinst r ument s.com...
- Page 20 www.REEDIN STRUM EN TS.com REED Inst r ument s www.REEDIN STRUM EN TS.com 1 -8 7 7 -8 4 9 -2 1 2 7 | info@r eedinst r ument s.com | www.r eedinst r ument s.com...
Need help?
Do you have a question about the R2310 and is the answer not in the manual?
Questions and answers