SMART Board MX Series User Manual
Hide thumbs
Also See for MX Series:
- User manual ,
- Installation and maintenance manual (119 pages) ,
- Installation and maintenance manual (60 pages)
Table of Contents
Advertisement
Quick Links
SBID-MX255-V3 / V3N
SBID-MX255-V3-PW / V3N-PW
SBID-MX055-V3 / V3N
SBID-MX055-V3-PW / V3N-PW
SBID-MX255-V2-C
SBID-MX255-V2-CPW
SBID-MX255-V2
SBID-MX255-V2-PW
SBID MX365
IDX55-3
Was this document helpful?
smarttech.com/docfeedback/171554
SMART Board
MX
|
MX Pro
series interactive displays
User guide
|
SBID-MX265-V3 / V3N
|
SBID-MX265-V3-PW / V3N-PW
|
SBID-MX065-V3 / V3N
|
SBID-MX065-V3-PW / V3N-PW
|
SBID-MX265-V2-C
|
SBID-MX265-V2-CPW
|
SBID-MX265-V2
|
SBID MX265-V2-PW
|
SBID-MX375
|
SBID-MX386
|
IDX65-3
|
IDX75-3
|
IDX86-3
®
|
SBID-MX275-V3 / V3N
|
SBID-MX286-V3 / V3N
|
SBID-MX275-V3-PW / V3N-PW
|
SBID-MX075-V3 / V3N
|
SBID-MX086-V3 / V3N
|
SBID-MX075-V3-PW / V3N-PW
|
SBID-MX275-V2-C
|
SBID-MX286-V2-C
|
SBID-MX275-V2-CPW
|
SBID-MX286-V2-CPW
|
SBID-MX275-V2
|
SBID-MX286-V2
|
SBID-MX275-V2-PW
|
SBID-MX286-V2-PW
|
SBID MX265
|
SBID-MX275
|
SBID-MX286
|
IDX55-2
|
IDX65-2
|
IDX75-2
|
IDX86-2
|
SBID-MX286-V3-PW / V3N-PW
|
SBID-MX086-V3-PW / V3N-PW
Advertisement
Chapters
Table of Contents

Related Manuals for SMART Board MX Series


Summary of Contents for SMART Board MX Series
- Page 1 SMART Board ® MX Pro series interactive displays User guide SBID-MX255-V3 / V3N SBID-MX265-V3 / V3N SBID-MX275-V3 / V3N SBID-MX286-V3 / V3N SBID-MX255-V3-PW / V3N-PW SBID-MX265-V3-PW / V3N-PW SBID-MX275-V3-PW / V3N-PW SBID-MX286-V3-PW / V3N-PW SBID-MX055-V3 / V3N SBID-MX065-V3 / V3N SBID-MX075-V3 / V3N SBID-MX086-V3 / V3N SBID-MX055-V3-PW / V3N-PW...
- Page 2 Learn more This guide and other resources for SMART Board MX and MX Pro series interactive displays are available in the Support section of the SMART website (smarttech.com/support). Scan this QR code to view these resources on your mobile device. ENERGY STAR is the government-backed symbol for energy efficiency, providing simple, credible, and unbiased information that consumers and businesses rely on to make well-informed decisions.
-
Page 3: Important Information
Important information Note Refer to the SMART Board MX and MX Pro series interactive displays installation and maintenance guide (smarttech.com/kb/171555) for important information about installing and maintaining the display. Warning Do not open or disassemble the display. You risk electrical shock from the high voltage inside the casing. -
Page 4: Table Of Contents
Contents Important information Chapter 1 Welcome About this guide About the display Identifying your specific model Accessories More information Chapter 2 Using basic features Waking up the display and putting it back to sleep Using the Home button Using the front control panel Using the remote control Using touch Writing, drawing, and erasing... - Page 5 Contents Chapter 5 Troubleshooting The display isn’t turning on The screen is blank or there’s a problem with the image on the screen There’s no sound or there’s a problem with the sound Touch isn’t working as expected The pens and erasers aren’t working as expected iQ apps aren’t working as expected SMART software on connected computers isn’t working as expected The SMART OPS PC module isn’t working as expected...
-
Page 6: Chapter 1 Welcome
This guide is intended for individuals who use displays in their organizations. Other documentation and resources are available for those who install and maintain displays (see More information on page 13). About the display ® The SMART Board MX or MX Pro interactive display with iQ is the hub of your classroom. smarttech.com/kb/171554... -
Page 7: Touch
Chapter 1 Welcome The display includes an extensive set of features and components: Touch You can do everything on the display that you can do at your computer—open and close applications, meet with others, create new documents or edit existing ones, visit websites, play and manipulate videos, and so on—by touching the display’s surface. -
Page 8: Iq Experience
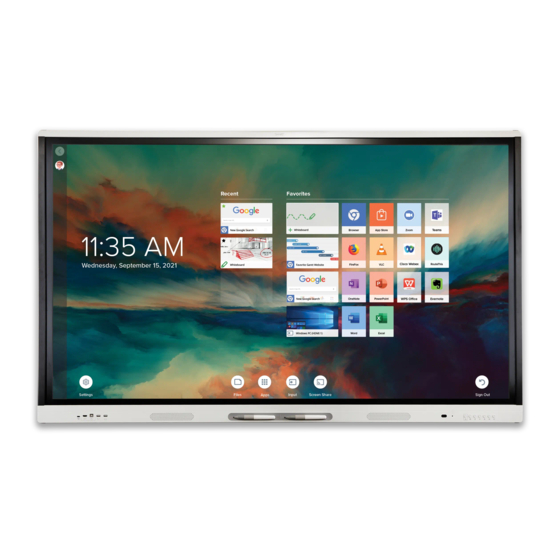
Chapter 1 Welcome iQ experience The display’s iQ experience provides one-touch access to collaborative tools, including a whiteboard, wireless screen sharing, and a web browser. With minimal network integration, there’s no need for wires, cables, or manual software and firmware updates. From the iQ experience Home screen, you can open the iQ apps, switch inputs, and adjust settings. -
Page 9: Room Computers And Guest Laptops
Chapter 1 Welcome Room computers and guest laptops You can connect room computers and guest laptops and use the display to view and interact with them. The display comes with SMART software that you can install on connected computers to take full advantage of the display’s features while using the connected computers. -
Page 10: Front Connector Panel
Chapter 1 Welcome For more information about the front control panel, see Using the front control panel on page 15. Front connector panel The front connector panel includes connectors for USB peripherals and a computer or other input source. For more information about the convenience panel, see Connecting room computers and guest laptops on page ... -
Page 11: Identifying Your Specific Model
Chapter 1 Welcome Identifying your specific model There are several series of SMART Board MX and MX Pro series interactive displays: SMART Board MX (V3) SMART Board MX (V2- SMART Board MX (V2) SMART MX series series C) series series... -
Page 12: Smart Ops Pc Module
Chapter 1 Welcome SMART OPS PC module Stands USB extenders Note For more information about these and other accessories, see smarttech.com/accessories. SMART OPS PC module SMART Open Pluggable Specification (OPS) PC modules provide a hassle- ® ™ free Windows Pro installation based on Intel Core processors and are designed specifically to work with a SMART display. -
Page 13: More Information
Chapter 1 Welcome Notes To extend touch using the SMART CAT 5 USB extender (CAT5-XT-1100) use a touch USB connector associated with an HDMI 1, HDMI 2, or VGA input. The extender will not function correctly if used to extend touch associated with the HDMI 3 input on the front of the display. For more information about extending USB connections, see USB cable extenders. -
Page 14: Chapter 2 Using Basic Features
Using the Home button Using the front control panel Using the remote control SMART Board MX (V3, V2 and V2-C) series SMART Board MX series Using touch Writing, drawing, and erasing Writing and drawing in digital ink Using the SMART Ink dynamic (floating) toolbar Changing a pen’s default color, thickness, and other properties... -
Page 15: Using The Home Button
You can return to the Home screen or the Input screen at any time by following the instructions below. To show the Home screen or the Input screen on SMART Board MX (V3, V2 and V2-C) series displays Tap the Home button on the front control panel. -
Page 16: Using The Remote Control
Chapter 2 Using basic features Name Procedure Screen shade Press to hide screen contents behind a screen shade (see Freezing or hiding the screen on page 23). Press to freeze and unfreeze the screen (see Freeze Freezing the screen on page 23). Press to turn down the volume (see Adjusting the Volume decrease volume on page ... -
Page 17: Smart Board Mx (V3, V2 And V2-C) Series
Chapter 2 Using basic features SMART Board MX (V3, V2 and V2-C) series The image and table below list the remote control’s functions. Name Procedure Press to enter or exit Standby mode (see Waking up the display Power and putting it back to sleep on page 14). Note Touch is not available right after waking up the display or turning it on. -
Page 18: Smart Board Mx Series
Open the Screen Share app (see Sharing your device’s screen to Share screen the display). Note This button is not available on all remote control models. SMART Board MX series The image and table below list the remote control’s functions. smarttech.com/kb/171554... -
Page 19: Using Touch
Chapter 2 Using basic features Name Function MUTE Mute or unmute the volume SOURCE Open the input source menu INFO Press to show the display’s detected resolution and refresh rate for the current input source Open the display’s settings AUDIO Change the display’s audio mode VOL + / VOL - Increase or decrease volume... - Page 20 Chapter 2 Using basic features Note Not all gestures work in all applications. Refer to an application’s documentation to learn which gestures it supports. Pan (one finger) Pan (two fingers) / scroll Pinch to zoom in / scale (enlarge) Pinch to zoom out / scale (reduce) Rotate Flick smarttech.com/kb/171554...
-
Page 21: Writing, Drawing, And Erasing
Chapter 2 Using basic features Erase with palm Erase with fist Writing, drawing, and erasing The display includes two pens, which you can use to write or draw in digital ink. You can erase digital ink using gestures or the eraser tool in the apps. Writing and drawing in digital ink To write or draw in digital ink 1. -
Page 22: Adjusting The Volume
Chapter 2 Using basic features Changing a pen’s default color, thickness, and other properties You can change a pen’s color, thickness, and other properties temporarily using the SMART Ink dynamic (floating) toolbar when you’re viewing a connected computer’s input. To change the pen’s default color, thickness, and other properties, see Changing pen, eraser, and button settings. -
Page 23: Freezing Or Hiding The Screen
Chapter 2 Using basic features Freezing or hiding the screen You can temporarily freeze or hide the contents on the screen using the display’s freeze and screen shade features. Freezing the screen You can temporarily freeze the screen by pressing the Freeze button on the front control panel or remote control. -
Page 24: Chapter 3 Using The Iq Apps
Chapter 3 Using the iQ apps The display comes with the following iQ apps: SMART Whiteboard Browser Input Screen Share kapp Whiteboard You can use these apps along with the Files Library and Apps Library to deliver lessons in a classroom or coordinate meetings and other collaborative activities. -
Page 25: Using Smart Whiteboard
To learn more about Browser, see Browsing the internet on your display. Using Screen Share For SMART Board MX (V2-C), MX (V2-C) Pro, MX (V2), MX (V2) Pro, and MX series displays. You can share the screens from computers and mobile devices on the display wirelessly using Screen Share. -
Page 26: Using Smart Mirror
Chapter 3 Using the iQ apps Using SMART Mirror For SMART Board MX (V3) and MX (V3) Pro series displays Use SMART Mirror to share content via the internet. No apps are needed to share your screen from Android, Chrome, OS, IOS, macOS, or Windows devices. To learn how to connect to the SMART Mirror from devices and collaborate on content, see Using SMART Mirror. -
Page 27: Cleaning Up The Display
Using kapp Whiteboard For SMART Board MX (V2-C), MX (V2-C) Pro, MX (V2), MX (V2) Pro, and MX series displays. Use the kapp Whiteboard to write and erase notes on the display just as you do on a traditional dry ®... -
Page 28: Chapter 4 Connecting Computers And Other Devices
Chapter 4 Connecting computers and other devices Installing and using SMART software Downloading and installing SMART software Using SMART software Connecting room computers and guest laptops Viewing a connected computer’s input Setting a connected computer’s resolution and refresh rate Connecting USB drives, peripherals, and other devices Troubleshooting connected computers Connecting a SMART OPS PC module Connecting USB drives, peripherals, and other devices... - Page 29 Chapter 4 Connecting computers and other devices You can purchase additional licenses or subscriptions to SMART software to install on other computers. The following software is also available but sold separately: Software Description Licensing details SMART TeamWorks Software that simplifies meetings and 1-year subscription Room facilitates deeper, more natural interaction...
- Page 30 Chapter 4 Connecting computers and other devices SMART Product Drivers and Ink are installed and used on the computer input of the display to enable touch and digital inking features. This supporting software is included with SMART’s software products, such as SMART Notebook, SMART Meeting Pro, and SMART TeamWorks, or is available for free download on support.smarttech.com/downloads/product-drivers.
-
Page 31: Connecting Room Computers And Guest Laptops
Chapter 4 Connecting computers and other devices Connecting room computers and guest laptops You can connect room computers and guest laptops to the display and view and interact with their inputs. SMART Board MX (V3) series Side and bottom connector panels Front connector panel smarttech.com/kb/171554... - Page 32 Chapter 4 Connecting computers and other devices SMART Board MX (V2-C) series Side and bottom connector panels Front connector panel smarttech.com/kb/171554...
- Page 33 Chapter 4 Connecting computers and other devices SMART Board MX (V2) series Side and bottom connector panels Front connector panel HDMI 3 smarttech.com/kb/171554...
- Page 34 Chapter 4 Connecting computers and other devices SMART Board MX series Side and bottom connector panels Front connector panel HDMI 1 HDMI 3 HDMI 2 Notes Install SMART software on any computers you connect to the display (see Installing and using SMART software on page ...
- Page 35 You can charge devices connected to the USB Type-C receptacle on the side connector panel of SMART Board MX (V3) series interactive displays up to 65 W (if a module is not installed in the accessory slot) or up to 30 W (if a module is installed in the accessory slot).
- Page 36 Chapter 4 Connecting computers and other devices To view the input of a computer connected to a SMART Board MX series display 1. Connect the computer to the display. 2. Press the Input on the front control panel. The Input selection menu appears.
-
Page 37: Connecting A Smart Ops Pc Module
Chapter 4 Connecting computers and other devices The following table presents the recommend resolutions and refresh rates for the display’s VGA input source: Resolution Input source Mode Refresh rate aspect ratio 1920 × 1080 16:9 [N/A] 60.000 Hz 1600 × 1200 [N/A] 60.000 Hz 1360 ×... -
Page 38: Connecting Usb Drives, Peripherals, And Other Devices
(such as keyboards), and other devices to these connectors and use the devices with the iQ experience, connected computers, and devices installed in the accessory slot (such as the SMART OPS PC module). SMART Board MX (V3) series SMART Board MX (V2-C) series... - Page 39 OPS PC (SuperSpeed) (Hi-Speed) Located on the side connector panels of SMART Board MX (V2 and V2-C) series displays Located on the front connector panels of all displays and on the side connector panel of SMART Board MX series displays smarttech.com/kb/171554...
-
Page 40: Chapter 5 Troubleshooting
Chapter 5 Troubleshooting The display isn’t turning on The screen is blank or there’s a problem with the image on the screen There’s no sound or there’s a problem with the sound Touch isn’t working as expected The pens and erasers aren’t working as expected iQ apps aren’t working as expected SMART software on connected computers isn’t working as expected The SMART OPS PC module isn’t working as expected... -
Page 41: The Screen Is Blank Or There's A Problem With The Image On The Screen
OPS to switch to the iQ experience and open the Home screen. Make sure the SMART Board MX (V3, V2 or V2-C) series display is not in Standby mode by pressing the Power button Make sure any connected computers are on and not in an energy saving mode. - Page 42 Symptom Troubleshooting steps The image on the screen is distorted. On SMART Board MX (V3, V2 or V2-C) series displays, press the Home button the front control panel or the remote control. There are lines, snow or, other visual noise on the screen.
-
Page 43: There's No Sound Or There's A Problem With The Sound
Chapter 5 Troubleshooting Symptom Troubleshooting steps The image is cut off or shifted to the Adjust any connected computers’ video settings, particularly zoom, crop, and left or right. underscan. See the computer’s operating system documentation. If you’re using a VGA video input and any connected computers’ desktops are entirely black, change them to dark gray or a different color. -
Page 44: Touch Isn't Working As Expected
Make sure SMART Product Drivers are installed and running on connected computers. (SMART Board MX (V3) displays require SMART Product Drivers 12.18 or later, and SMART Board MX (V2-C) and (V2) displays require SMART Product Drivers 12.14 or later). -
Page 45: The Pens And Erasers Aren't Working As Expected
Reinstall or update SMART Product Drivers and SMART Ink on any connected not to writing with a pen. computers. When you write on the screen, the ink Make sure you are using a SMART Board MX or MX Pro series interactive display appears in the wrong place. pen. Restart the display. -
Page 46: Smart Software On Connected Computers Isn't Working As Expected
Chapter 5 Troubleshooting SMART software on connected computers isn’t working as expected Symptom Troubleshooting steps SMART Notebook software isn’t See Troubleshooting SMART Notebook. working as expected. Lumio by SMART isn’t working as See Troubleshooting common issues in Lumio by SMART. expected. - Page 47 Scan the QR code on the label to view the SMART Board MX or MX Pro series interactive display support pages on the SMART website. For SMART Board MX series displays, the serial number is on labels located on the bottom frame and the back of the display.
-
Page 48: Certification And Compliance
Certification and compliance Caution Federal Communication Commission i. the device for operation in the band 5150-5250 MHz interference statement is only for indoor use to reduce the potential for harmful interference to co-channel mobile satellite Suppliers Declaration of Conformity systems; 47 CFR §... - Page 49 Certification and compliance Innovation, Science et Développement économique Déclaration du Canada Cet appareil est conforme à la norme ISED CNR-247 pour les appareils radio agréés. Son fonctionnement est soumis aux deux conditions suivantes: 1. le dispositif ne doit pas produire de brouillage préjudiciable, et 2.
- Page 50 Certification and compliance Déclaration d’exposition aux radiations Cet équipement est conforme aux limites d’exposition aux rayonnements ISED établies pour un environnement non contrôlé. Cet équipement doit être installé et utilisé avec un minimum de 20 cm de distance entre la source de rayonnement et votre corps.
- Page 51 SMART Technologies smarttech.com/support smarttech.com/contactsupport smarttech.com/kb/171554...
Need help?
Do you have a question about the MX Series and is the answer not in the manual?
Questions and answers