
Related Manuals for SMART Board SPNL-4065


Summary of Contents for SMART Board SPNL-4065
- Page 1 SMART Board® 4000 series interactive flat panels USER’S GUIDE FOR MODELS SPNL-4055, SPNL-4065, SPNL-4075 AND SPNL-4084...
-
Page 2: Product Registration
Product registration If you register your SMART product, we’ll notify you of new features and software upgrades. Register online at smarttech.com/registration. Keep the following information available in case you need to contact SMART Support. Serial number: Date of purchase: Licenses The terms HDMI and HDMI High-Definition Multimedia Interface, and the HDMI logo are trademarks or registered trademarks of HDMI Licensing LLC in the United States and other countries. -
Page 3: Important Information
Important information WARNING Failure to follow the installation instructions shipped with the interactive flat panel could result in injury and product damage which may not be covered by the warranty. Do not open or disassemble the interactive flat panel. You risk electrical shock from the high voltage inside the casing. - Page 4 IMPORTANT INFORMATION Disconnect all the interactive flat panel’s power cables from the wall outlet and seek assistance from qualified service personnel if any of the following occurs: The power cable or plug is damaged Liquid is spilled into the interactive flat panel Objects fall into the interactive flat panel The interactive flat panel is dropped Structural damage, such as cracking, occurs...
-
Page 5: Table Of Contents
Contents Important information Chapter 1: About your interactive flat panel SMART Board 4055 interactive flat panel feature highlights SMART Board 4065 interactive flat panel feature highlights SMART Board 4075 interactive flat panel feature highlights SMART Board 4084 interactive flat panel feature highlights Included accessories Other documentation and resources Chapter 2: Mounting your interactive flat panel Before mounting the interactive flat panel Choosing a mounting location... - Page 6 CONTENTS More information smarttech.com/kb/170800...
-
Page 7: Chapter 1: About Your Interactive Flat Panel
Chapter 1 About your interactive flat panel SMART Board 4055 interactive flat panel feature highlights SMART Board 4065 interactive flat panel feature highlights SMART Board 4075 interactive flat panel feature highlights SMART Board 4084 interactive flat panel feature highlights Included accessories Pen and pen tray Remote control Included cables Other documentation and resources Specifications... -
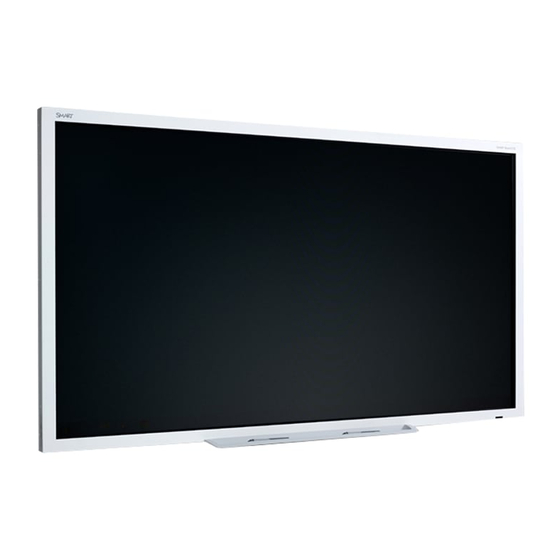
Page 8: Smart Board 4065 Interactive Flat Panel Feature Highlights
CHAPTER 1 ABOUT YOUR INTERACTIVE FLAT PANEL The high-definition LED display features low friction coated glass that enables fingers to glide smoothly over the surface, creating a natural touch experience. The interactive flat panel virtually eliminates glare and provides an optimal view from any angle in the classroom. It delivers an unparalleled viewing and writing experience and offers the best value for classrooms. -
Page 9: Smart Board 4075 Interactive Flat Panel Feature Highlights
CHAPTER 1 ABOUT YOUR INTERACTIVE FLAT PANEL SMART Board 4075 interactive flat panel feature highlights Designed specifically for classrooms, the SMART Board 4075 interactive flat panel combines a premium touch experience with the power of SMART Notebook collaborative learning software on a 75" (190.5 cm) LED display. The interactive flat panel’s 4K ultra-high-definition display provides optimal image clarity and features low- friction coated glass that lets fingers glide smoothly... -
Page 10: Smart Board 4084 Interactive Flat Panel Feature Highlights
CHAPTER 1 ABOUT YOUR INTERACTIVE FLAT PANEL SMART Board 4084 interactive flat panel feature highlights Designed specifically for classrooms, the SMART Board 4084 interactive flat panel combines a premium touch experience with the power of SMART Notebook collaborative learning software on a 84" (213.4 cm) display. The 4K ultra-high-definition resolution display provides optimal image clarity and features low-friction coated glass that lets fingers glide smoothly over the surface,... -
Page 11: Other Documentation And Resources
Your interactive flat panel’s specifications list the product’s dimensions, weight, recommended operating and storage temperatures, power requirements and consumption and other important information for installation and maintenance. Model Specifications SPNL-4055 smarttech.com/kb/170809 SPNL-4065 smarttech.com/kb/170802 SPNL-4075 smarttech.com/kb/171098 SPNL-4084 smarttech.com/kb/170998 Installation instructions The interactive flat panel comes with installation instructions. These installation instructions explain how to unpack, assemble and mount the interactive flat panel and how to connect it to computers and other devices. -
Page 12: Training
CHAPTER 1 ABOUT YOUR INTERACTIVE FLAT PANEL Training The SMART training website (smarttech.com/training) includes an extensive library of training resources you can refer to when first learning to set up or use the interactive flat panel. Knowledge base The Support center (smarttech.com/support) includes a knowledge base that you can refer to while maintaining or troubleshooting your interactive flat panel. -
Page 13: Chapter 2: Mounting Your Interactive Flat Panel
Chapter 2 Mounting your interactive flat panel Before mounting the interactive flat panel Choosing a mounting location Choosing a mounting height To mount your SMART Board 4000 series interactive flat panel on a wall, you require a team of professional installers. This chapter is intended for installers. Installers should read this chapter along with the installation instructions included with the interactive flat panel before they mount the interactive flat panel. - Page 14 Refer to local building codes to ensure the wall can support the weight of the interactive flat panel and mounting equipment. Model Weight SPNL-4055 116 lb 13 oz (53 kg) SPNL-4065 153 lb (69.4 kg) SPNL-4075 189 lb (86 kg) SPNL-4084 238 lb (108 kg) Use a standard VESA mounting plate (not included) to mount the interactive flat panel on a...
-
Page 15: Choosing A Mounting Location
CHAPTER 2 MOUNTING YOUR INTERACTIVE FLAT PANEL Choosing a mounting location Consider the following when you select a location for the interactive flat panel: Choose a location for the interactive flat panel that’s far from bright light sources, such as windows and strong overhead lighting. IR lighting can cause issues with the performance of the cameras and can lead to unintentional or missed touches. -
Page 17: Chapter 3: Connecting Power And Devices
Chapter 3 Connecting power and devices Connecting your interactive flat panel Cable management Configuring touch and display settings for your interactive flat panel Graphics card configuration Panel settings Configuring your computer’s screen resolution Setting up multiple displays Windows operating systems OS X operating system software This chapter describes how to connect the interactive flat panel to power, computers and other devices. - Page 18 CHAPTER 3 CONNECTING POWER AND DEVICES Connector Details AC power AC power pass-through USB B receptacle Computer to interactive flat panel touch interface Video in Component video receptacle Service port WARNING Do not use this connector. This service connector for the interactive flat panel must be used only by a qualified technician.
-
Page 19: Configuring Touch And Display Settings For Your Interactive Flat Panel
CHAPTER 3 CONNECTING POWER AND DEVICES IMPORTANT Do not connect the power cable to a power outlet until you have connected all cables to the interactive flat panel. Configuring touch and display settings for your interactive flat panel If you’re using multiple displays or a laptop connected to the interactive flat panel, ensure that they are set up correctly. -
Page 20: Configuring Your Computer's Screen Resolution
CHAPTER 3 CONNECTING POWER AND DEVICES To set Screen Mode 1. Press Menu on the remote control or on the side panel. The on-screen display menu appears. 2. Press the up and down buttons and select Setup. 3. Press the right button on the remote control or VOL- to select Screen Mode. 4. -
Page 21: Setting Up Multiple Displays
CHAPTER 3 CONNECTING POWER AND DEVICES 1. Right-click the desktop and then select Screen Resolution. 2. From the Display drop-down menu, select your interactive flat panel. 3. From the Resolution drop-down menu, select a screen resolution. 4. Click OK. Your computer applies the new screen resolution To configure your Mac computer’s screen resolution 1. -
Page 22: Os X Operating System Software
CHAPTER 3 CONNECTING POWER AND DEVICES 3. Click Setup. The Identify pen or touch input screens dialog box appears. 4. Click Touch input. A message appears on the interactive flat panel: “Touch this screen to identify it as the touchscreen.” 5. - Page 23 CHAPTER 3 CONNECTING POWER AND DEVICES To mirror the desktop 1. Make sure the additional display is properly connected and turned on. 2. From the Apple menu, choose System Preferences. 3. From the View menu, choose Displays. 4. Click the Arrangement tab. 5.
-
Page 25: Chapter 4: Using Your Interactive Flat Panel
Chapter 4 Using your interactive flat panel Using the on-screen display menu Using the control panel Using the remote control On-screen display menu for SPNL-4055, SPNL-4065 and select SPNL-4084 Picture settings Sound settings Setup settings Time settings On-screen display menu for SPNL-4075 and select SPNL-4084... - Page 26 CHAPTER 4 USING YOUR INTERACTIVE FLAT PANEL Button Details Power Turn the interactive flat panel on or turn off Move the highlighted area up to select items in the on-screen display menu DOWN Move the highlighted area down to select items in the on-screen display menu VOL + Move the highlighted area left to select items in the on-screen display menu,...
-
Page 27: Using The Remote Control
CHAPTER 4 USING YOUR INTERACTIVE FLAT PANEL Using the remote control Use the remote control to access on-screen menus and to change the interactive flat panel’s settings. Button Details Selects the VGA input HDMI Select the HDMI input [Number buttons] Press buttons on the number pad to change channels VOL +/- Increase or decrease the audio output level [Up and down buttons]... -
Page 28: On-Screen Display Menu For Spnl-4055, Spnl-4065 And Select Spnl-4084
Select the video aspect ratio SLEEP Set the sleep timer VIDEO Select the RCA input Power Turns the interactive flat panel on or off Multi Media button Display the Multi Media mode On-screen display menu for SPNL-4055, SPNL-4065 and select SPNL-4084 NOTE smarttech.com/kb/170800... -
Page 29: Picture Settings
CHAPTER 4 USING YOUR INTERACTIVE FLAT PANEL SMART Board 4084 interactive flat panels can have one of two versions of on-screen display (OSD) menu.. This section applies to SMART Board 4084 panels with a serial number in the range of M101IW02E3001 to M101IW12E3126. You can access the on-screen display (OSD) menu by pressing MENU on the side panel of your interactive flat panel or on the remote control. -
Page 30: Setup Settings
CHAPTER 4 USING YOUR INTERACTIVE FLAT PANEL Setup settings Option Value Function Menu Language [Languages] Sets the on-screen display menu’s language Menu Trans. [N/A] Sets the on-screen display menu’s transparency Screen Mode 16:9 Sets the image size Zoom1 Zoom2 Full Reset [N/A] Resets all Setup options Software Update [N/A]... -
Page 31: Picture Settings
CHAPTER 4 USING YOUR INTERACTIVE FLAT PANEL You can access the OSD menu by pressing MENU on the side panel of the interactive flat panel or on the remote control. To exit the OSD menu, press MENU on the interactive flat panel’s side panel, or EXIT on the remote control. -
Page 32: Multi Media Mode
CHAPTER 4 USING YOUR INTERACTIVE FLAT PANEL Option Value Function SPDIF mode Sets the digital sound output 120 Hz Sets the parametric equalizer adjustments for specific frequency bands 500 Hz 1.5 K Hz 5 K HZ 10 K Hz Internal speaker [N/A] Turns the internal speaker on or off Setup settings Option... -
Page 33: Compatible File Formats
CHAPTER 4 USING YOUR INTERACTIVE FLAT PANEL Compatible file formats The interactive flat panel can play the following file types. Video Category Code MPEG1 MPEG1 MPEG2 MPEG2 MPEG4 MPEG-4 Visual DivX5 DivX4 DivX3 XviD MS-MEG4 V3 WMV3 MJPEG M-JPEG Audio AC-3 Images JPEG TIFF smarttech.com/kb/170800... -
Page 34: Cleaning The Interactive Flat Panel
CHAPTER 4 USING YOUR INTERACTIVE FLAT PANEL Accessing content on a USB drive To access content on a USB drive 1. Turn on the interactive flat panel. 2. On the remote control, press the Multi Media button. 3. Connect a USB drive to the USB A receptacle on the bottom connector panel. See Connecting your interactive flat panel on page 11. -
Page 35: Preventing Condensation
CHAPTER 4 USING YOUR INTERACTIVE FLAT PANEL Preventing condensation The interactive flat panel screen contains layers of glass that can collect condensation, especially in the following conditions: Temperature extremes with high humidity Rapid changes in humidity, which can occur when you operate the product near water (such as a pool, kettle or air conditioner ventilator) Direct exposure to sunlight Cold air output from an air conditioner towards the bottom of the interactive flat panel. -
Page 37: Chapter 5: Troubleshooting Your Interactive Flat Panel
Chapter 5 Troubleshooting your interactive flat panel Locating the serial number Resolving common touch control and resolution issues with Windows and Mac operating systems Resolving image issues This chapter provides information necessary for solving simple issues that occur with your interactive flat panel. If issues persist, or aren’t covered in this chapter, contact SMART Support (smarttech.com/support) or your authorized SMART reseller (smarttech.com/where). -
Page 38: Resolving Common Touch Control And Resolution Issues With Windows And Mac Operating Systems
CHAPTER 5 TROUBLESHOOTING YOUR INTERACTIVE FLAT PANEL Resolving common touch control and resolution issues with Windows and Mac operating systems Problem Cause Solution Resolution and/or touch inaccuracies The display’s resolution is not set to the Press the recommended setting. Auto button on the remote NOTE control. -
Page 39: Resolving Image Issues
CHAPTER 5 TROUBLESHOOTING YOUR INTERACTIVE FLAT PANEL Problem Cause Solution Pen and touch setting may not be 1. For Windows operating systems, selected. open Control Panel > Pen and Touch. 2. Select the Touch tab. 3. Ensure that the following options are selected:Use your finger as an input device and Enable multi-touch gestures and inking. -
Page 41: Appendix A: Calibrating Your Interactive Flat Panel
Appendix A Calibrating your interactive flat panel If your SMART Board 4000 series interactive flat panel has an inaccurate touch or the touch is not working, you may need to calibrate it. Follow the instructions below to calibrate your SMART Board interactive flat panel. IMPORTANT The SMART Board interactive flat panel is factory calibrated. -
Page 42: Calibrating Your Interactive Flat Panel With Mac Operating System Software
APPENDIX A CALIBRATING YOUR INTERACTIVE FLAT PANEL 3. Click Calibrate. 4. Tap each crosshair as they appear. NOTE It may take several attempts to register your tap. 5. Click OK on the Tablet and PC settings page to save the changes. NOTE If you make a mistake (such as tapping somewhere other than the crosshair), repeat the procedure. - Page 43 APPENDIX A CALIBRATING YOUR INTERACTIVE FLAT PANEL 5. Press and hold each cross as it appears. IMPORTANT If you’re using multiple displays, the orient screen automatically moves to the next display. If this other display is not an interactive flat panel, touch screen press ESC. If you accidentally touch the flat panel while the orient screen is on this display, you will have to repeat the procedure above.
-
Page 45: Appendix B: Hardware Environmental Compliance
Appendix B Hardware environmental compliance SMART Technologies supports global efforts to ensure that electronic equipment is manufactured, sold and disposed of in a safe and environmentally friendly manner. Waste Electrical and Electronic Equipment (WEEE) Electrical and electronic equipment and batteries contain substances that can be harmful to the environment and to human health. - Page 46 SMART TECHNOLOGIES smarttech.com/support smarttech.com/contactsupport smarttech.com/kb/170800...
Need help?
Do you have a question about the SPNL-4065 and is the answer not in the manual?
Questions and answers