SMART Board MX / MX V5 / MX Pro / MX Pro V5 Series Manual
- User manual (51 pages) ,
- Installation and maintenance manual (119 pages) ,
- User manual (46 pages)
Advertisement
-
1
Welcome
- 1.1 About this guide
-
1.2
About the unit's features and components
- 1.2.1 Touch
- 1.2.2 Writing/drawing and erasing
- 1.2.3 iQ
- 1.2.4 Display
- 1.2.5 Audio
- 1.2.6 NFC sign in
- 1.2.7 Microphone array
- 1.2.8 Network connectivity
- 1.2.9 Room computers and guest laptops
- 1.2.10 Accessory slot
- 1.2.11 Front control panel
- 1.2.12 Front connector panel
- 1.2.13 Ambient light sensor
- 1.2.14 Power status light
- 1.2.15 Remote control and IR sensor
- 1.3 Identifying your specific model
- 1.4 Accessories
- 1.5 More information
-
2
Using basic features
- 2.1 Waking up the unit and putting it back to sleep
- 2.2 Using the Home button
- 2.3 Using the front control panel
- 2.4 Using the remote control
- 2.5 Using touch
- 2.6 Writing/drawing and erasing
- 2.7 Adjusting the volume
- 2.8 Freezing or hiding the screen
- 2.9 Using the SMART ID card with the unit
- 2.10 Using the microphone array
- 3 Using the iQ apps
- 4 Connecting computers and other devices
- 5 Troubleshooting
- 6 Important information
- 7 Documents / Resources
Welcome
The SMART Board MX or MX Pro series interactive display is the hub of your classroom or meeting room.
About this guide
This guide explains how to use a SMART Board MX (V5) or MX Pro (V5) series interactive display.
This guide is intended for individuals who use displays in their organizations. Other documentation and resources are available for those who install and maintain displays (see More information).
About the unit's features and components
The display includes an extensive set of features and components:

Touch
You can do everything on the display that you can do at your computer—open and close applications, meet with others, create new documents or edit existing ones, visit websites, play and manipulate videos, and so on—by touching the display's surface.
You can use an array of gestures within applications, including panning, scaling, rotating, and zooming in and out.
For more information, see Using touch.
Writing/drawing and erasing
The display comes with two pens, which you can use to write or draw on the screen.
Use your fist or palm to erase digital ink on the screen.
With Object Awareness, the display responds automatically to the tool or object you're using, whether it's a pen, finger, or palm. The display's Simultaneous Tool Differentiation technologies allow two people to write independently and simultaneously.
For more information, see Writing/drawing and erasing under Using basic features chapter.
iQ
SMART Board MX (V5) and MX Pro (V5) series models with iQ feature one-touch access to collaborative tools, including a whiteboard, wireless screen sharing, and a web browser. With minimal network integration, there's no need for wires, cables, or manual software and firmware updates.
From the iQ Home screen, you can open the iQ apps, switch inputs, and adjust settings.
For more information about the Home screen, see Using the Home button.
For more information about the iQ apps, see Using the iQ apps.
Display
The 4K ultra-high-definition LCD display provides optimal image clarity and wide viewing angles.
The size of the display varies by model:
| Models | Size (diagonal) |
| SBID-MX255-V5, SBID-MX255-V5-PW, SBID-MX055-V5, SBID-MX055-V5-PW | 55" |
| SBID-MX265-V5, SBID-MX265-V5-PW, SBID-MX065-V5, SBID-MX065-V5-PW | 65" |
| SBID-MX275-V5, SBID-MX275-V5-PW, SBID-MX075-V5, SBID-MX075-V5-PW | 75" |
| SBID-MX286-V5, SBID-MX286-V5-PW, SBID-MX086-V5, SBID-MX086-V5-PW | 86" |
Audio
The display includes two integrated speakers, designed to provide sound at the front of a room.
NFC sign in
SMART Board MX (V5) and MX Pro (V5) series models with iQ allow you to sign in to your SMART Account using near field communication (NFC): just hold your SMART ID card to the card reader area on the display's frame and enter a PIN. This feature helps you save time signing in to your account without typing your username and password.
For more information, see Using the SMART ID card with the unit.
Microphone array
You can use SMART Board MX (V5) and MX Pro (V5) models' built-in microphone array with a conferencing app. The microphone array provides improved sound detection. You can also use the display's built-in microphone array in place of a connected computer's microphone.
For more information, see Using the microphone array
Network connectivity
The display requires a network connection for downloading software and firmware updates, and a number of the iQ apps require a network connection as well.
You can connect to a network using Wi-Fi or the RJ45 LAN jack on the display:
- Wi-Fi supports both 2.4 and 5 GHz bands.
- The two RJ45 jacks allow you to connect the display and an external device, such as a computer, to an Ethernet network.
Room computers and guest laptops
You can connect room computers and guest laptops and use the display to view and interact with them.
The display comes with SMART software that you can install on connected computers to take full advantage of the display's features while using the connected computers.
For more information, see Connecting computers and other devices.
Accessory slot
For more information about SMART OPS PC modules, see SMART OPS PC module.

The accessory slot's maximum available power is 85 W. The slot is not a limited power source. To reduce the risk of fire, make sure that accessories connecting to the slot satisfy the fire enclosure requirements of IEC 62368-1.
Front control panel
The front control panel contains buttons for turning the display on and off, controlling the volume, freezing and unfreezing the screen, and showing and hiding a screen shade.
For more information about the front control panel, see Using the front control panel
Front connector panel
The front connector panel includes connectors for USB peripherals and a computer or other input.
For more information about the front connector panel, see Connecting room computers and guest laptops.
Ambient light sensor
The ambient light sensor is located in the bottom-right corner of the display's frame.
The ambient light sensor detects the brightness of the room and adjusts the screen's brightness accordingly.
Power status light
The power status light is located in the bottom-right corner of the display's frame.
The power status light indicates the display's status.
| Power status light | Display status |
| Red | Standby mode |
| Green | Normal operating mode |
Remote control and IR sensor
You can use the remote control to turn the display on and off, adjust display settings, and so on. The IR sensor for the remote control is located in the bottom-right corner of the display's frame.
For more information about the remote control, see Using the remote control
Identifying your specific model
There are several models of SMART Board MX (V5) and MX Pro (V5) series interactive displays:
| Model | Screen size (approximate) |
| SBID-MX255-V5 | 55" (140 cm) |
| SBID-MX265-V5 | 65" (165 cm) |
| SBID-MX275-V5 | 75" (190 cm) |
| SBID-MX286-V5 | 86" (218 cm) |
| SBID-MX255-V5-PW | 55" (140 cm) |
| SBID-MX265-V5-PW | 65" (218 cm) |
| SBID-MX275-V5-PW | 75" (165 cm) |
| SBID-MX286-V5-PW | 86" (190 cm) |
| SBID-MX055-V5 | 55" (140 cm) |
| SBID-MX065-V5 | 65" (165 cm) |
| SBID-MX075-V5 | 75" (190 cm) |
| SBID-MX086-V5 | 86" (218 cm) |
| SBID-MX055-V5-PW | 55" (140 cm) |
| SBID-MX065-V5-PW | 65" (165 cm) |
| SBID-MX075-V5-PW | 75" (190 cm) |
| SBID-MX086-V5-PW | 86" (218 cm) |
Accessories
Accessories for the display include:
- SMART OPS PC module
- Stands
- USB extenders
Note
For more information about these and other accessories, see smarttech.com/accessories.
SMART OPS PC module
SMART Open Pluggable Specification (OPS) PC modules provide a hasslefree Windows Pro installation based on Intel Core processors and are designed specifically to work with a SMART Board interactive display. All OPS PC modules are fully licensed with Windows Pro. Install the OPS PC module in a display's accessory slot to provide a complete 4K UHD Windows installation at your fingertips, without the need for an external PC or additional cables.

Install familiar Windows applications, such as SMART Notebook, SMART TeamWorks, and SMART Meeting Pro software, and access the internet directly through your display's network connection. Upgrades and service for the OPS PC module are easy to perform without removing the display from its mounting.
Stands
If you want to move the display from place to place, you can install it on a SMART mobile stand. If you are installing the display on a wall that cannot support the display's full weight, you can install the display on a SMART floor stand.
Note
For users in Australia and New Zealand: SMART does not provide stands for use in Australia and New Zealand, nor can we provide recommendations for stands from other vendors.
USB extenders
As noted in the display's specifications, there is a maximum length for USB cable connections between the display and computer.
Use the USB-XT extender if you need a longer USB connection. See the USB-XT extender specifications (smarttech.com/kb/119318).
More information
In addition to this guide, SMART provides other documents for the display in the Support section of the SMART website (smarttech.com/support).
Using basic features
This chapter explains how to wake the display when it's asleep, how to view connected computers' input, and how to interact with the display.
Waking up the unit and putting it back to sleep
To wake the display, press the Power button ![]() on the front control panel or remote control.
on the front control panel or remote control.
To return the display to a partial sleeping state, press the Power button ![]() on the front control panel or remote control.
on the front control panel or remote control.
Note
Touch is not available immediately after waking or turning on the display. Wait a few seconds, and then the display will respond to touch.
For information about turning the display off, see the SMART Board MX (V5) and MX Pro (V5) series interactive displays installation and maintenance guide.
Using the Home button
You can use the Home screen to open and use iQ apps, view the input of connected computers, and more. You can also change the background and personalize other features of the Home screen.
The Input screen shows thumbnails of connected computers and allows you to switch among inputs.
You can return to the Home screen or the Input screen at any time by following the instructions below.
To show the Home screen or the Input screen
Press the Home button ![]() below the screen.
below the screen.
OR
Press the Home button ![]() on the remote control.
on the remote control.
Using the front control panel
The front control panel contains buttons for switching inputs, showing and hiding a screen shade, controlling the volume, freezing and unfreezing the screen, and turning the display on and off.

| No. | Name | Procedure |
| 1 | Input select | Press to switch inputs (see Viewing a connected computer's input). |
| 2 | Screen shade | Press to hide screen contents behind a screen shade (see Freezing or hiding the screen). |
| 3 | Freeze | Press to freeze and unfreeze the screen (see Freezing the screen). |
| 4 | Volume decrease | Press to turn down the volume (see Adjusting the volume). |
| 5 | Volume increase | Press to turn up the volume (see Adjusting the volume). |
| 6 | Power | Press to wake the display and press again to enter Sleep mode (see Waking up the unit and putting it back to sleep). |
Using the remote control
The display comes with an infrared remote control.
Use the infrared remote control to turn the display on or off, switch inputs, control the volume, access the display's iQ apps, and more. You can also use the remote control to open the on-screen menus and change the display's settings.

- Do not subject the remote control to strong shock.
- Keep the remote control away from liquids. If it gets wet, wipe it dry immediately.
- Do not expose the remote control to heat or steam.
- Do not open any part of the remote control other than the battery compartment.
The image and table below list the remote control's functions.

| No. | Name | Procedure |
| 1 | Power |
Touch is not available immediately after waking or turning on the display. Wait a few seconds, and then the display will respond to touch.
|
| 2 | Home | Open the iQ Home screen (see Using the Home button). |
| 3 | Up and down buttons | Select a menu option in the settings. |
| 4 | OK | Select menu option in the settings. |
| 5 | Left and right buttons | Change the value of the selected setting. |
| 6 | Back | Go one step back in the navigation history. |
| 7 | Input | Switch inputs (see Viewing a connected computer's input). |
| 8 | Settings | Open display settings. |
| 9 | Screen shade | Hide screen contents behind a screen shade (see Showing and hiding the screen shade). |
| 10 | Freeze frame | Freeze and unfreeze the screen (see Freezing or hiding the screen). |
| 11 | Volume increase | Increase the volume (see Adjusting the volume). |
| 12 | Volume decrease | Decrease the volume (see Adjusting the volume). |
| 13 | Volume mute | Mute the volume (see Adjusting the volume). |
| 14 | Share screen | Open the Screen Share app (see Sharing your device's screen to the display). Note |
Using touch
You can do everything on the SMART product that you can do at your computer—open and close applications, meet with others, create or edit documents, visit websites, play and manipulate videos, and so on—by touching the SMART product's surface.
You can use a variety of gestures within applications, including panning, scaling, rotating, and zooming.
The display's support for up to 20 simultaneous interaction points enables you and other users to interact with objects on the screen at the same time.


Note
Not all gestures work in all applications. Refer to an application's documentation to learn which gestures it supports.
Writing/drawing and erasing
The display includes two pens, which you can use to write or draw in digital ink. You can erase digital ink using gestures or the eraser tool in the apps.
Writing and drawing in digital ink
- Pick up one of the display's pens.
- Use the pen to write or draw in digital ink.
Using the SMART Ink dynamic/floating toolbar
When you start drawing on the screen while viewing a connected computer's input, the SMART Ink dynamic (floating) toolbar for SMART Ink appears on the screen. You can use this toolbar to temporarily change the pen's color, thickness, or other properties. You can also access SMART Ink's other tools, such as screen capture, spotlight, screen shade, and so on.

Changing a pen's default color, thickness, and other properties
You can change a pen's color, thickness, and other properties temporarily using the SMART Ink dynamic (floating) toolbar when you're viewing a connected computer's input.
Erasing digital ink
You can erase digital ink from the screen using your palm or fist.

To erase digital ink
Move your fist or palm over the digital ink you want to erase.
Adjusting the volume
Use the buttons on the front control panel or the remote control to increase, decrease, or mute the display's volume.
To turn the volume up or down
Press the Volume Up button ![]() or Volume Down button
or Volume Down button ![]() on the front control panel or the remote control.
on the front control panel or the remote control.
Notes
- Press and hold the Volume Down button
![]() to rapidly decrease the volume.
to rapidly decrease the volume. - When you press the Volume Up button
![]() or Volume Down button
or Volume Down button ![]() on the front control panel or the remote control, you can use the on-screen slider to adjust the volume.
on the front control panel or the remote control, you can use the on-screen slider to adjust the volume.
To mute the volume
Press the remote control's Mute button![]() .
.
Freezing or hiding the screen
You can temporarily freeze or hide the screen contents using the display's freeze and screen shade features.
Freezing the screen
You can temporarily freeze the screen by pressing the Freeze button  on the front control panel or remote control. This is particularly useful when you want to pause a video, an animation, or other moving images.
Note
Freezing the screen does not pause applications that are running on the connected computer or audio. It simply freezes the display of those applications.
Tip
You can write or draw over the screen while it is frozen (see Writing/drawing and erasing). If iQ is enabled, you can then save the screenshot of your writing or drawing to the Files Library.
To unfreeze the screen, press the Freeze button again.
Showing and hiding the screen shade
You can temporarily hide the contents of the screen behind a virtual screen shade by pressing the Screen Shade button ![]() on the front control panel or remote control.
on the front control panel or remote control.
To remove the screen shade and reveal the screen contents, press the Screen Shade button ![]() again.
again.
Using the SMART ID card with the unit
The SMART Board MX (V5) and MX Pro (V5) series models' integrated RFID NFC reader/writer technology enables you to sign in to your SMART Account by holding a SMART ID card to the card reader area on the display's frame (pictured below) and then typing your PIN.

After you set up your SMART ID card, you can use it to sign in to any NFC-enabled SMART Board interactive display with iQ.
Signing in with your SMART ID card gives you access to the usual features of your SMART Account. You can personalize the display's settings (such as the display's wallpaper) and download files from Google Drive or OneDrive. If your SMART Account is connected to an active SMART Learning Suite subscription, you can also sync all your lesson files from SMART Notebook software and Lumio by SMART to the display.
NFC sign in requires:
- iQ system version 3.12 SP2 or later.
- the display to be connected to a network.
Only SMART ID cards are supported.
Note
- When you hold your SMART ID card to the card reader area on the frame, keep the card as flat as possible.
- If you select a different service region, you'll need to set up your SMART ID card again by removing the card and setting it up again.
- If you're signed in to your SMART Account on one display but then sign in on a second display, you'll be signed into your SMART Account on both displays.
Tip
After signing into your SMART Account, be sure to sign out at the end of the session to keep your account secure. For extra security, IT administrators can enable the Automatic inactivity logout setting within Settings > Security to make the display sign out of a user's SMART Account automatically after a period of inactivity.
Setting up a SMART ID card
- Tap your profile avatar to open the Notification Center.

- At the bottom of the Notification Center, tap Sign In and choose an option for signing in to your SMART Account. Enter your user name password when prompted.
- Open the Notification Center again and tap Edit account > Set up ID card > Add ID card.
- Type a PIN (which can also include symbols for added security), and tap Next.
You use this PIN when you use your SMART ID card to sign in to your SMART Account. This is designed to prevent your SMART ID card being used by an unauthorized user. - Re-type the PIN and tap Next.
- Hold your SMART ID card to the card reader area on the frame for 1 or 2 seconds.
- When prompted, hold your SMART ID card to the card reader area on the frame again for 1–6 seconds.
Your SMART ID card is now set up, and you can use it to sign in to your SMART Account on any NFCenabled SMART Board interactive display that's connected to a network.

Signing in to your SMART Account using your SMART ID card
To use your SMART ID card to sign in to your SMART Account
- Hold your SMART ID card to the card reader area on the frame for 1 or 2 seconds.
- Enter your PIN and tap Next.
- Hold your SMART ID card to the card reader area on the frame for 1 or 2 seconds.
You are signed in to your SMART Account on the display.
To sign out of your SMART Account
- Tap your profile avatar to open the Notification Center.

- At the bottom of the Notification Center, tap Sign out.

Locking and unlocking your display using your SMART ID card
Notes
- Locking and unlocking your display using your SMART ID card is supported in iQ system version 3.11 or later.
- You must set up your SMART ID card before using it to lock and unlock the display (see Setting up a SMART ID card).
- You must be signed in to your SMART Account to use your SMART ID card to lock and unlock the display (see Signing in to your SMART Account using your SMART ID card).
- You can also temporarily lock your display with a PIN to prevent unauthorized access. If you attempt to use a SMART ID card other than the one used to lock the screen, you'll need to enter a Lock Screen PIN to unlock the screen.
To lock your display using your SMART ID card
Hold your SMART ID card to the card reader area on the frame for 1 to 2 seconds.
To unlock your display using your SMART ID card
Hold your SMART ID card to the card reader area on the frame for 1 to 2 seconds.
Note
If you attempt to unlock the screen using a SMART ID card that is different to the one used to lock the screen, you'll be prompted to enter the lock screen PIN.
Managing your SMART ID card
To change the PIN associated with your SMART ID
Note
If you choose a new PIN, you won't be able to unlock your screen using your old PIN.
- Sign in to your SMART Account on your display (see Signing into your SMART Account using your SMART ID card).
- Tap your profile avatar to open the Notification Center.

- At the bottom of the Notification Center, tap Edit account > Reset ID card PIN.
- Type a new PIN (which can also include symbols for added security), and tap Next.
- Hold your SMART ID card to the card reader area on the frame for 1 or 2 seconds.
- When prompted, hold your SMART ID card to the card reader area on the frame again for 1–6 seconds.
The PIN associated with your SMART ID card has now been changed.

To remove a SMART ID card from your SMART Account
Note
If you remove a SMART ID card from your SMART Account, you'll no longer be able to use that card to sign in to your account.
- Sign in to your SMART Account on your display (see Signing into your SMART Account using your SMART ID card).
- Open the Notification Center and tap Edit account > Remove ID card.
- Tap Remove.
The SMART ID card has now been removed from your Account.
Using the microphone array
You can use the microphone array to capture audio while using a conferencing app on your display. You can also connect a room computer or guest laptop to the display and use the display's built-in microphone array in place of the connected computer's. The microphone array provides improved sound selection and noise cancellation.
To use the microphone array with the display's conferencing apps
Start the conferencing app on the display.
If the display's microphone array is not automatically selected, open the sound controls in the conferencing app and select SMART IFP Mic from the list of sound input devices.
Tip
Use the sound controls in your display's conferencing app to adjust settings such as background noise reduction and microphone sensitivity.
To use the microphone array with a connected computer
- Connect the computer to the display and select it as the display's input. (see Viewing a connected computer's input).
- Open the sound controls on the connected computer.
Windows
Select Start > Settings > System > Sound > Input > Choose your input computer device
Mac computer
Select Apple menu > System Preferences, click Sound, then click Input.
- Select SMART IFP Mic from the list of sound input devices.
Tip
Use the connected computer's sound controls to adjust settings such as input volume and background noise reduction.
To set the microphone array as the default microphone when using a conferencing app on a connected computer
- Connect the computer to the display and select it as the display's input (see Viewing a connected computer's input).
- Start the conferencing app on the computer.
- Open the conferencing app's sound controls and select SMART IFP Mic from the list of sound input devices.
Tip
Use the conferencing app's sound controls to adjust settings such as input volume and background noise reduction.
Using the iQ apps
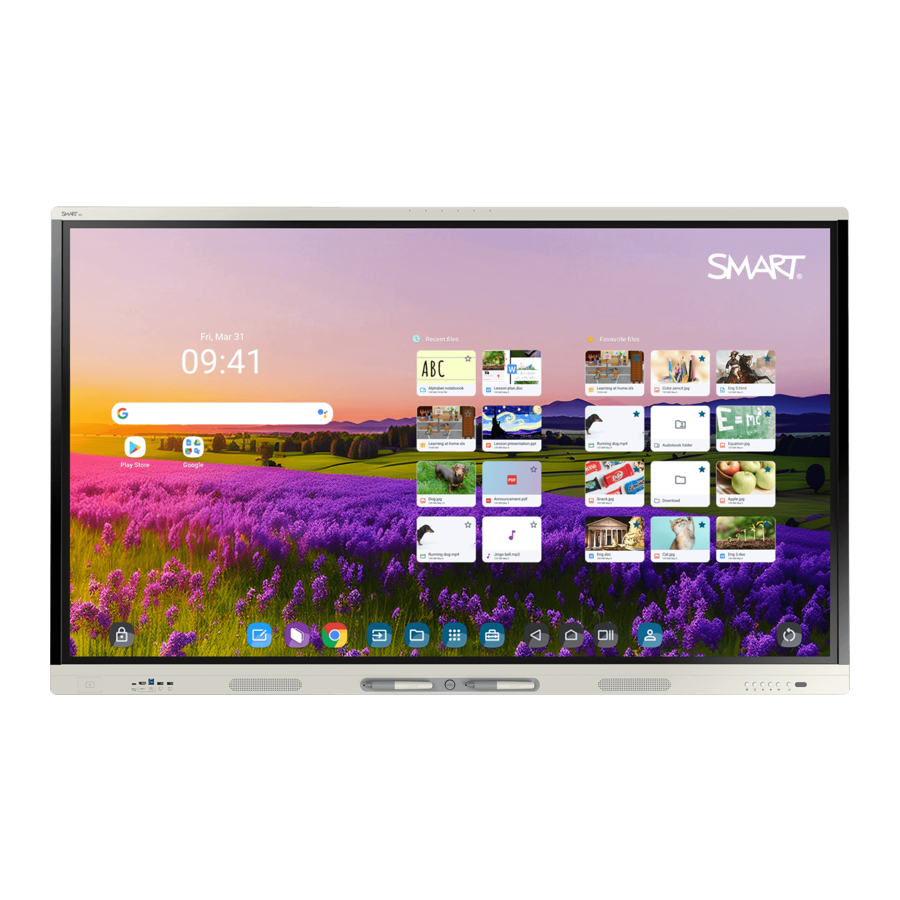
Using the Home screen
iQ's Home screen shows recent files and favorite apps and files.
To show the Home screen
Tap the Home button at the bottom of the screen.
Using the Apps Library
The Apps Library contains the Browser and SMART Whiteboard. You can also add apps from the web and SMART's app store or install third-party apps.
To open the Apps Library
From the Home screen, tap Apps ![]() .
.
Using the Files Library
The Files Library contains SMART Notebook files, SMART Whiteboards, PDFs, and screenshots. If a USB drive is connected to the display, the files on the USB drive are also available in the Files Library. Although these files can be viewed on the display, they are not saved on the display.
To open Files Library
From the Home screen, tap Files ![]() .
.
Using SMART Whiteboard
Use the SMART Whiteboard in iQ to create whiteboards and open, view, and interact with SMART Notebook lesson files.
Using Browser
You can use Browser to view web sites on the display.
Using screen sharing
You can share the screens from computers and mobile devices on the display wirelessly using screen share.
The screen sharing app supports the following devices:
- Chromebook laptops, using Google Cast
- Windows computers, using Miracast1 or Google Cast Chrome browser extension
- Mac computers and iOS devices, using AirPlay
- Android devices, using Cast Screen
1Windows 10 operating system only
Using screen captures
When using the Browser or screen share apps, you can write or draw on an annotation layer and save a screen capture to the Files library.
Installing third-party apps
You can install third-party apps from the Google Play store using SMART Remote Management.
Cleaning up the unit
After you've finished using the display, open the launcher and tap Clean Up ![]() to clean up the display for the next user.
to clean up the display for the next user.
Connecting computers and other devices

Ensure that any cables that cross the floor to the display are properly bundled and marked to avoid a trip hazard.
Installing and using SMART software
The display comes with the following software, which you can install on connected computers:
| Software | Description | Notes |
| SMART Notebook | Free software designed for use with a SMART Board interactive display. SMART Notebook software comes with many features that you can use to create, edit, and deliver engaging lessons for your students. | |
| SMART Meeting Pro | Software that enables you to capture ideas in a virtually unlimited interactive workspace. | Pro models only. |
| SMART Product Drivers | Software that enables the computer to detect input from the display. | Included with SMART Notebook and SMART Meeting Pro software. |
| SMART Ink | Software that enables you to write and draw in digital ink over applications, files, folders, websites, and any other open window. | Included with SMART Notebook and SMART Meeting Pro software. |
| SMART Remote Management | Cloud-based mobile device management software for remotely maintaining, supporting, controlling, and securing the display and your other devices. |
Tip
You can purchase additional licenses or subscriptions to SMART software to install on other computers.
The following software is also available but sold separately:
| Software | Description |
| SMART Learning Suite | A suite of desktop and online software that combines lesson delivery, activities, assessments, and collaborative workspaces. Includes SMART Notebook Plus software and Lumio by SMART. |
| SMART TeamWorks Room | Software that simplifies meetings and facilitates deeper, more natural interaction with onsite and remote participants. |
Contact your authorized SMART reseller (smarttech.com/where) for information about purchasing SMART software.
Downloading and installing SMART software
You can download SMART software from smarttech.com/downloads.
Using SMART software
For information about using SMART software, see the Support section of the SMART website:
- SMART Notebook
- Lumio by SMART
- SMART Learning Suite
- SMART TeamWorks
- SMART Meeting Pro
- SMART Product Drivers and Ink
- SMART Remote Management
SMART Product Drivers and Ink are installed and used on computers connected to the display to enable touch and digital ink features. This supporting software is included with SMART's software products, such as SMART Notebook, SMART Meeting Pro, and SMART TeamWorks, and is also available for free download.
SMART Product Drivers and Ink software have a number of features you can use to customize default settings for your display and troubleshoot common issues:
- Adjust touch, mouse, and gesture settings
- Turn SMART Ink on or off
- Using SMART Ink with Microsoft Office
Connecting room computers and guest laptops
You can connect room computers and guest laptops to the display and view and interact with their inputs.

Notes
- Install SMART software on any computers you connect to the display (see Installing and using SMART software).
- Your organization's installers might have connected cables to the display and run the cables behind a wall or under the floor to a desk or table where you can place your computer.
- If a connected computer reports "Too many USB hubs" or "cannot start (code 10)," see the knowledge base article, SMART Board interactive displays and USB tier structure use.
Viewing a connected computer's input
- Connect the computer to the display.
- View the available inputs in one of the following ways:
- If iQ is enabled, tap Input
![]() on the Home screen.
on the Home screen.
OR
If iQ is disabled, press the Home button (![]() or
or ![]() ).
). - Press Input on the front control panel.
- Press Input on the remote control.
- If iQ is enabled, tap Input
 or
or  ).
). The display shows thumbnails of the devices that are connected to the display's inputs:
- A gray thumbnail indicates no device is connected to an input.
- A black thumbnail indicates a device is connected to an input but is in Standby mode.
- A thumbnail showing a preview screen indicates an active device is connected to an input.
- A thumbnail with Touch enabled
![]() indicates a USB cable is connected between the display and device and touch is available.
indicates a USB cable is connected between the display and device and touch is available.
- Tap the computer's thumbnail.
Setting a connected computer's resolution and refresh rate
This table presents the recommend resolutions and refresh rates for the display's USB-C and HDMI inputs:
| Resolution | Input aspect ratio | Mode | Refresh rate |
| 3840 × 2160 | 16:9 | UHD / 2160p | 59.94 Hz / 60 Hz 50 Hz 29.97 Hz / 30 Hz 25 Hz 23.98 Hz / 24 Hz |
| 1920 × 1080 | 16:9 | FHD / 1080p | 59.94 Hz / 60 Hz 50 Hz 29.97 Hz / 30 Hz 25 Hz 23.98 Hz / 24 Hz |
| 1360 × 768 | 16:9 | HD | 60.015 Hz |
| 1366 × 768 | 16:9 | HD | 60.015 Hz |
| 1280 × 720 | 16:9 | HD / 720p | 59.94 Hz / 60 Hz 50 Hz 29.97 Hz / 30 Hz 25 Hz 23.98 Hz / 24 Hz |
| 720 × 480 | 16:9 | 480p (DVD Player) | 60 Hz |
This table presents the recommend resolutions and refresh rates for the display's VGA input:
| Resolution | Input aspect ratio | Mode | Refresh rate |
| 1920 × 1080 | 16:9 | [N/A] | 60.000 Hz |
| 1600 × 1200 | 4:3 | [N/A] | 60.000 Hz |
| 1360 × 768 | 16:9 | [N/A] | 60.015 Hz |
| 1280 × 1024 | 5:4 | SXGA 60 | 60.020 Hz |
| 1024 × 768 | 4:3 | XGA 60 XGA 70 XGA 75 | 60.004 Hz 70.069 Hz 75.029 Hz |
| 800 × 600 | 4:3 | SVGA 60 SVGA 72 SVGA 75 | 60.317 Hz 72.188 Hz 75.000 Hz |
| 640 × 480 | 4:3 | VGA 60 | 59.940 Hz |
If possible, set connected computers to these resolutions and refresh rates. See the connected computers' operating system documentation for instructions.
Connecting a SMART OPS PC module
If your organization has purchased a SMART OPS PC module, you or your organization's installers can install the module in the display's accessory slot following the OPS PC module's installation instructions (docs.smarttech.com/kb/171775 or docs.smarttech.com/kb/171544). You can then view the OPS PC module's input on the display.

For more information about SMART OPS PC modules, see the SMART OPS PC modules user guide
Connecting USB drives/peripherals and other devices
The display includes the following USB receptacles. You can connect USB drives, peripherals (such as keyboards), and other devices to these receptacles and use the devices with iQ, connected computers, and devices installed in the accessory slot (such as the SMART OPS PC module).

This table shows the supported USB speeds for each input:
| Input | USB 2.0 Type-A | USB 3.0 Type-A | USB Type-C |
| iQ | Hi-Speed | SuperSpeed | SuperSpeed |
| USB-C 1 | Hi-Speed | Hi-Speed | Hi-Speed |
| USB-C 2 | Hi-Speed | Hi-Speed | Hi-Speed |
| HDMI 1 | Hi-Speed | SuperSpeed | SuperSpeed |
| HDMI 2 | Hi-Speed | SuperSpeed | SuperSpeed |
| HDMI 3 | Hi-Speed | SuperSpeed | SuperSpeed |
| VGA | Hi-Speed | SuperSpeed | SuperSpeed |
| Accessory slot | Hi-Speed | SuperSpeed | SuperSpeed |
Troubleshooting
Contacting your reseller for additional support
If an issue you're experiencing with the display persists or isn't covered in Troubleshooting, contact your authorized SMART reseller (smarttech.com/where) for support.
Your reseller might ask you for the display's serial number.
The serial number is on a label located on the left side of the display (pictured).
Tip
Scan the QR code on the label to view the SMART Board MX or MX Pro series interactive display support pages on the SMART website.
You can also find the serial number in the settings. Refer to the SMART Board MX (V5) and MX Pro (V5) series interactive displays installation and maintenance guide (smarttech.com/kb/171897) for more information.
Important information
Note
Refer to the SMART Board MX (V5) and MX Pro (V5) series interactive displays installation and maintenance guide for important information about installing and maintaining the display.

![shock hazard]() Do not open or disassemble the display. You risk electrical shock from the high voltage inside the casing. Opening the casing also voids the warranty.
Do not open or disassemble the display. You risk electrical shock from the high voltage inside the casing. Opening the casing also voids the warranty.- Do not stand (or allow children to stand) on a chair to touch the surface of the display.
![burn hazard]()
![shock hazard]()
To reduce the risk of fire or electric shock, do not expose the display to rain or moisture.![burn hazard]()
![shock hazard]()
Do not insert objects inside the cabinet ventilation holes, because they could touch dangerous voltage points and cause electric shock, fire, or product damage which may not be covered by the warranty.![burn hazard]()
![shock hazard]()
Do not place heavy objects on the power cable. Damage to the cable could cause shock, fire, or product damage which may not be covered by the warranty.- If the glass is broken, do not touch the liquid crystal. To prevent injury, handle glass fragments with care when disposing of them.
- Disconnect all of the display's power cables from the wall outlet and seek assistance from qualified service personnel if any of the following occur:
- The power cable or plug is damaged
- Liquid is spilled into the display
- Objects fall into the display
- The display is dropped
- Structural damage, such as cracking, occurs
- The display behaves unexpectedly when you follow operating instructions
- Before inserting or removing an OPS from the display, turn off the display using the switch at the back of the display.
 Do not open or disassemble the display. You risk electrical shock from the high voltage inside the casing. Opening the casing also voids the warranty.
SMART Technologies
smarttech.com/support
smarttech.com/contactsupport
Documents / Resources
References
![smarttech.com]() Get Connected With SMART Board Accessories
Get Connected With SMART Board Accessories![smarttech.com]() http://smarttech.com/kb/119318
http://smarttech.com/kb/119318![smarttech.com]() SMART Support - SMART Technologies
SMART Support - SMART Technologies![smarttech.com]() Find an Education Reseller | SMART Technologies
Find an Education Reseller | SMART Technologies![smarttech.com]() Downloads and drivers - SMART Technologies
Downloads and drivers - SMART Technologies![docs.smarttech.com]() http://docs.smarttech.com/kb/171775
http://docs.smarttech.com/kb/171775![docs.smarttech.com]() http://docs.smarttech.com/kb/171544
http://docs.smarttech.com/kb/171544![smarttech.com]() http://smarttech.com/kb/171897
http://smarttech.com/kb/171897![smarttech.com]() Contact Customer Support | SMART Technologies
Contact Customer Support | SMART Technologies
Download manual
Here you can download full pdf version of manual, it may contain additional safety instructions, warranty information, FCC rules, etc.
Download SMART Board MX / MX V5 / MX Pro / MX Pro V5 Series Manual
Advertisement


Need help?
Do you have a question about the MX Series and is the answer not in the manual?
Questions and answers